English ⌄
How Smart Sales Ledger Works
Tap what you want to set up — we'll walk you through the exact screens.
Customer Opening Balance
Create a customer opening balance from the add form or from the ledger wallet.
Use this when you are creating a new customer and already know their starting due.
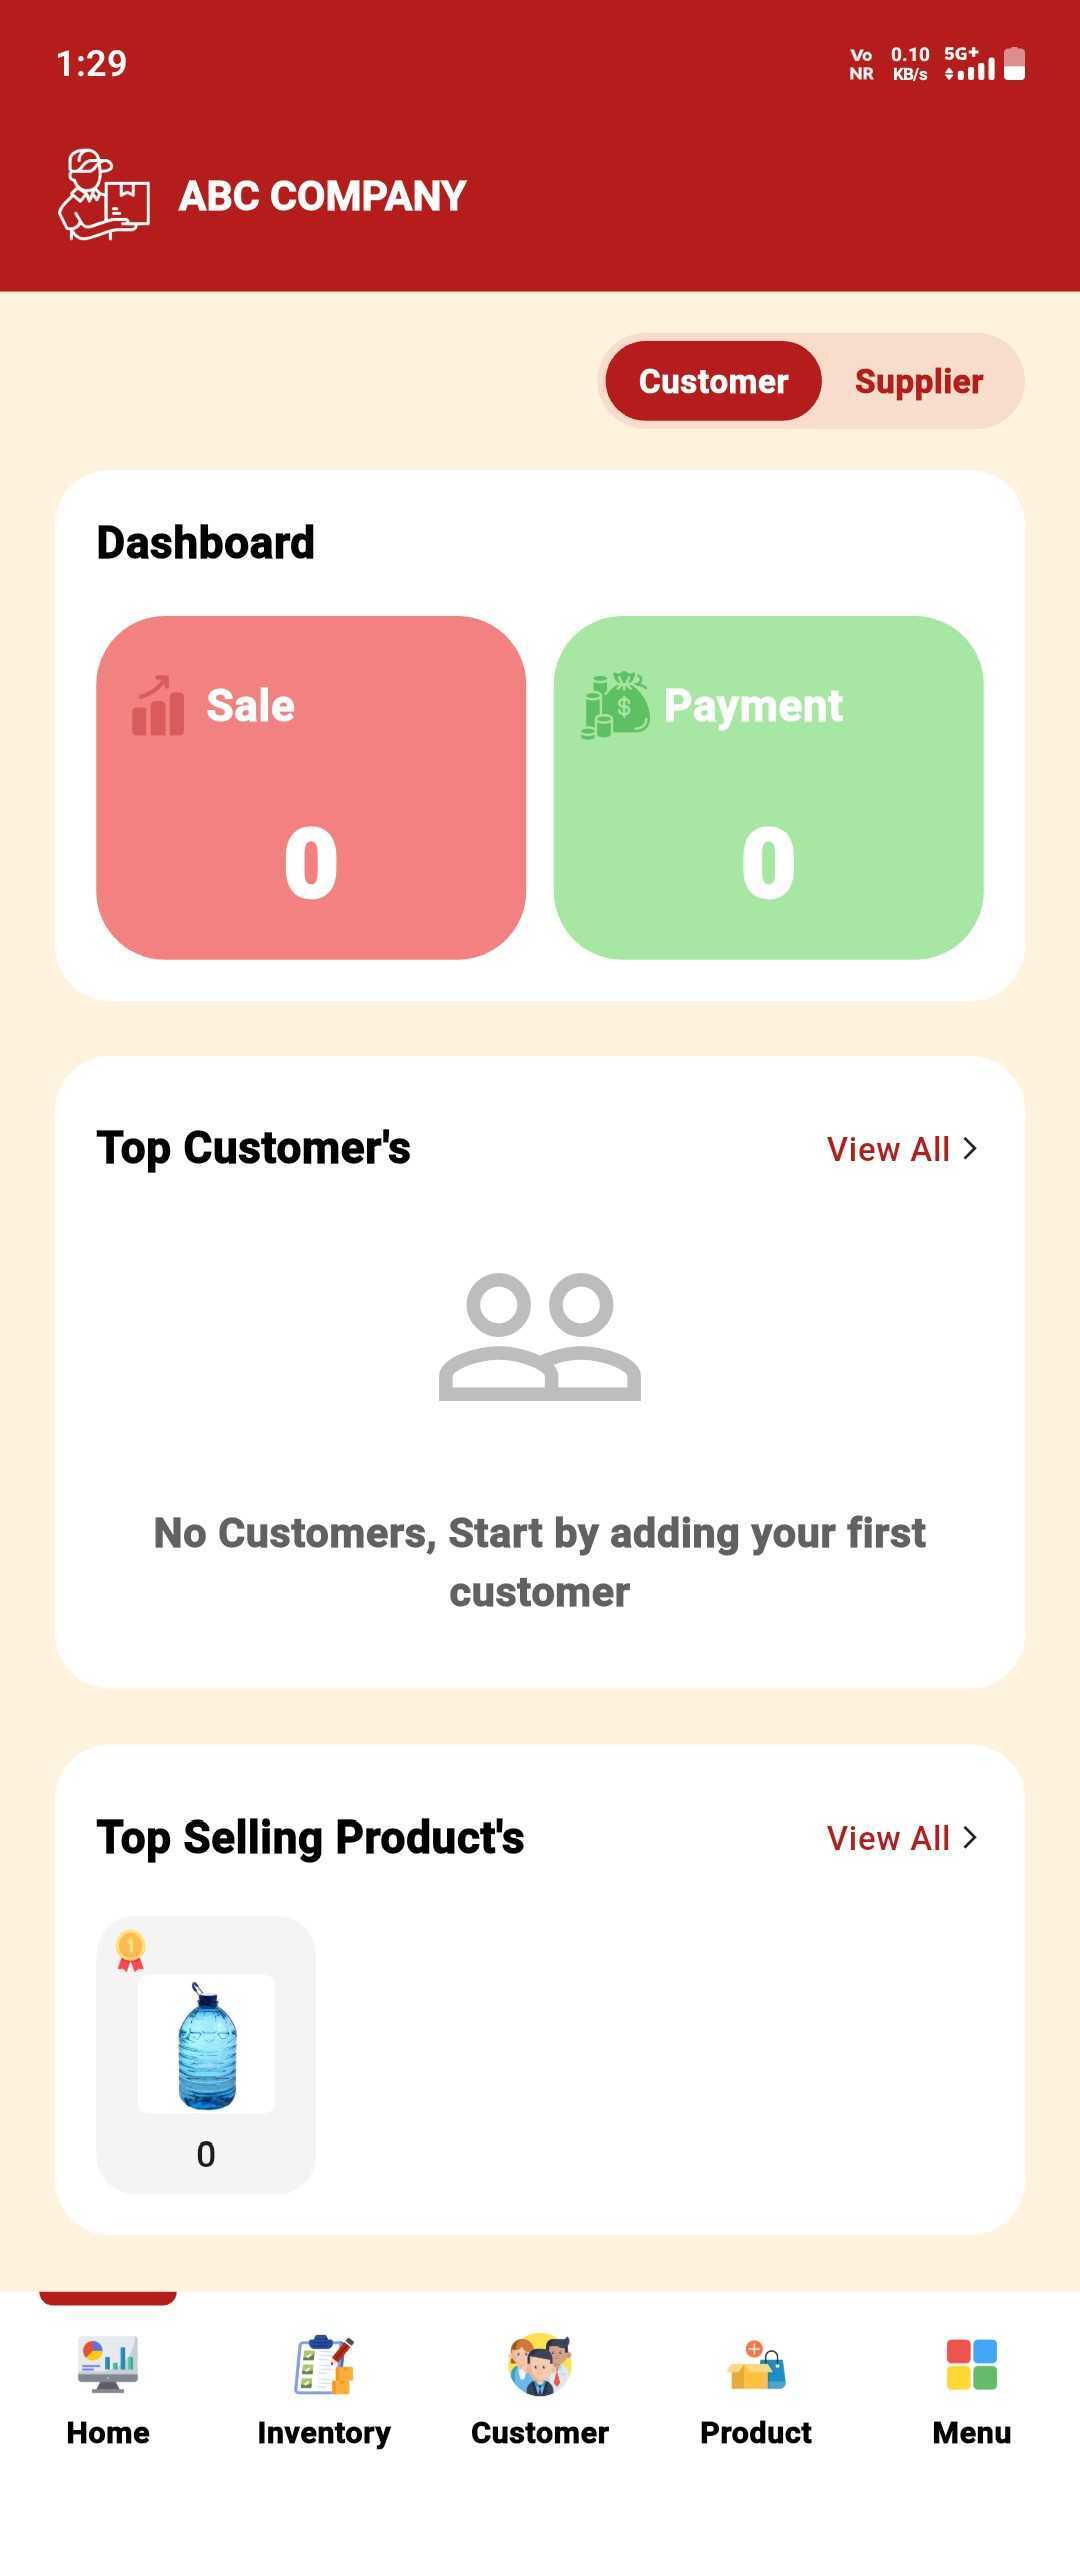
Open the Customer Screen
Open the Customer screen to get started.
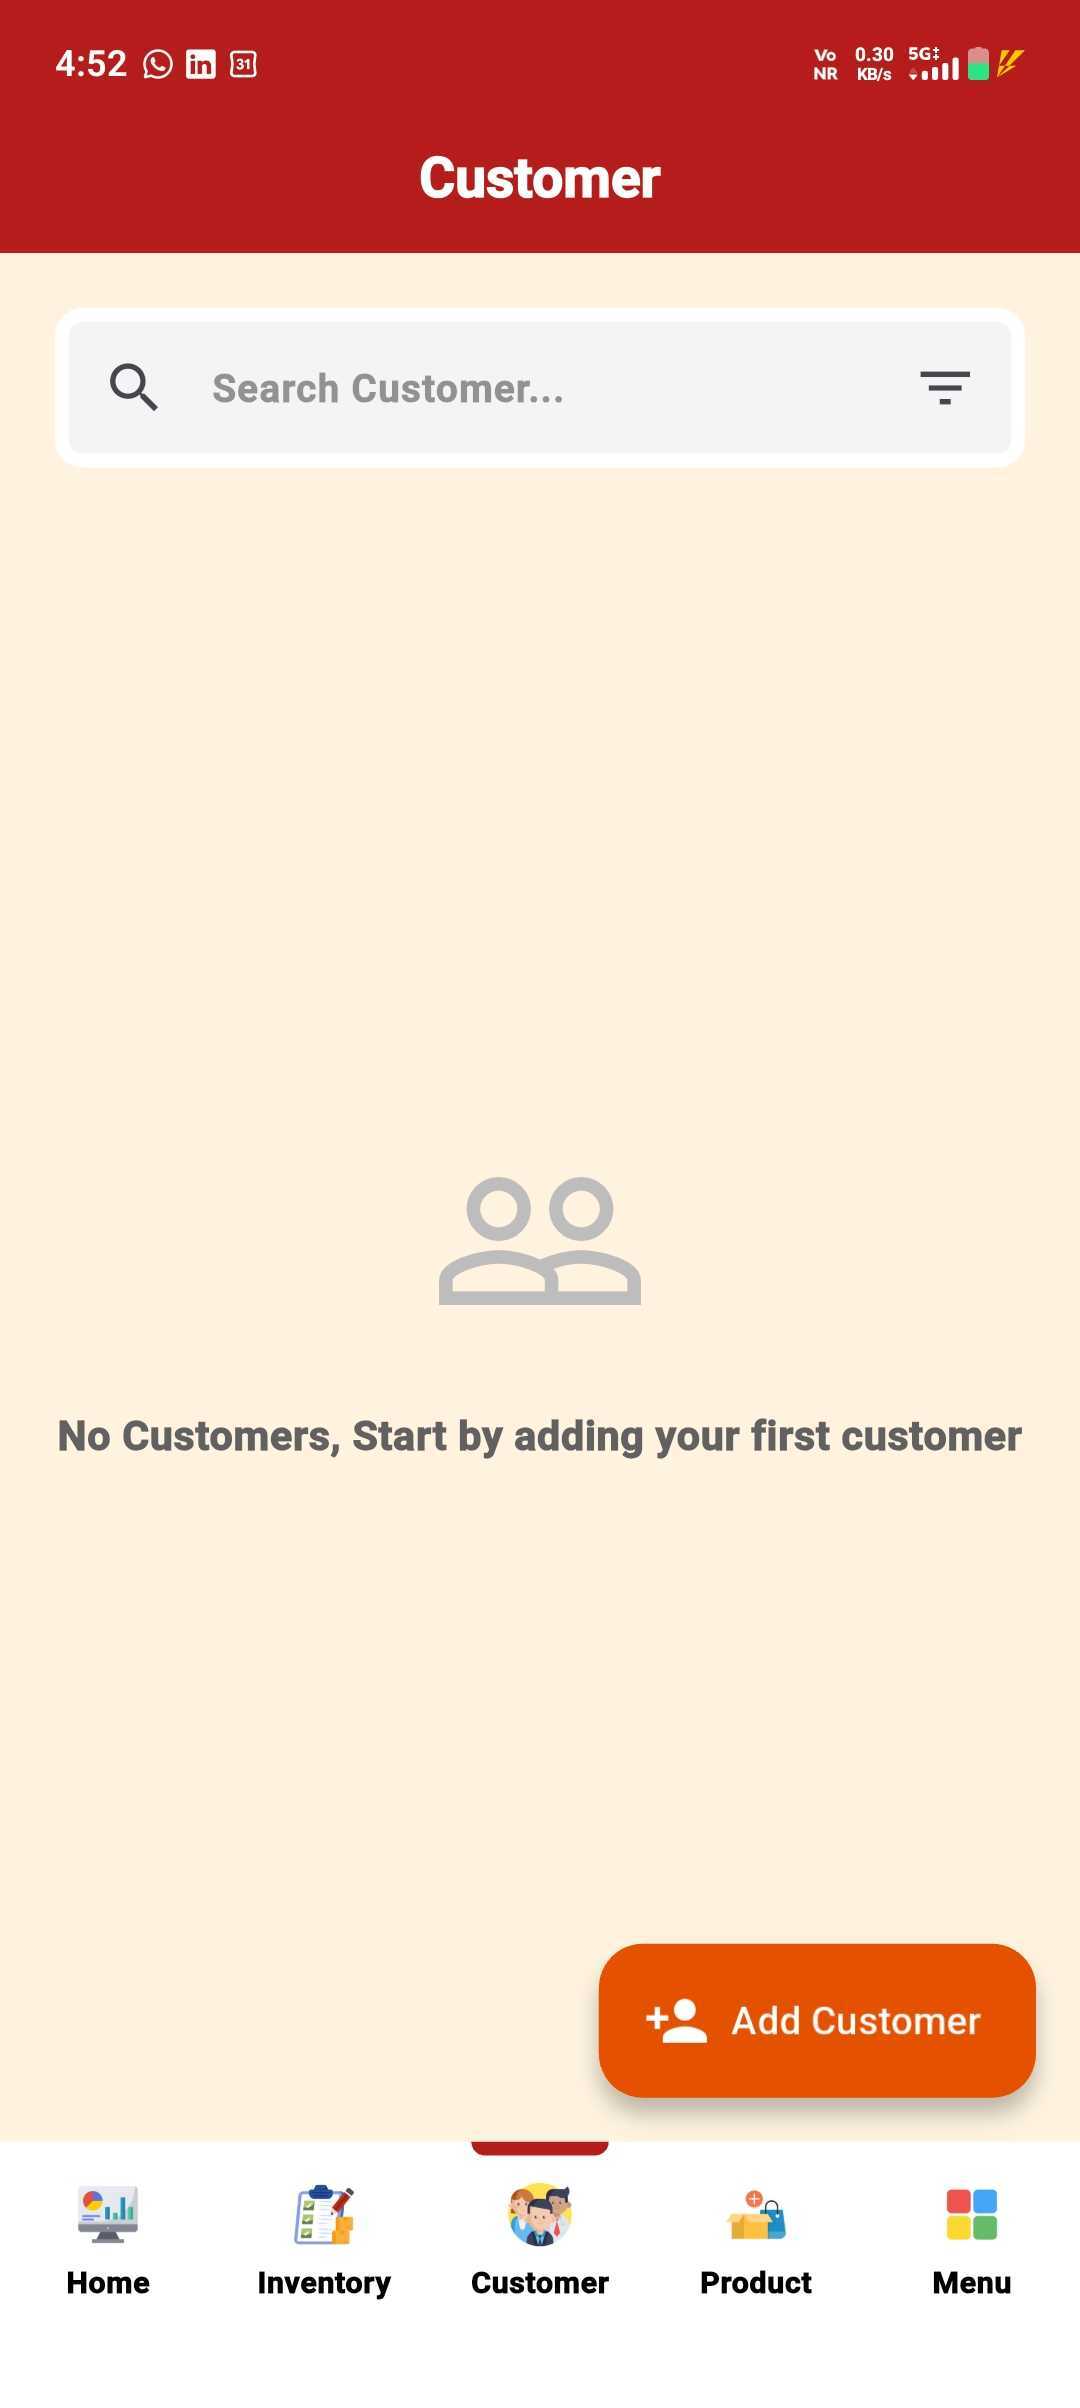
Open the Add Form
Open the customer add form from the Customer section.
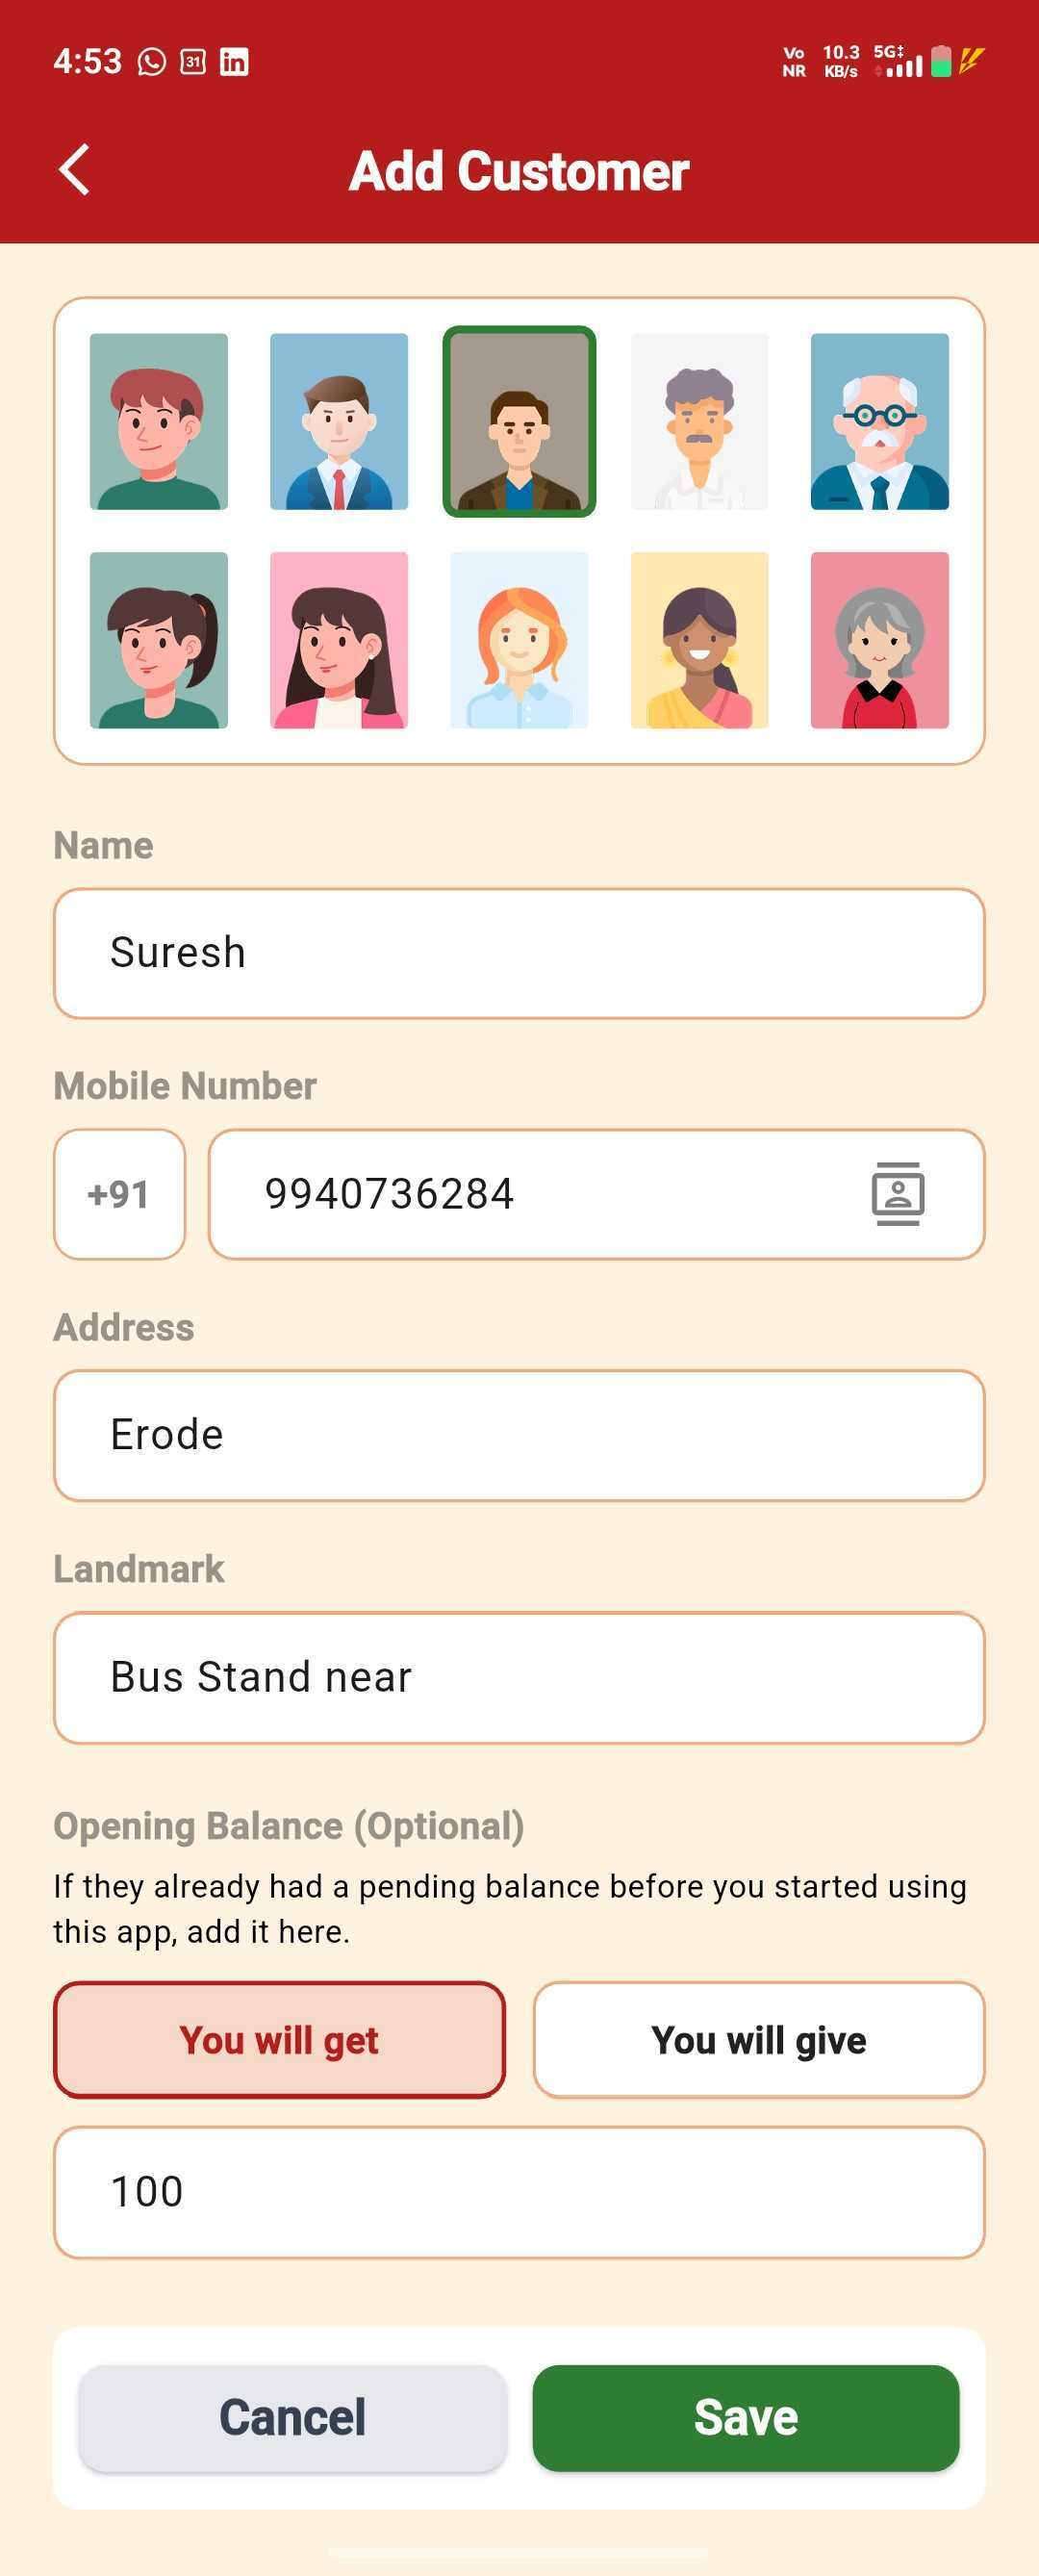
Enter Opening Balance
Add the customer details and enter their opening balance in the same form, then Save.
Open the Customer Ledger
Select the customer to confirm the ledger details.
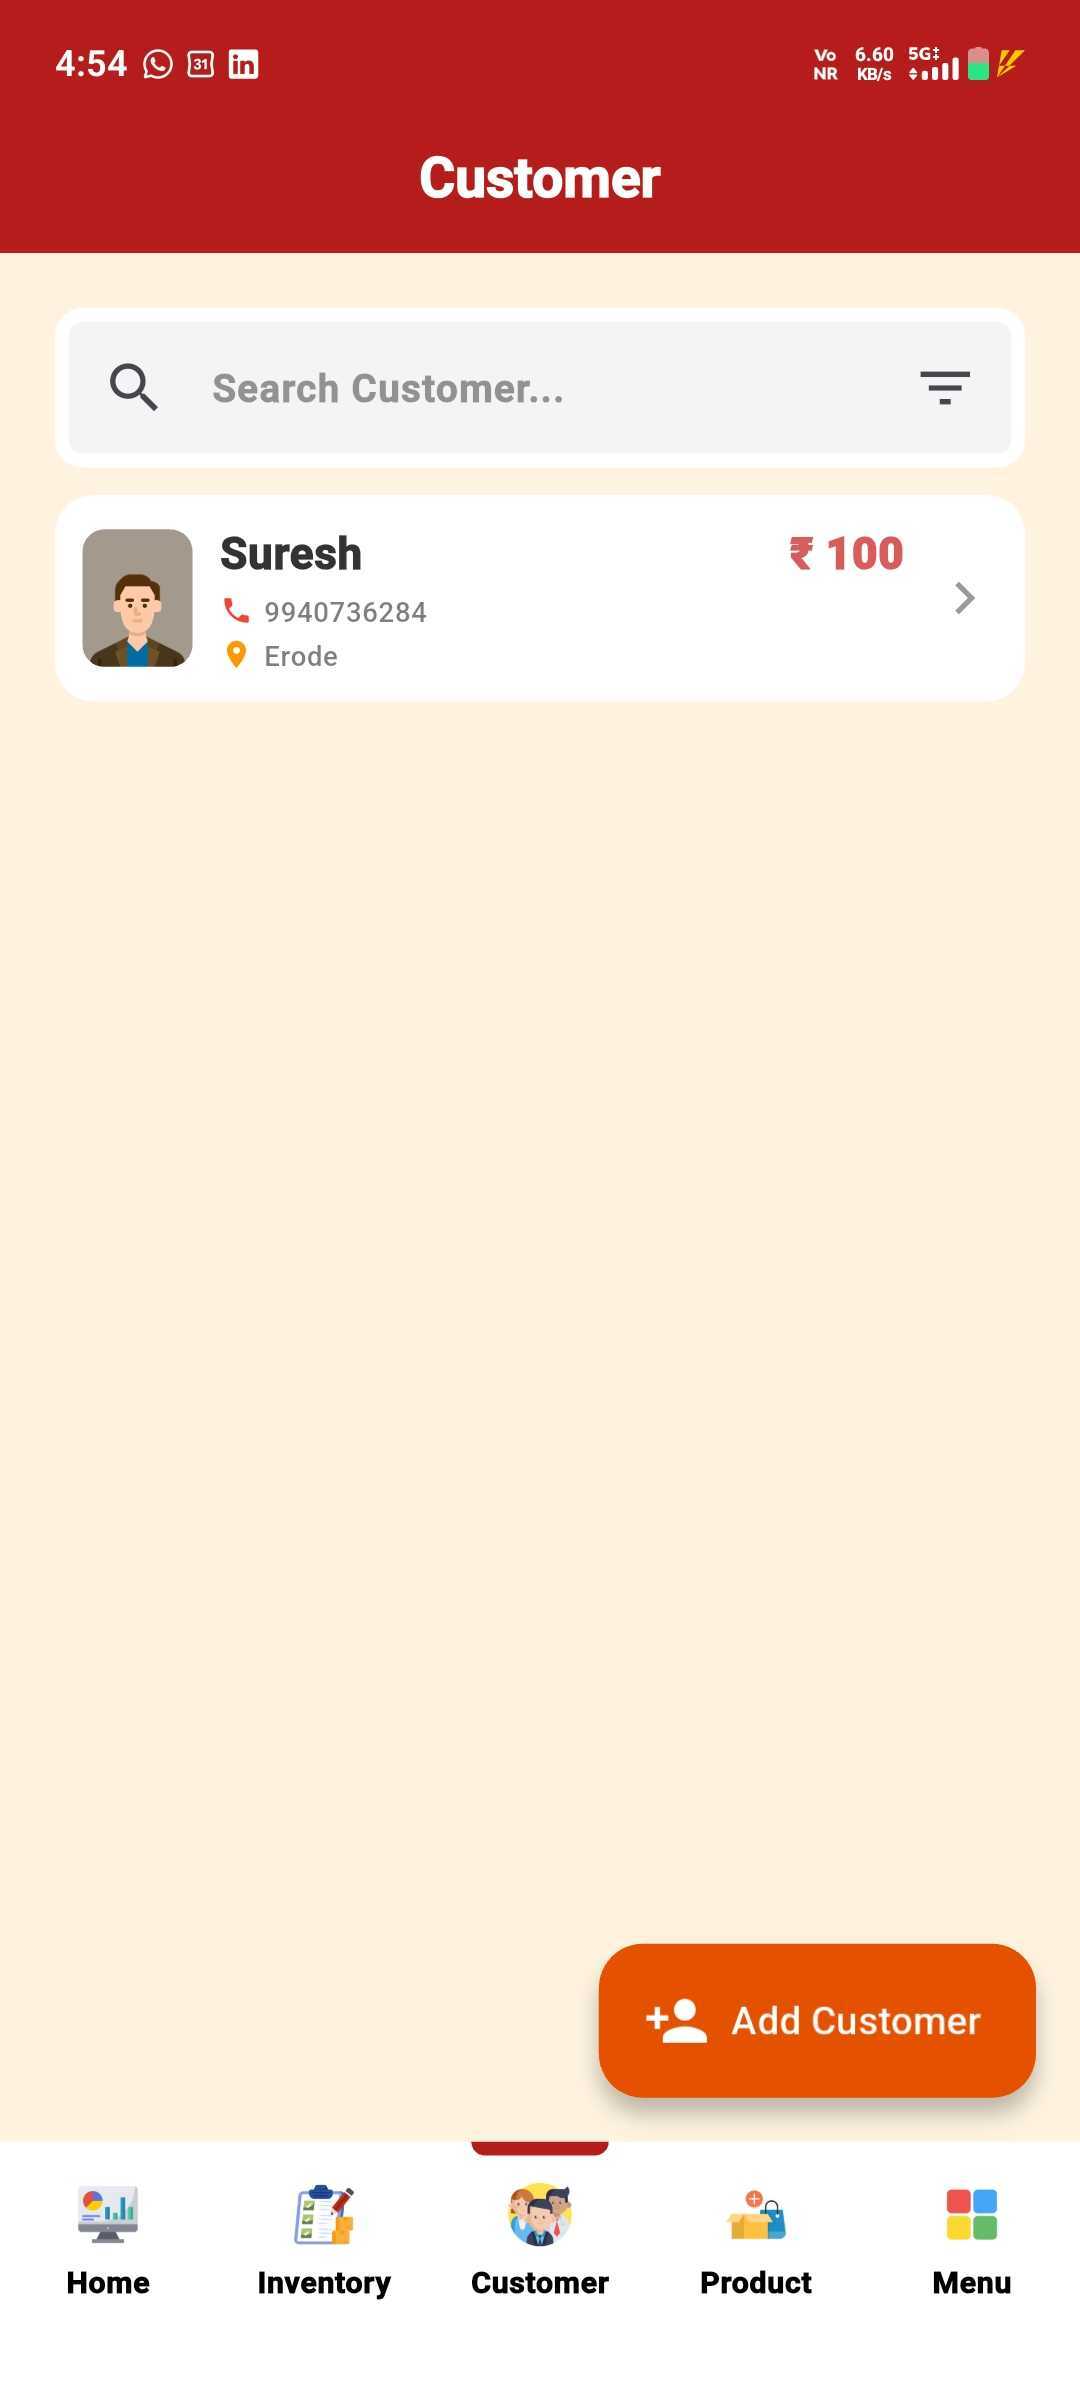
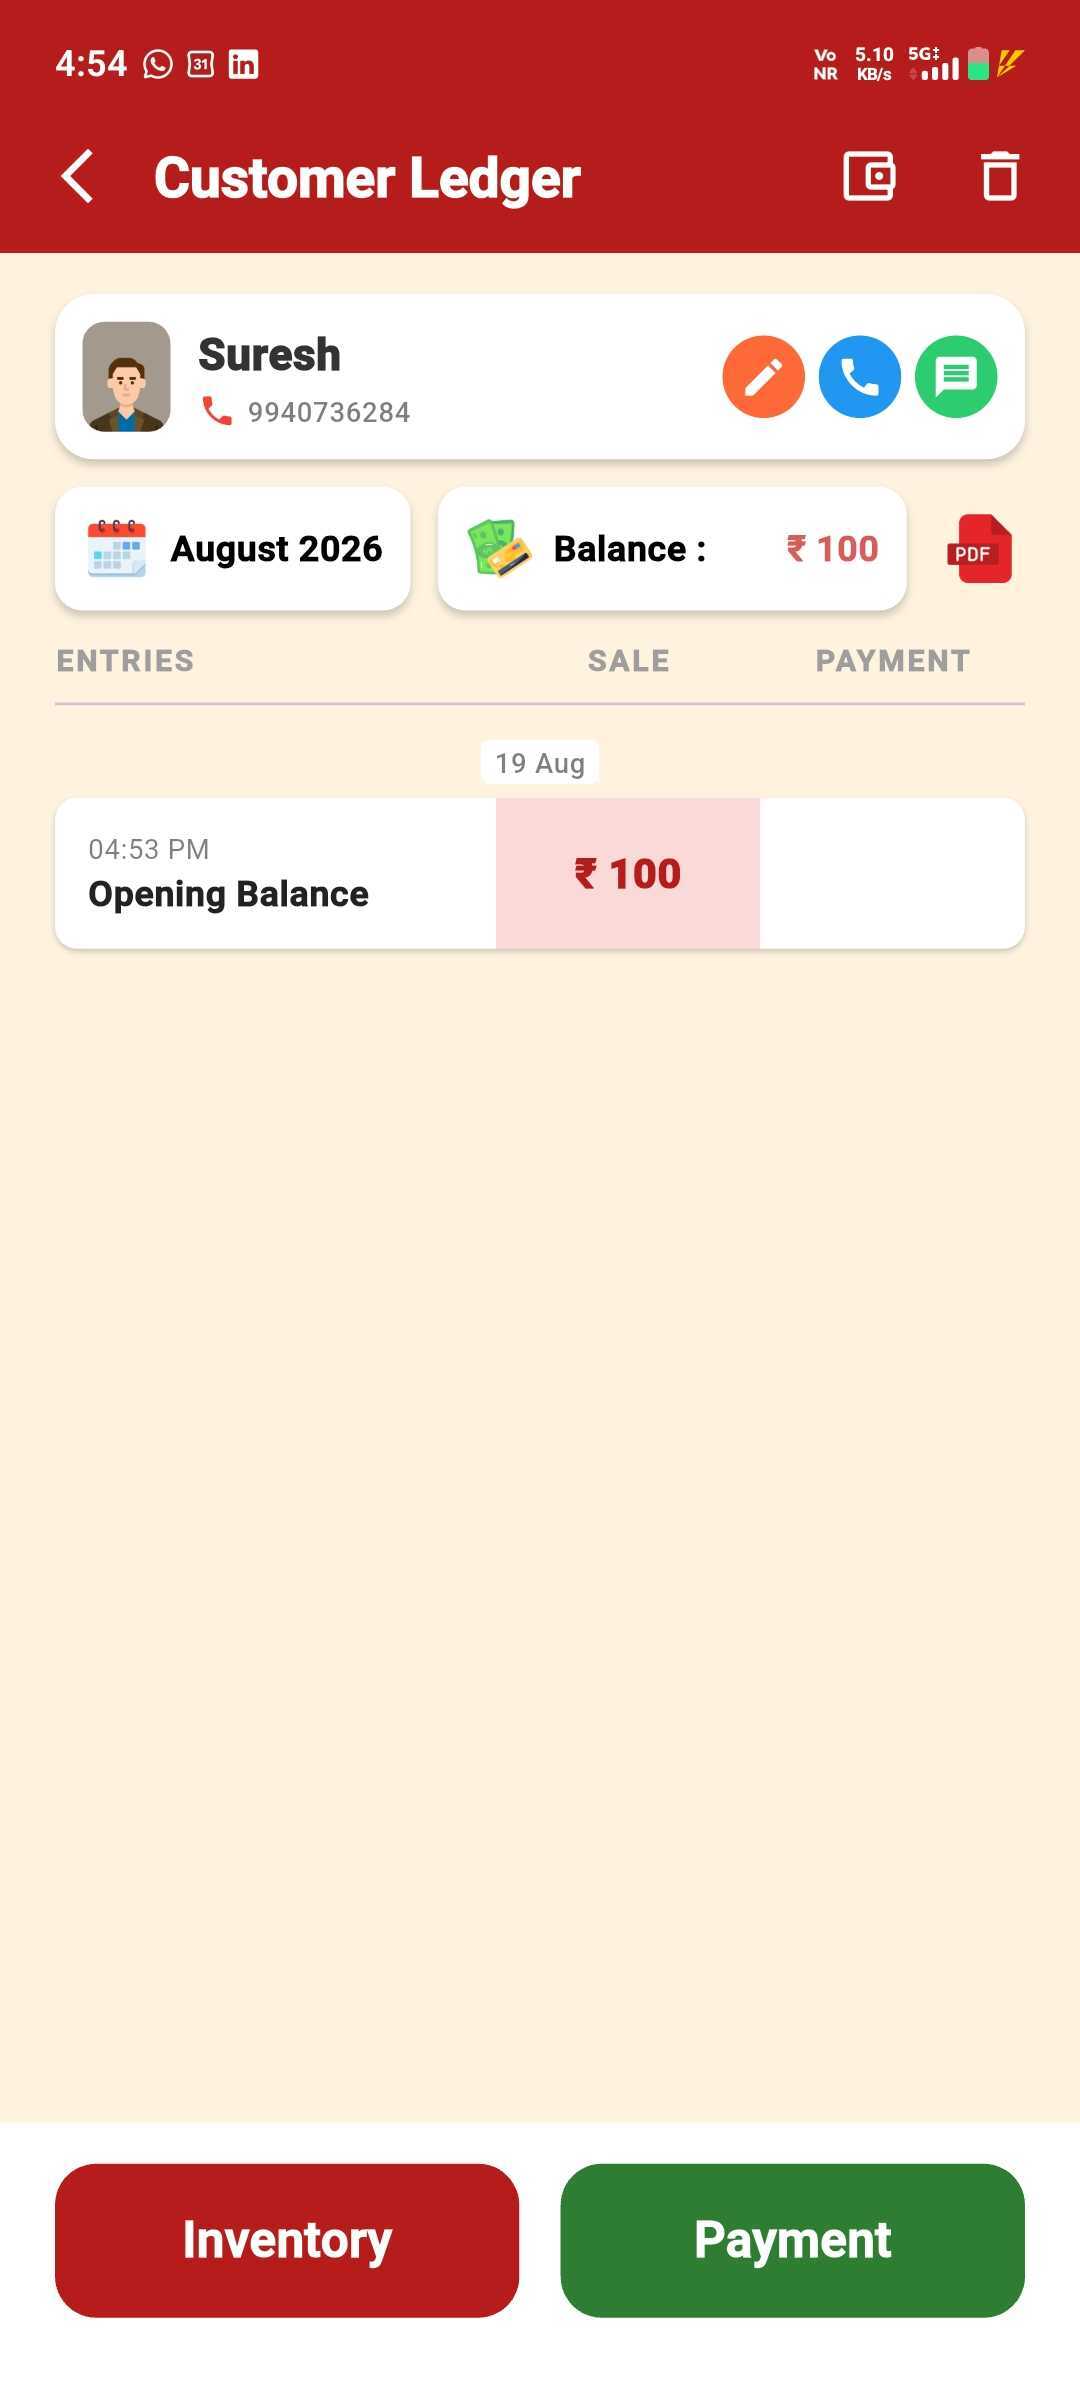
Balance Already Applied
The ledger opens showing the opening balance you just added.
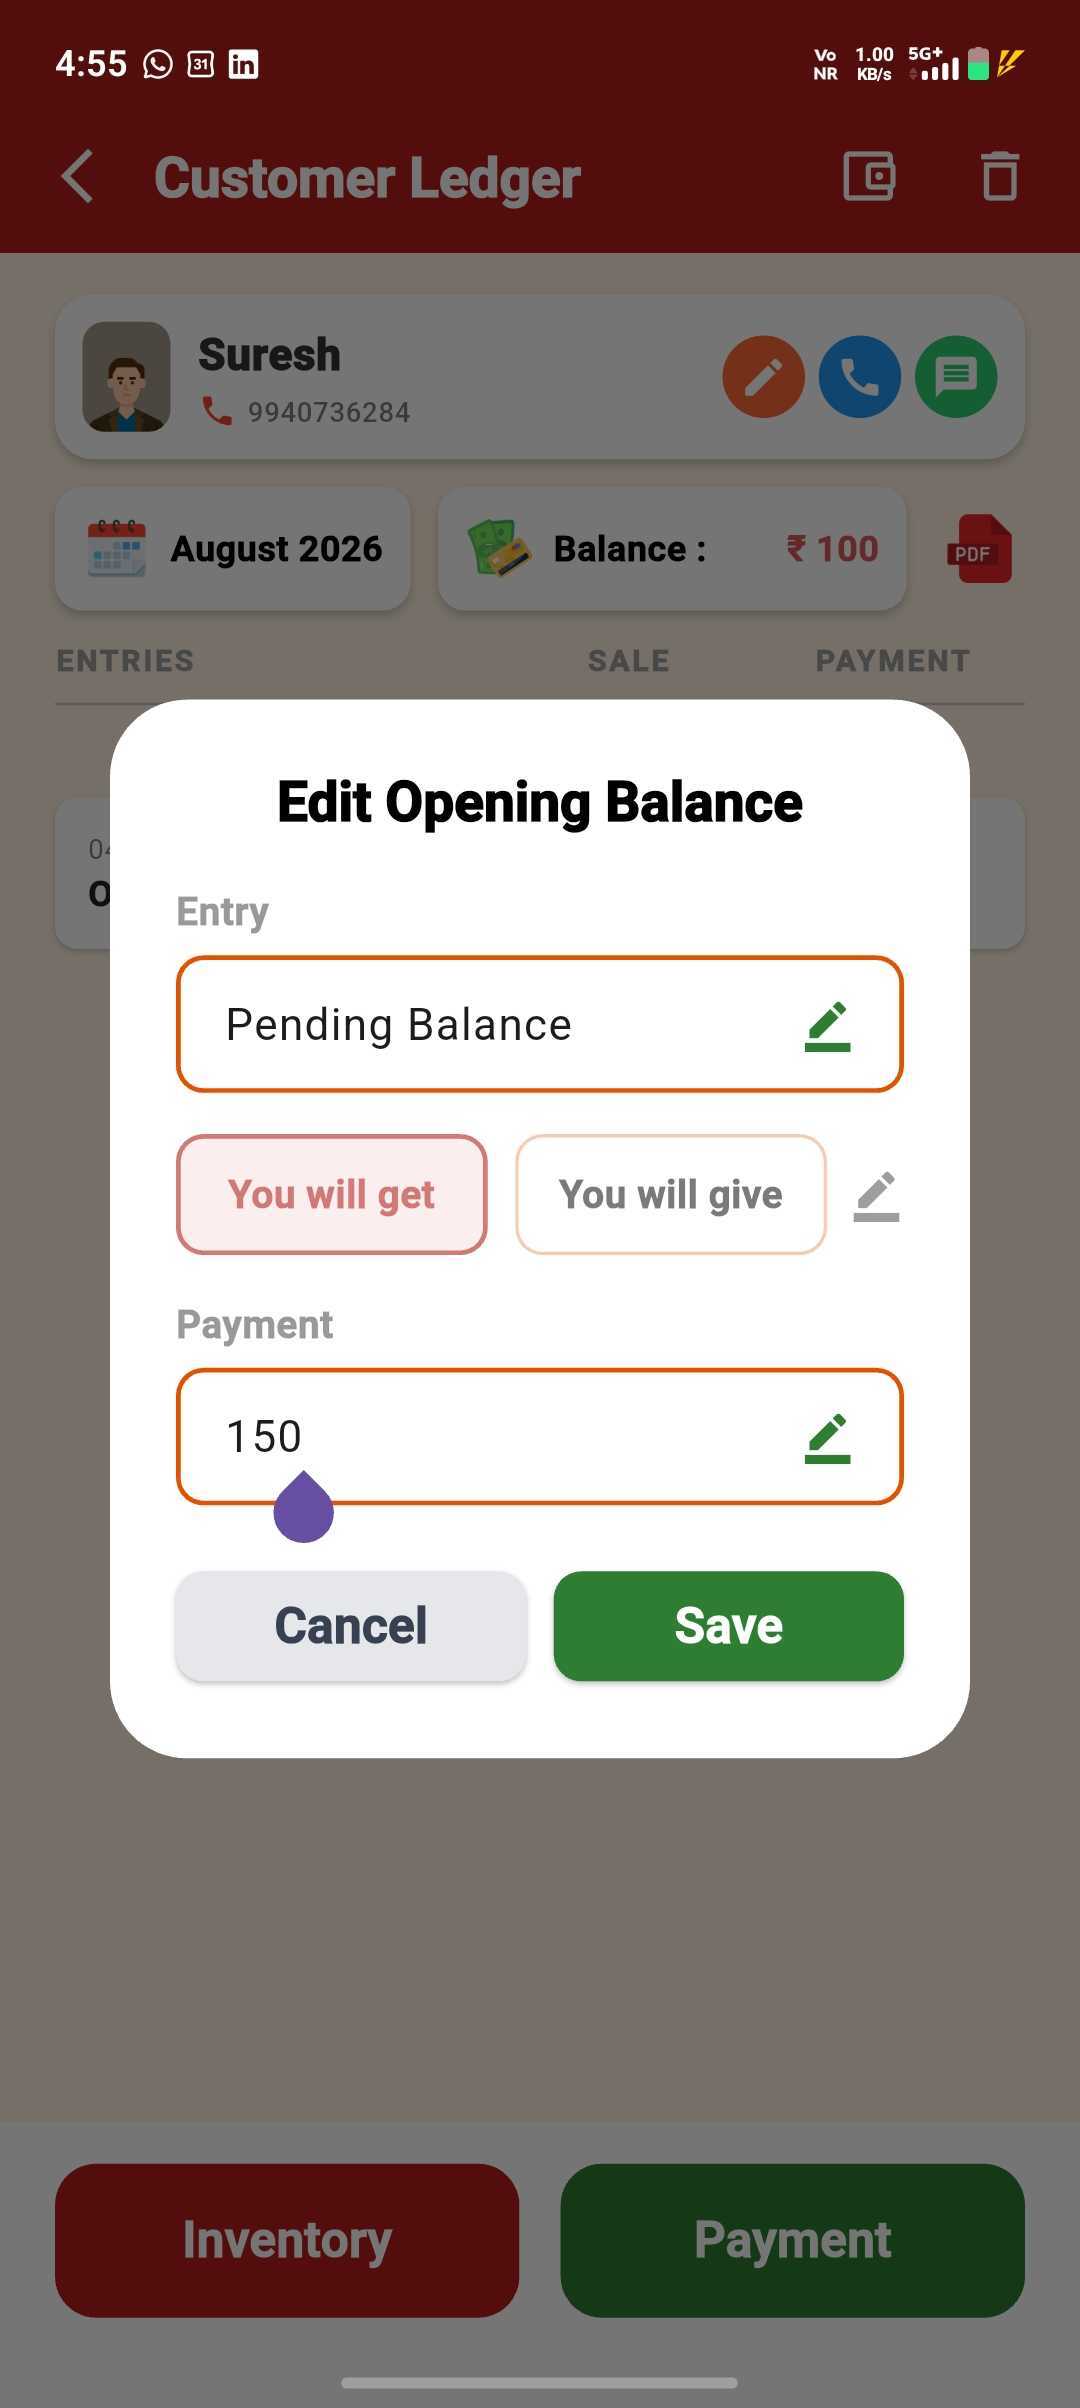
Edit Anytime
Tap the entry to change the amount, then save.
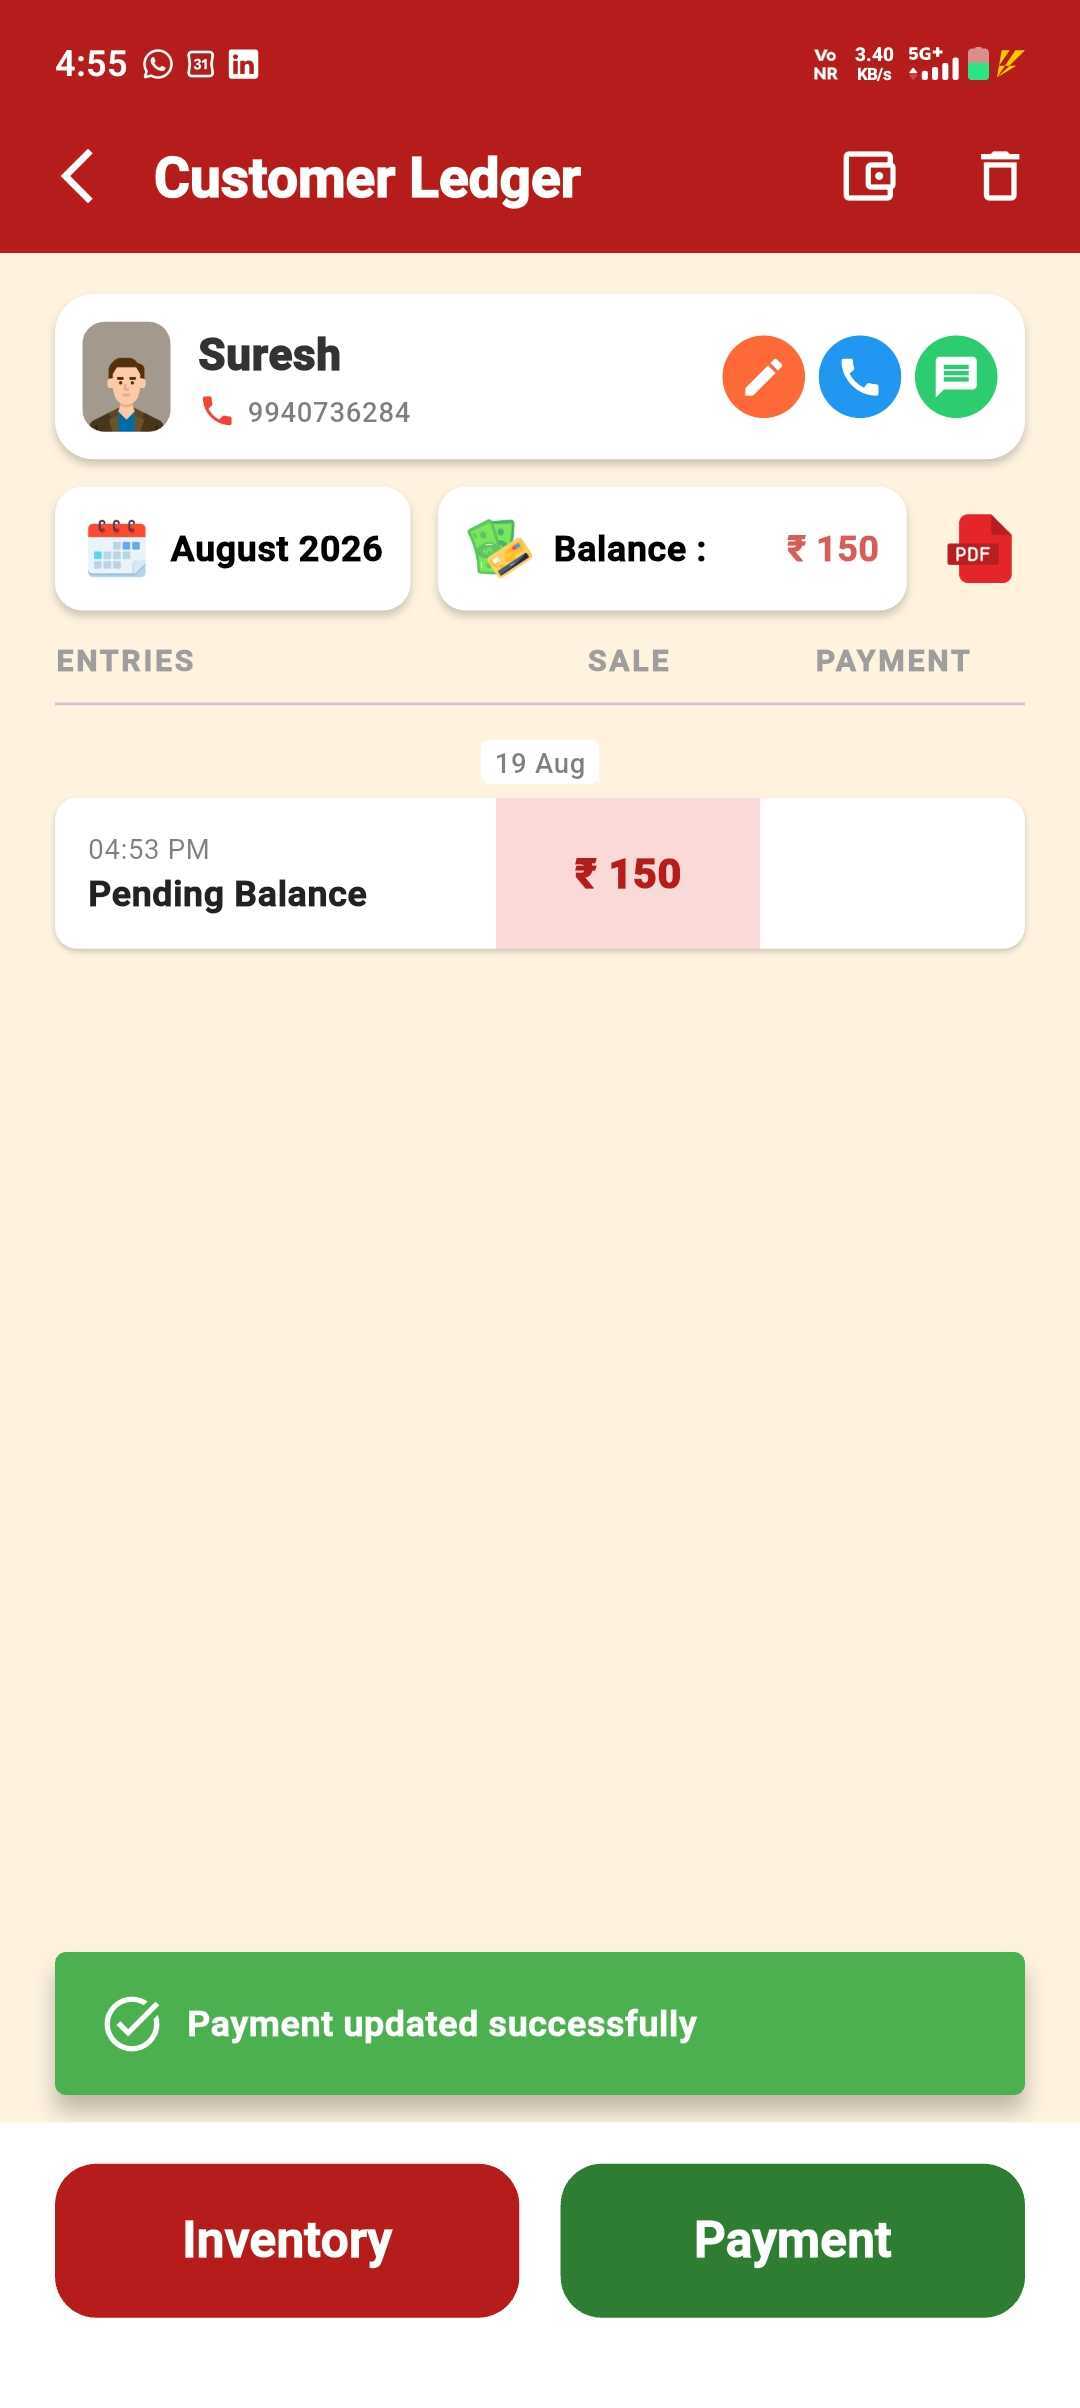
Ledger Stays Accurate
Your edit reflects immediately in the customer's ledger.
Use this when the customer is already created and you want to add the starting balance later.
Open the Customer Screen
Open the Customer screen and choose the customer.
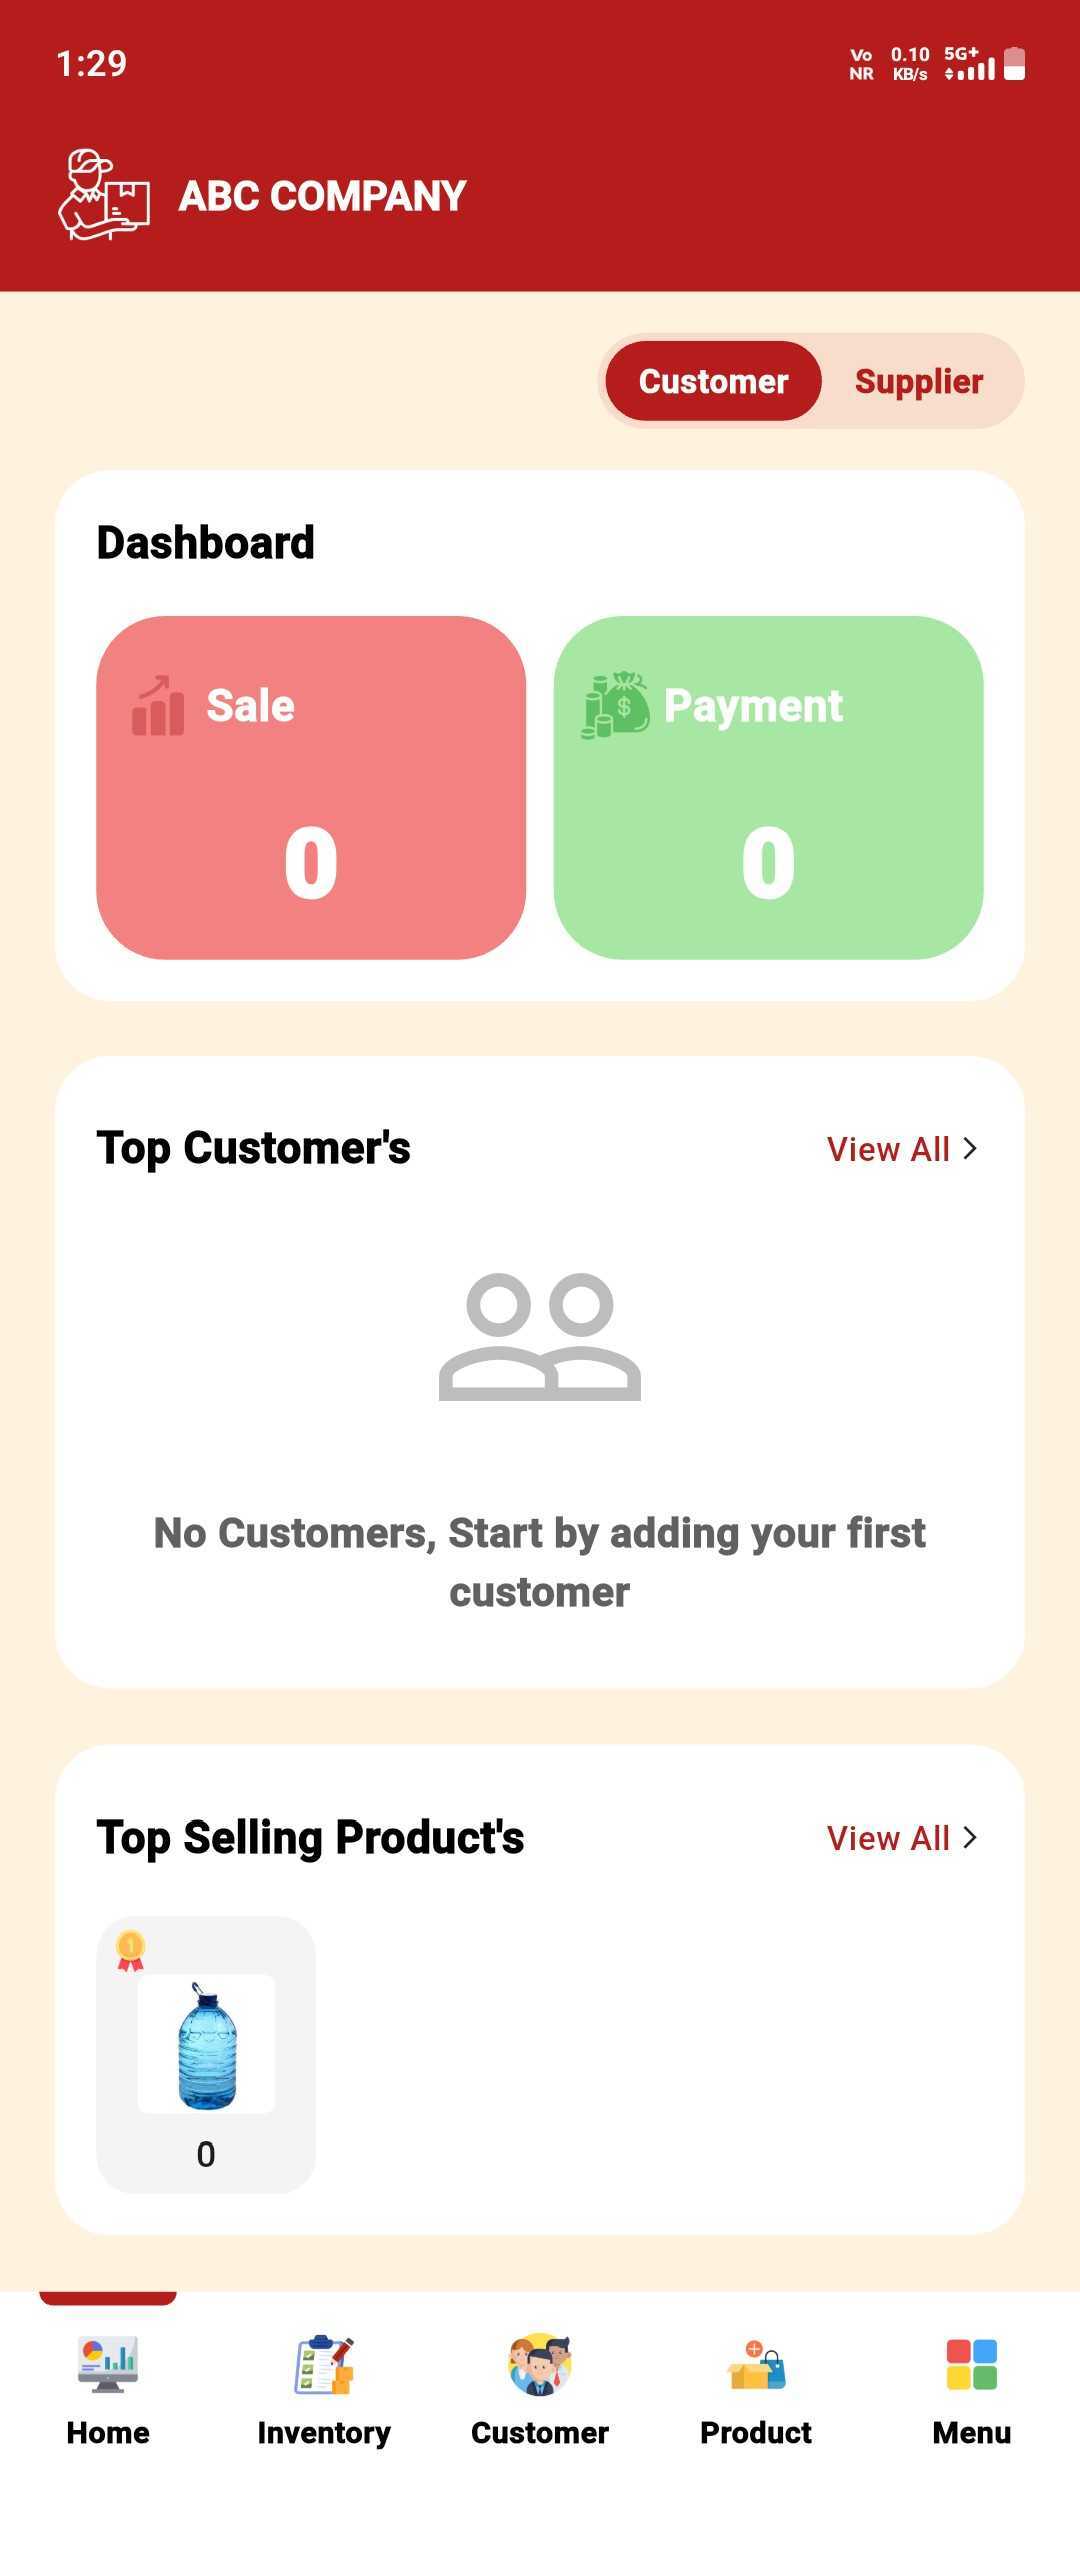
Open the Customer Ledger
Tap the customer to open their ledger screen.
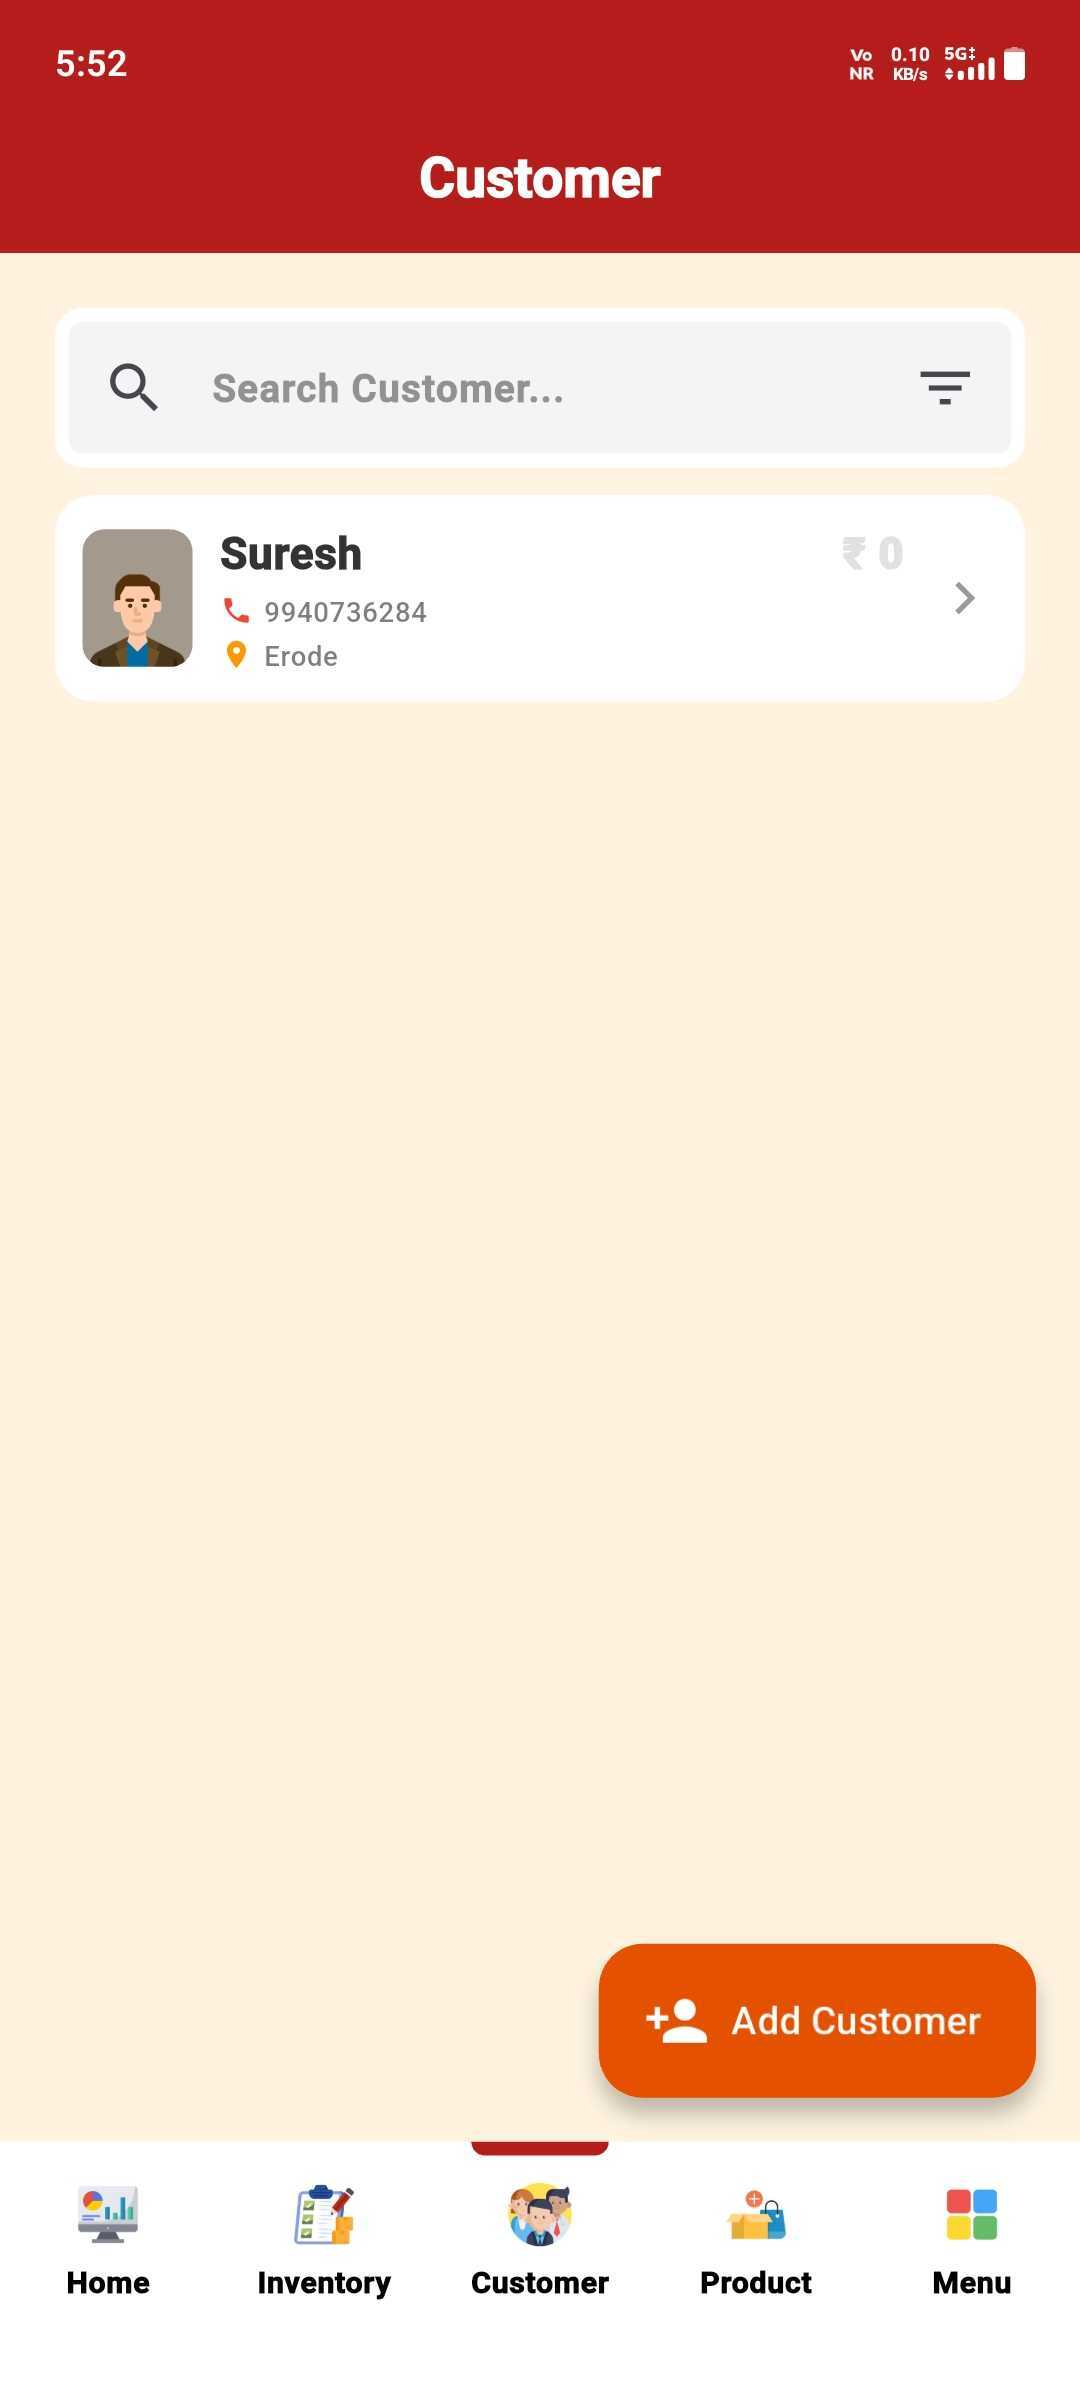
Tap Wallet
Tap the wallet/payment action on the ledger screen.
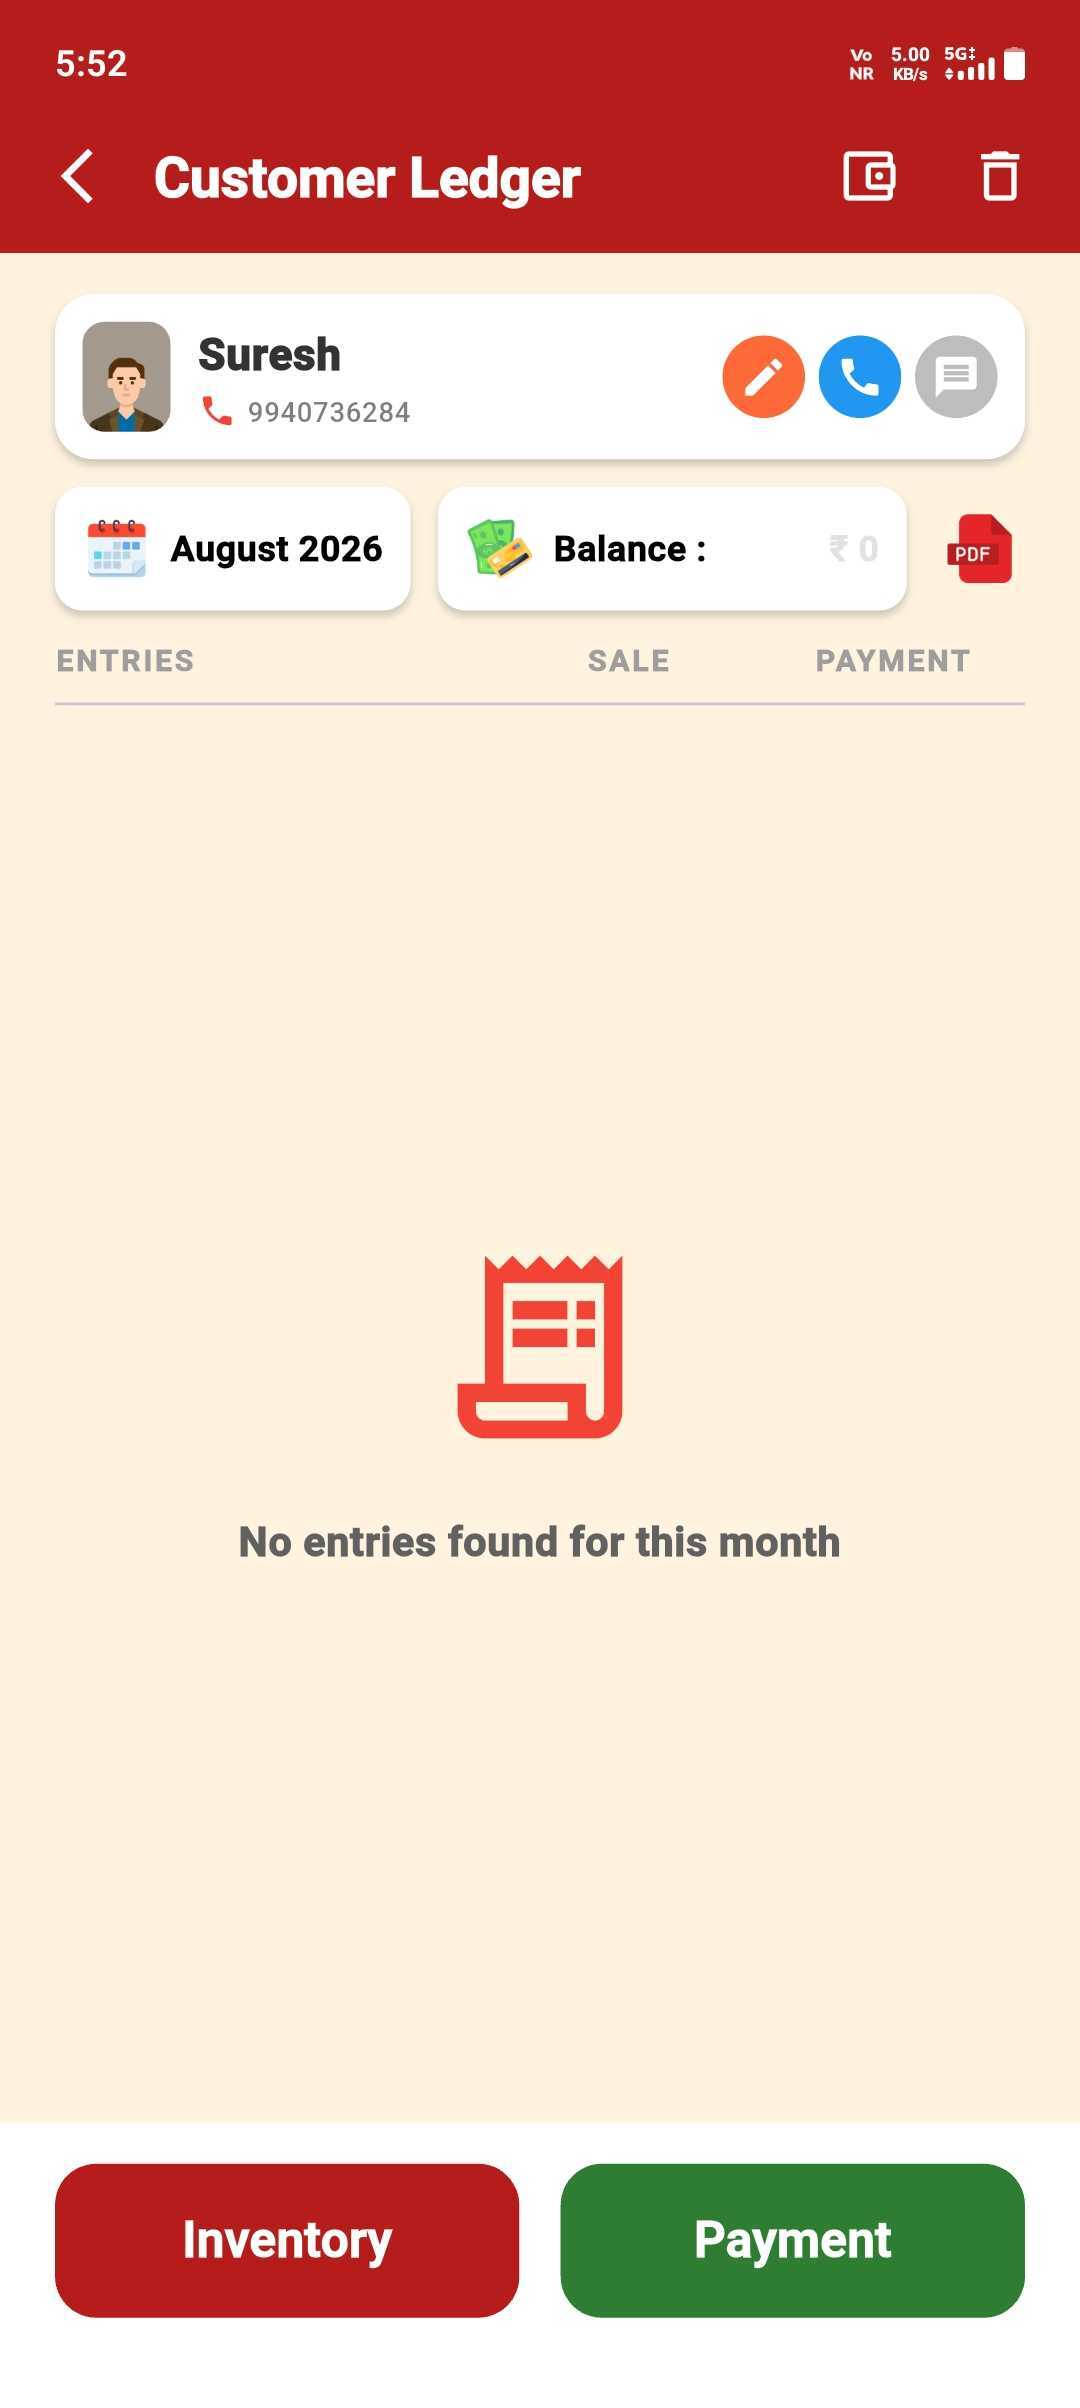
Save Opening Balance
Enter the opening balance amount and save it.
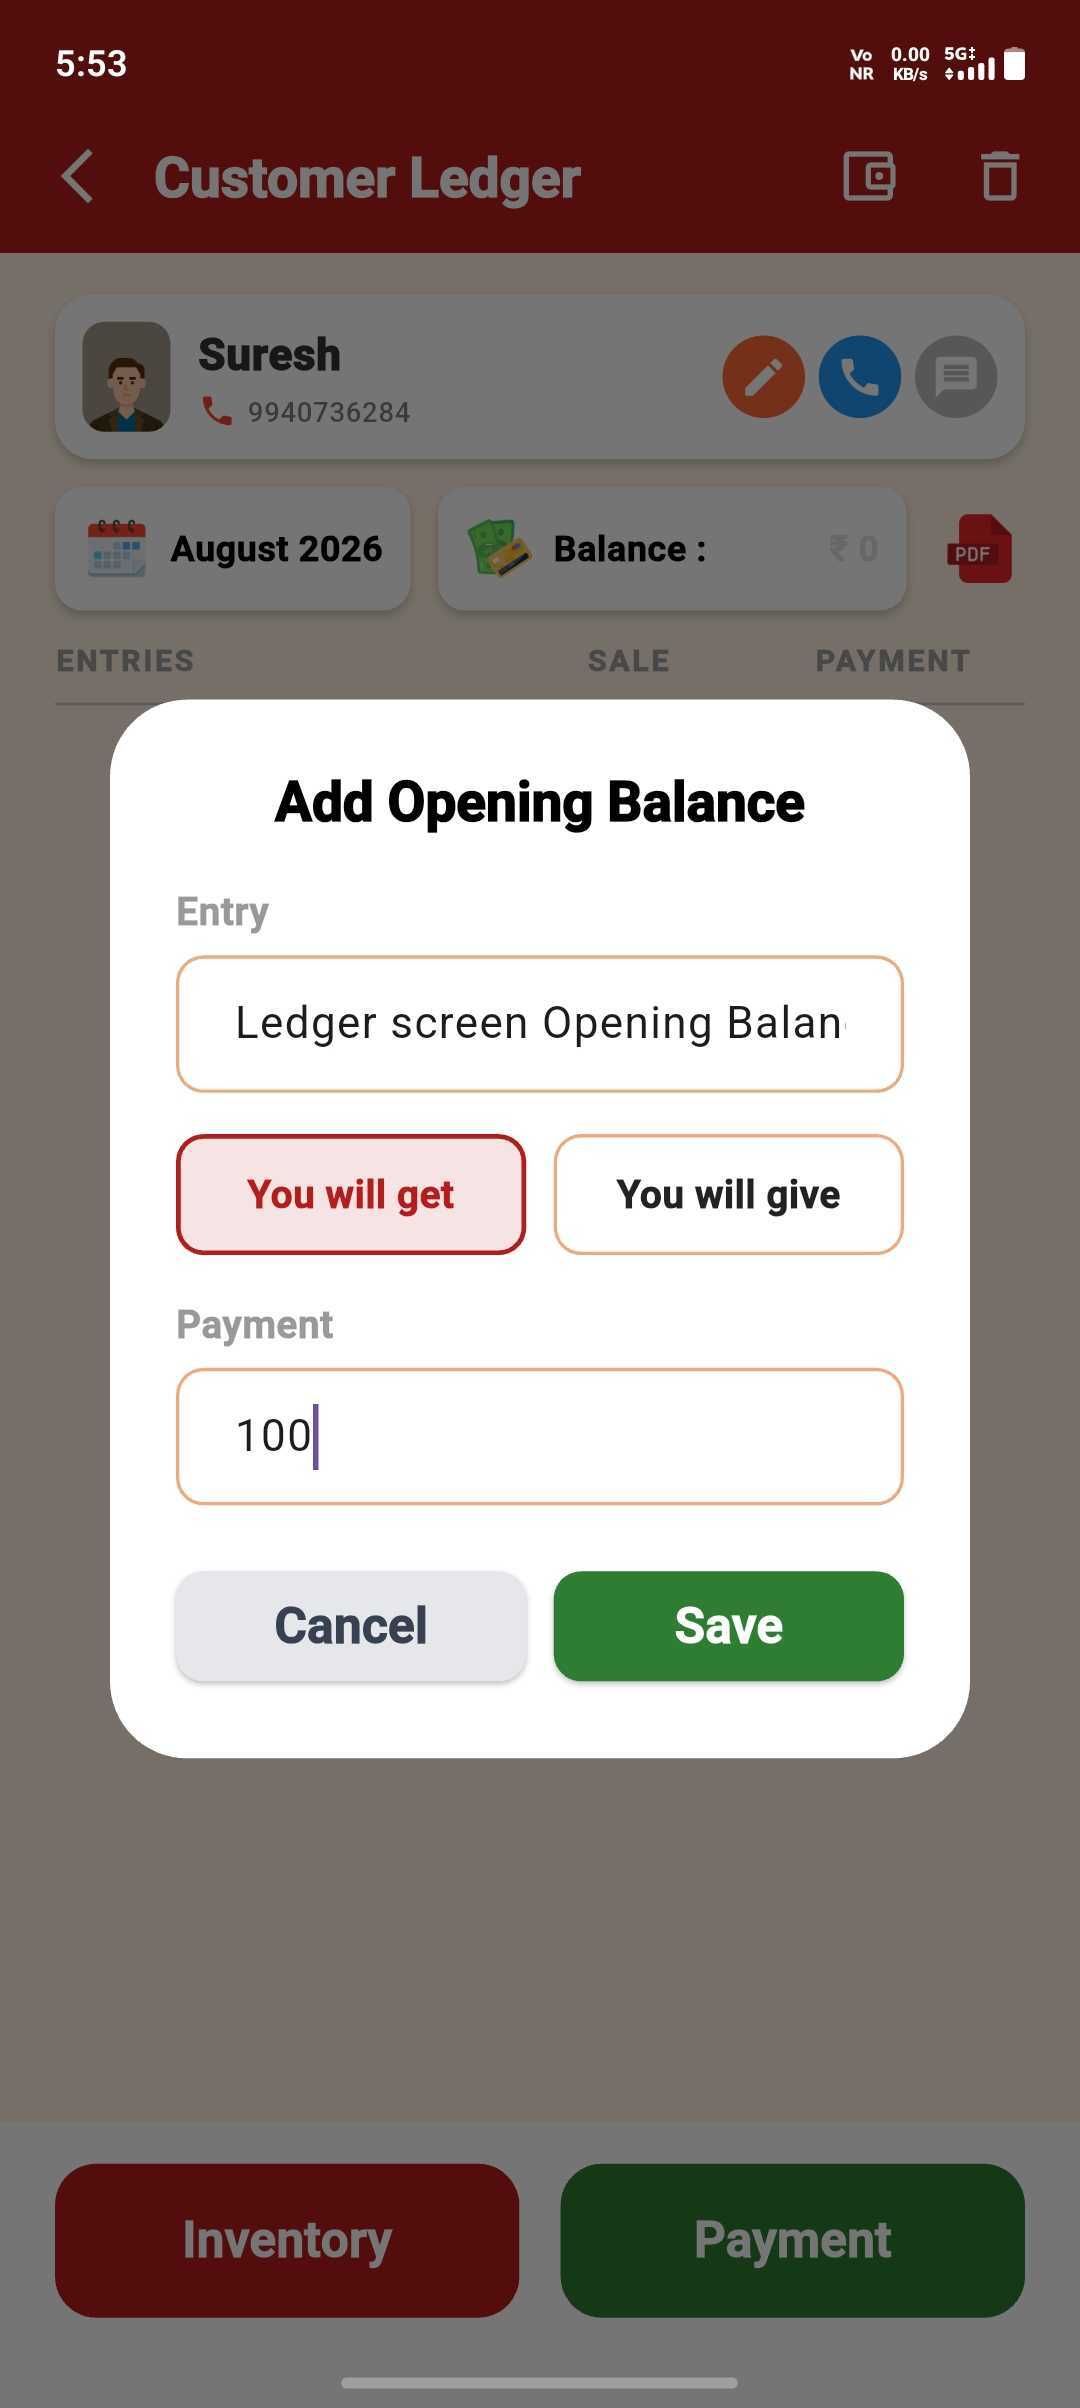
Balance Updated
The opening balance is reflected in the customer ledger.
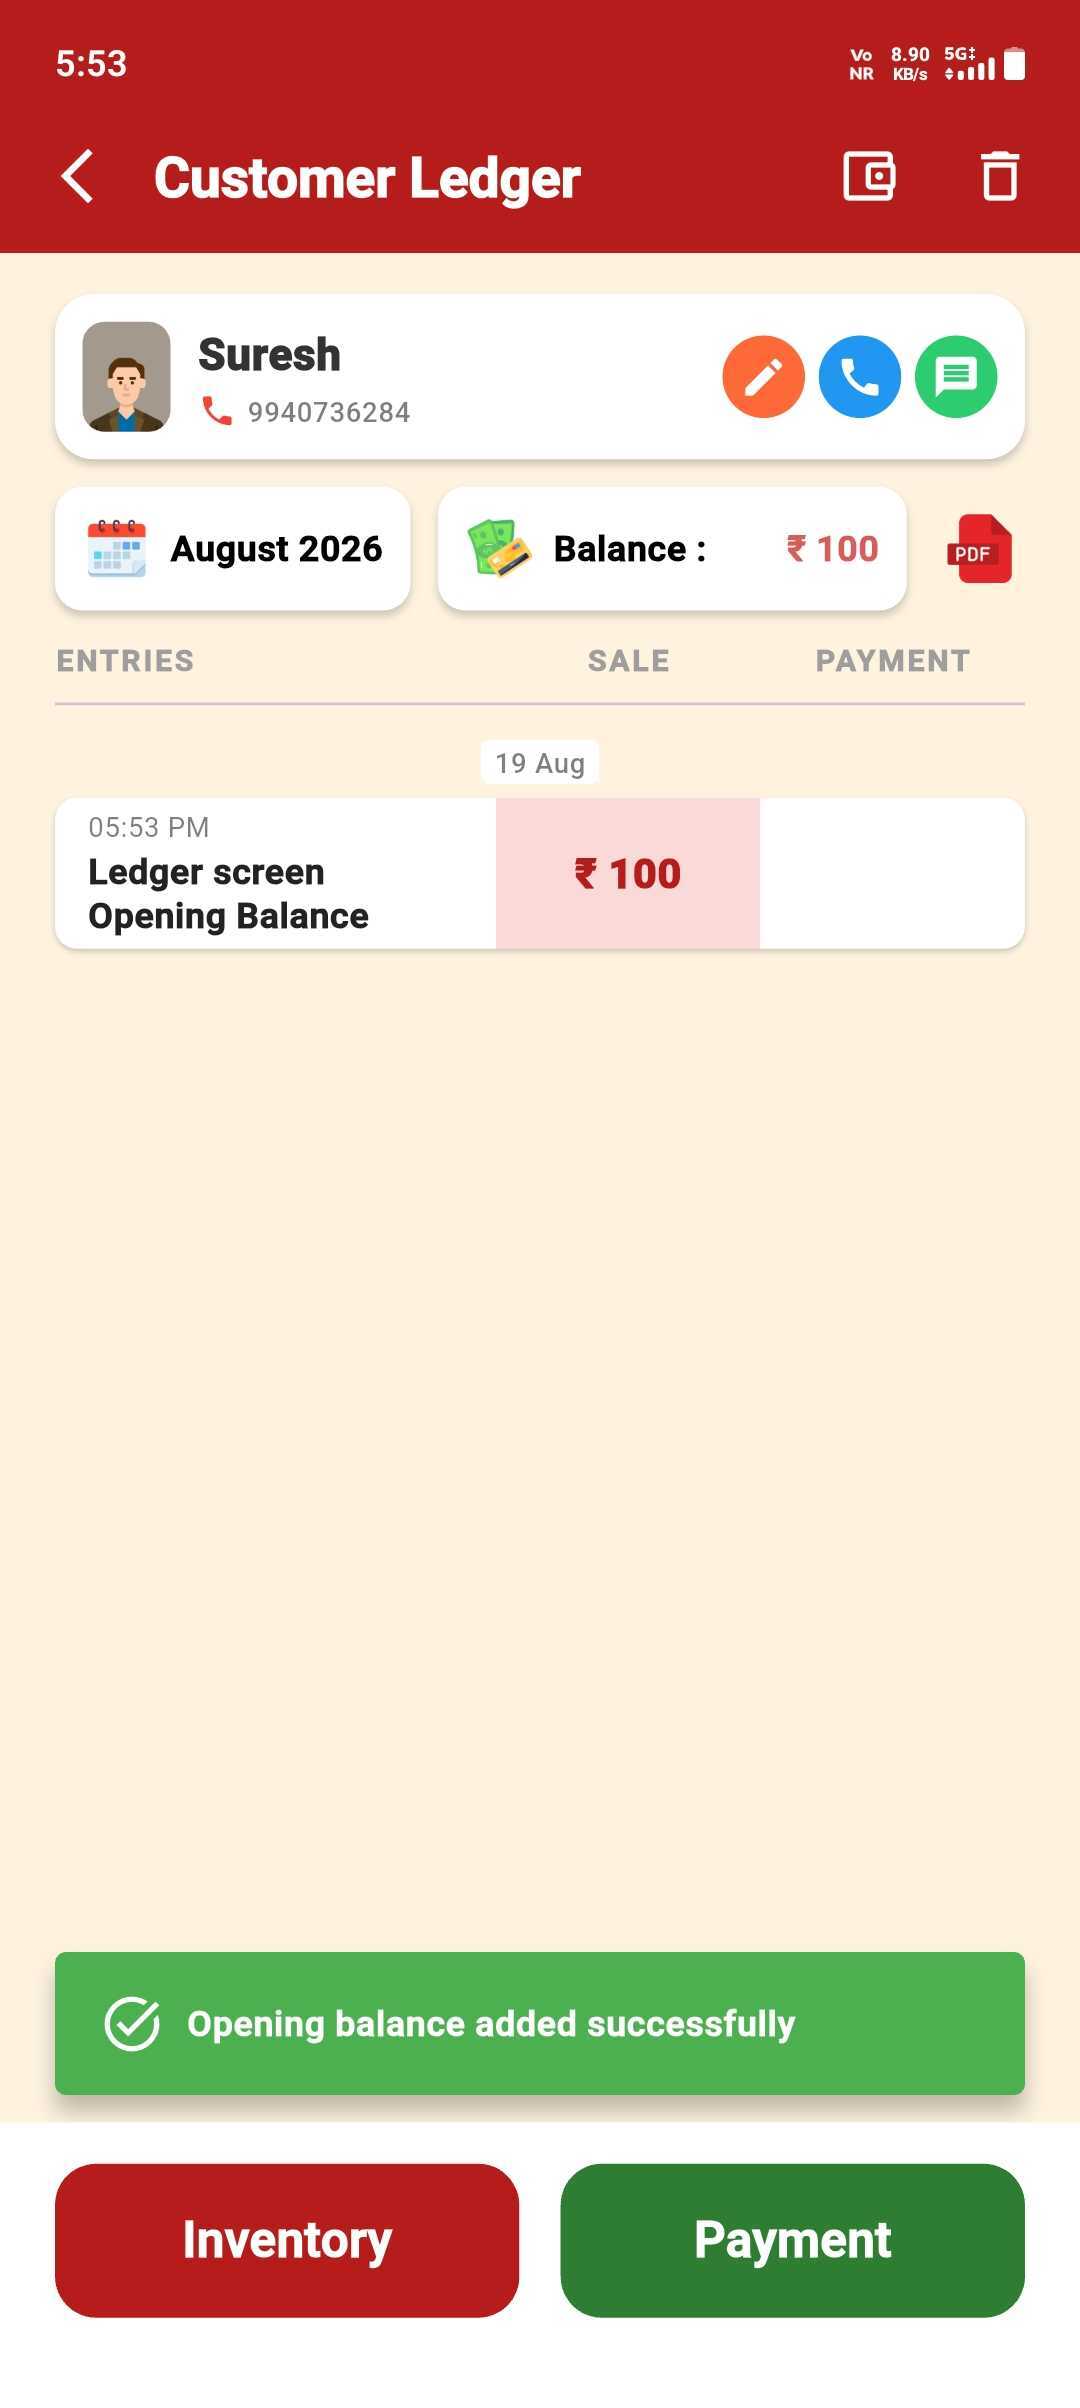
Edit Anytime
Tap the entry to change the amount, then save.
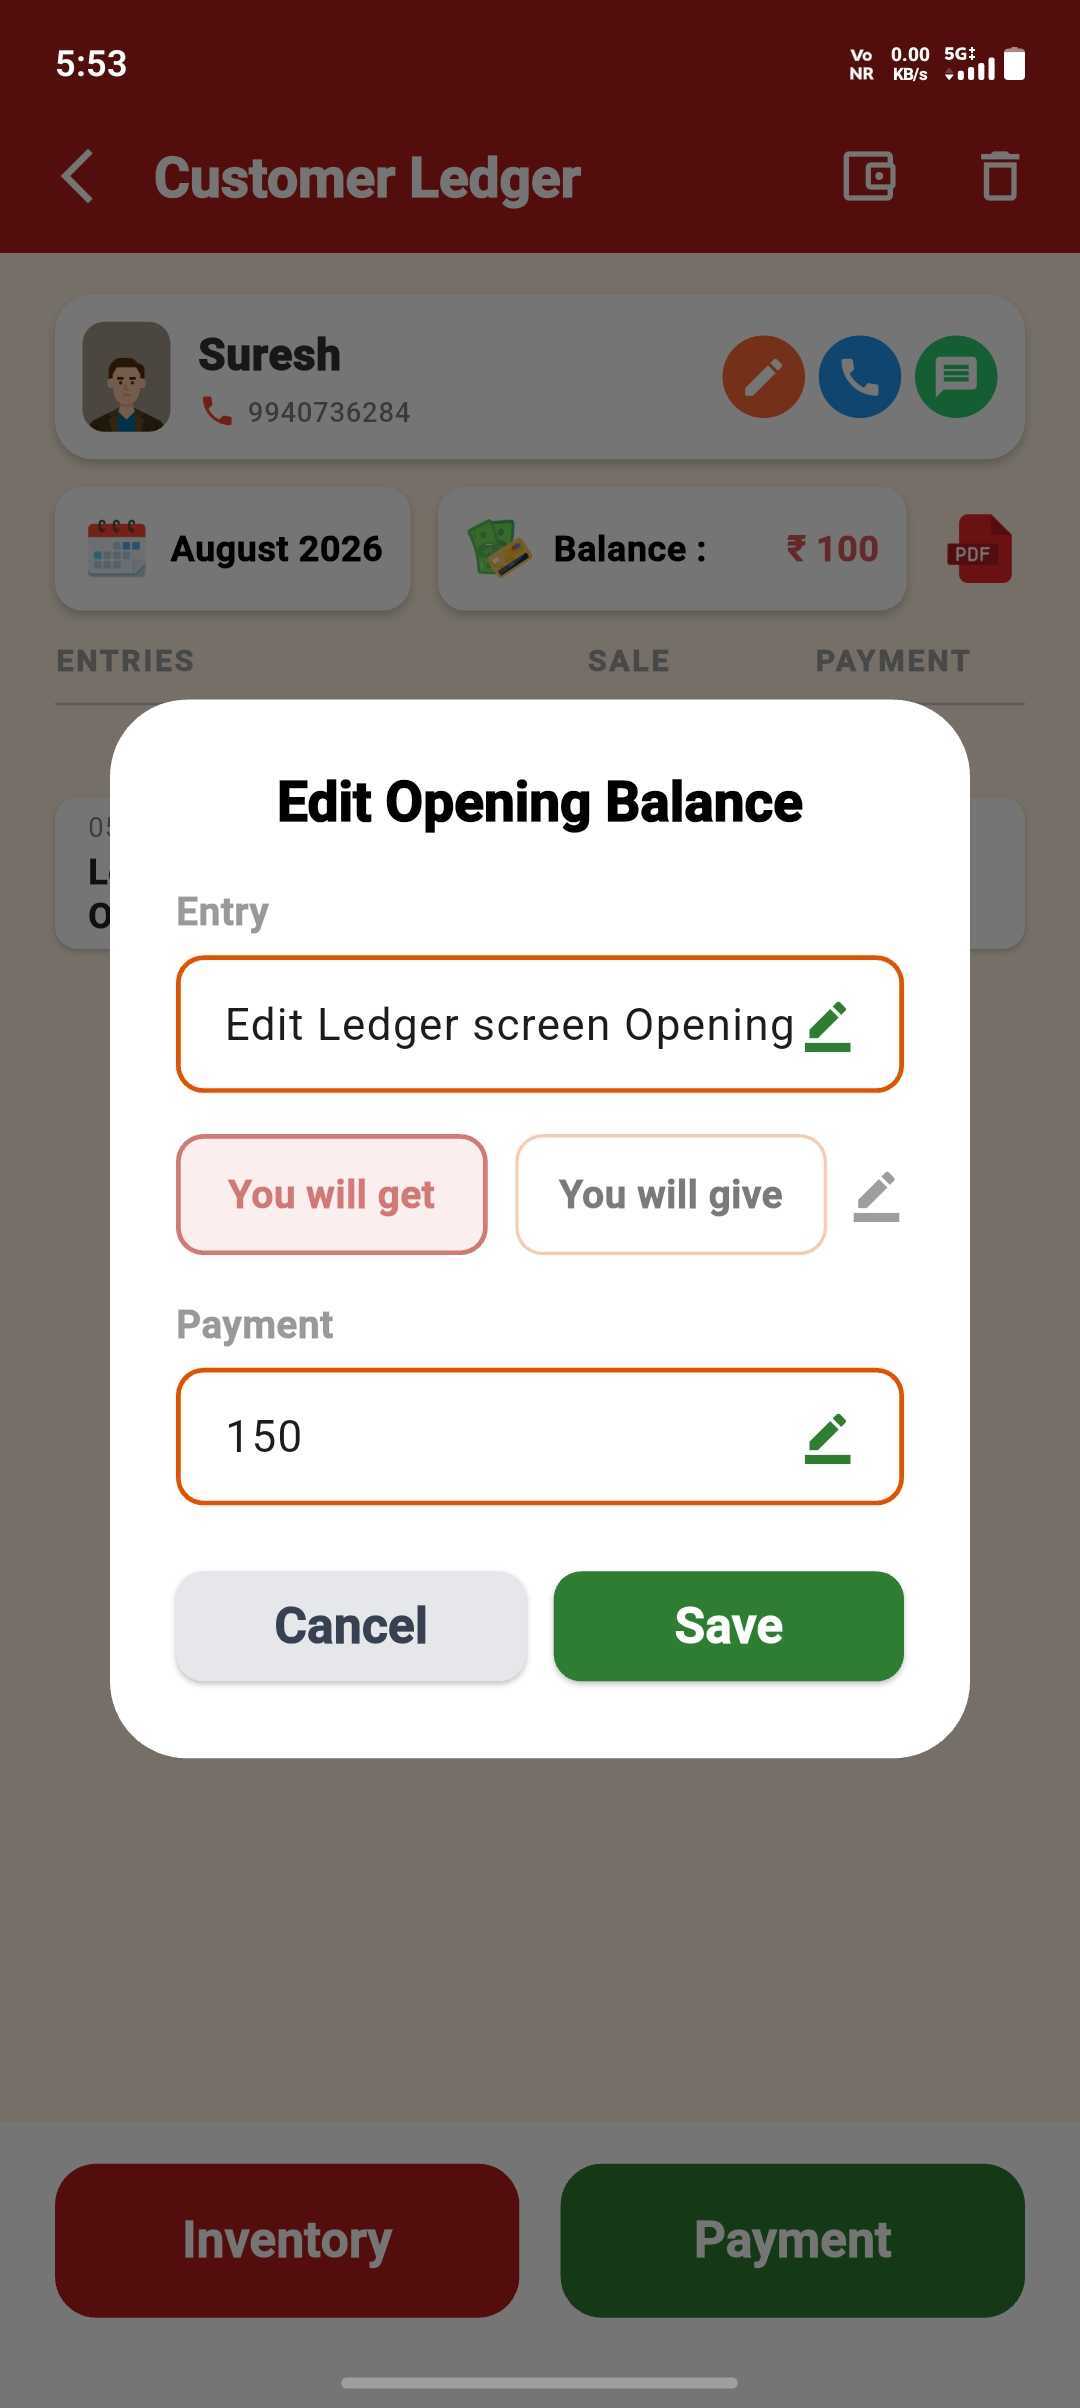
Ledger Stays Accurate
Your edit reflects immediately in the customer's ledger.
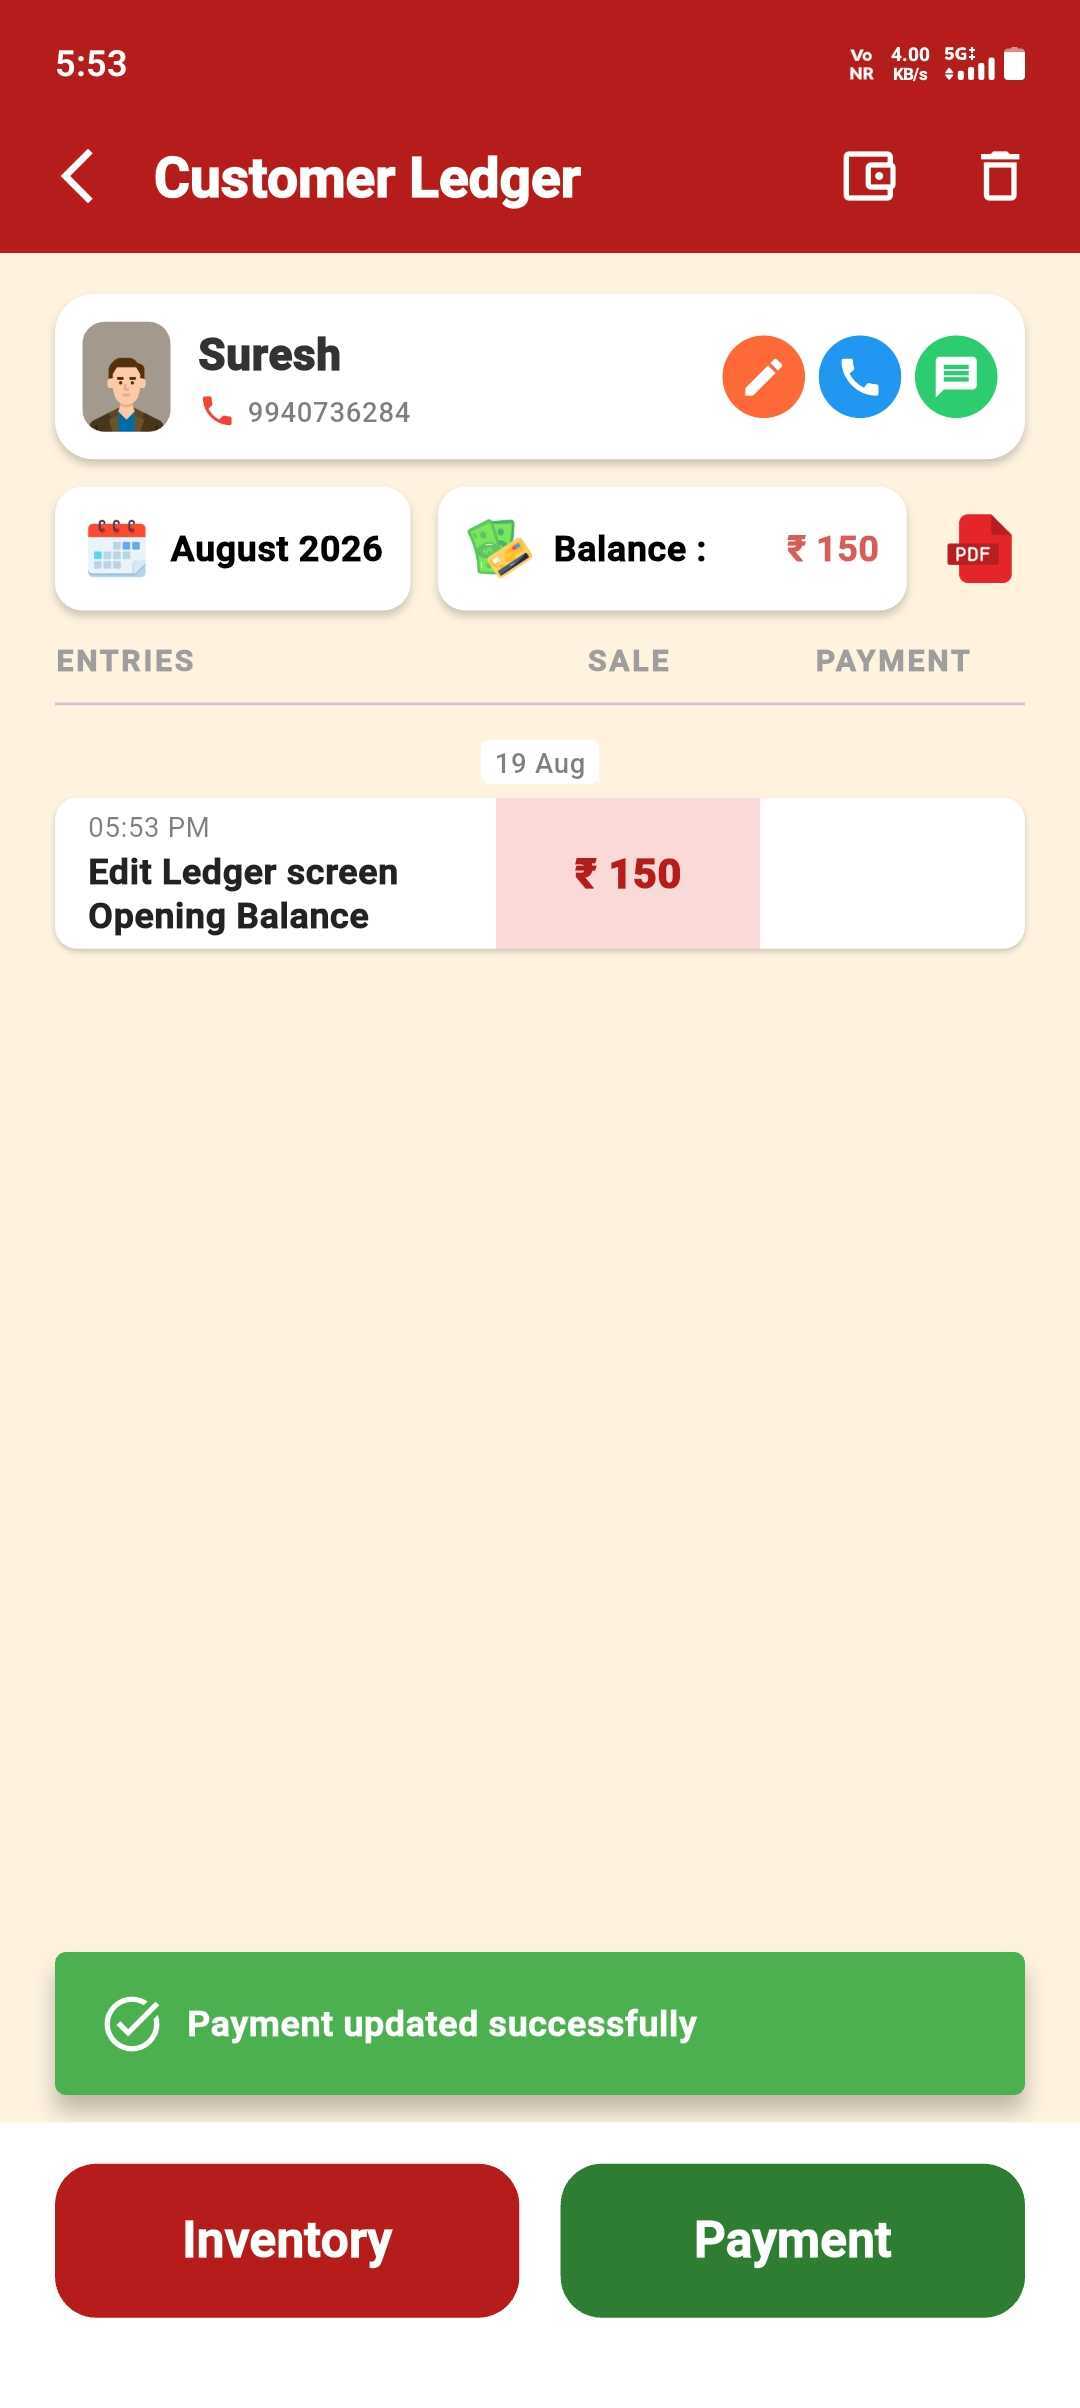
Supplier Opening Balance
Create a supplier opening balance from the add form or from the ledger wallet.
Use this when you are creating a new supplier and already know the starting due.
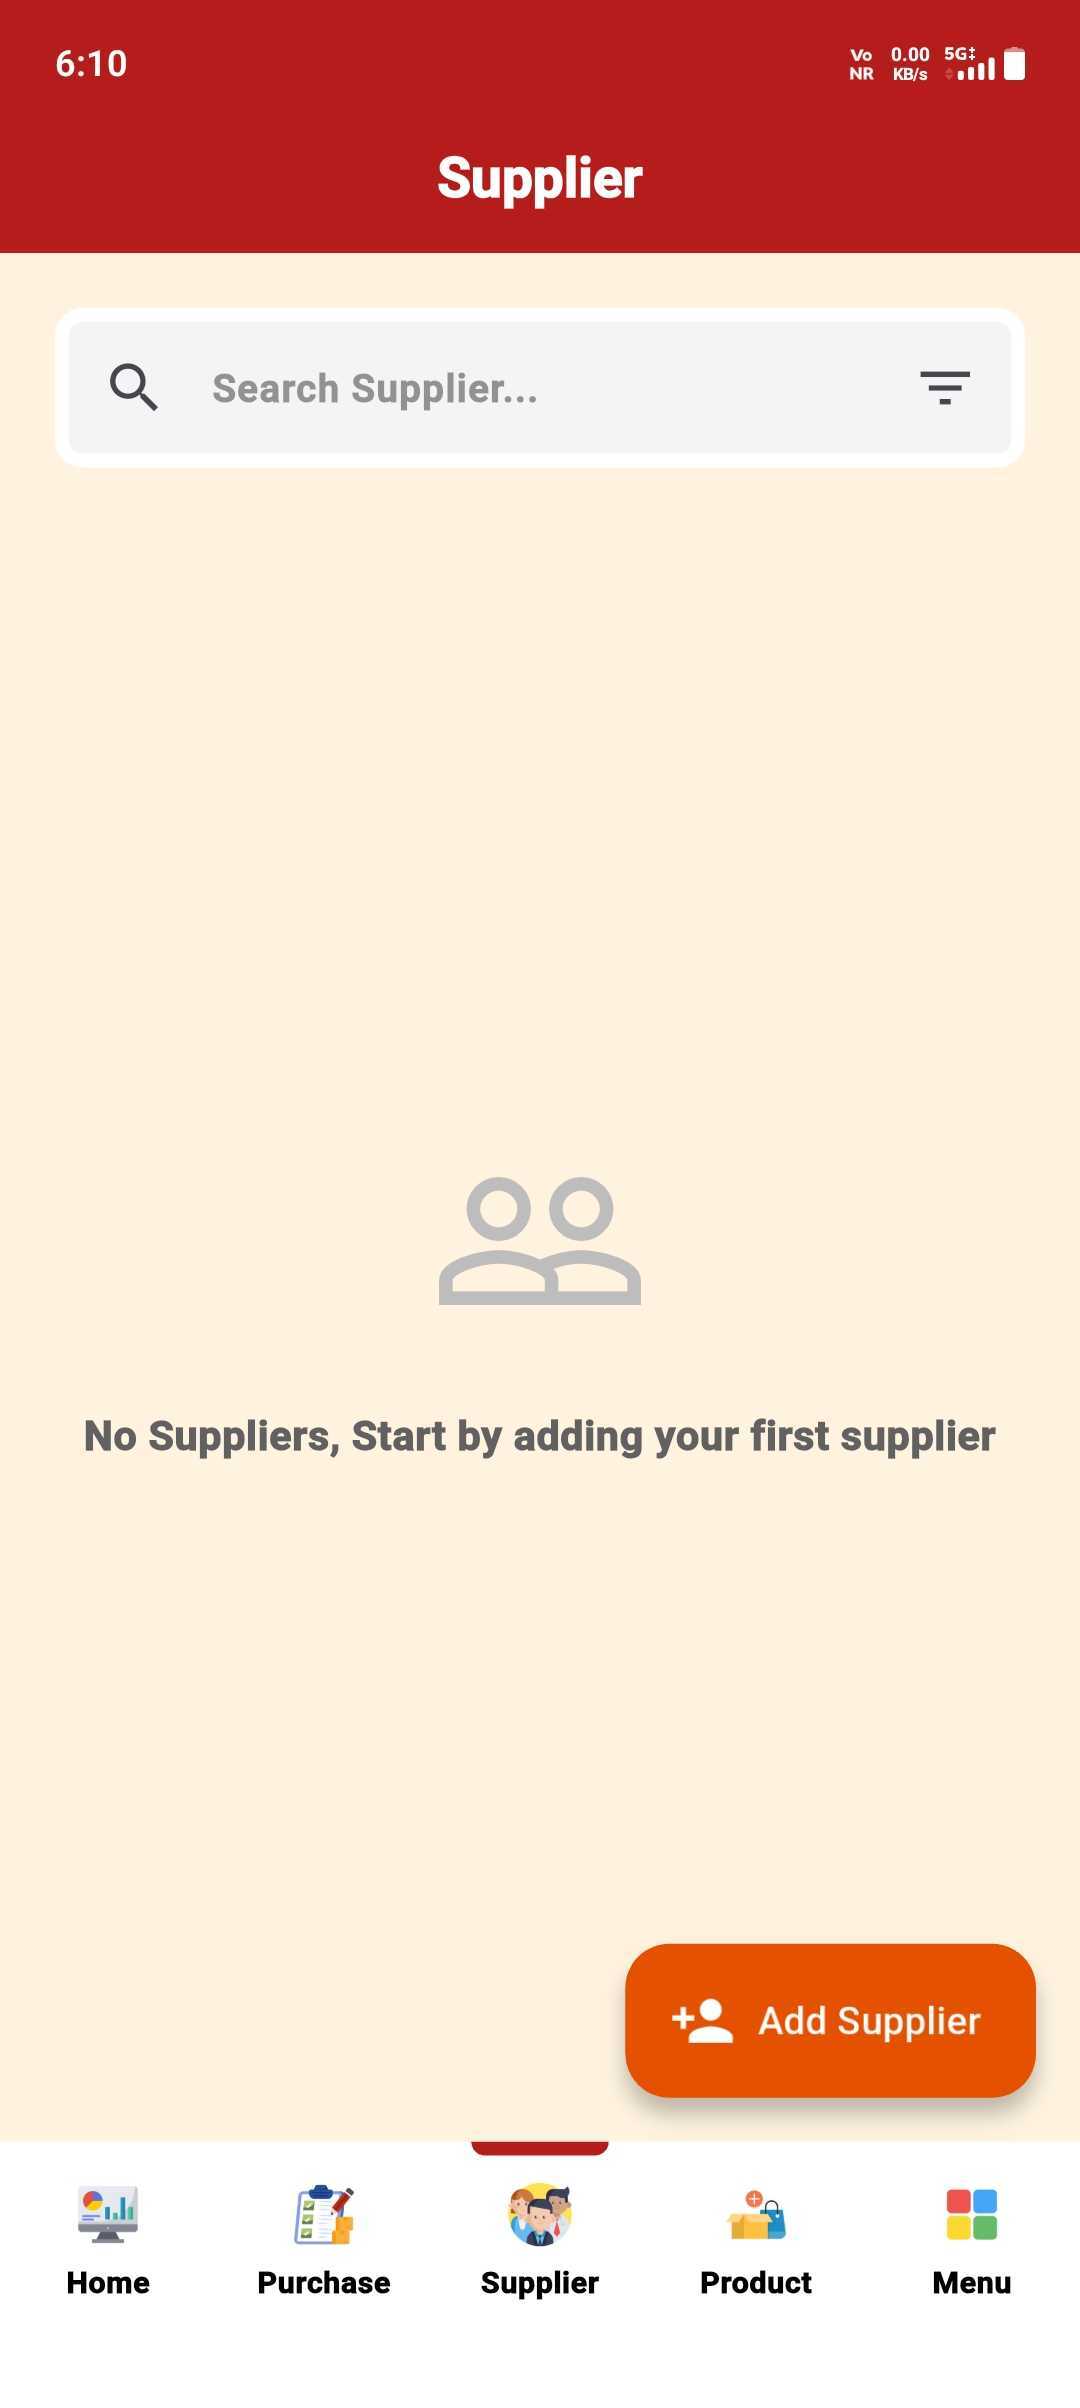
Open the Supplier Tab
On the Home dashboard, select Supplier.
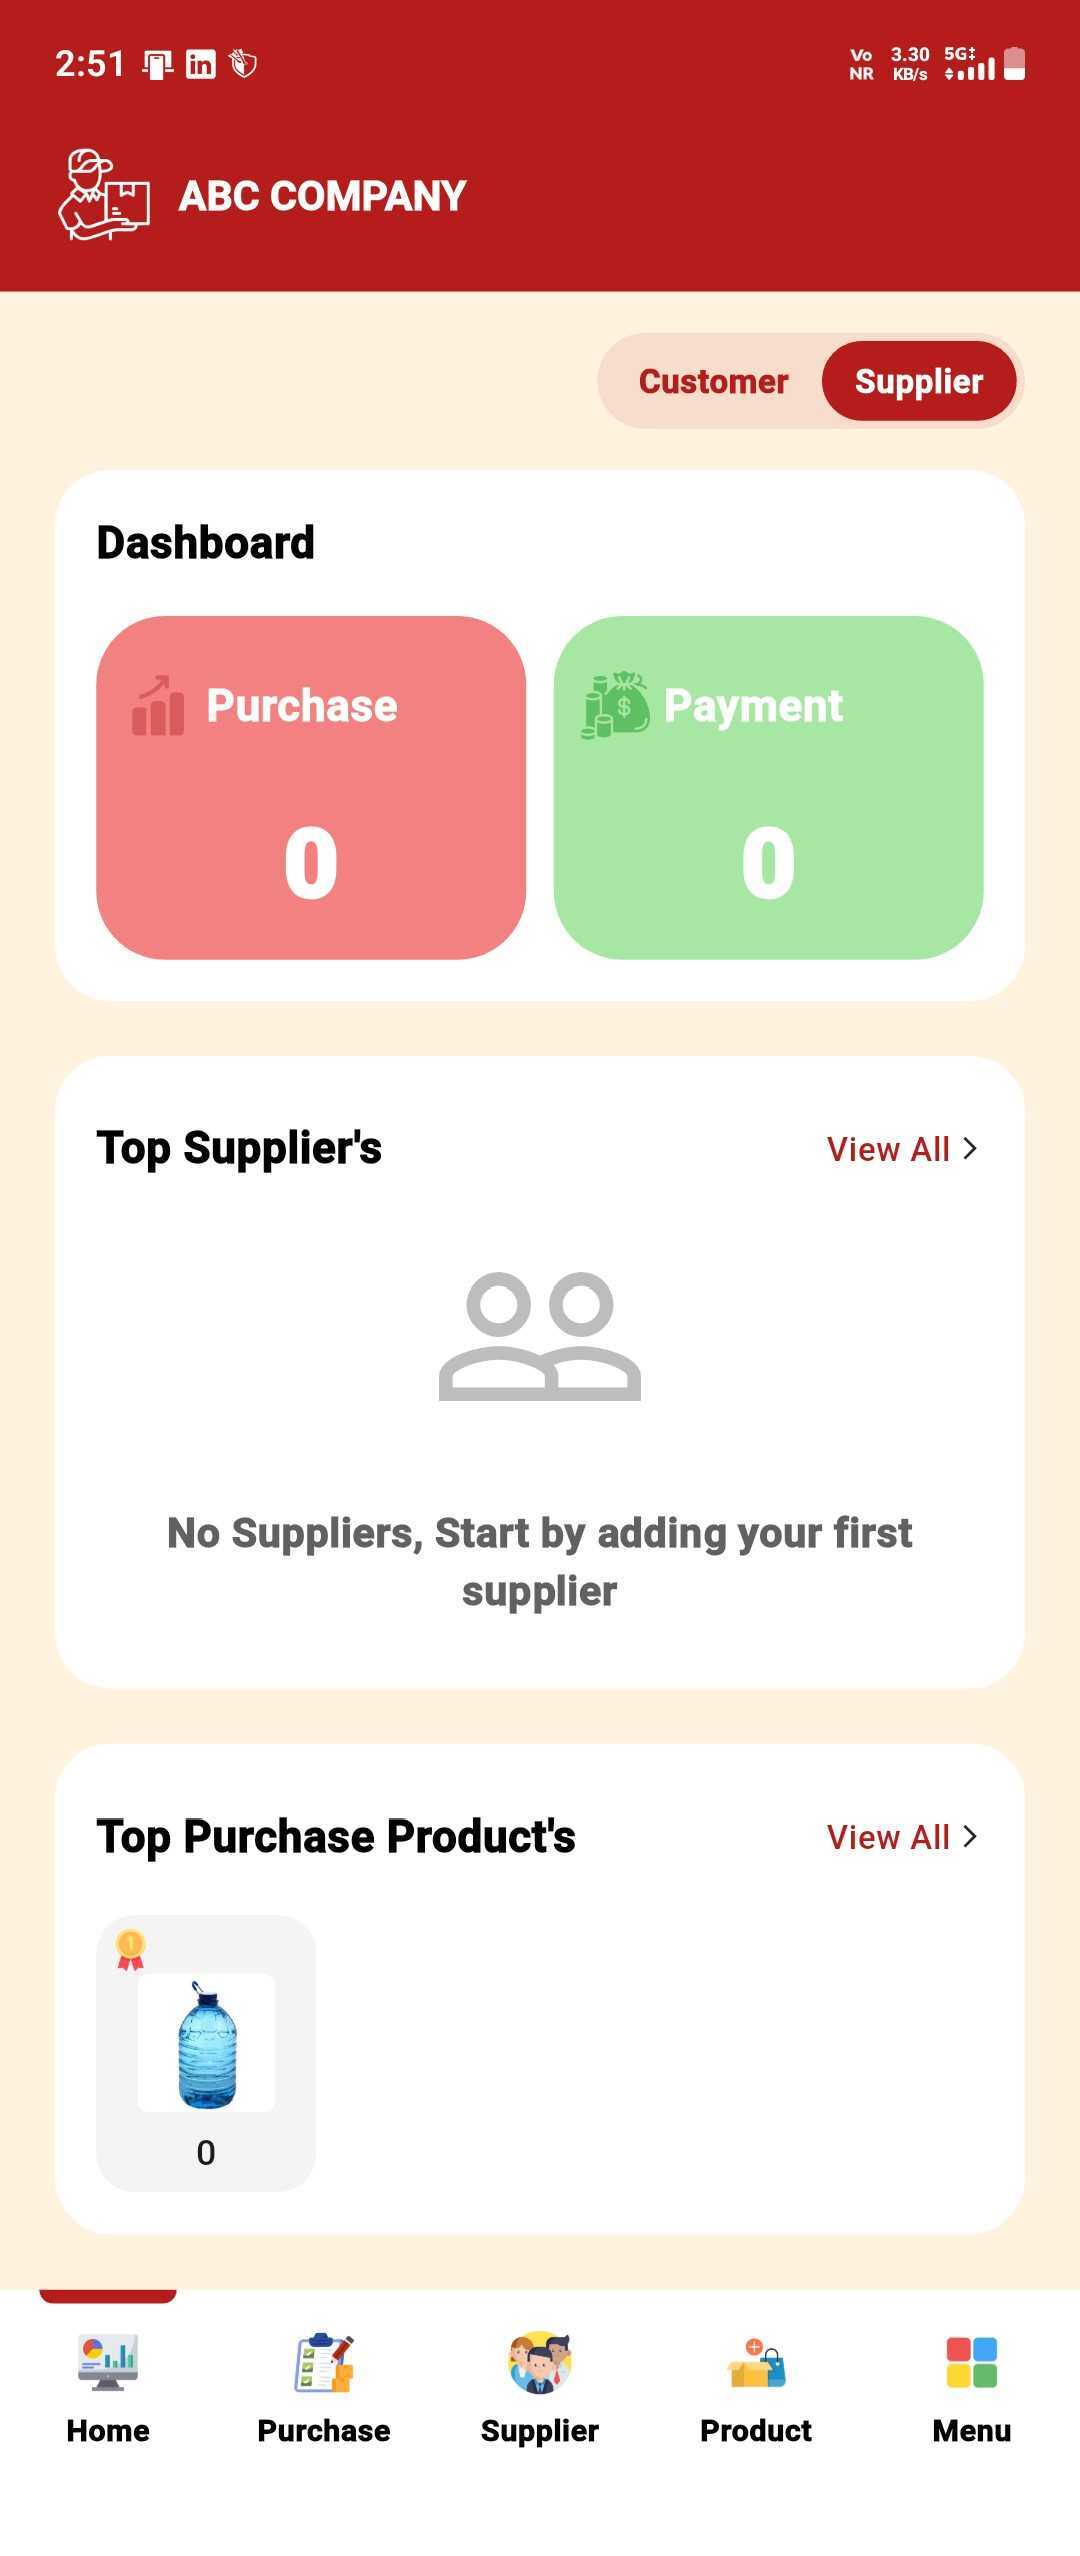
Tap Add Supplier
Open the supplier add form.
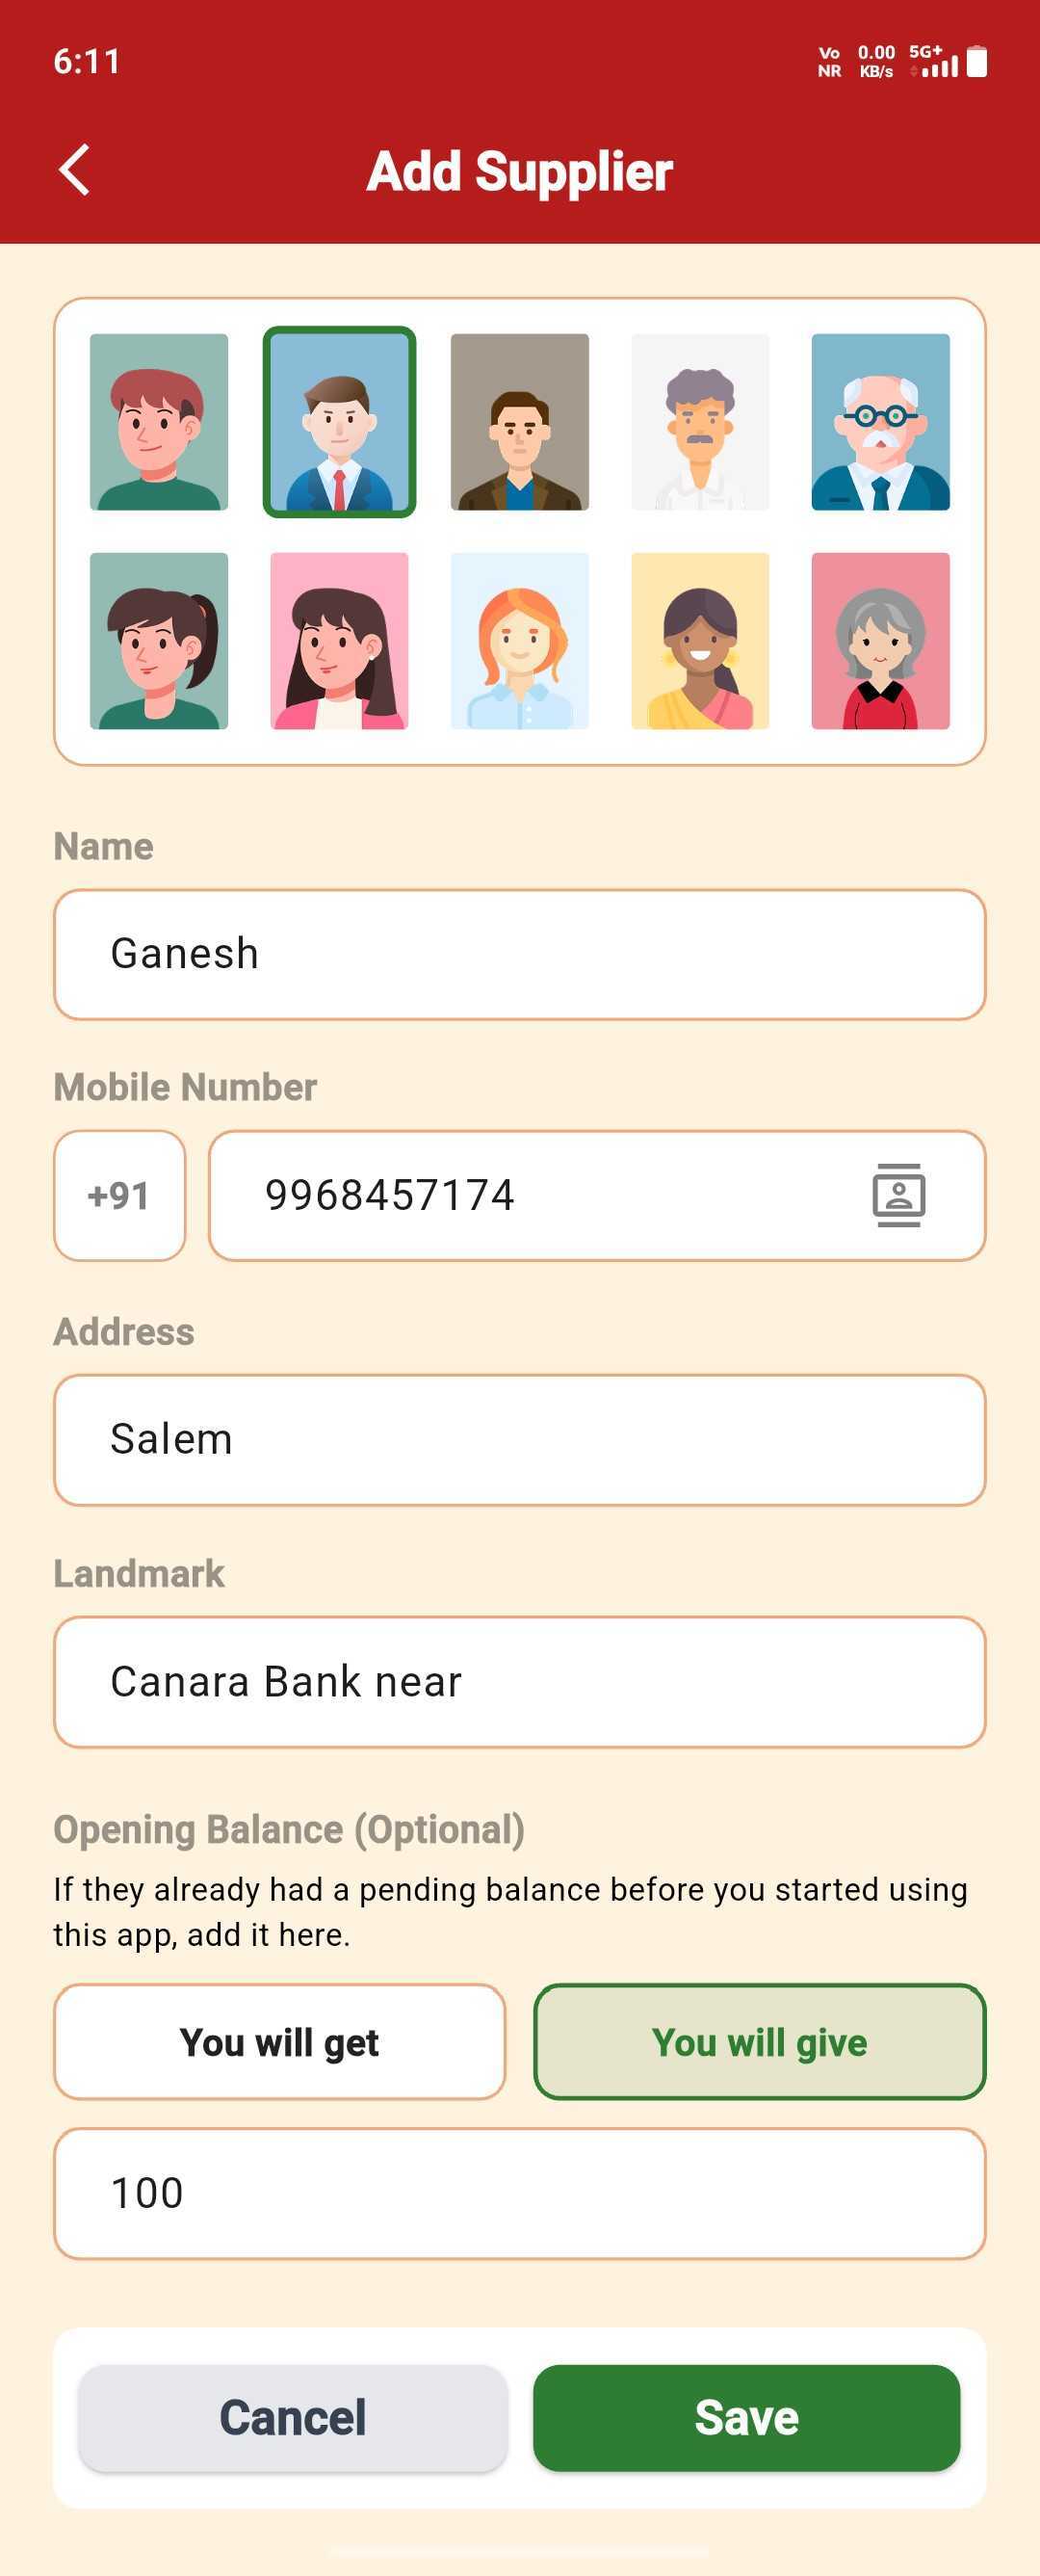
Enter Opening Balance
Add the supplier details and enter the opening balance in the same form, then Save.
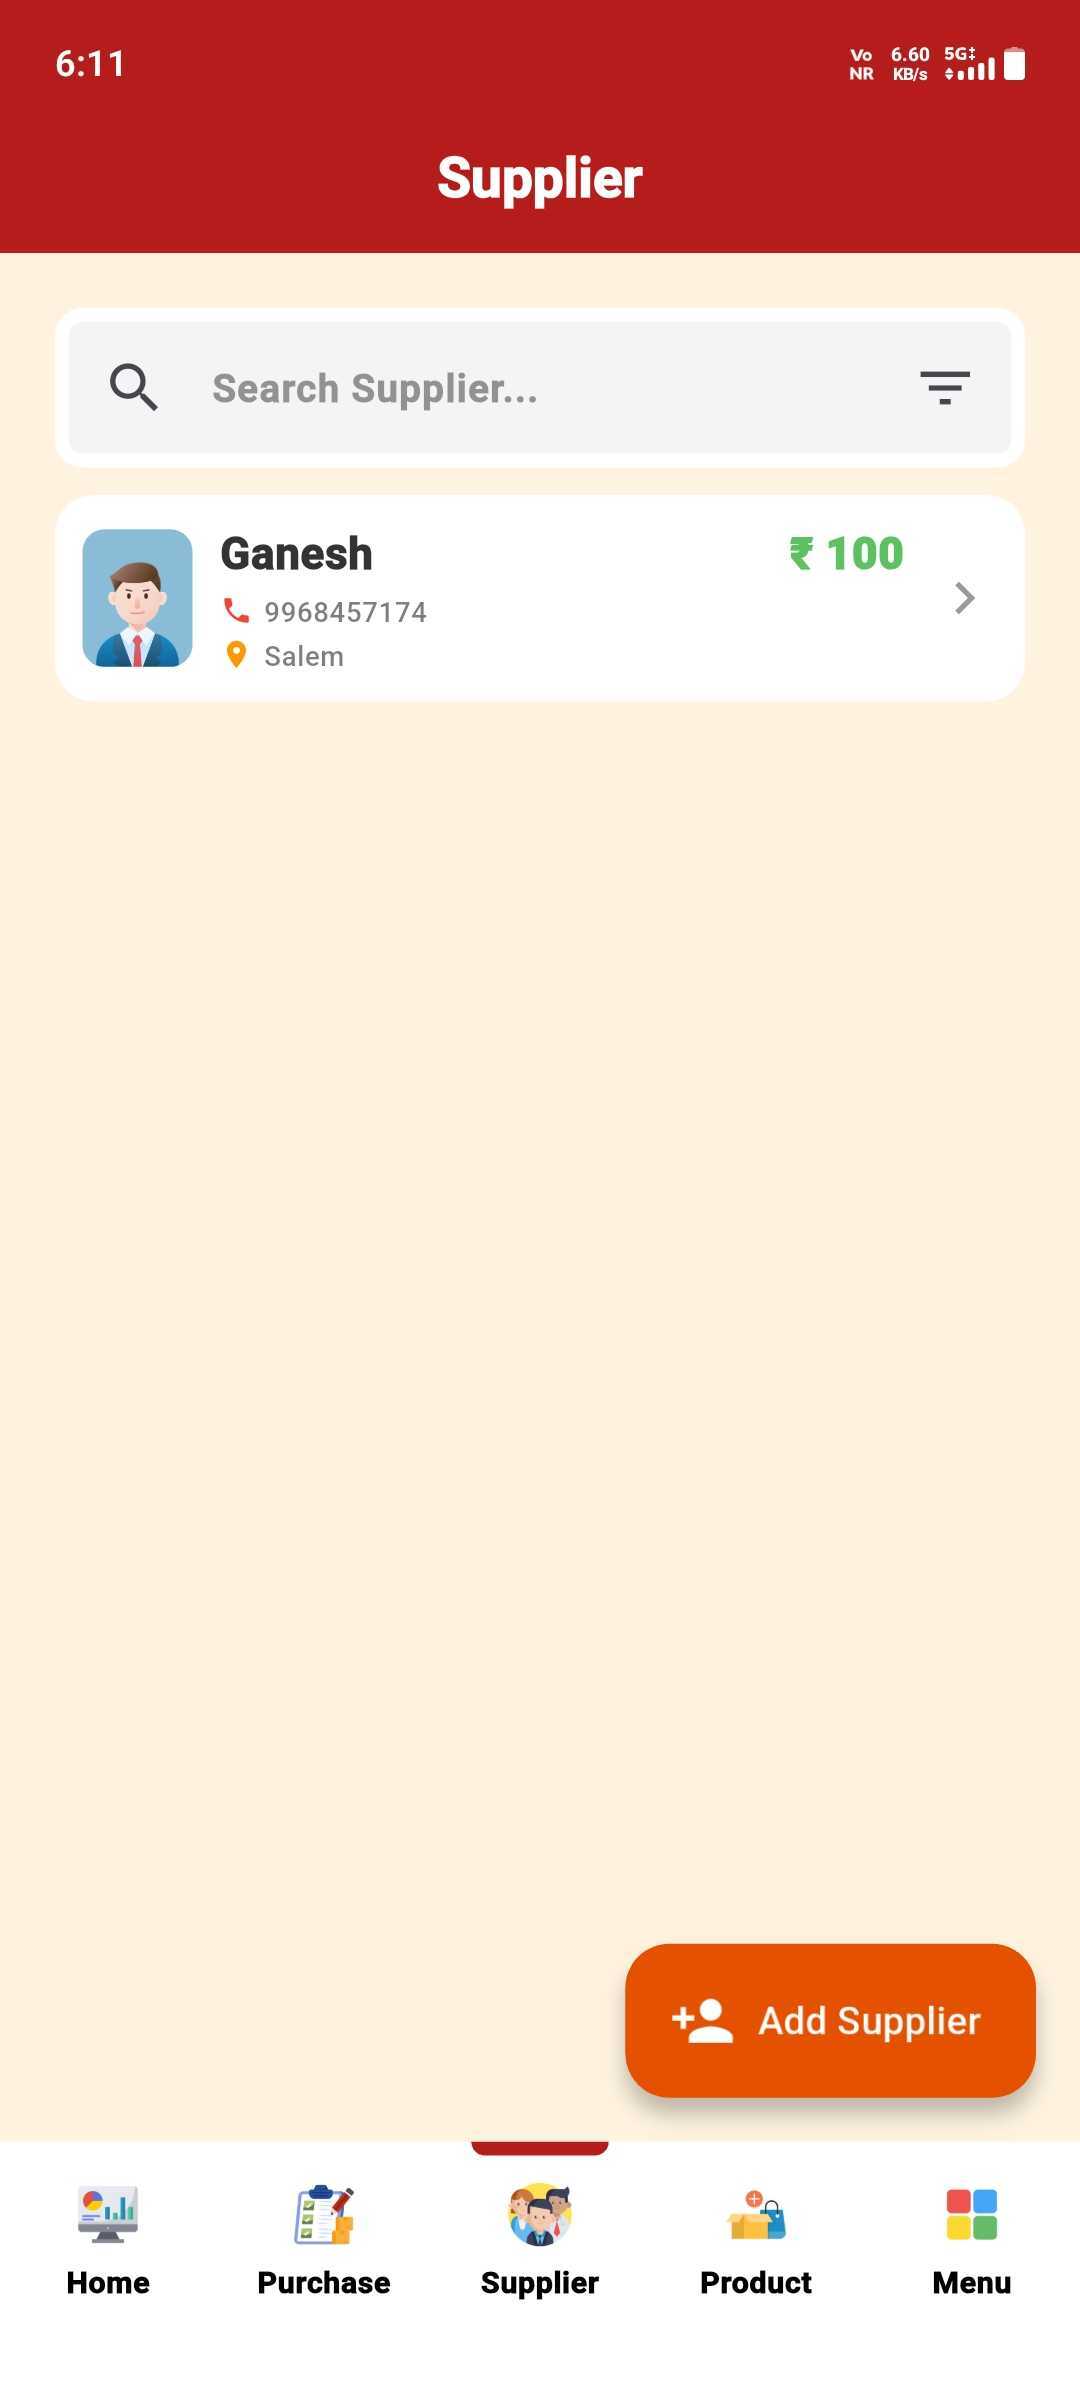
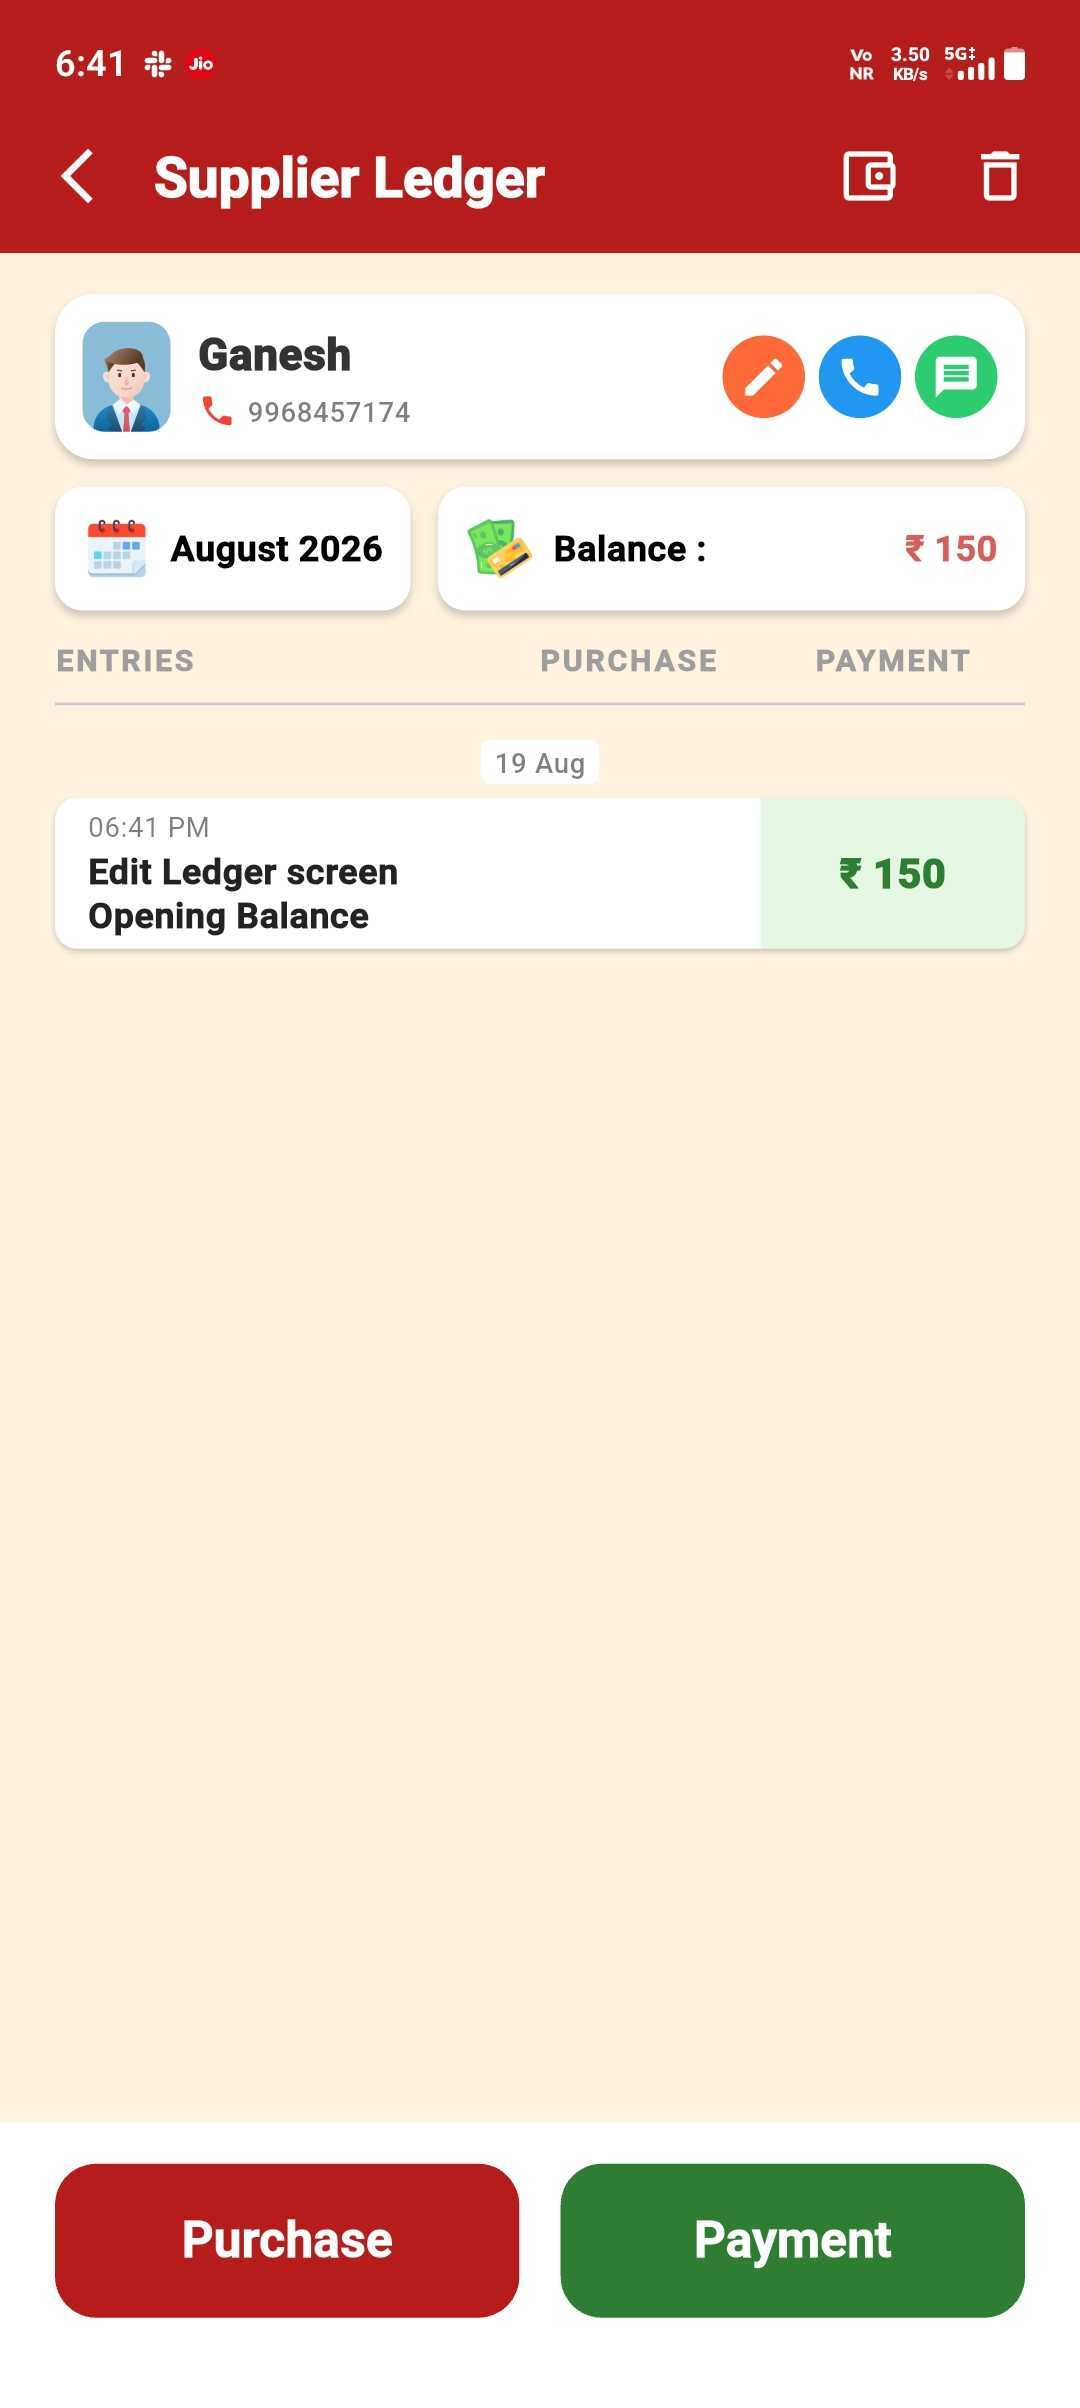
Open the Supplier Ledger
Select the supplier to confirm the ledger details.
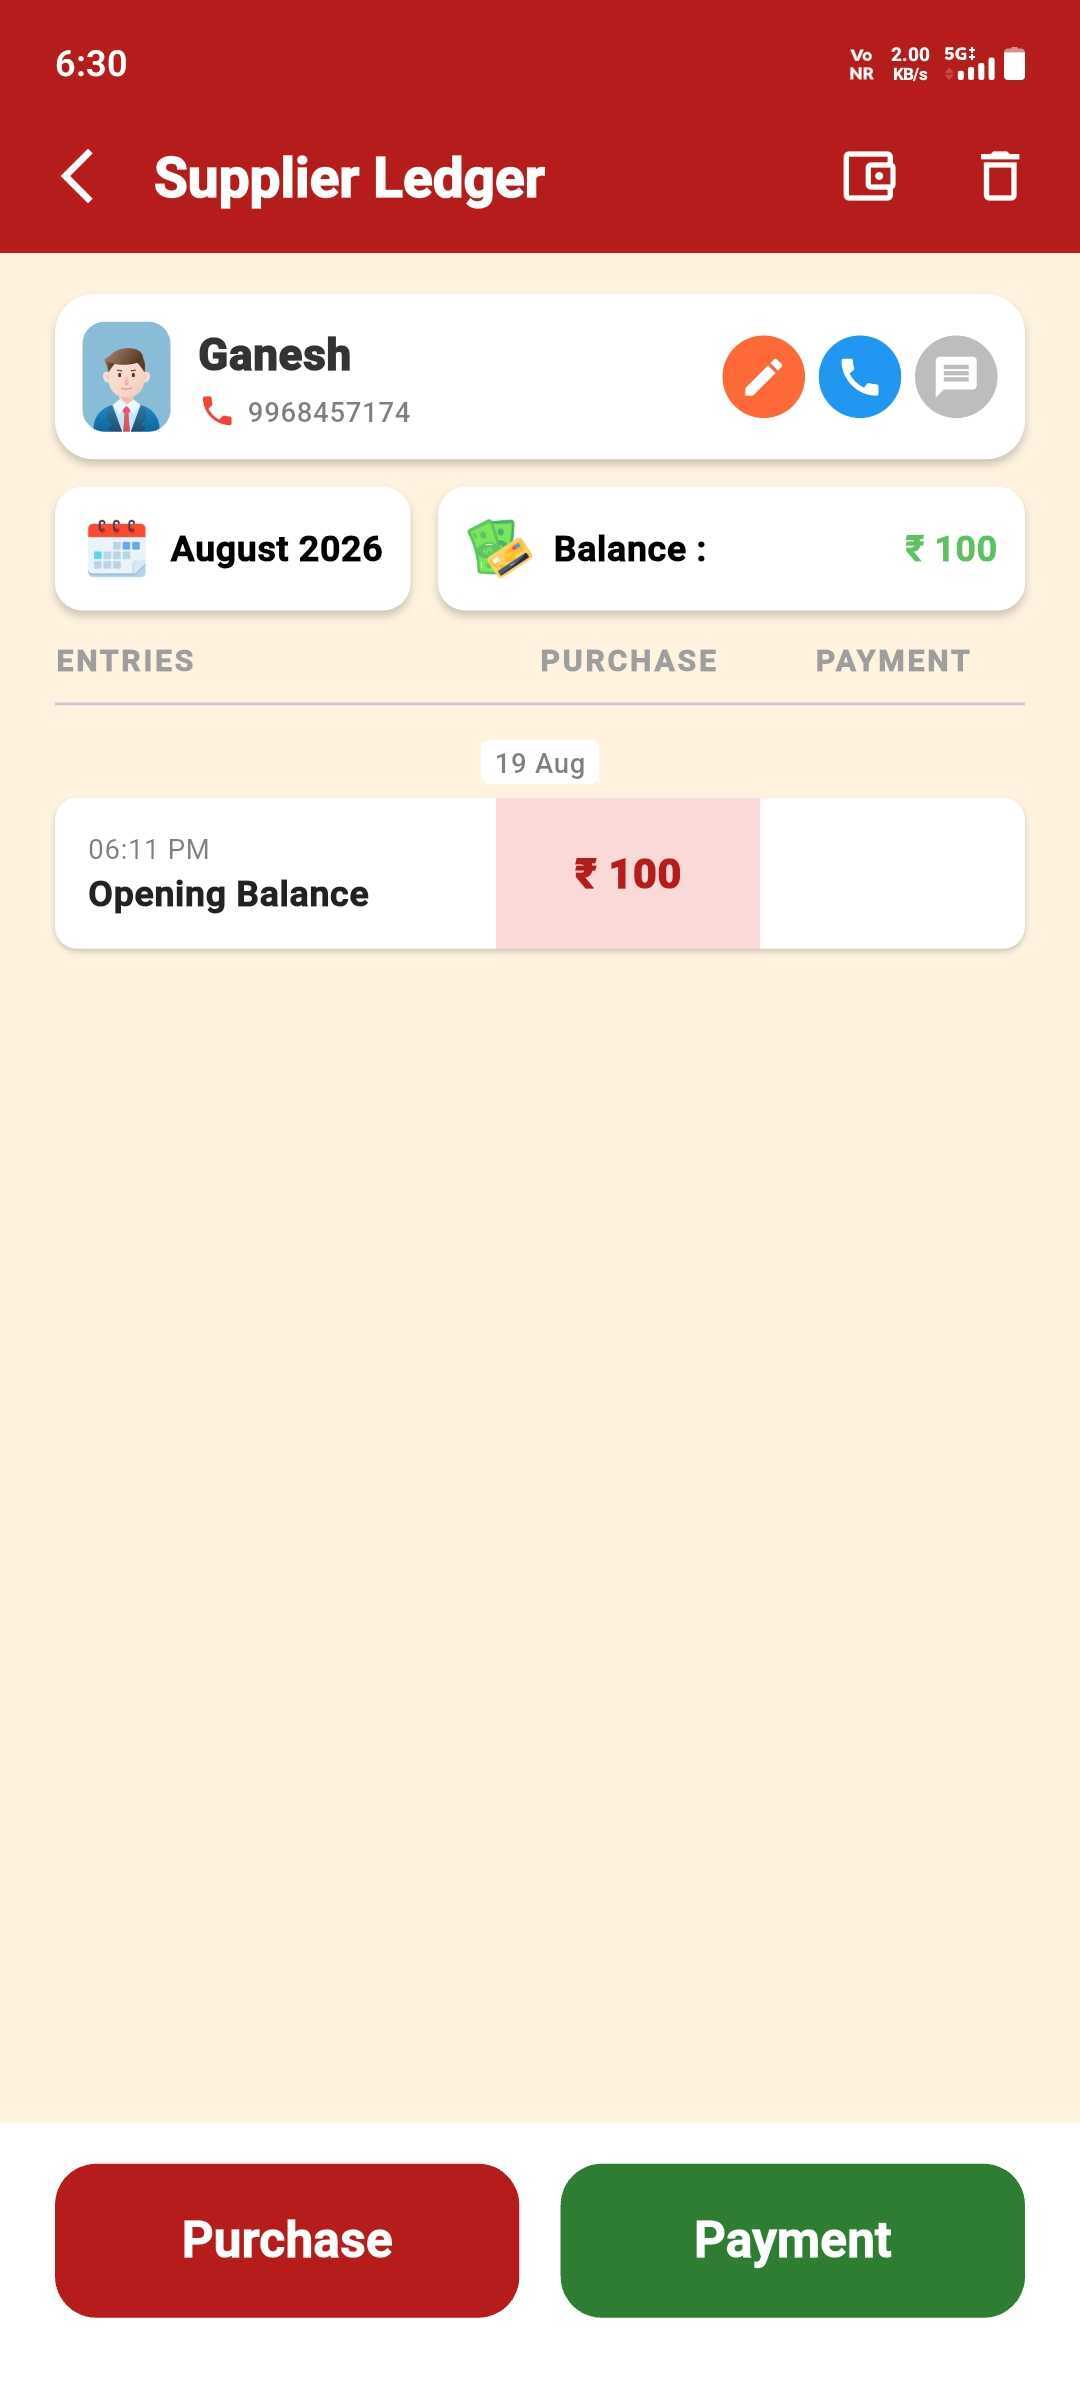
Balance Already Applied
The ledger opens showing the opening balance you just added.
Edit Anytime
Tap the entry to change the amount, then save.
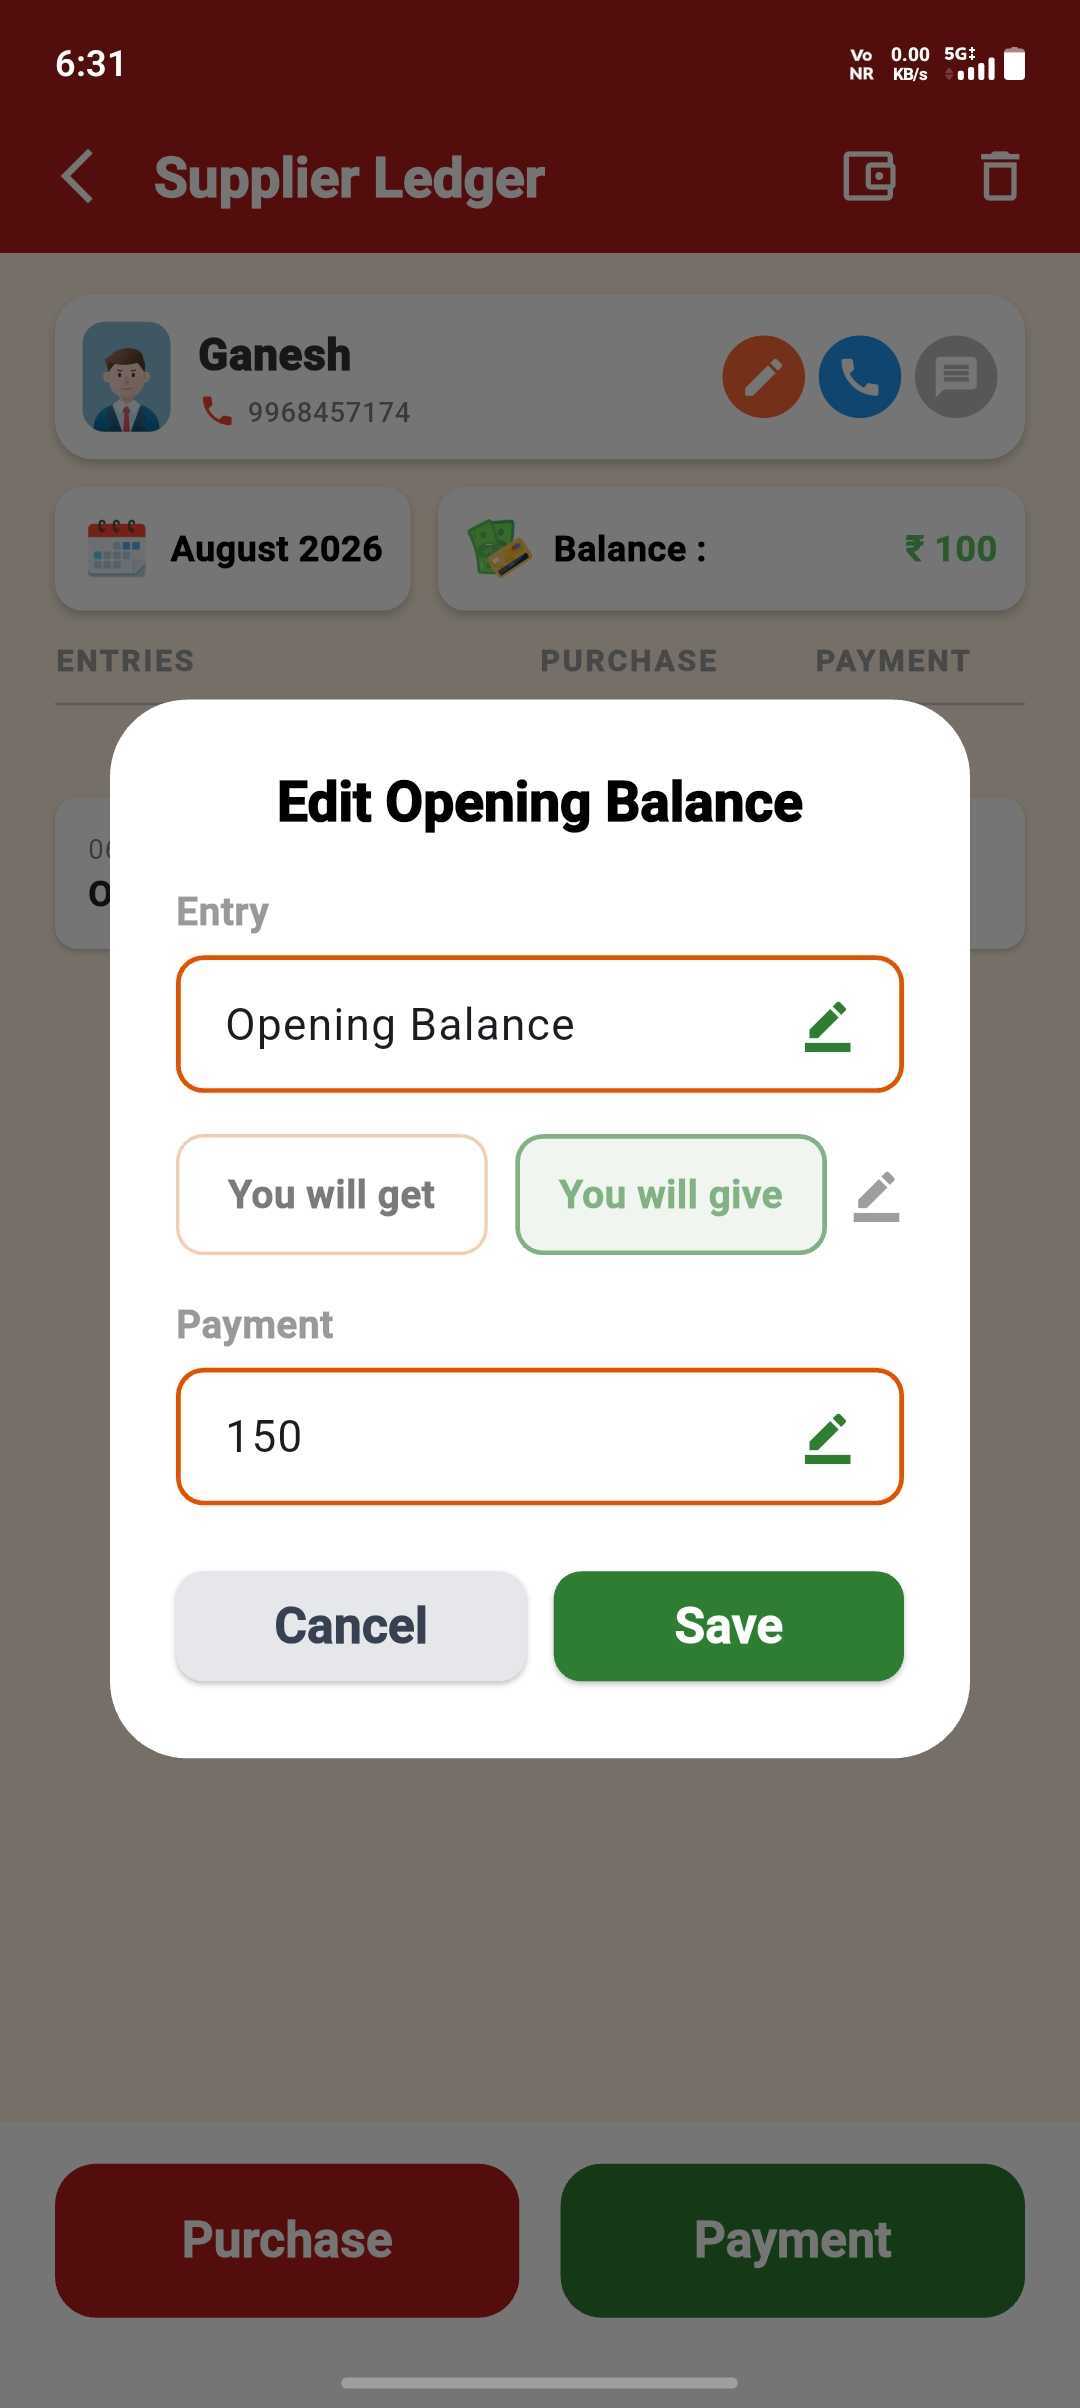
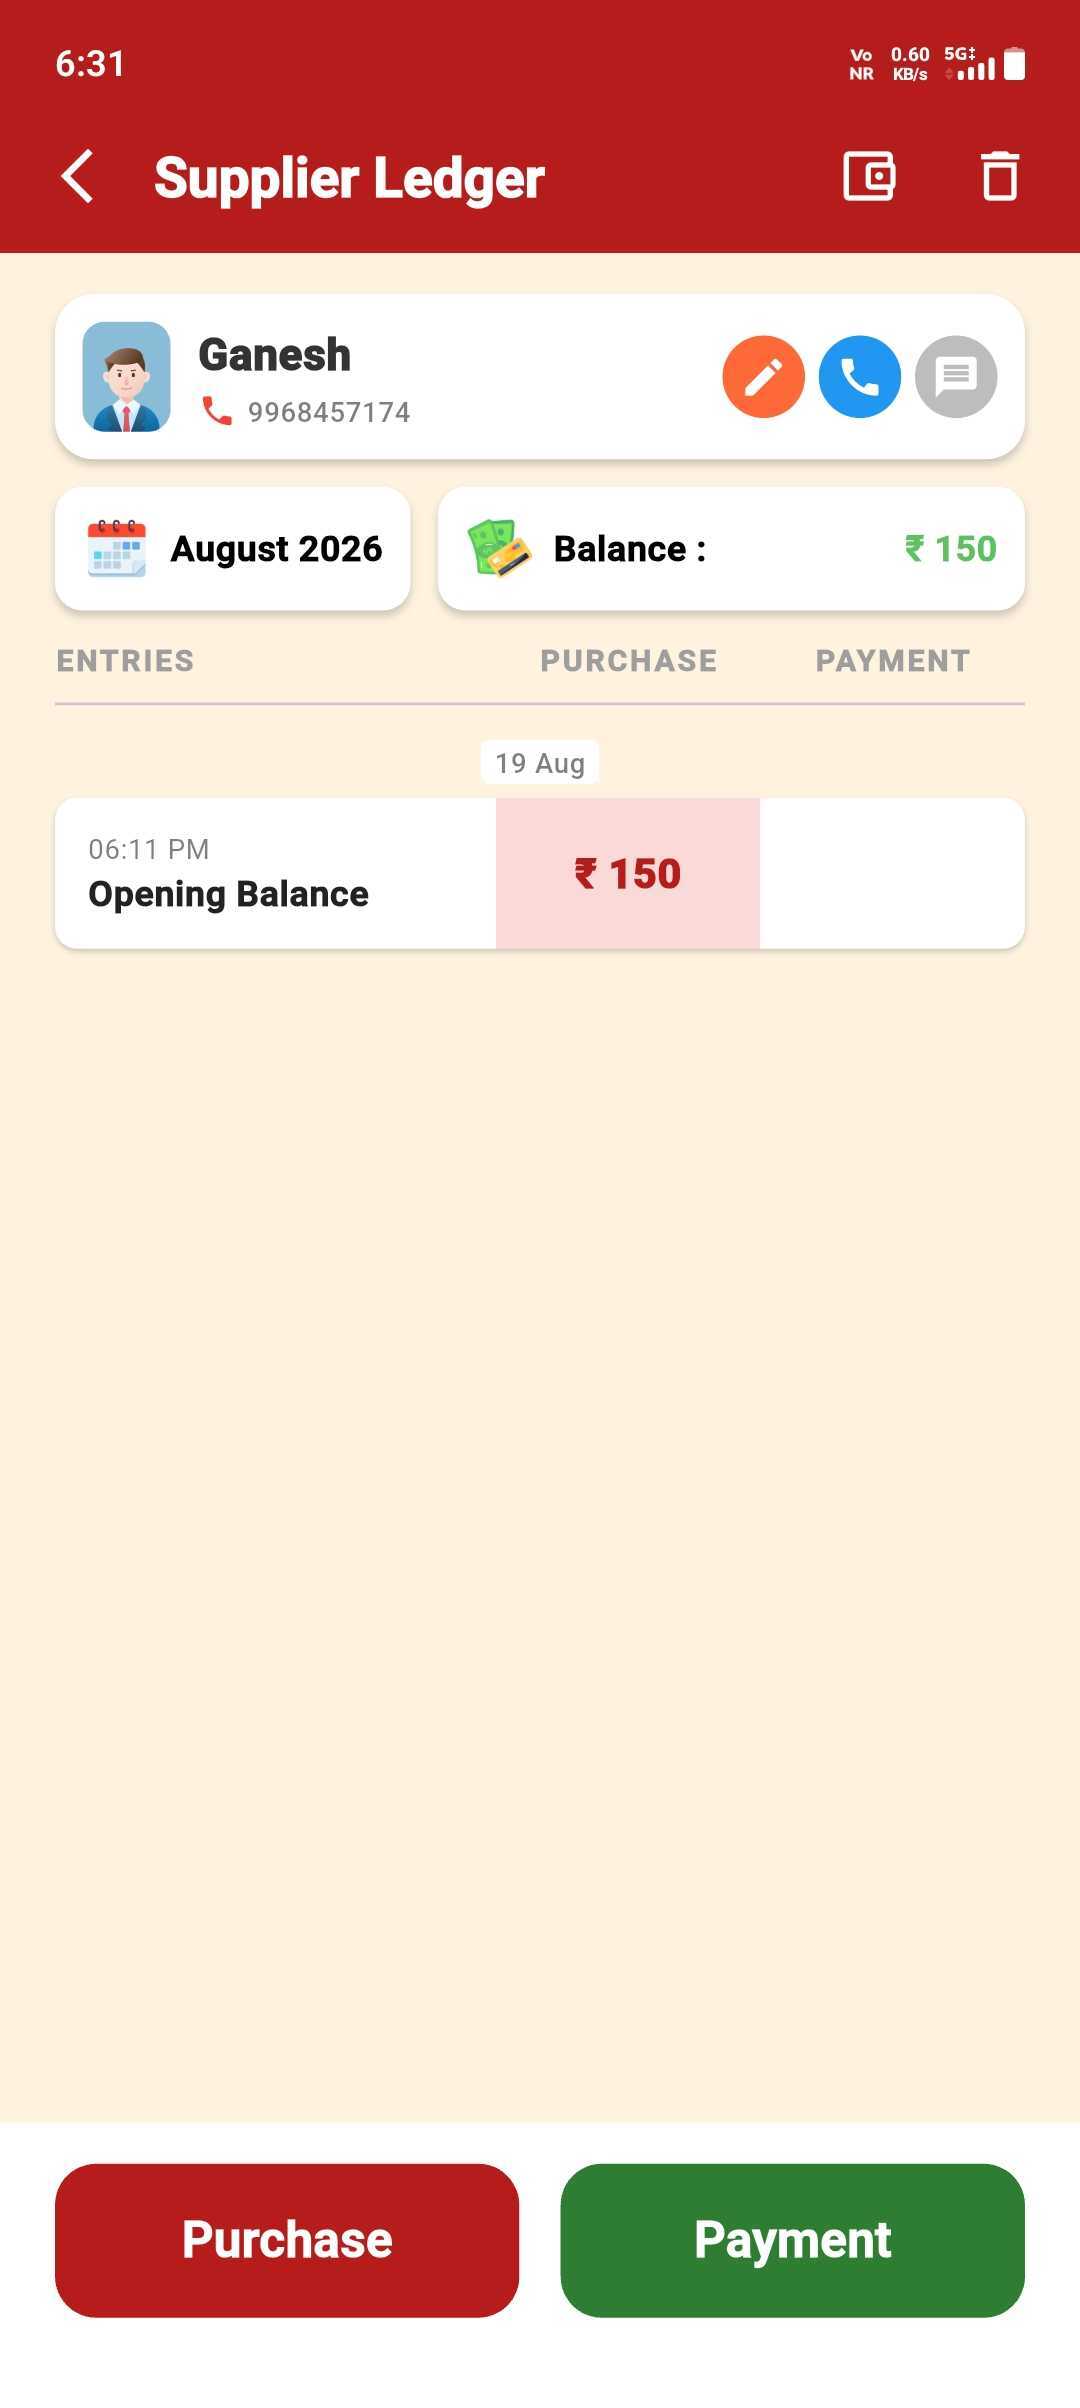
Ledger Stays Accurate
Your edit reflects immediately in the supplier's ledger.
Use this when the supplier is already created and you want to add the starting balance later.
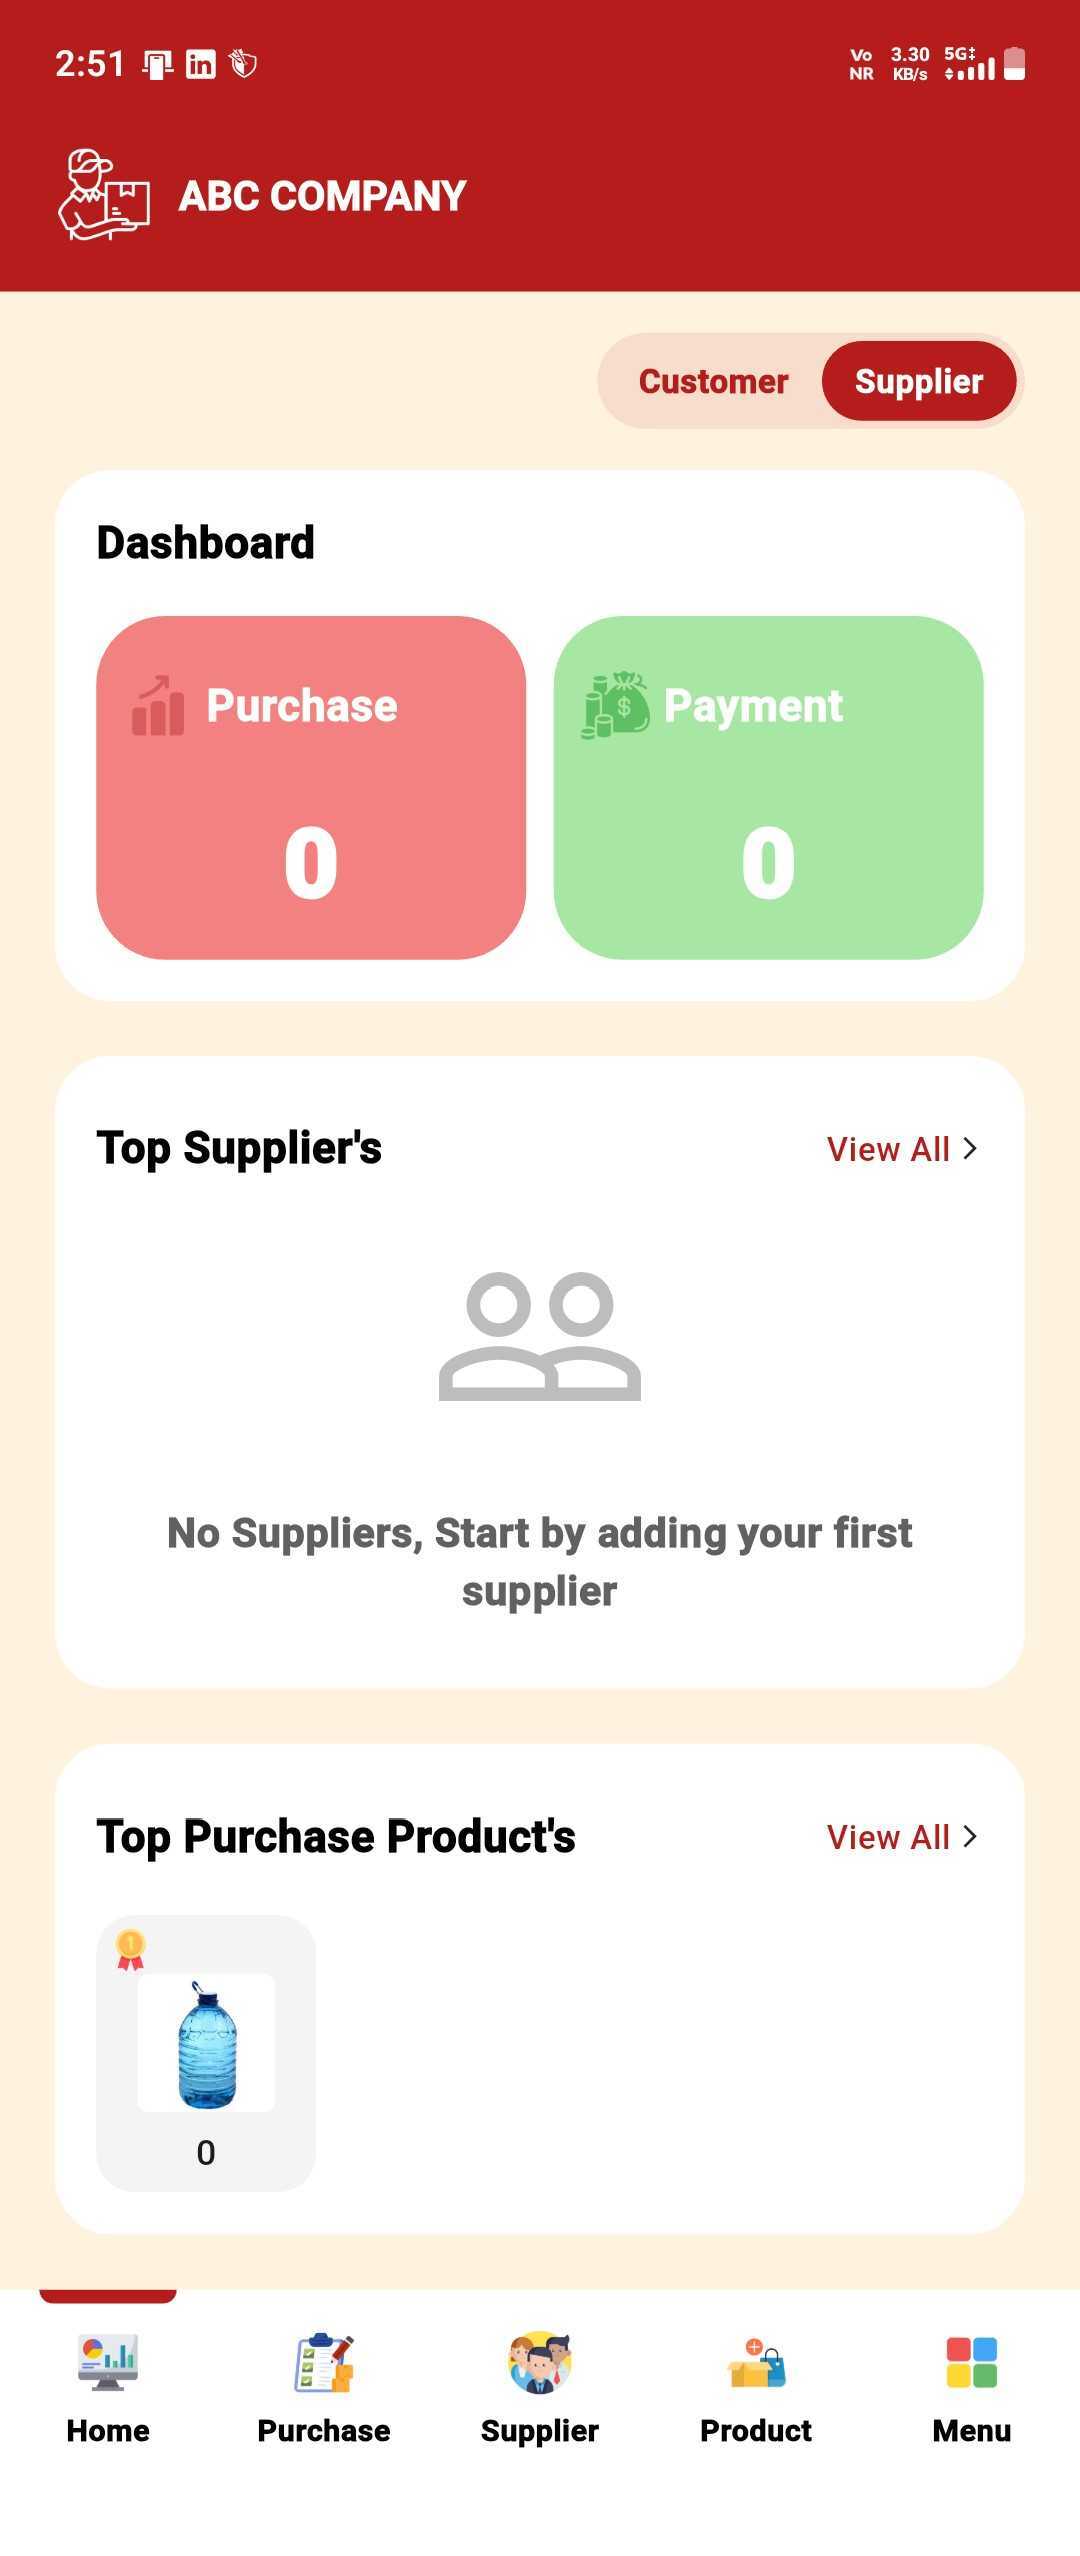
Open the Supplier Screen
Open the Supplier screen and choose the supplier.
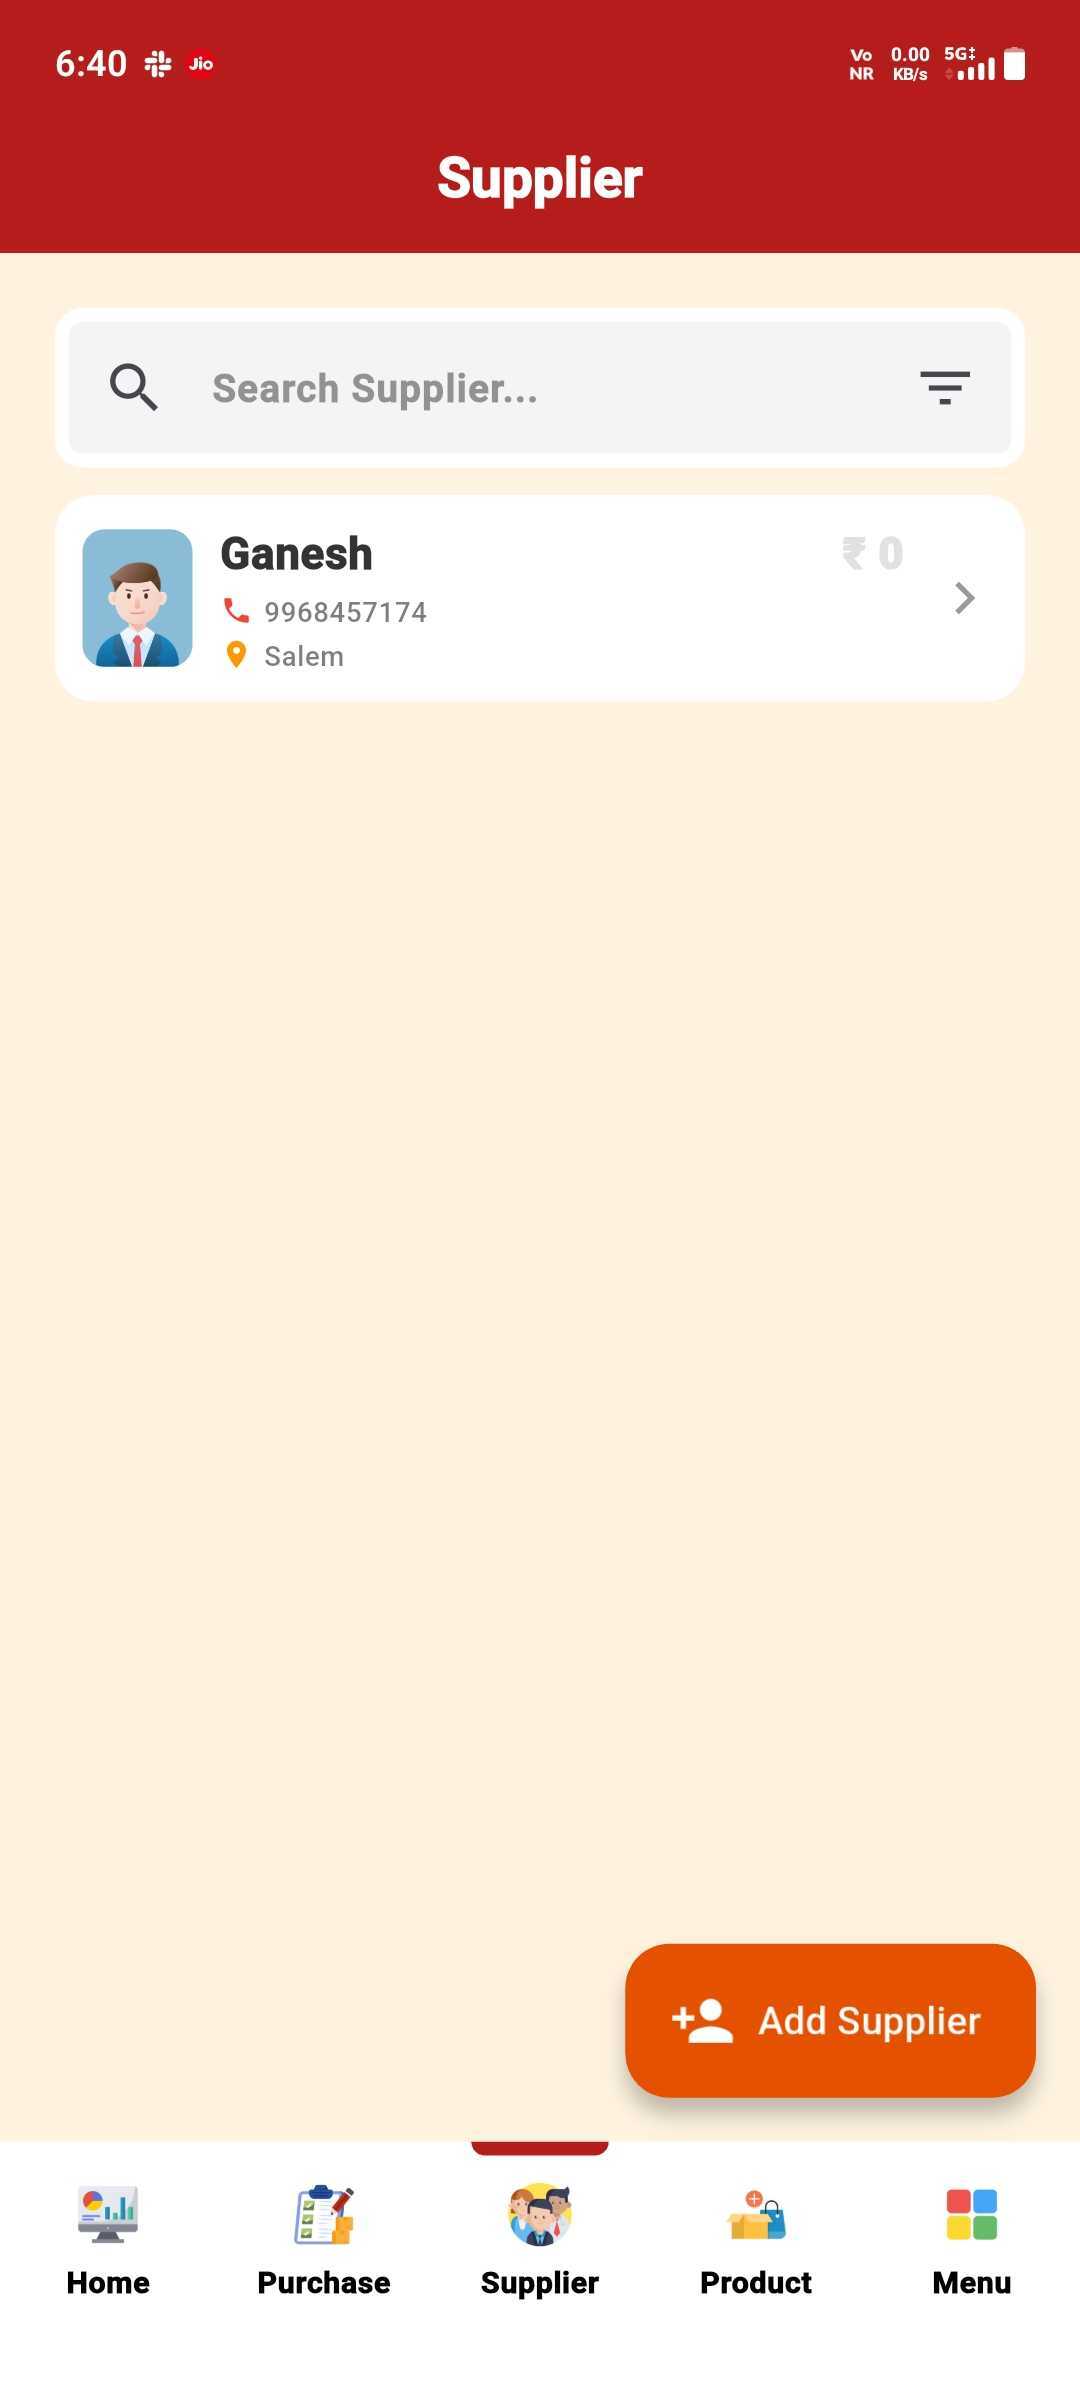
Open the Supplier Ledger
Tap the supplier to open their ledger screen.
Tap Wallet
Tap the wallet/payment action on the ledger screen.
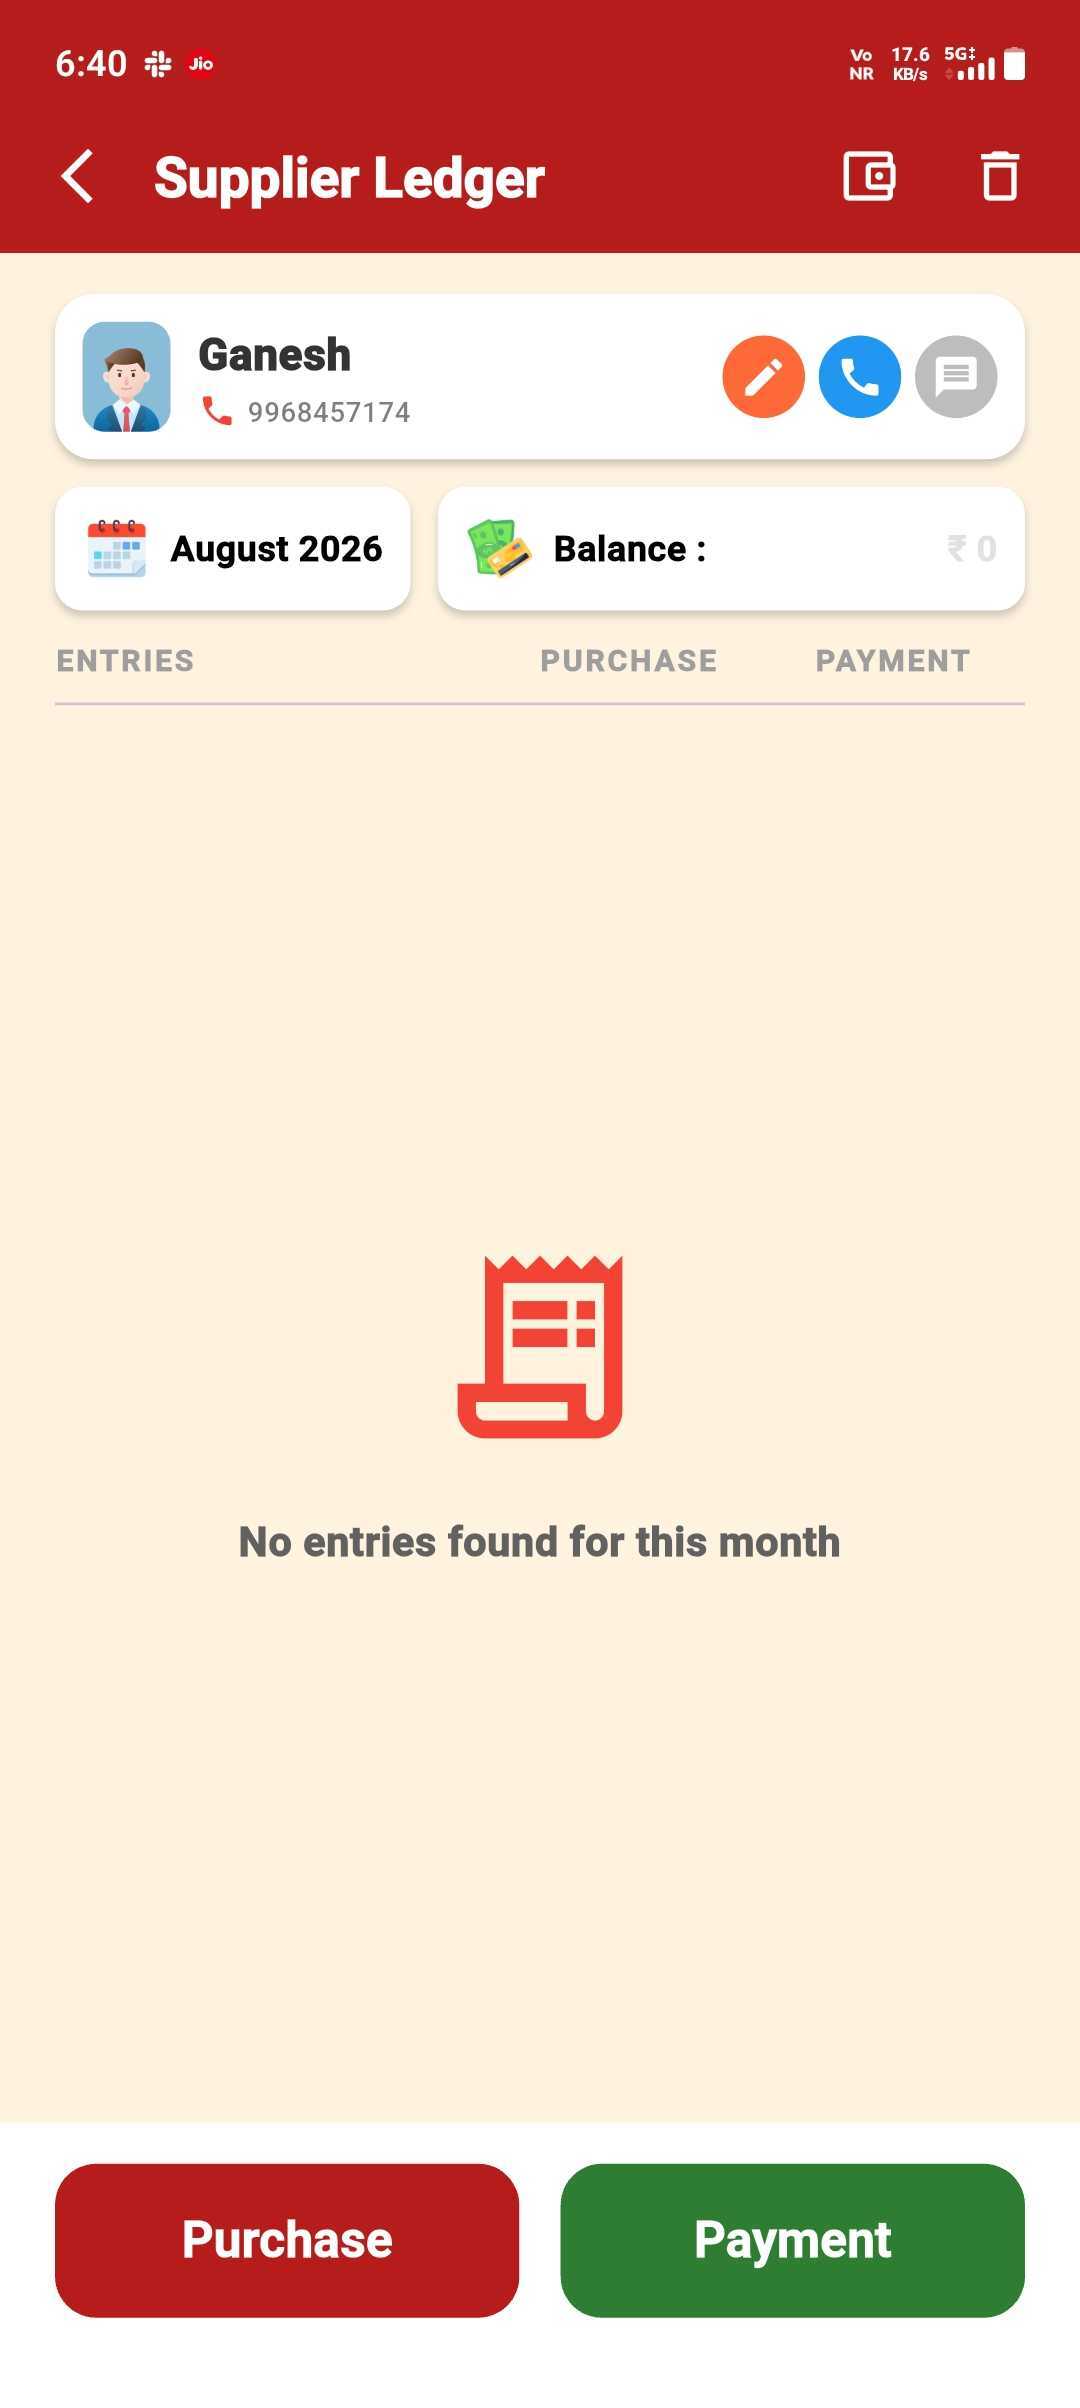
Save Opening Balance
Enter the opening balance amount and save it.
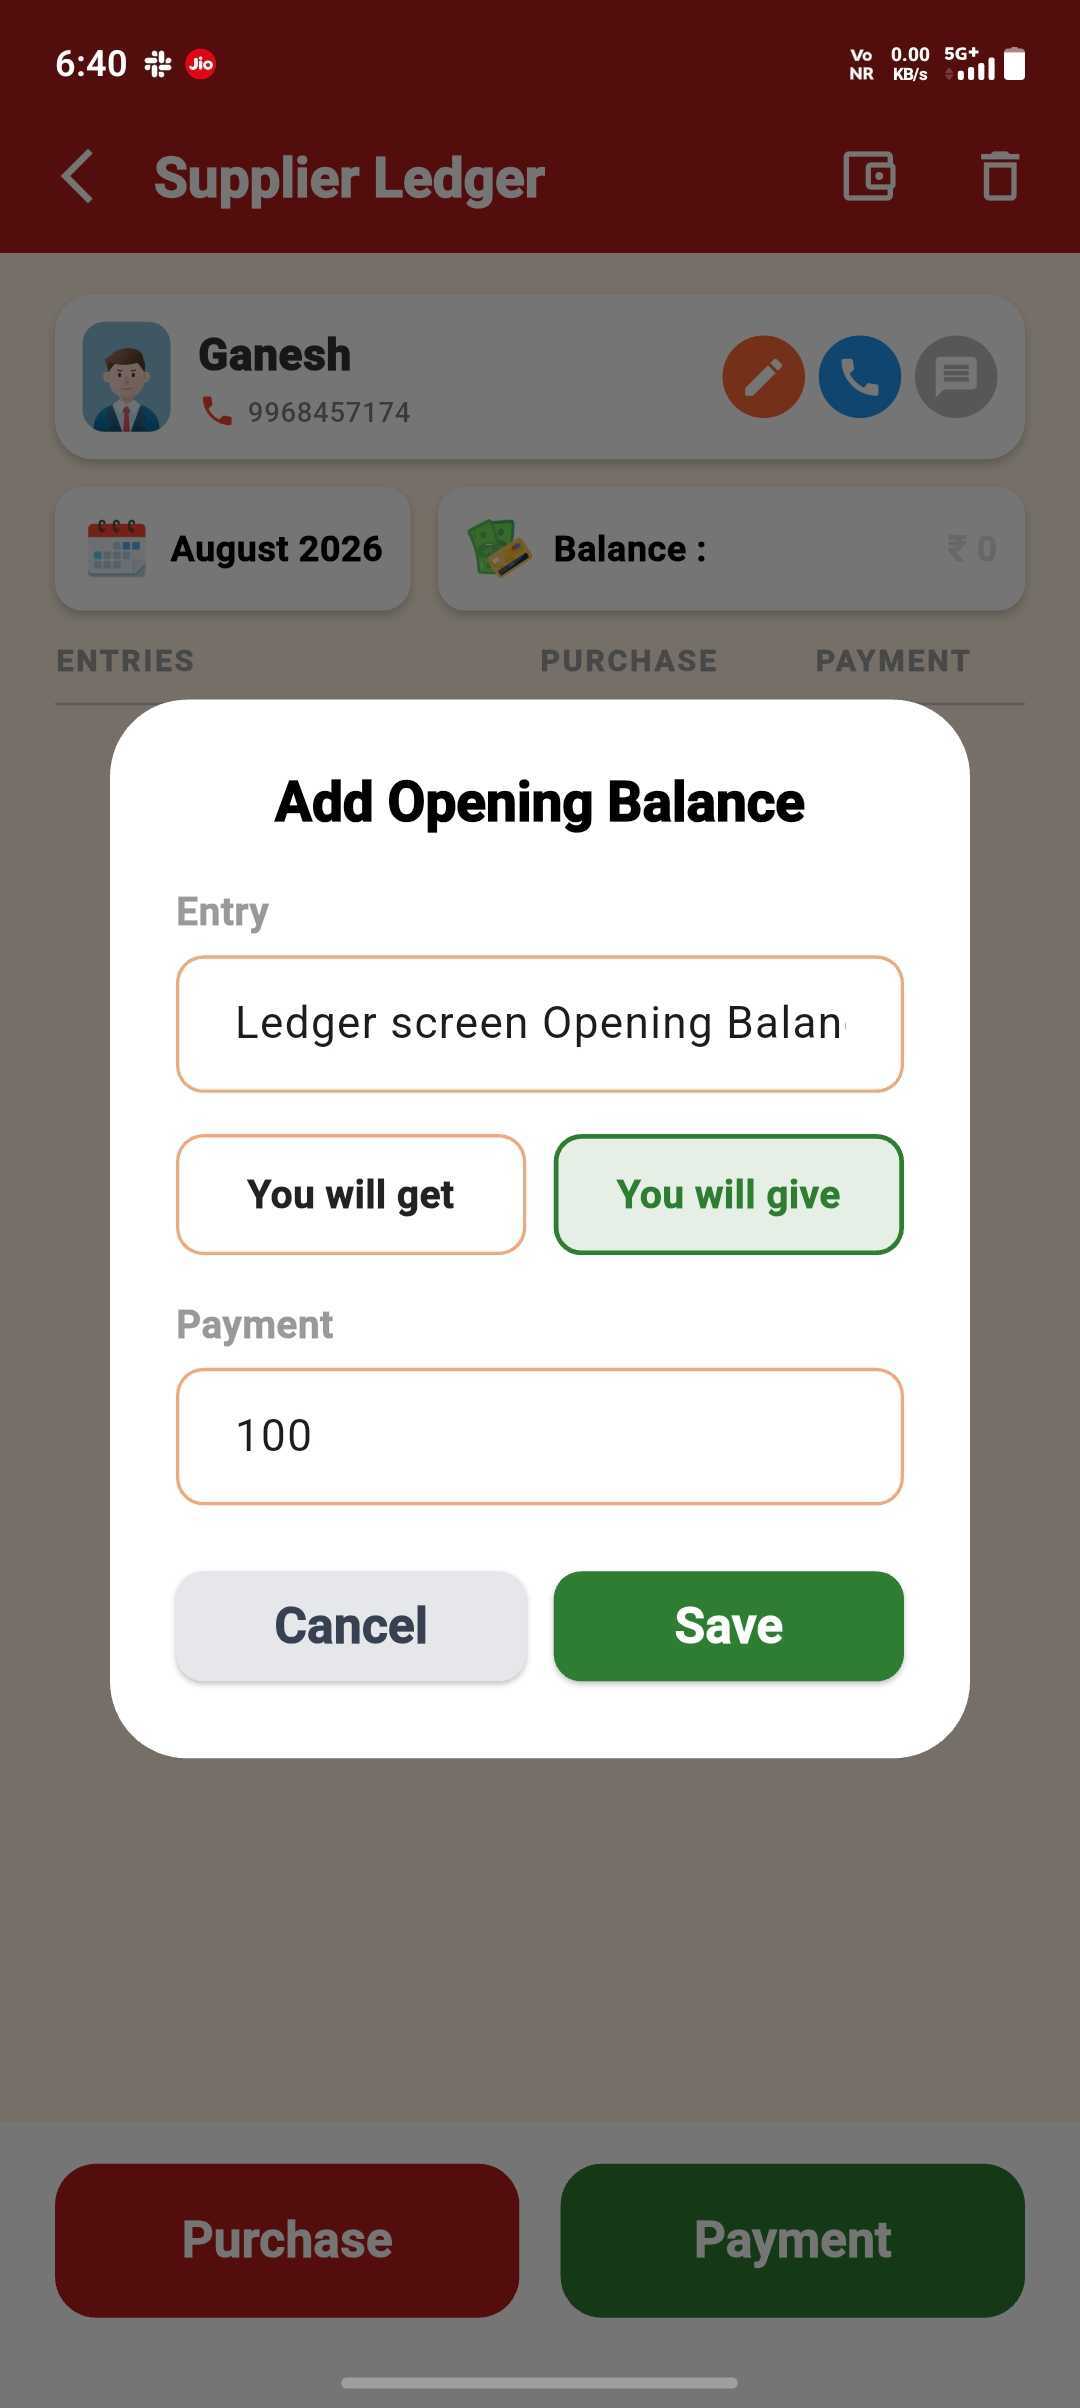
Balance Updated
The opening balance is reflected in the supplier ledger.
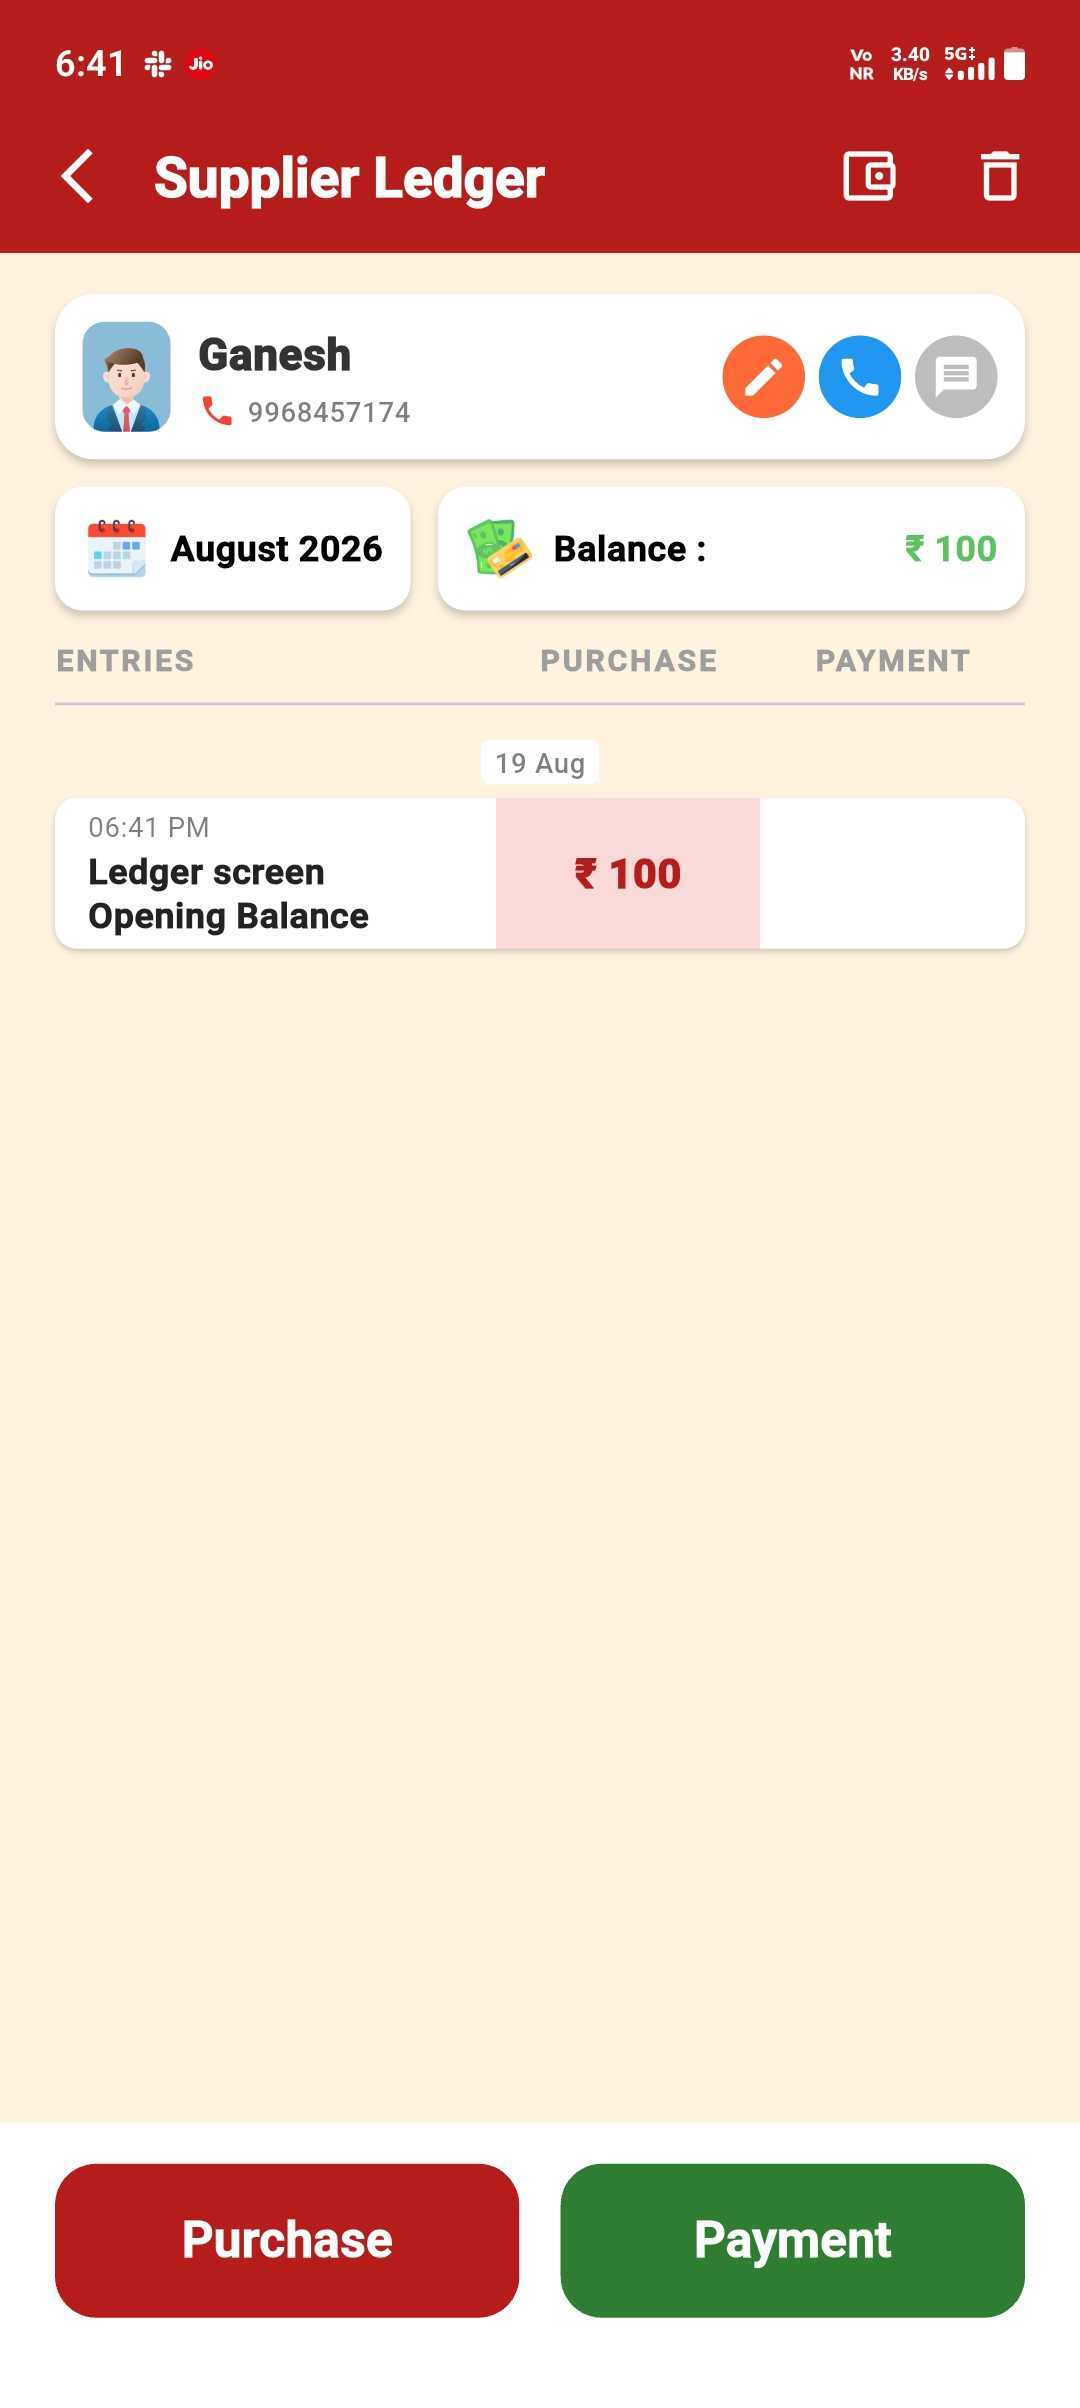
Edit Anytime
Tap the entry to change the amount, then save.
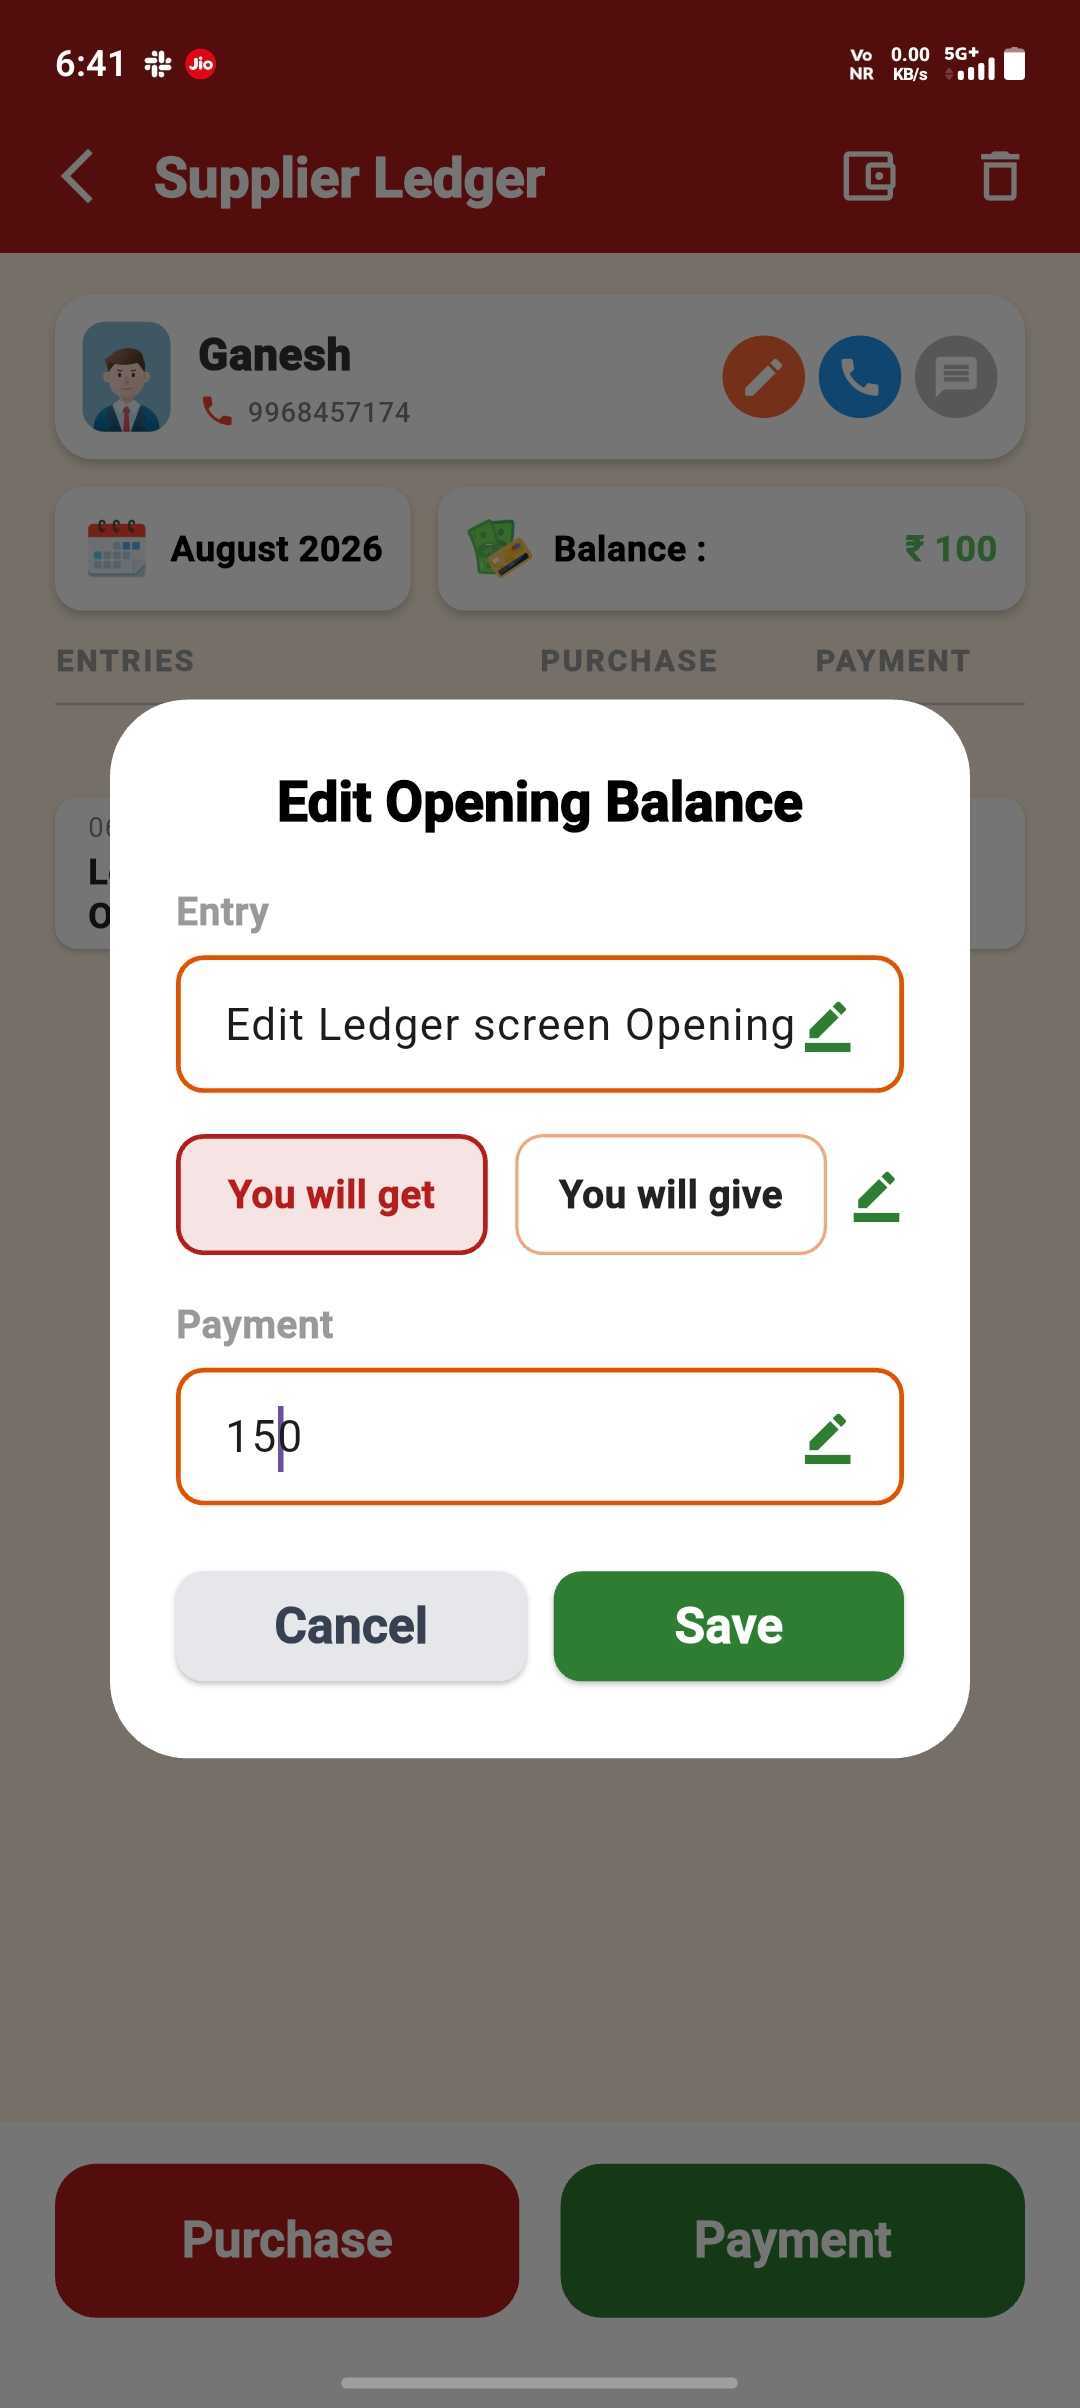
Ledger Stays Accurate
Your edit reflects immediately in the supplier's ledger.
Company Registration
Get your business account ready in under a minute.
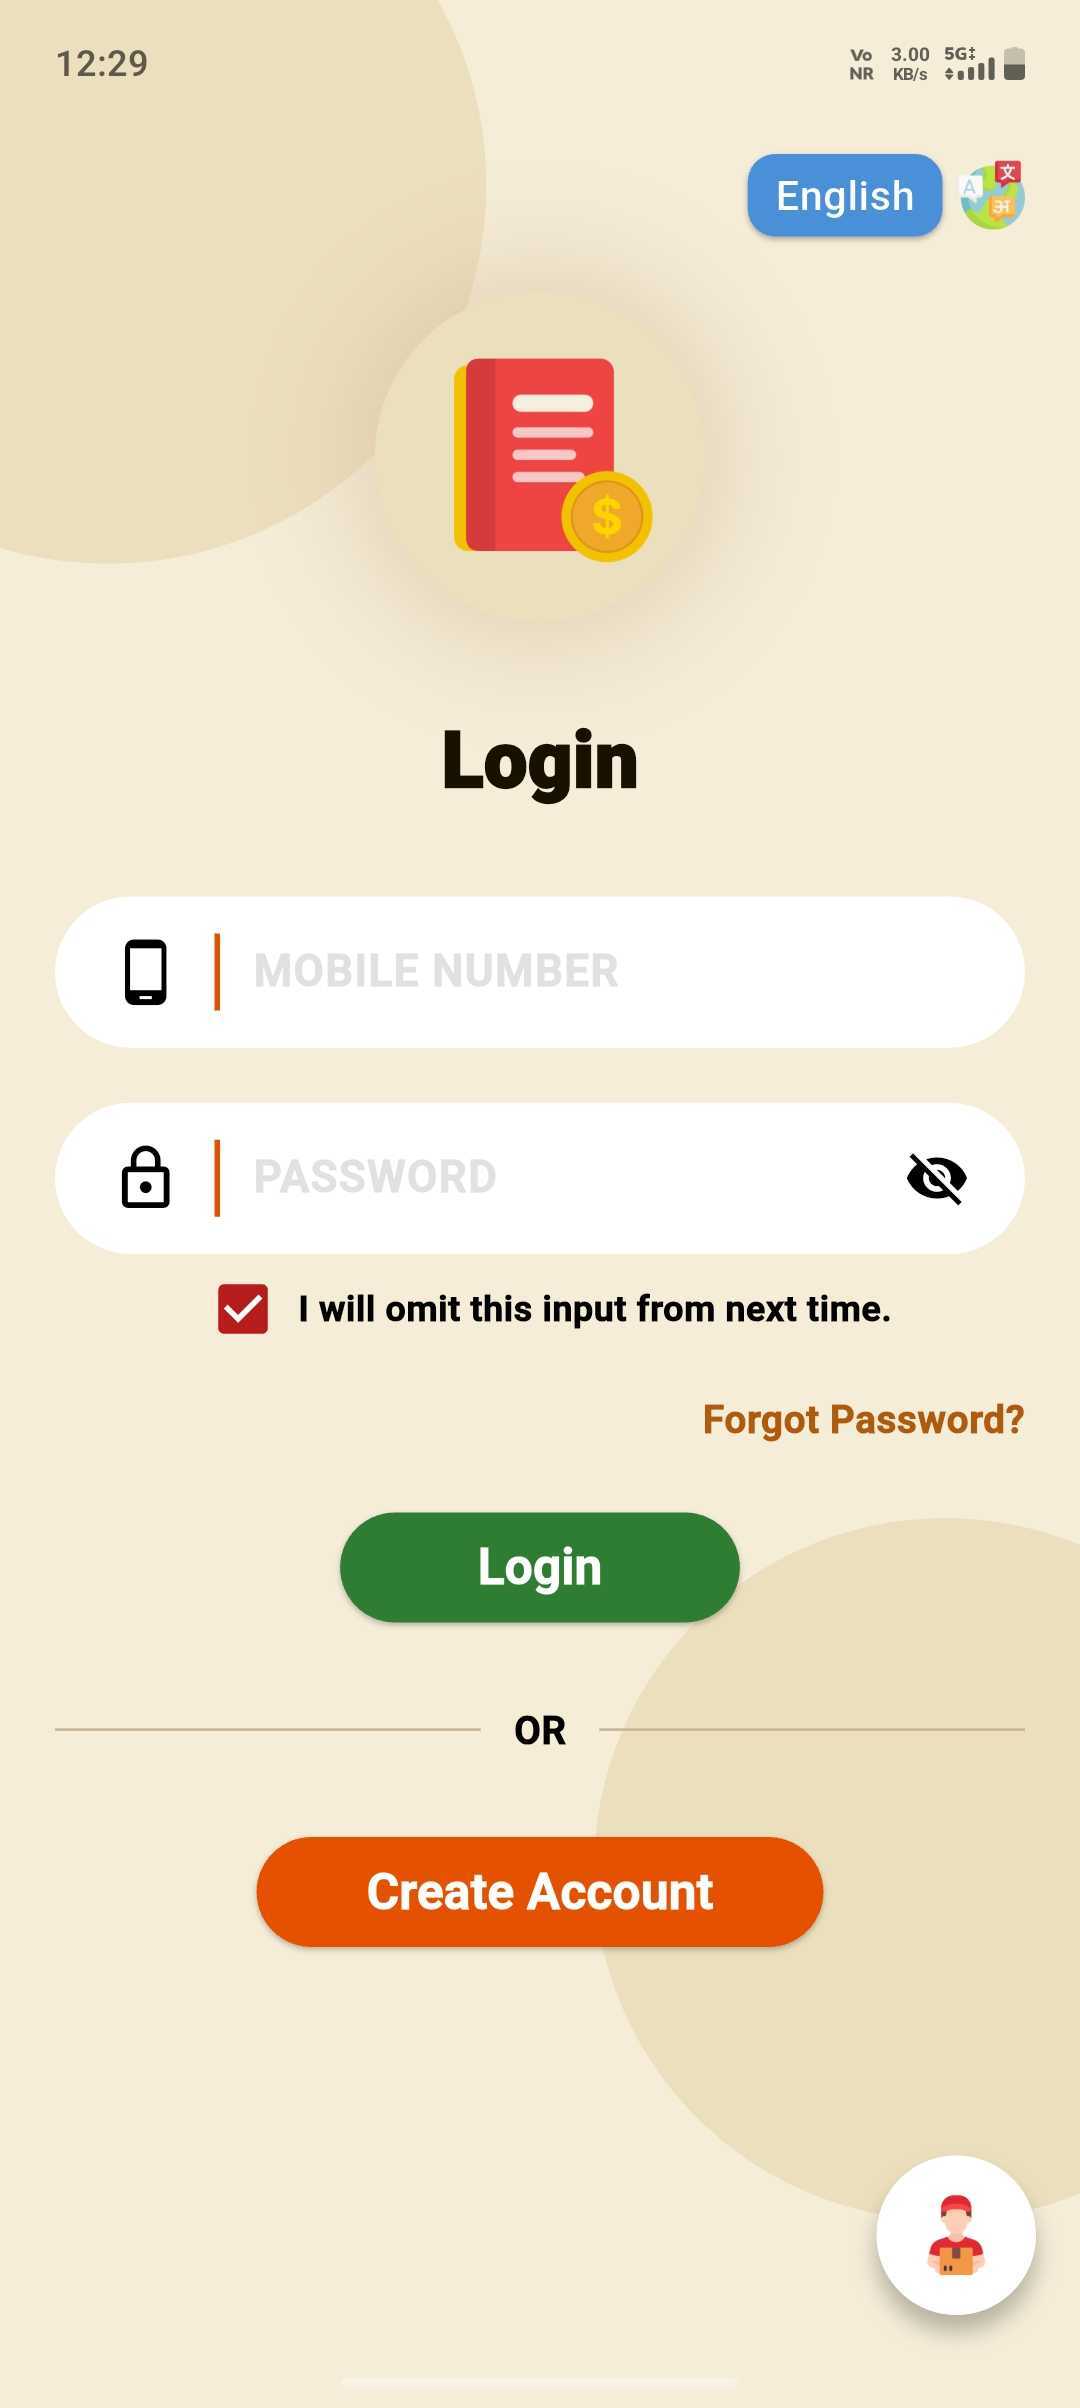
Tap Create Account
On the Login screen, tap Create Account to get started.
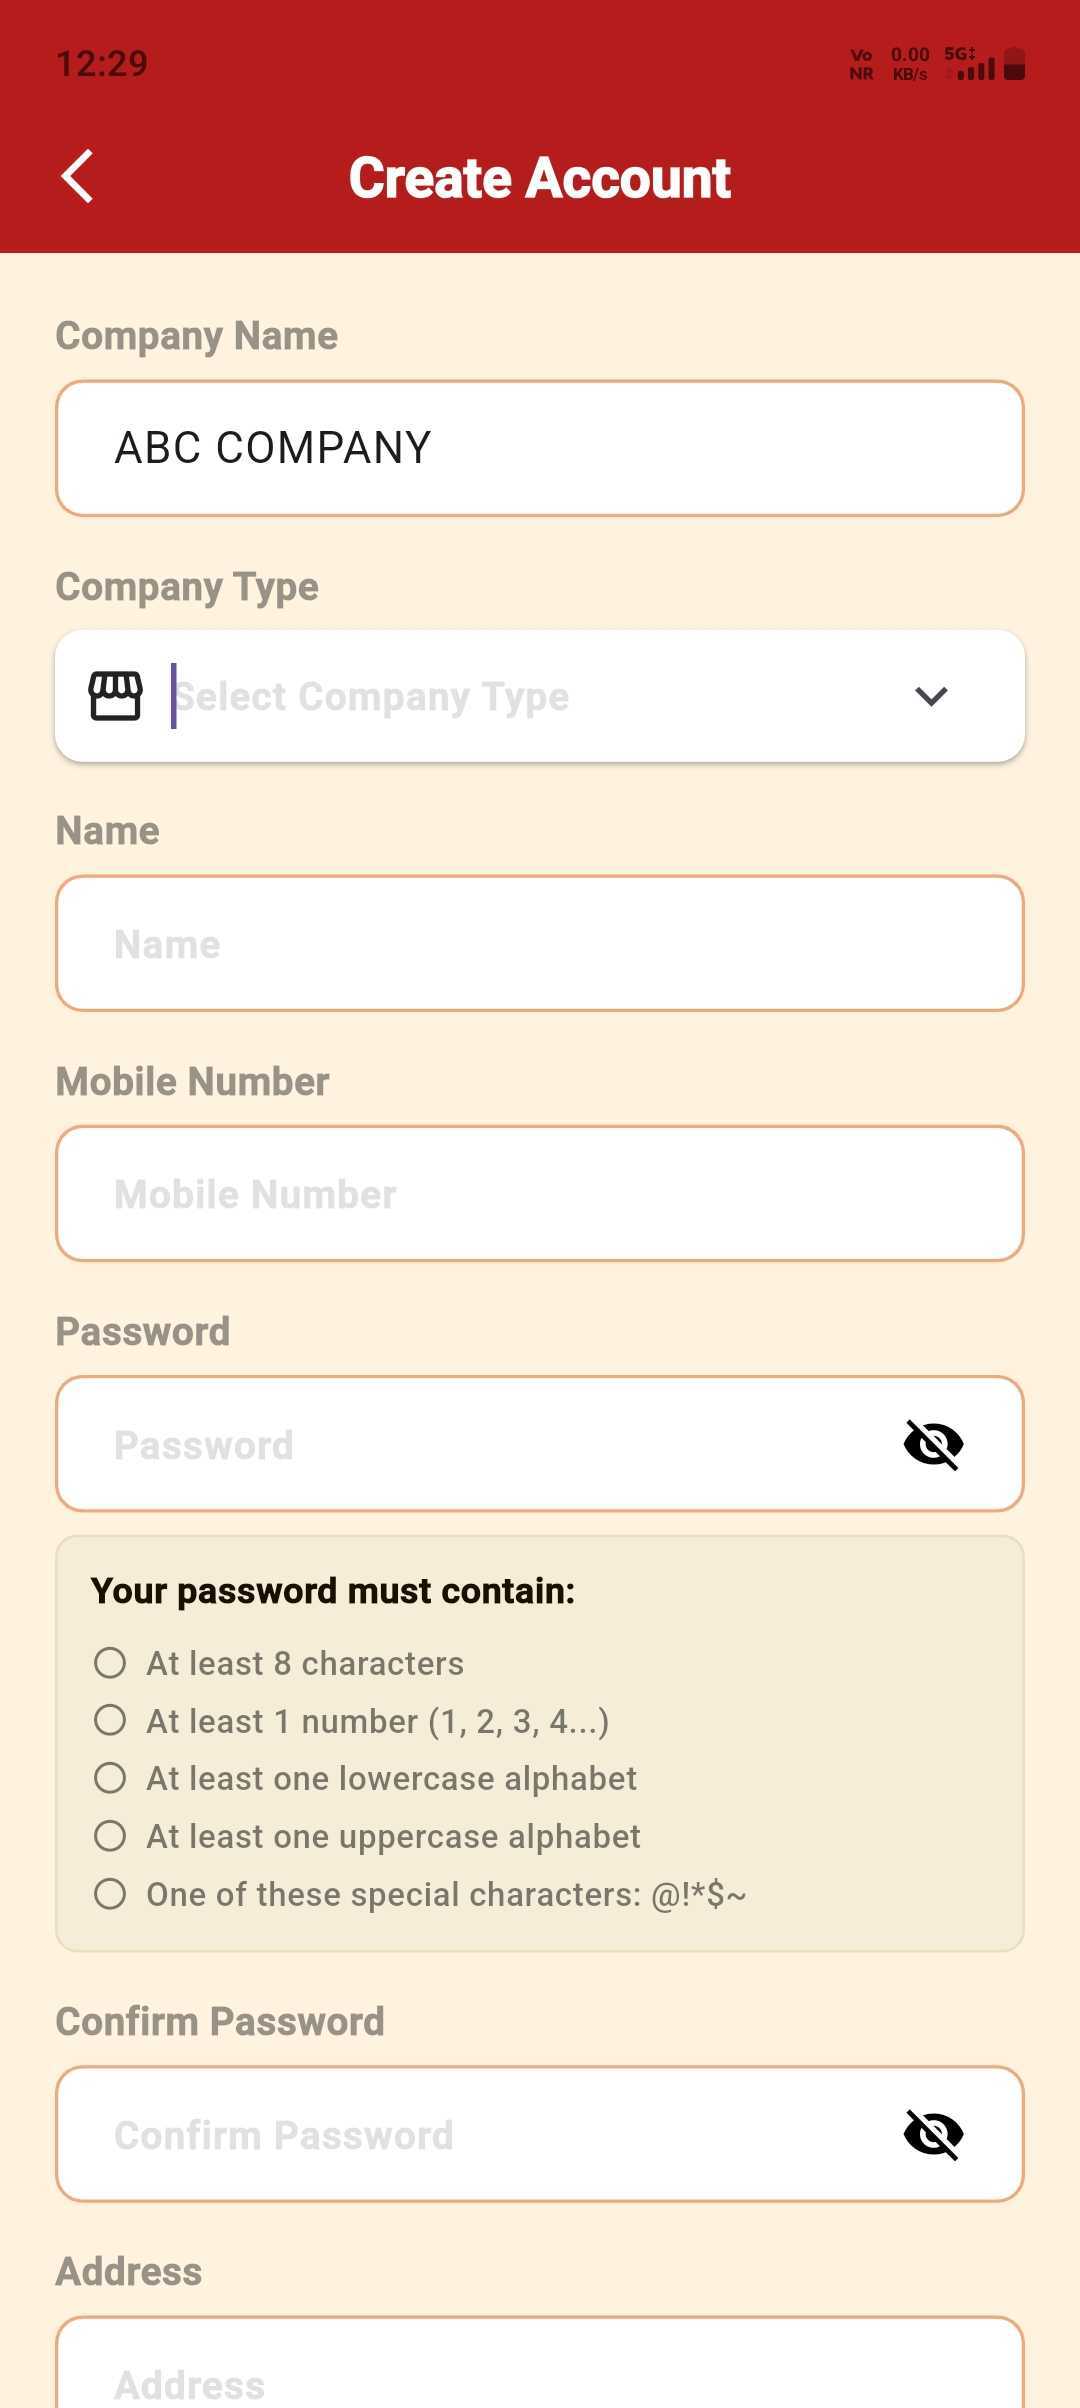
Enter Company Details
Add your Company Name and pick a Company Type from the list.
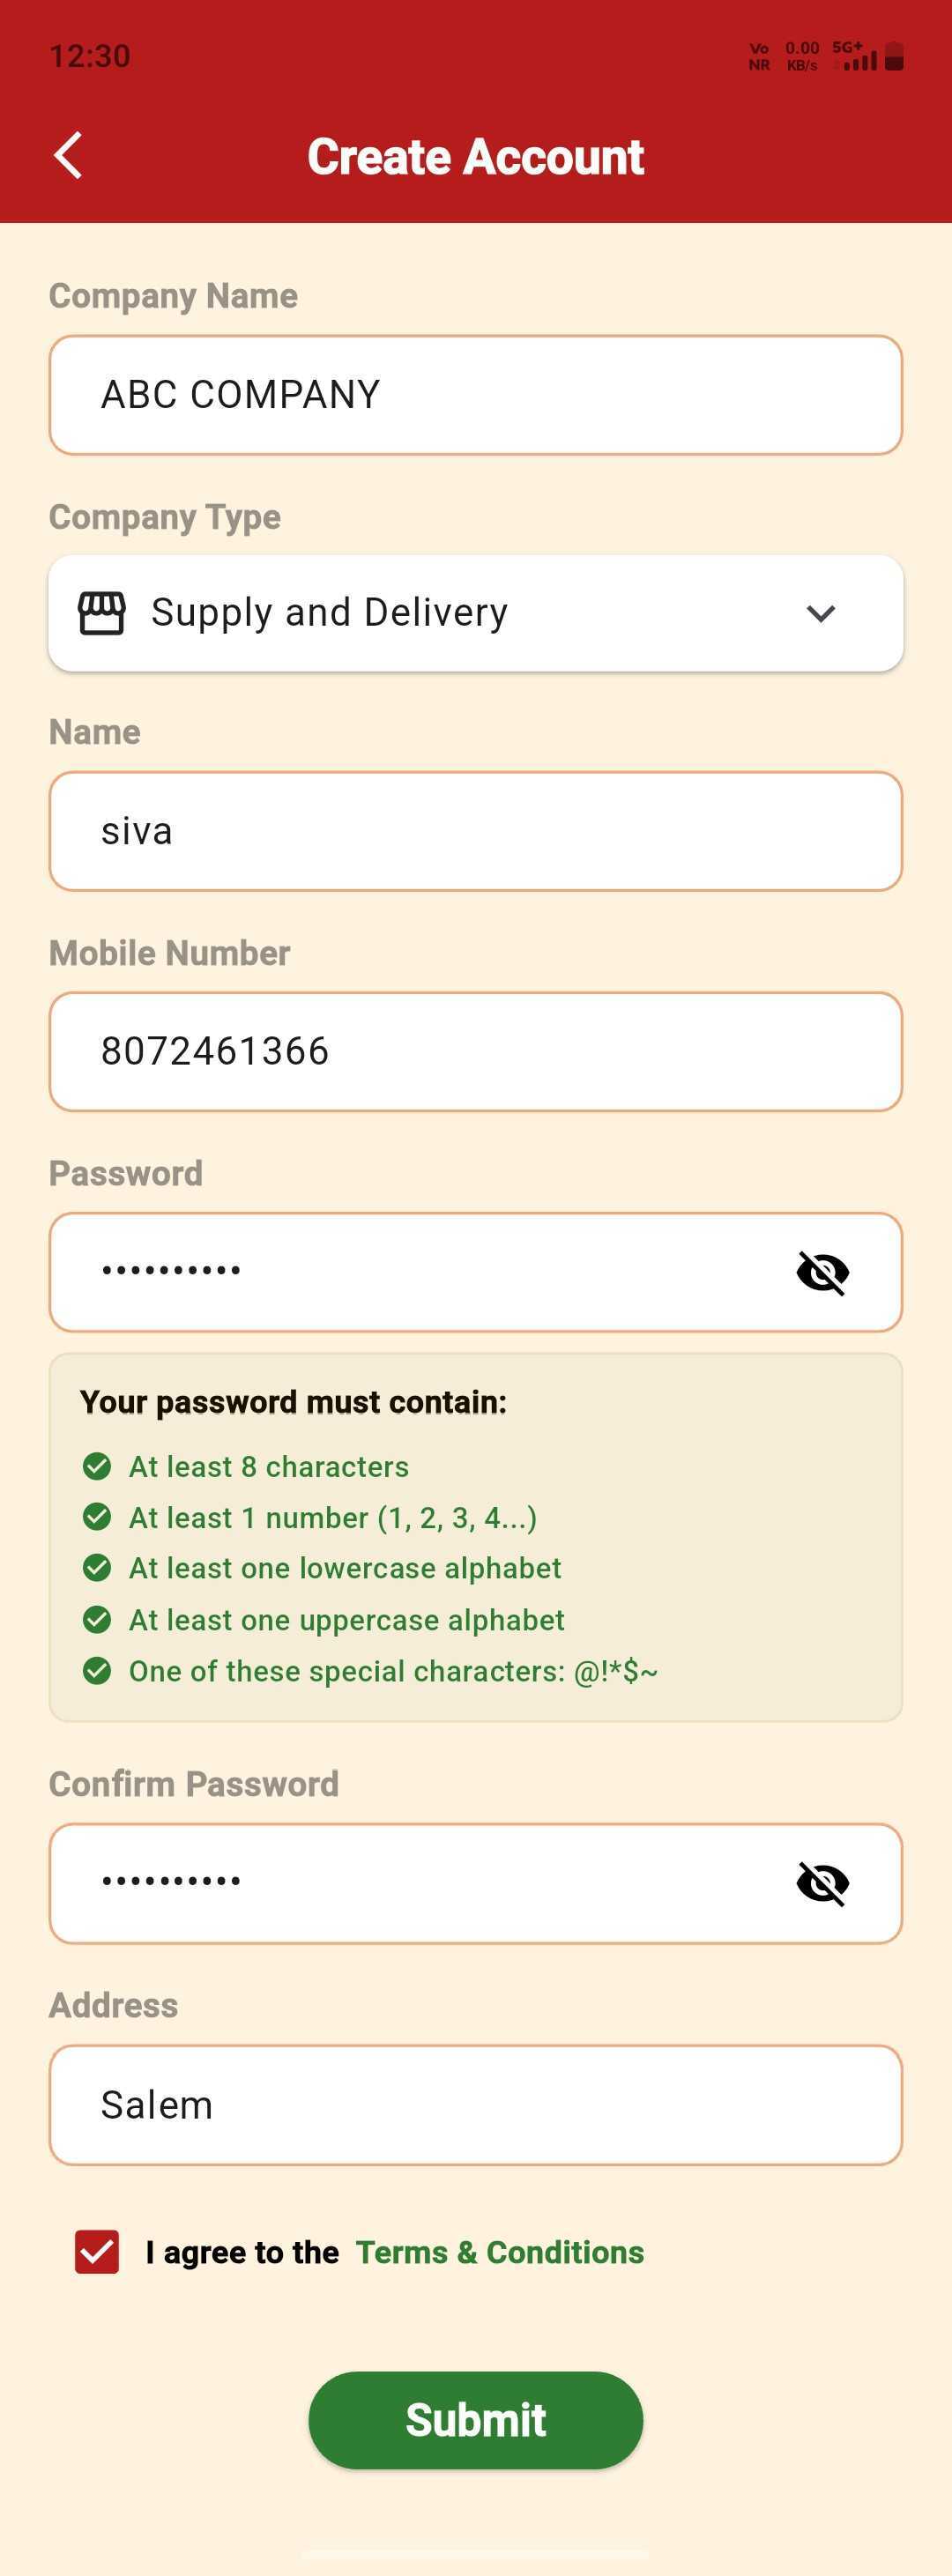
Complete Your Profile
Add your Name, Mobile Number & Password, agree to the Terms, then Submit.
OTP Verification
A 6-digit OTP is sent to your mobile number.
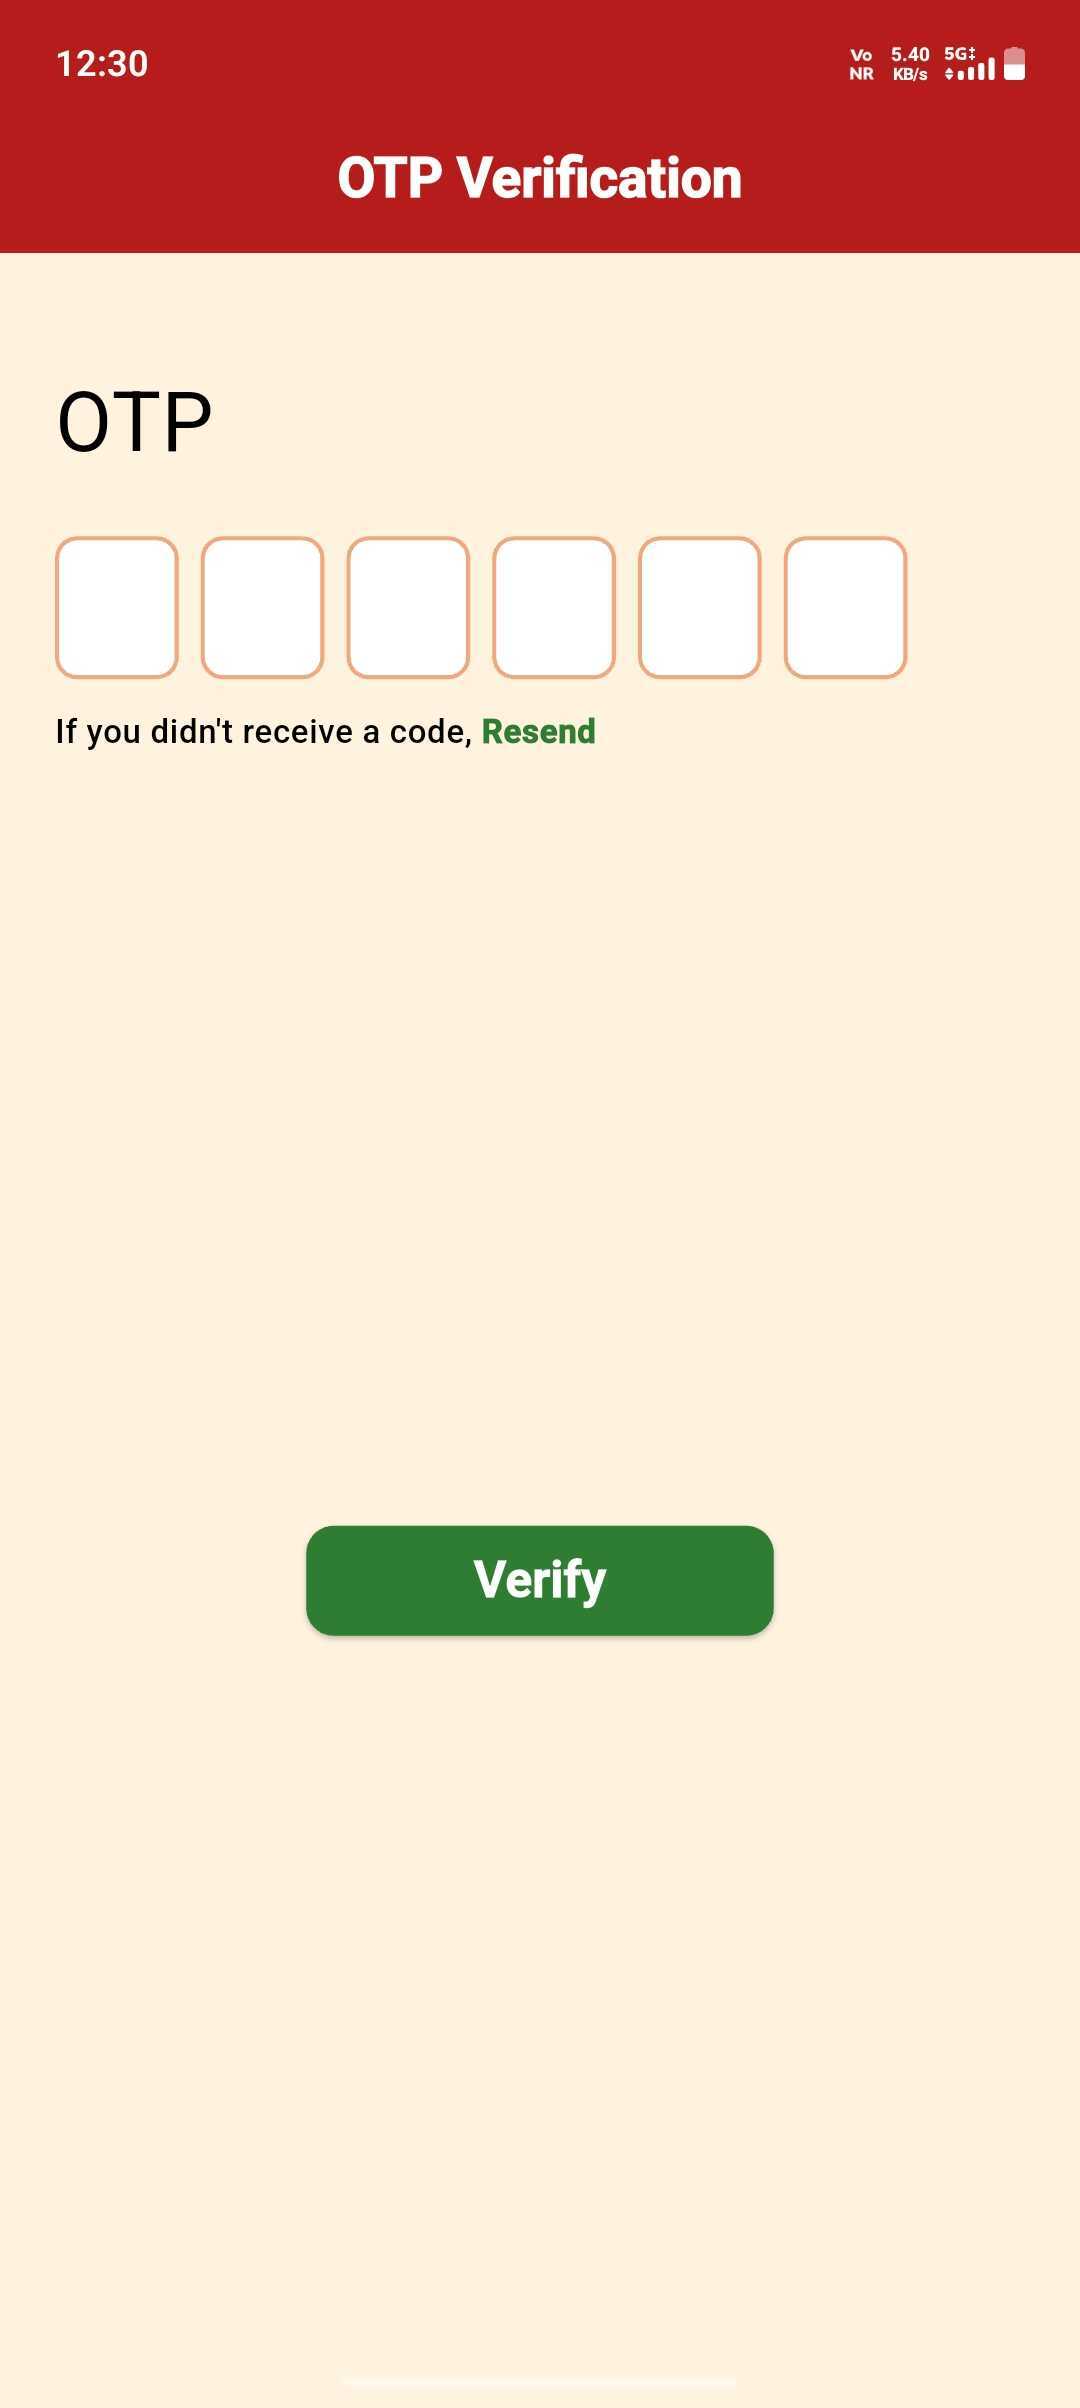
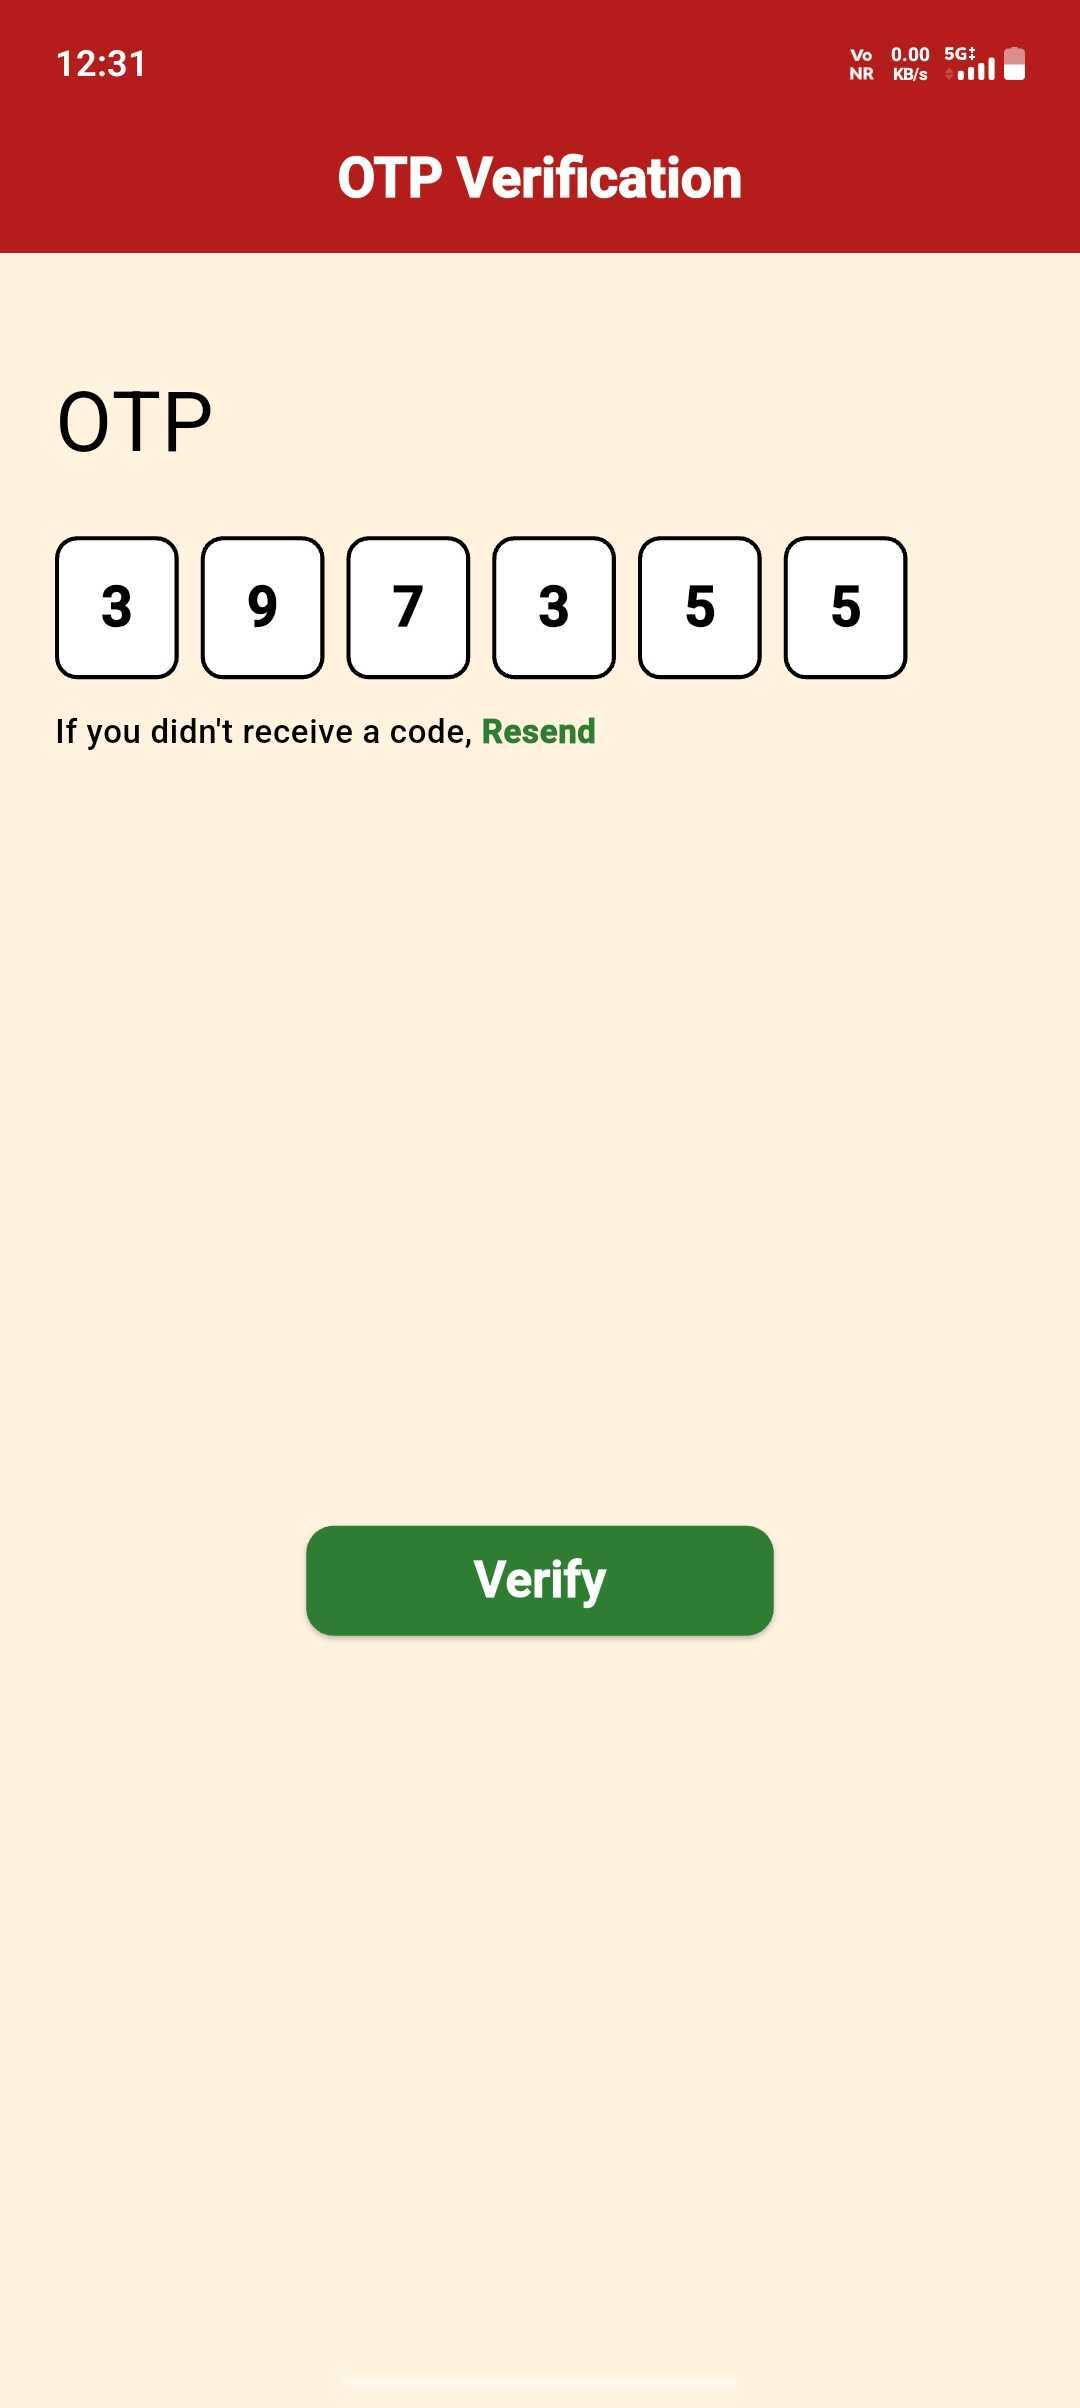
Enter the OTP
Type in the code and tap Verify.
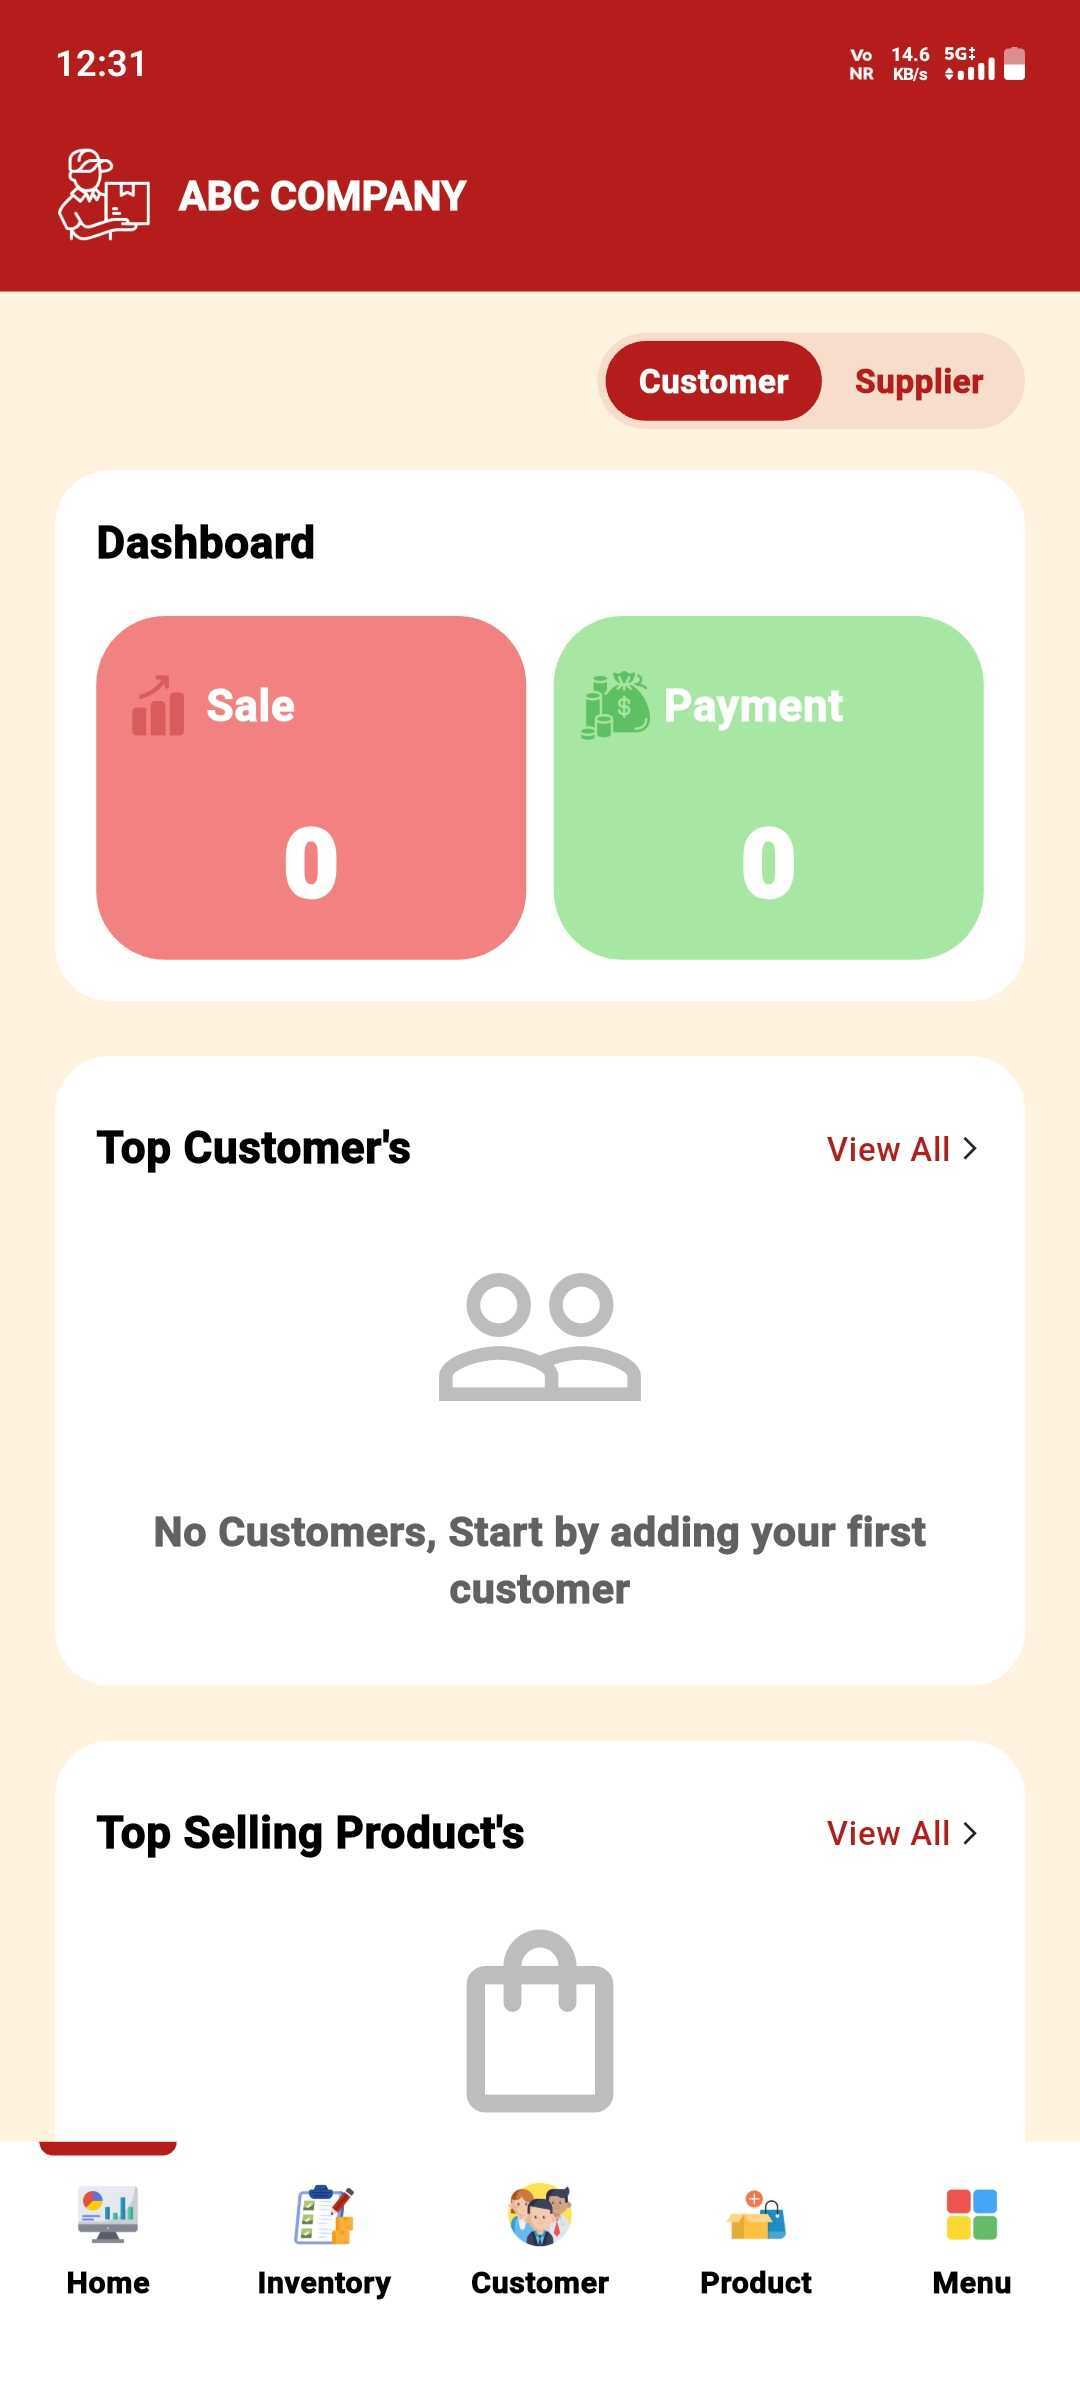
You're In!
Your dashboard is ready — start adding customers & products.
Product Registration
Add products with price & stock — ready to sell in minutes.
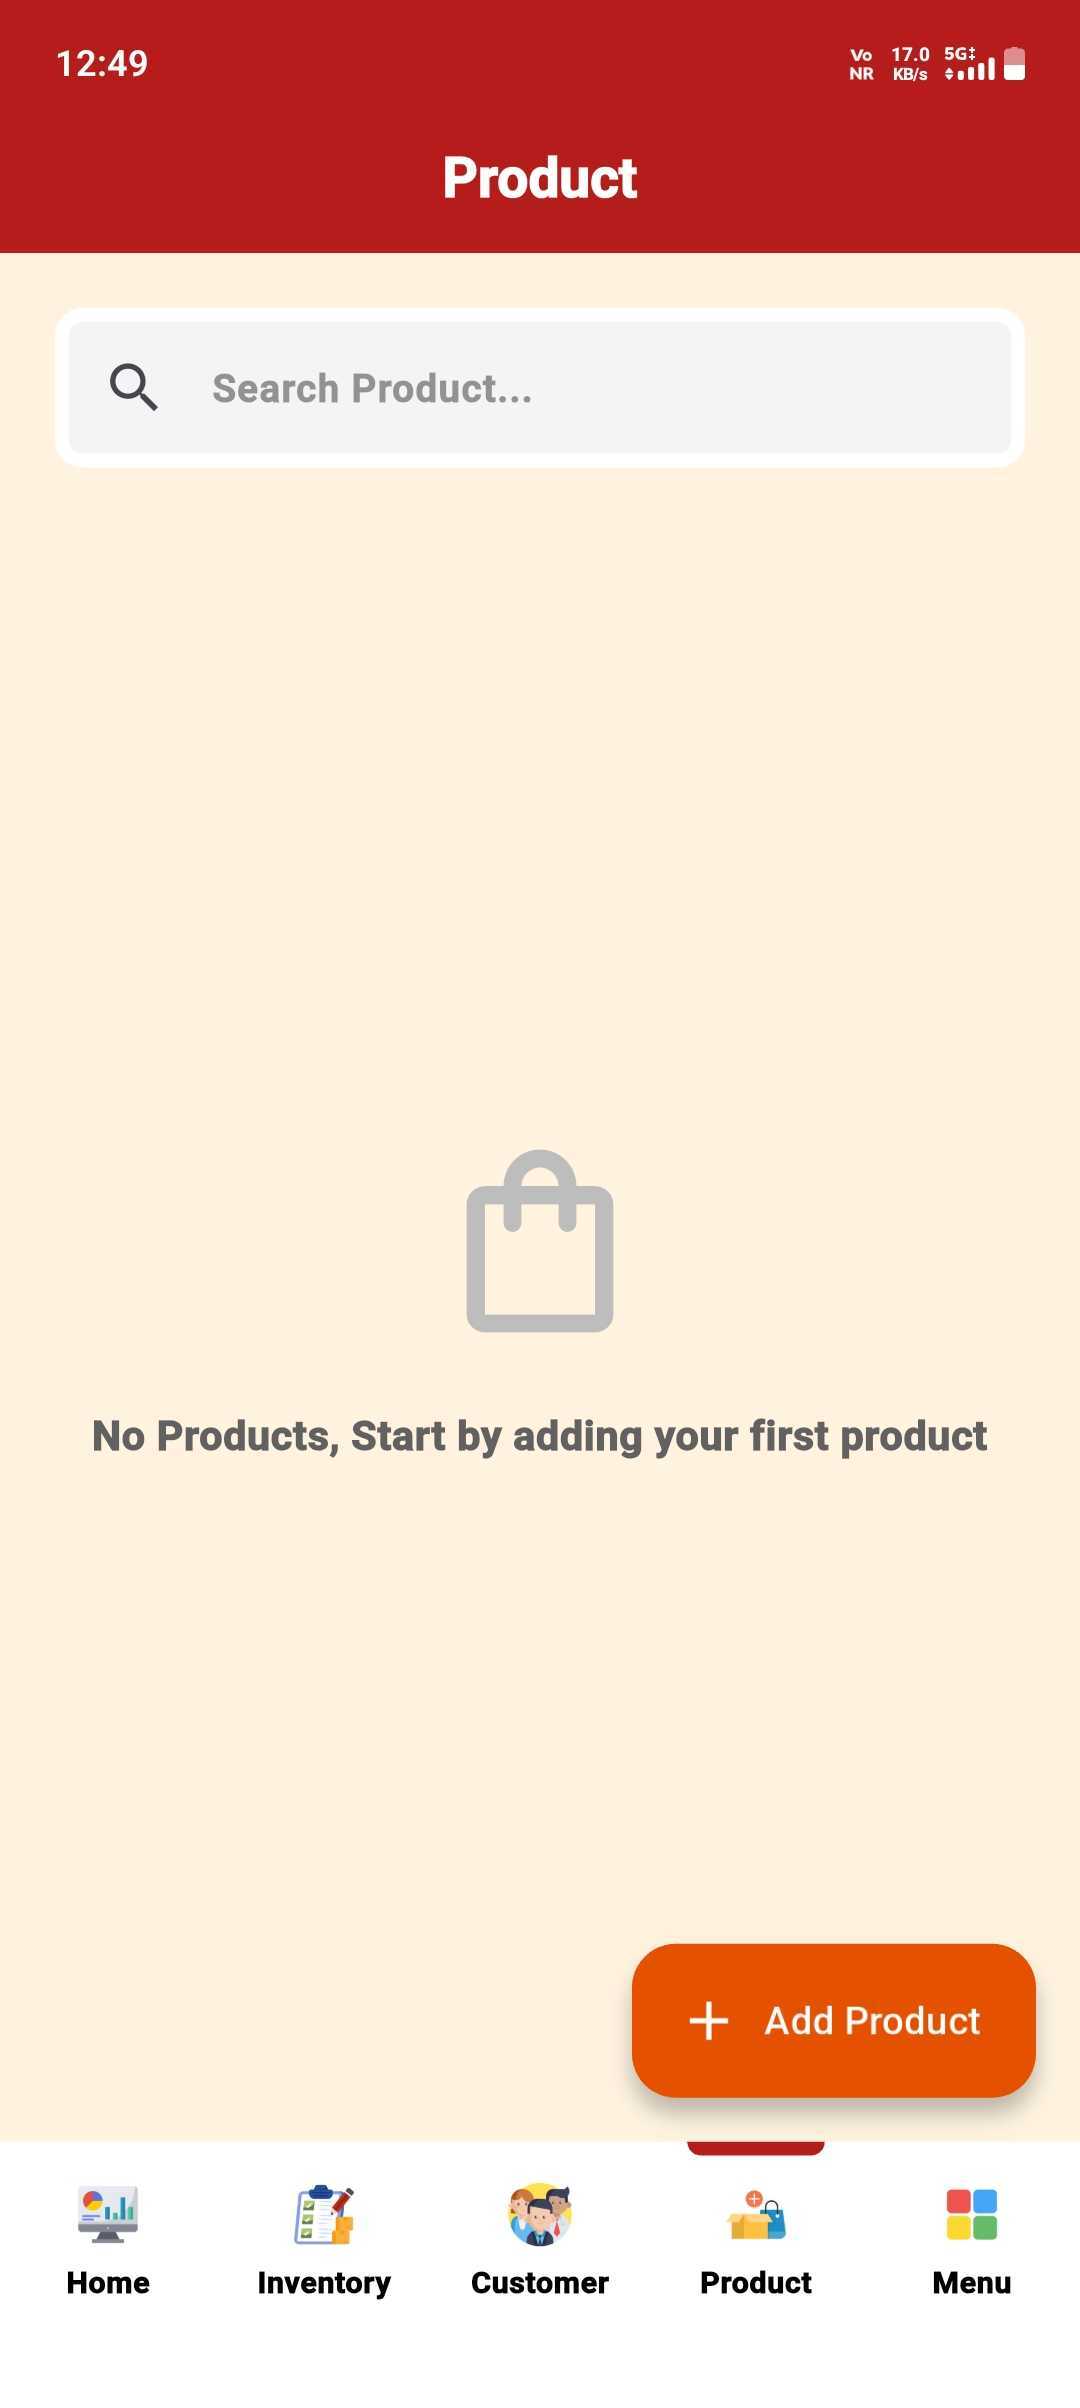
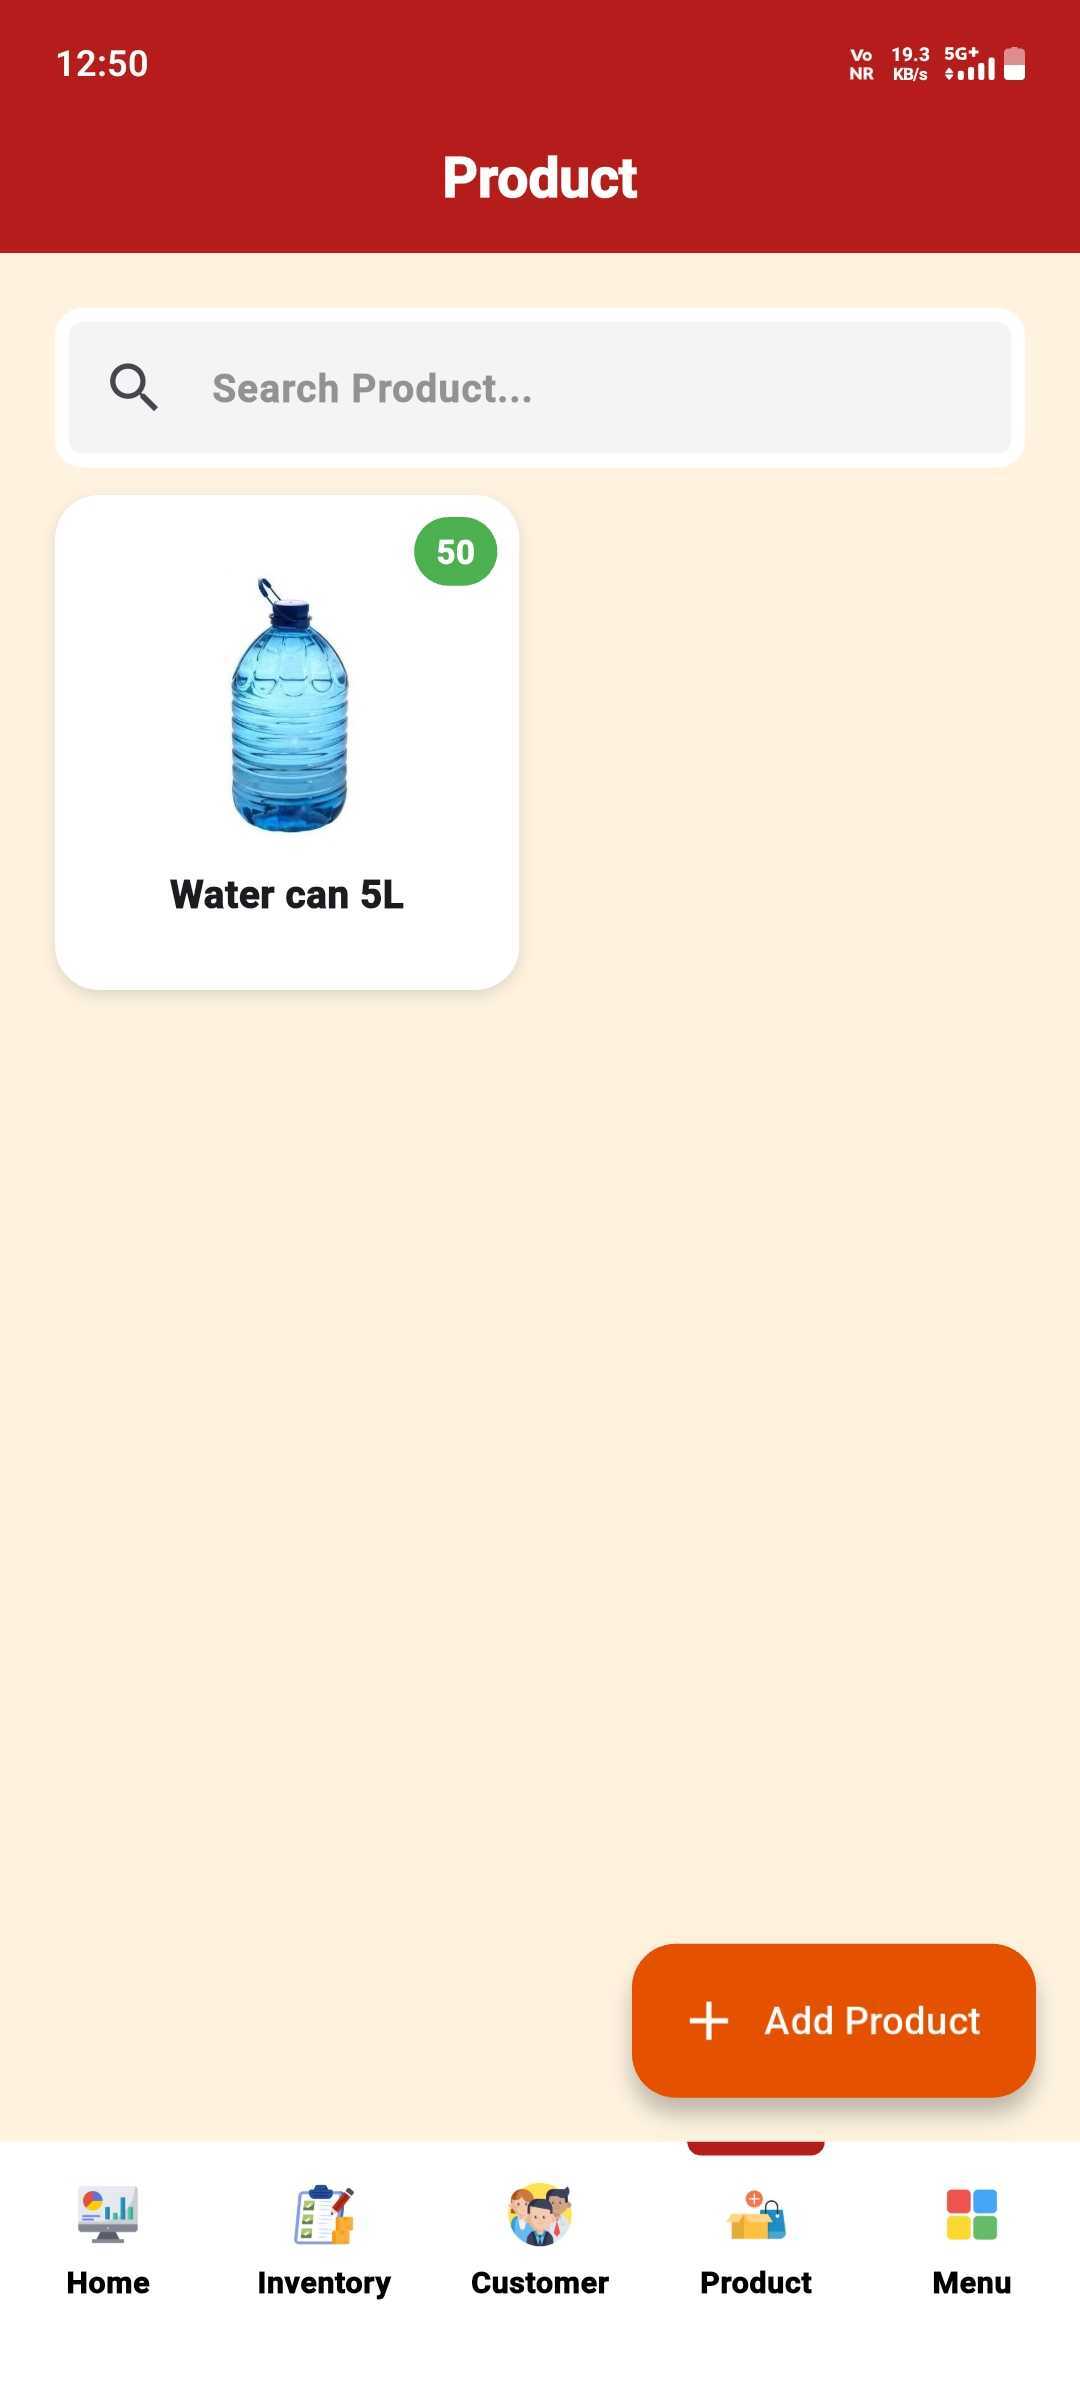
Open Product List
Tap the Product tab, then the Add Product button.
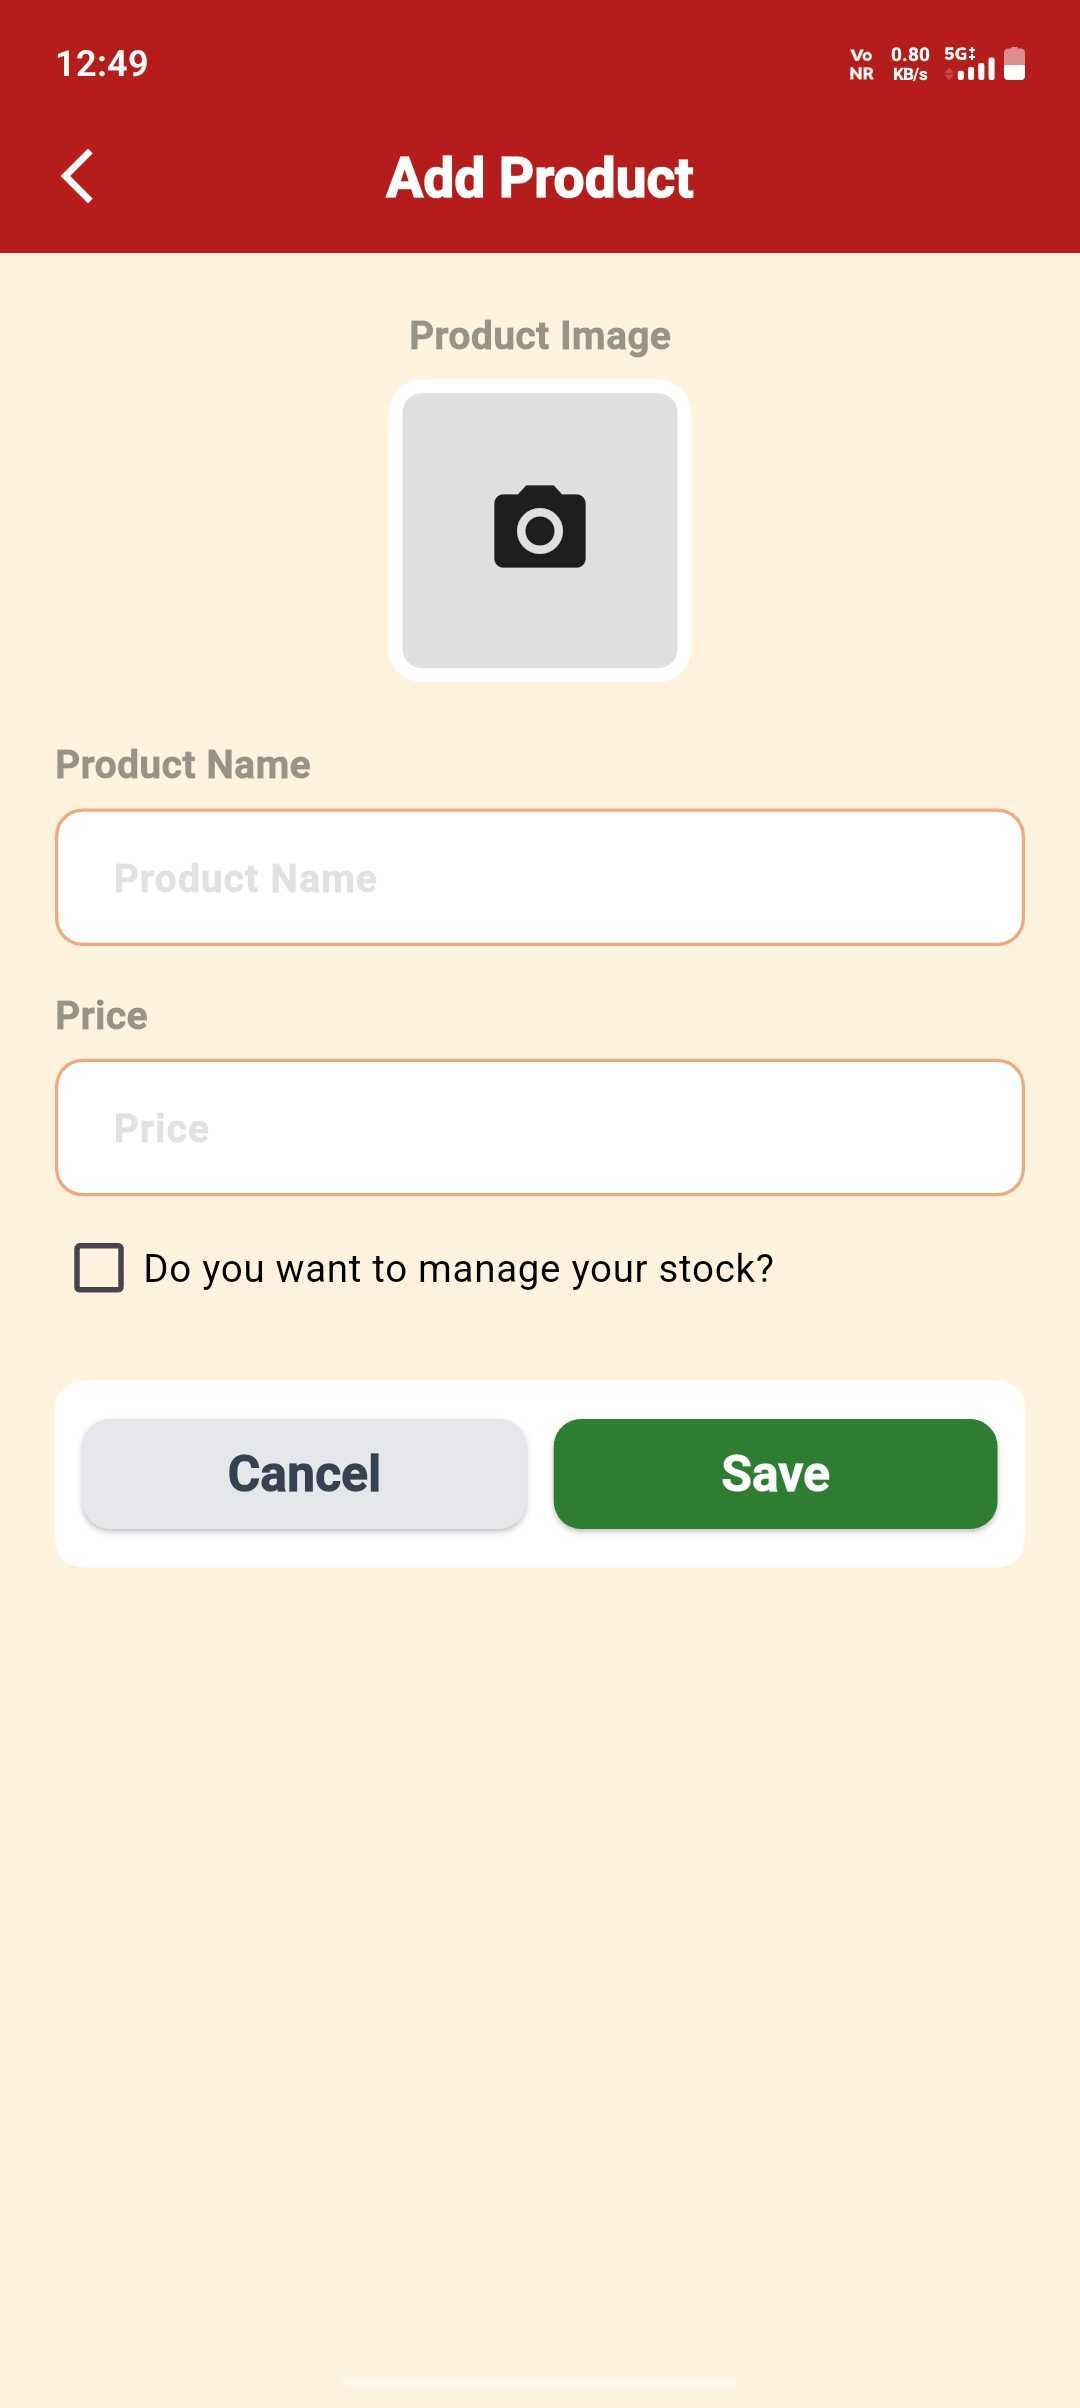
Add Name & Price
Enter a Product Name and Price — a photo is optional.
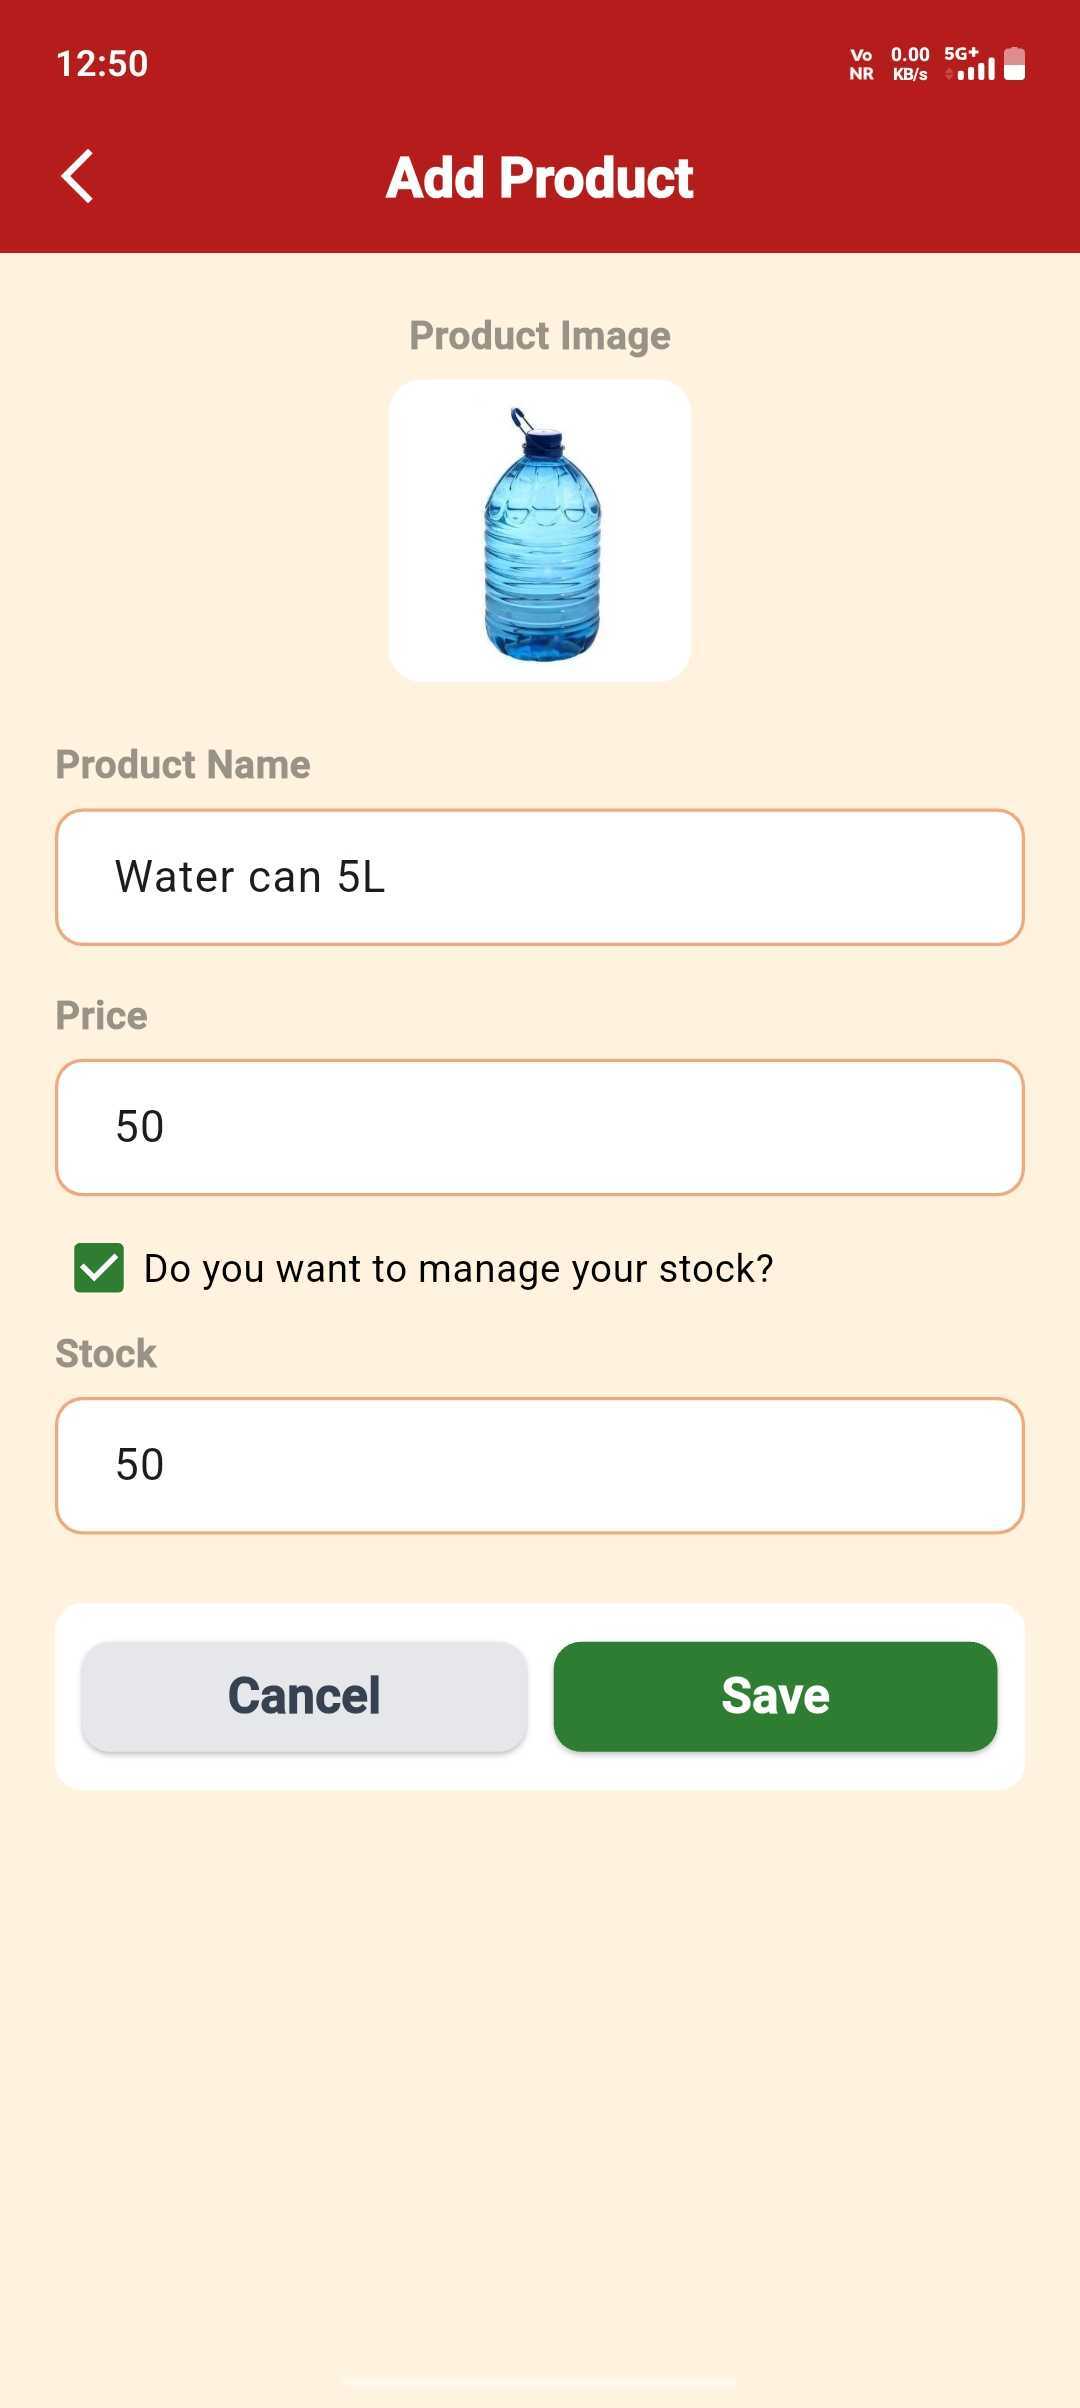
Set Opening Stock
Tick "manage your stock", enter how many you have, then Save.
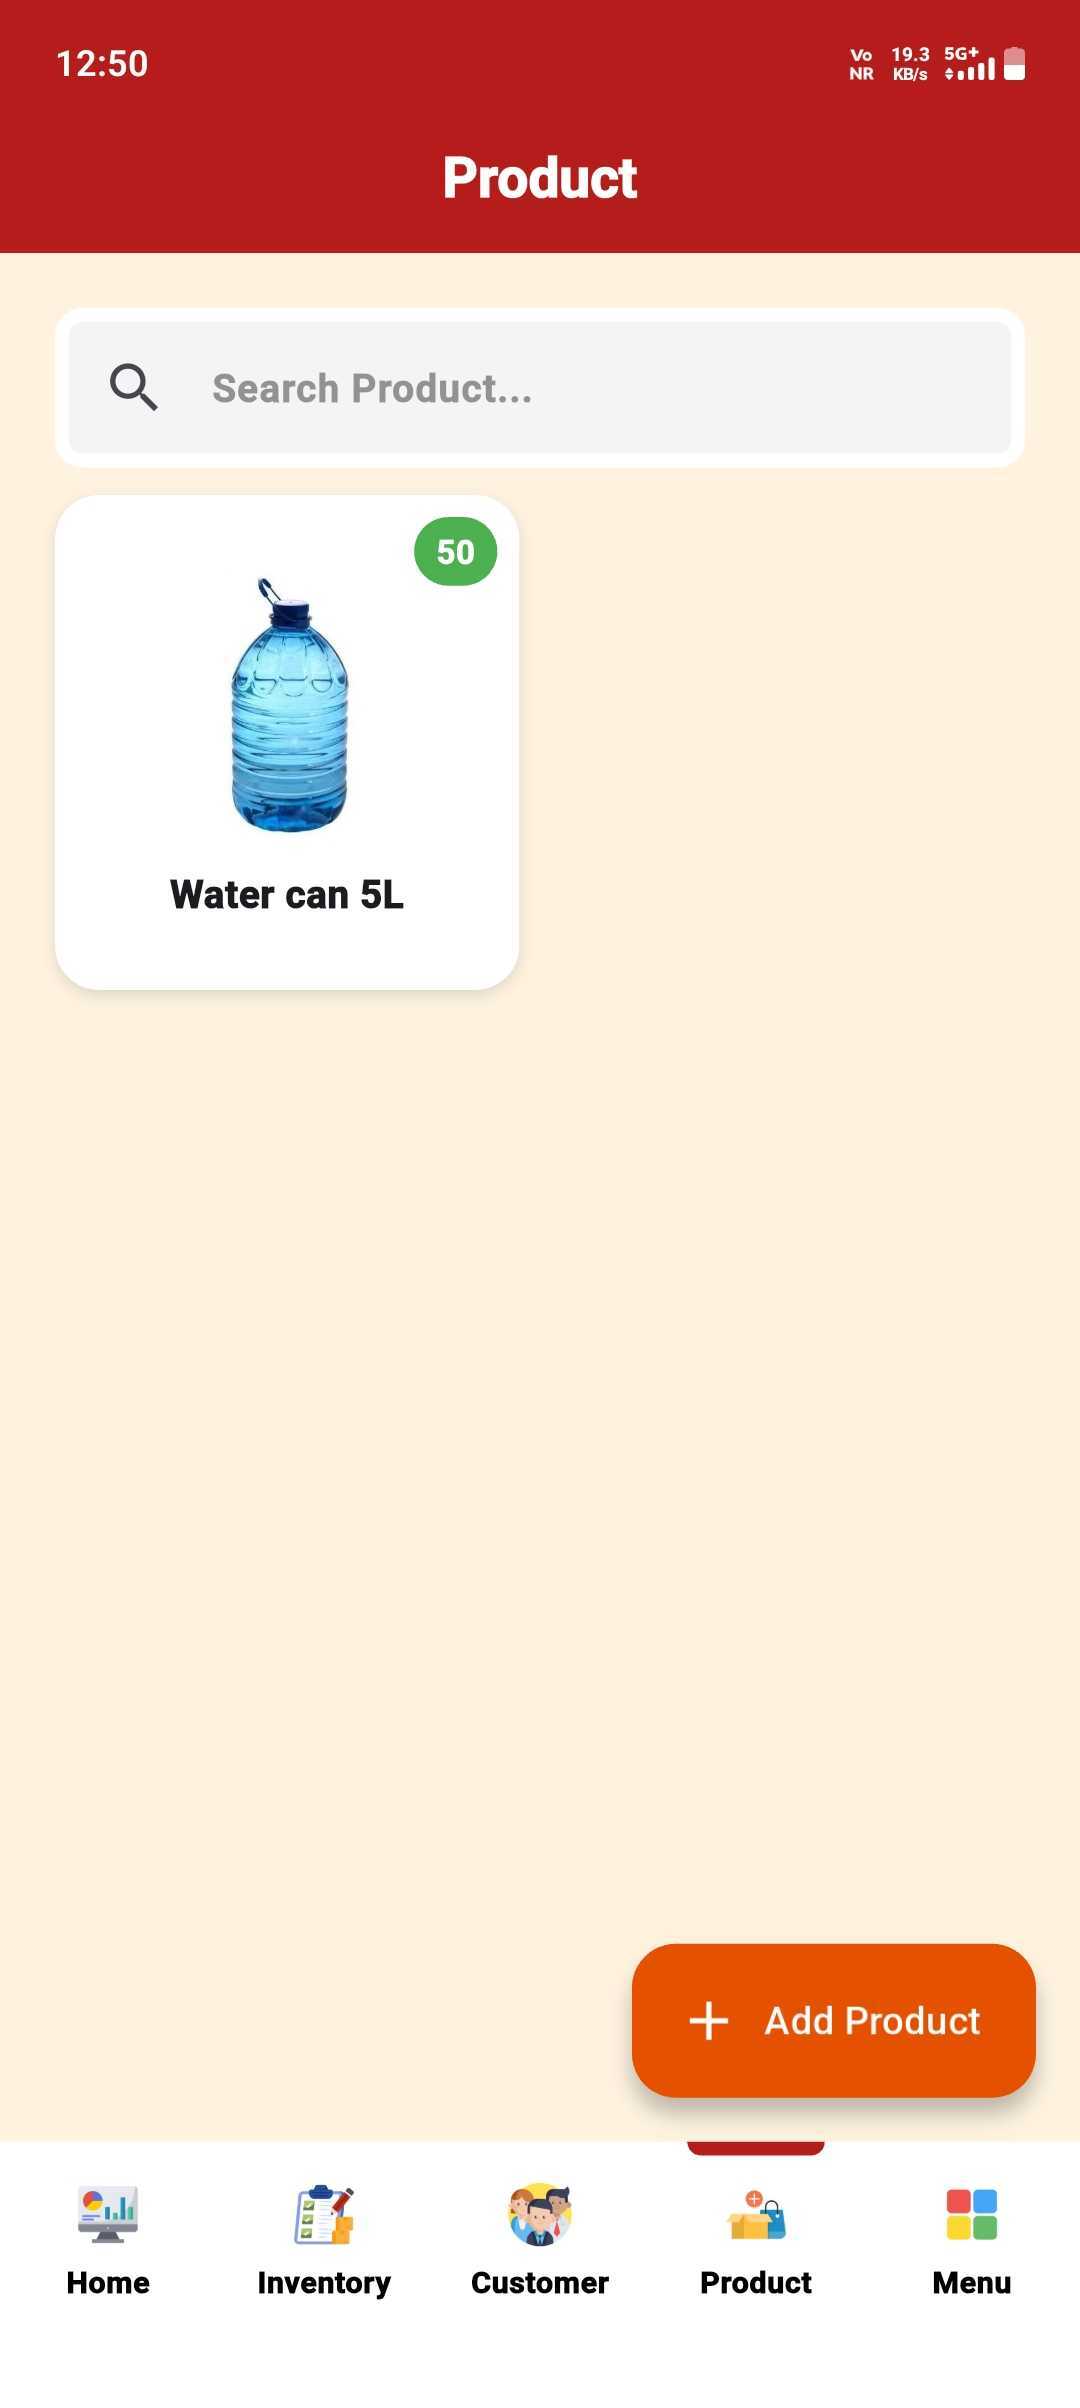
Done — It's Listed
Your product appears instantly with its stock count on the card.
Delete a Product
Remove a product you no longer stock or sell.
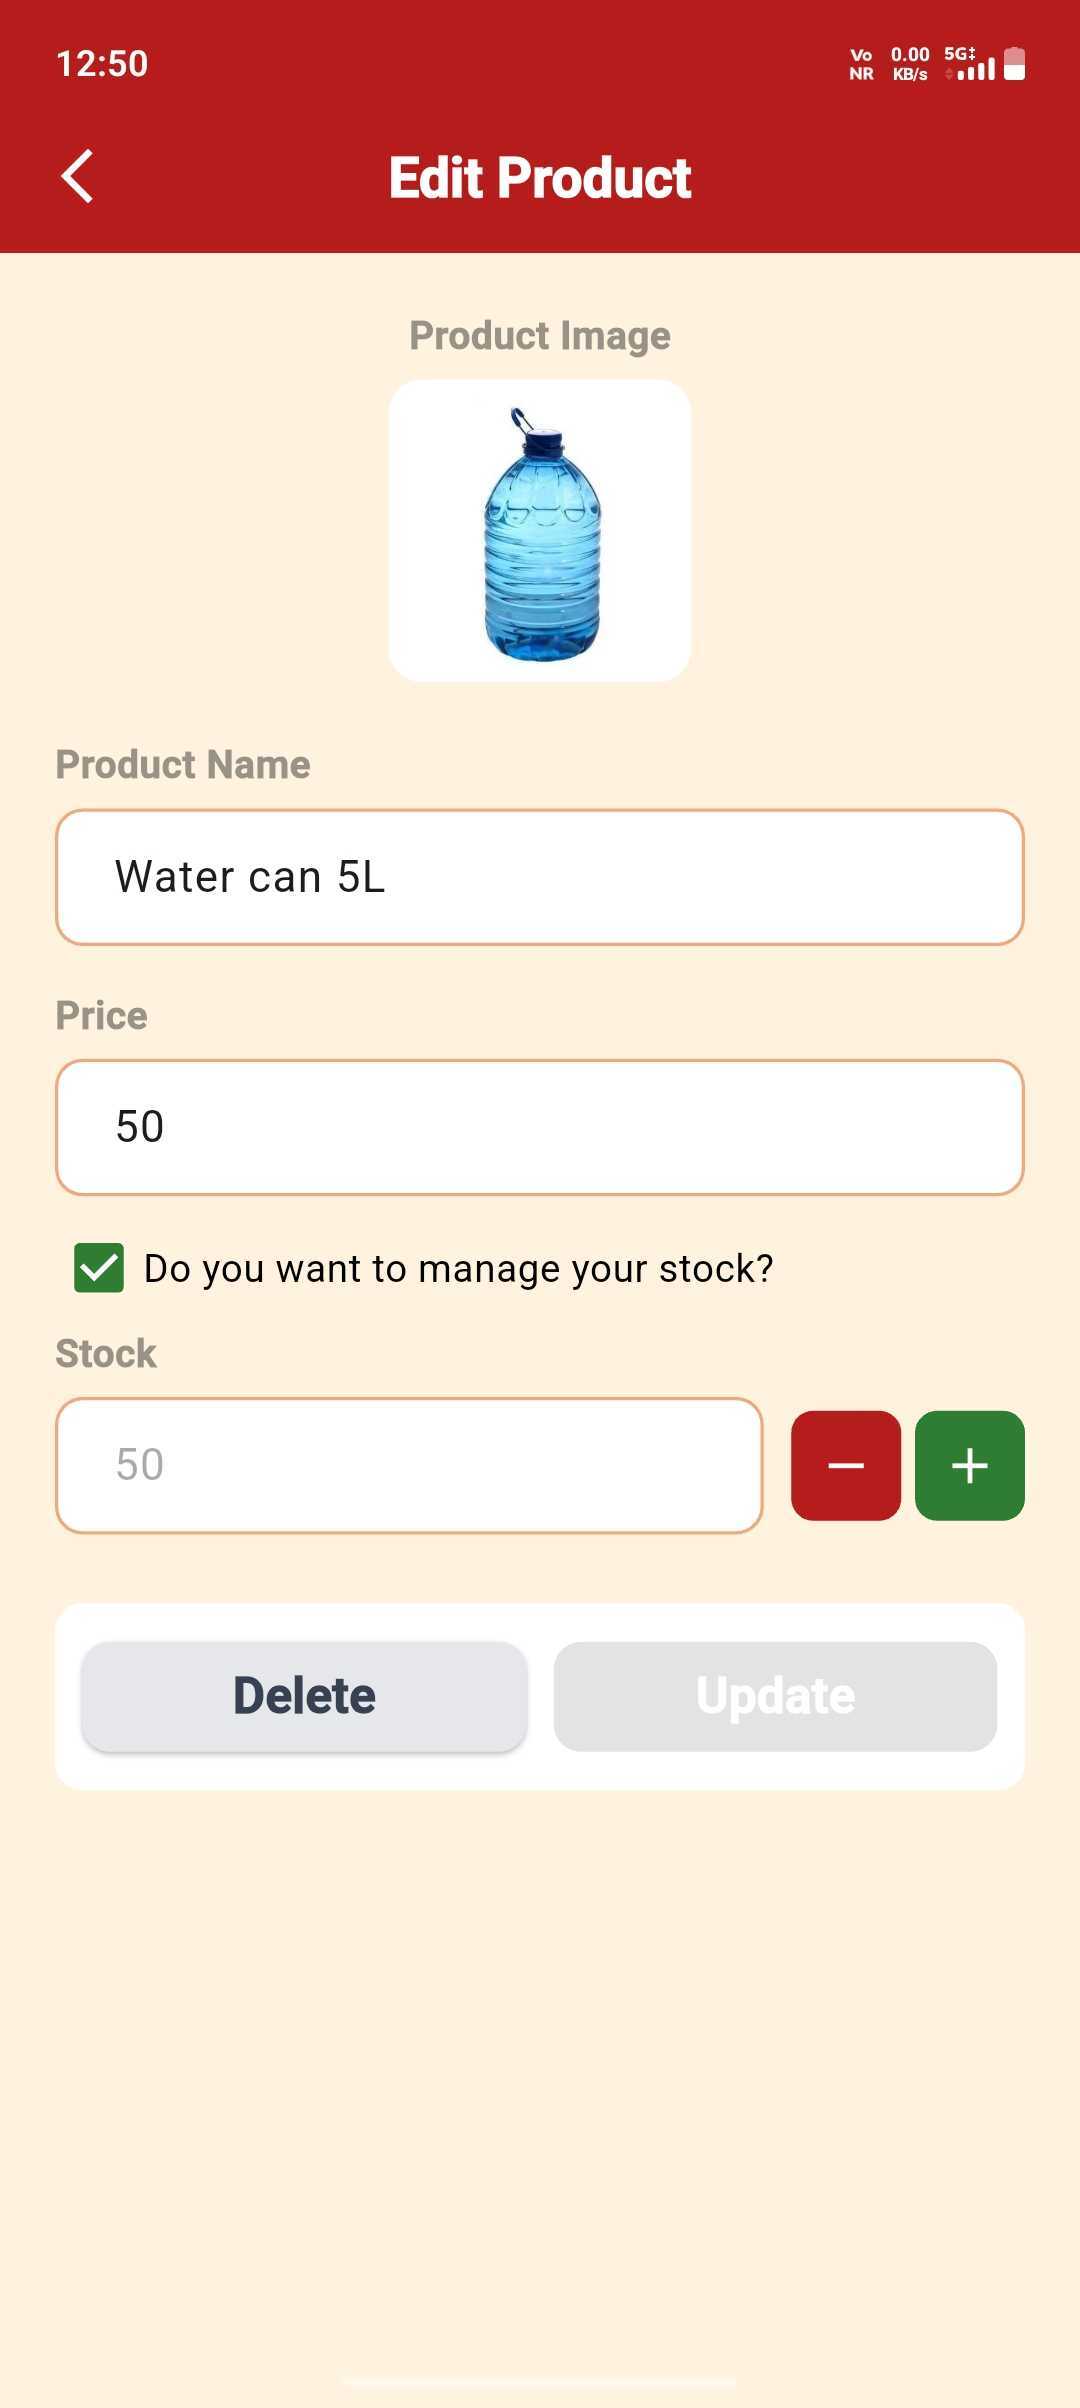
Open the Product
Tap the product card to open Edit Product.
Tap Delete
On the Edit Product screen, tap Delete.
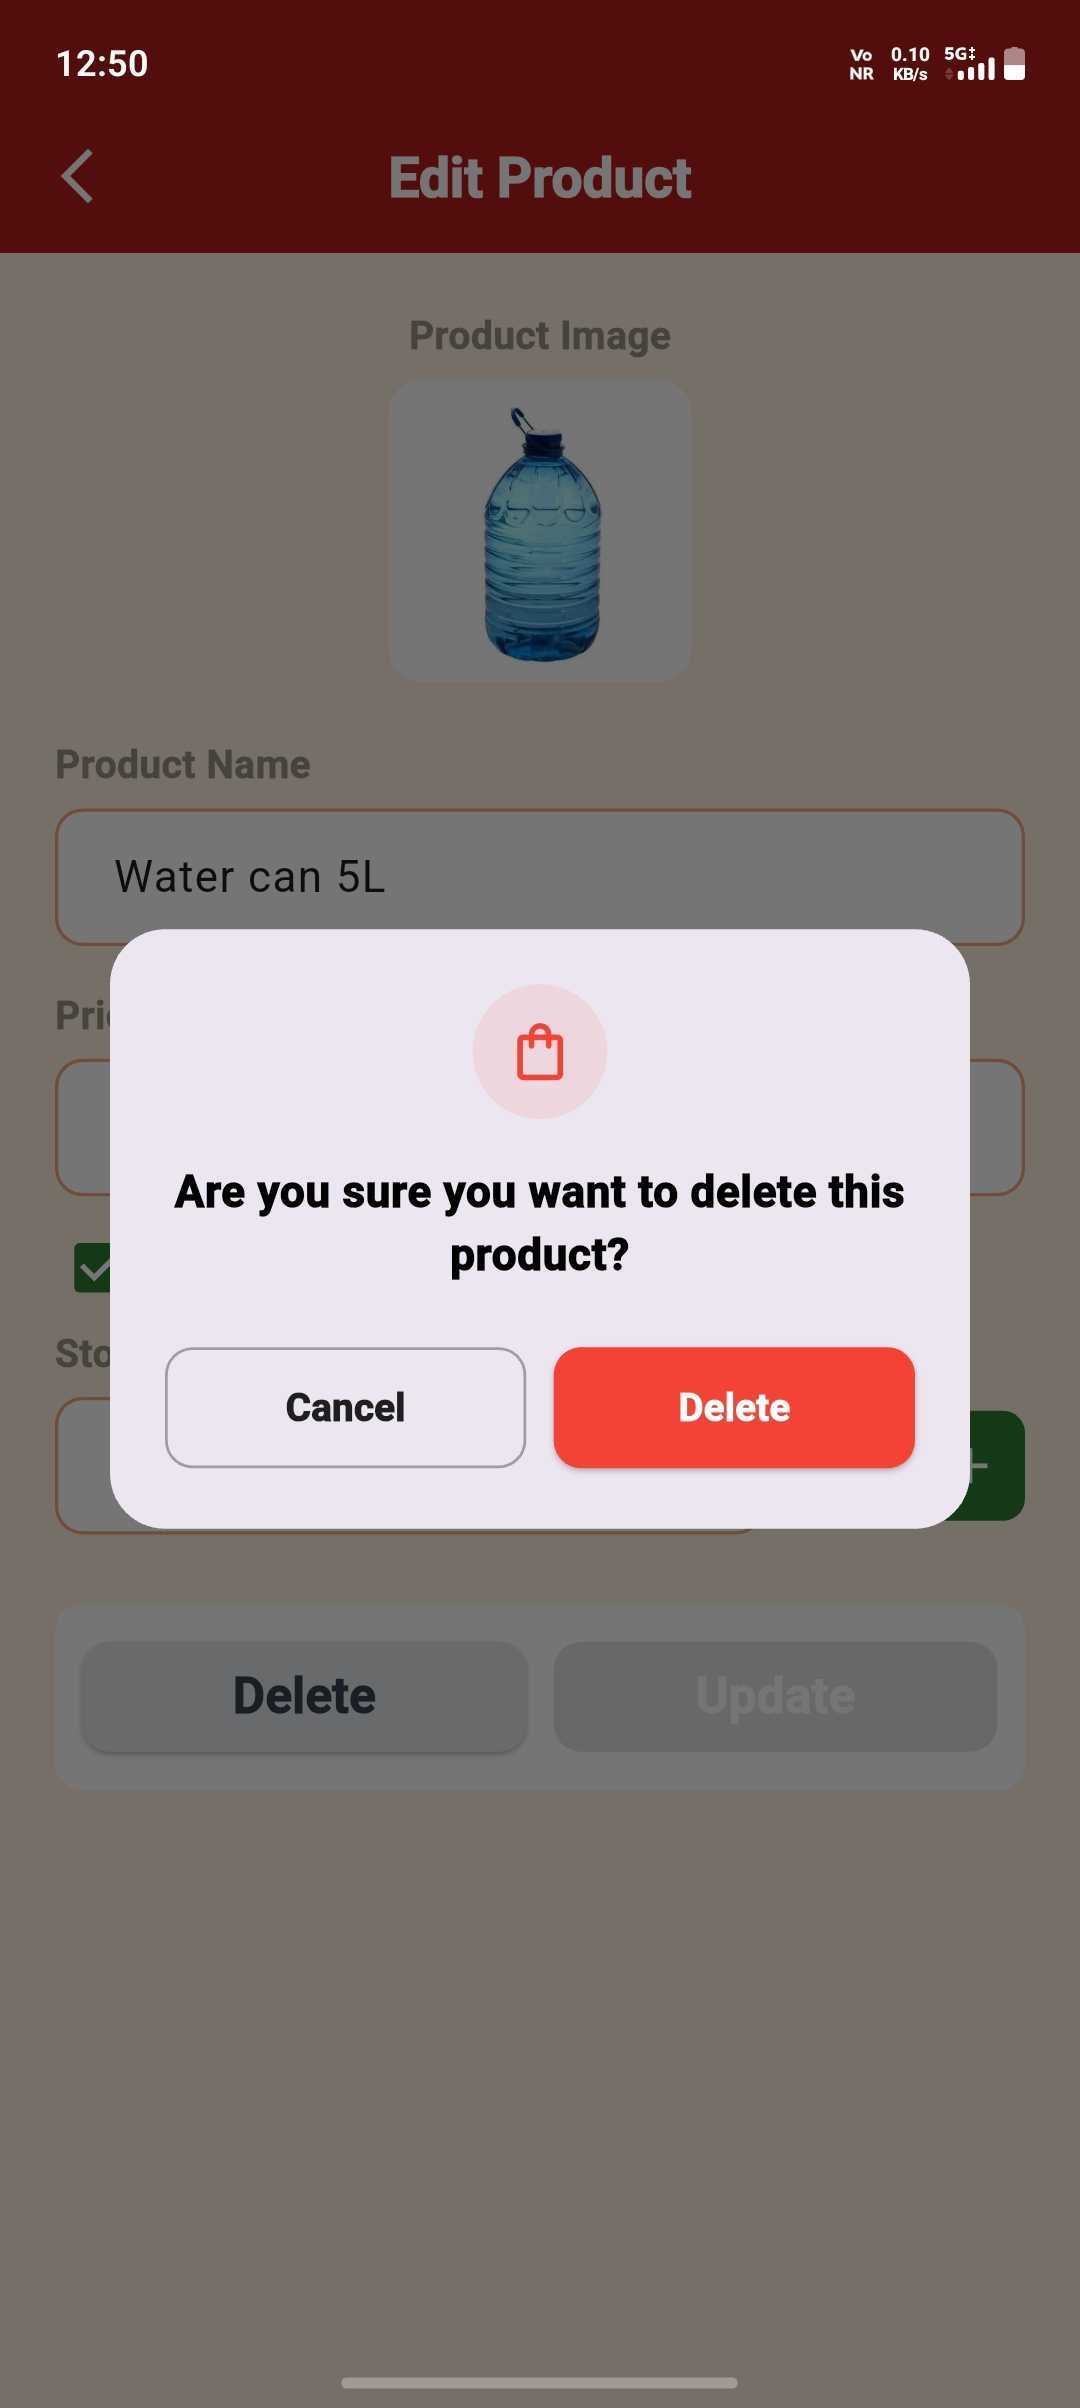
Confirm Deletion
Tap Delete again to confirm — the product is removed.
Add Customer
Add a customer in seconds — ready for their first sale.
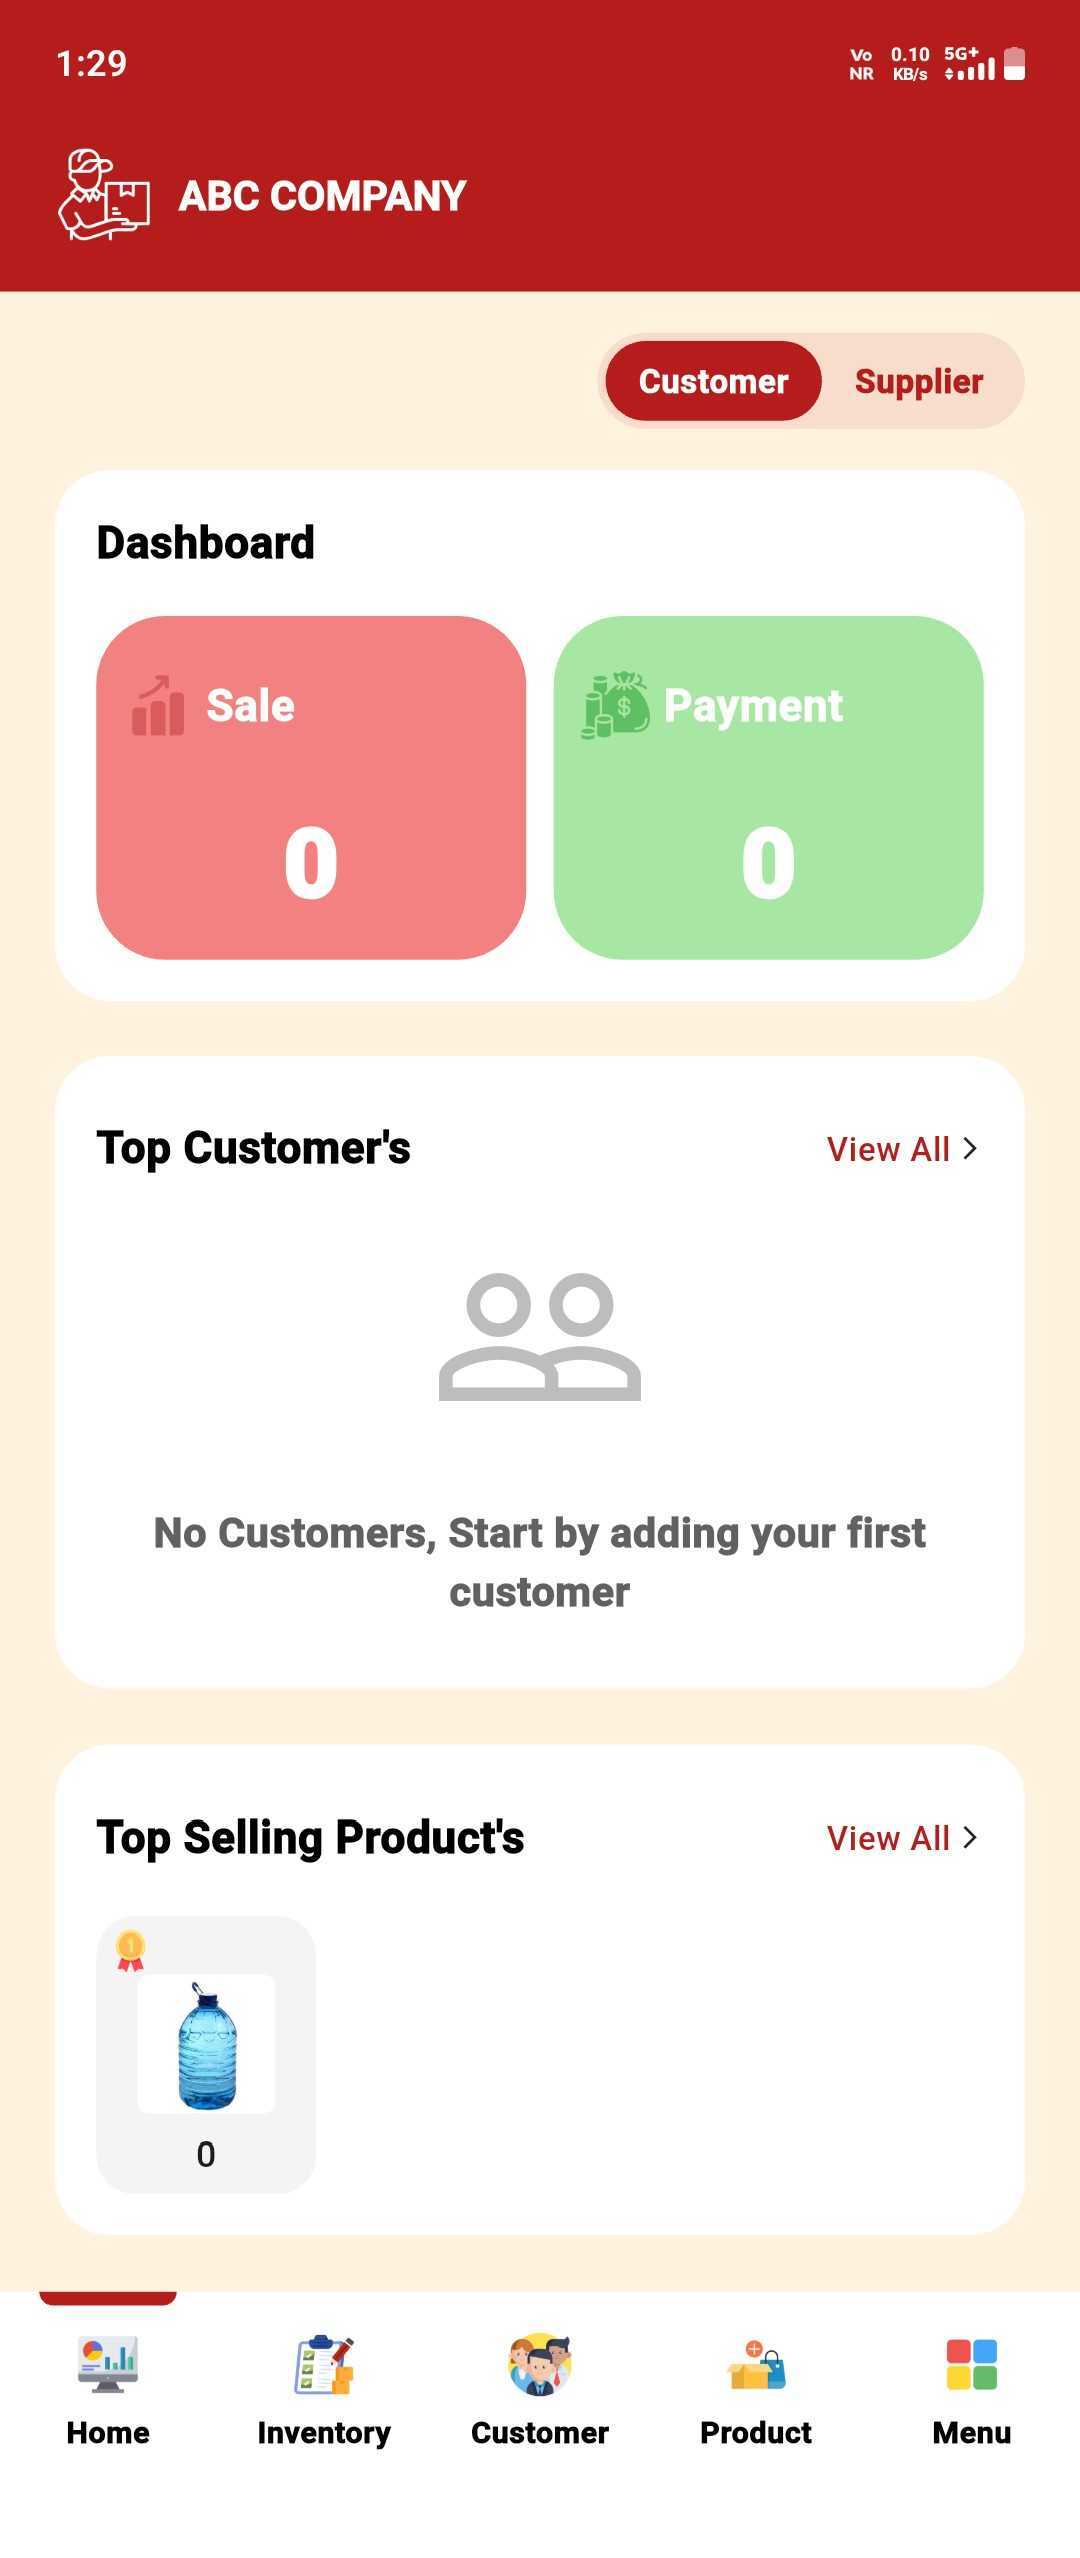
Open the Customer Tab
On the Home dashboard, make sure the Customer toggle is selected.
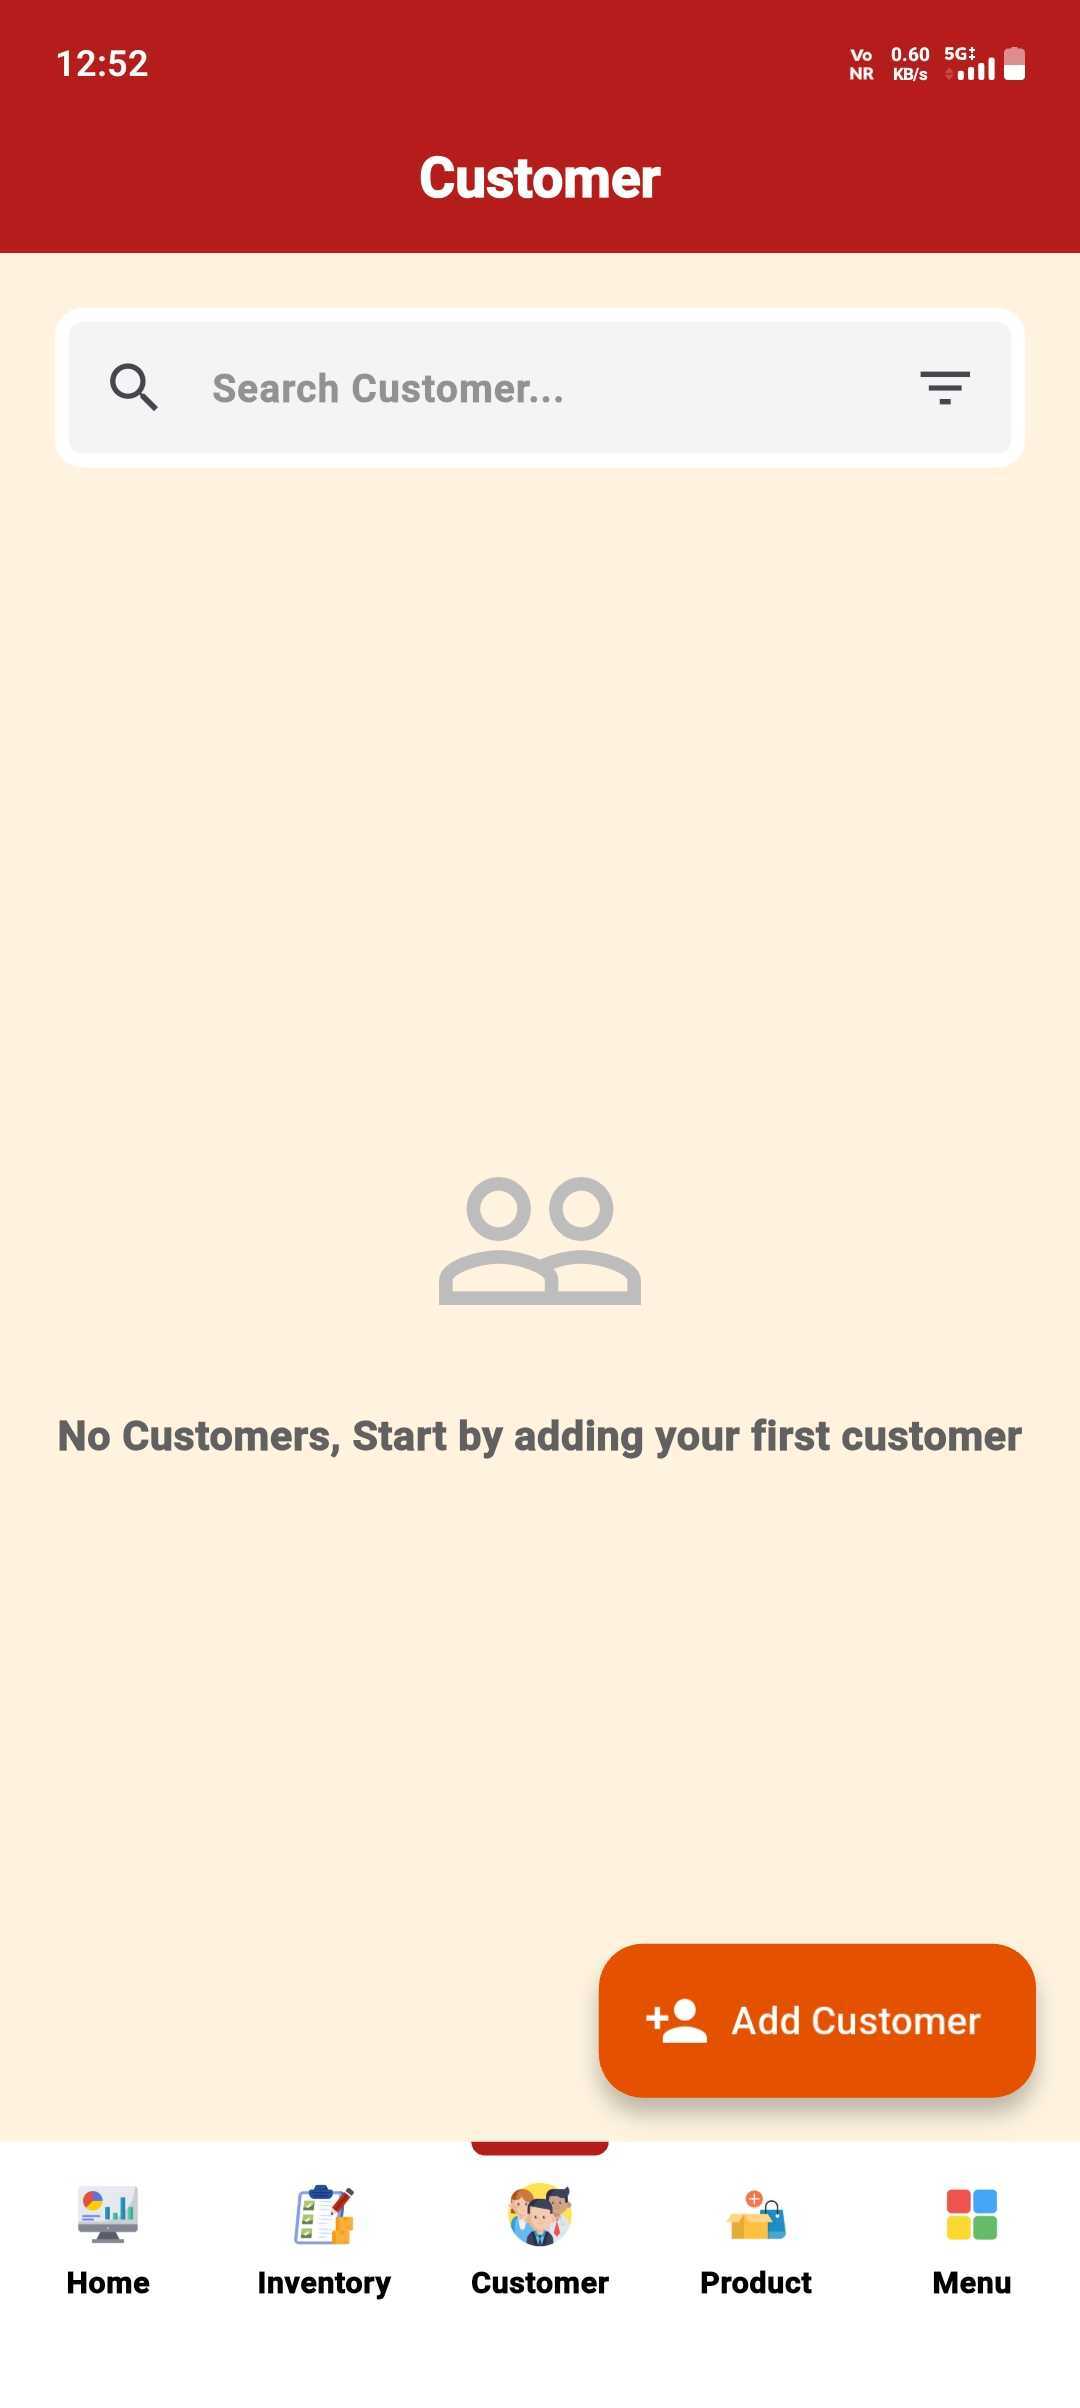
Open Customer List
Tap the Add Customer button.
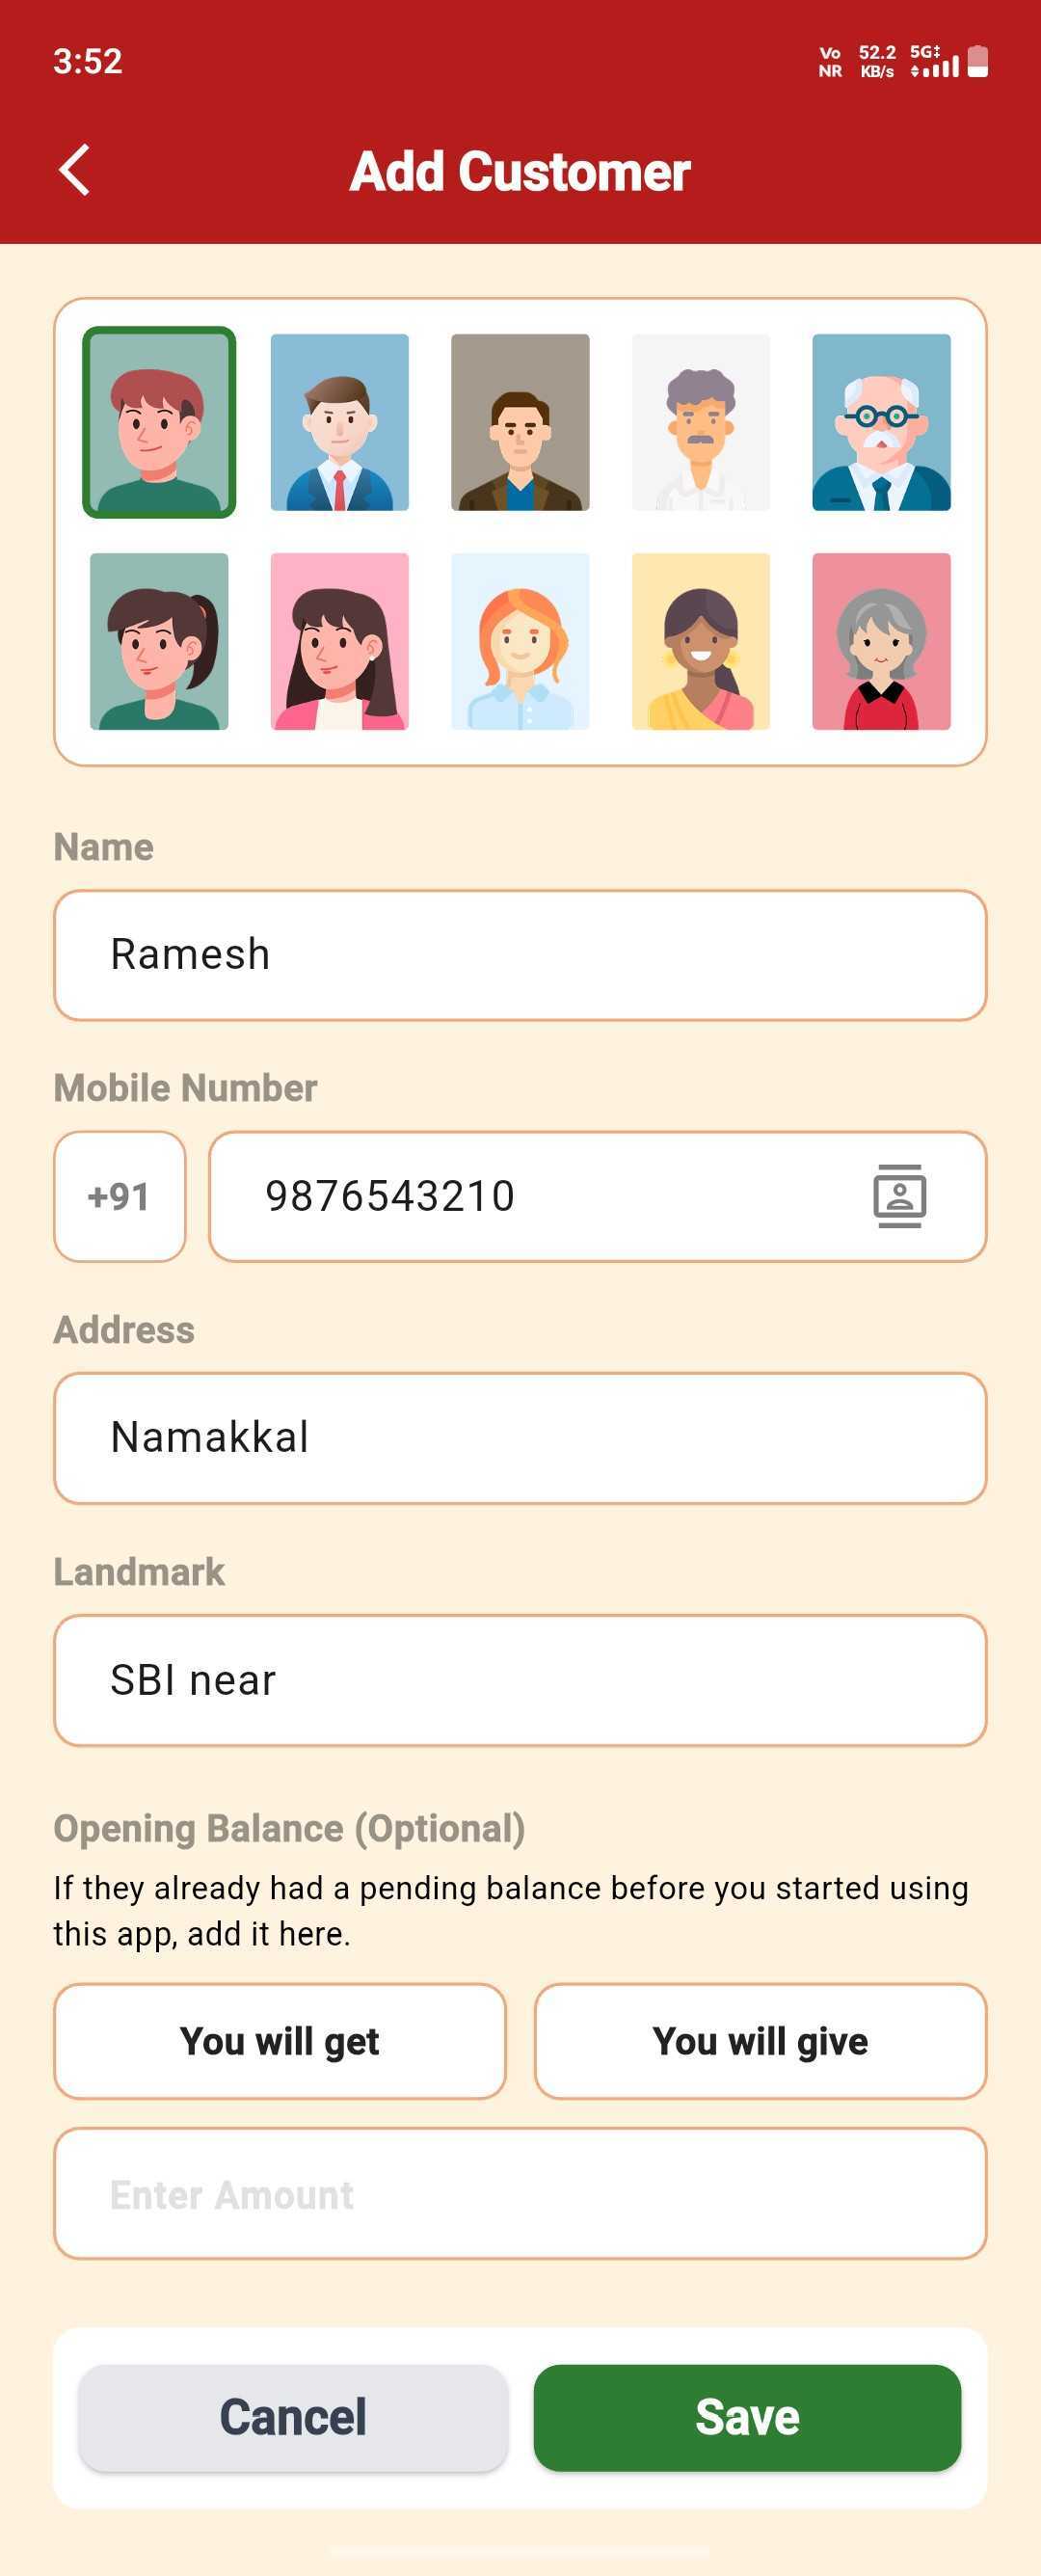
Add Their Details
Pick an avatar, add Name, Mobile Number, Address & Landmark — you can even add an opening balance right here, then Save.
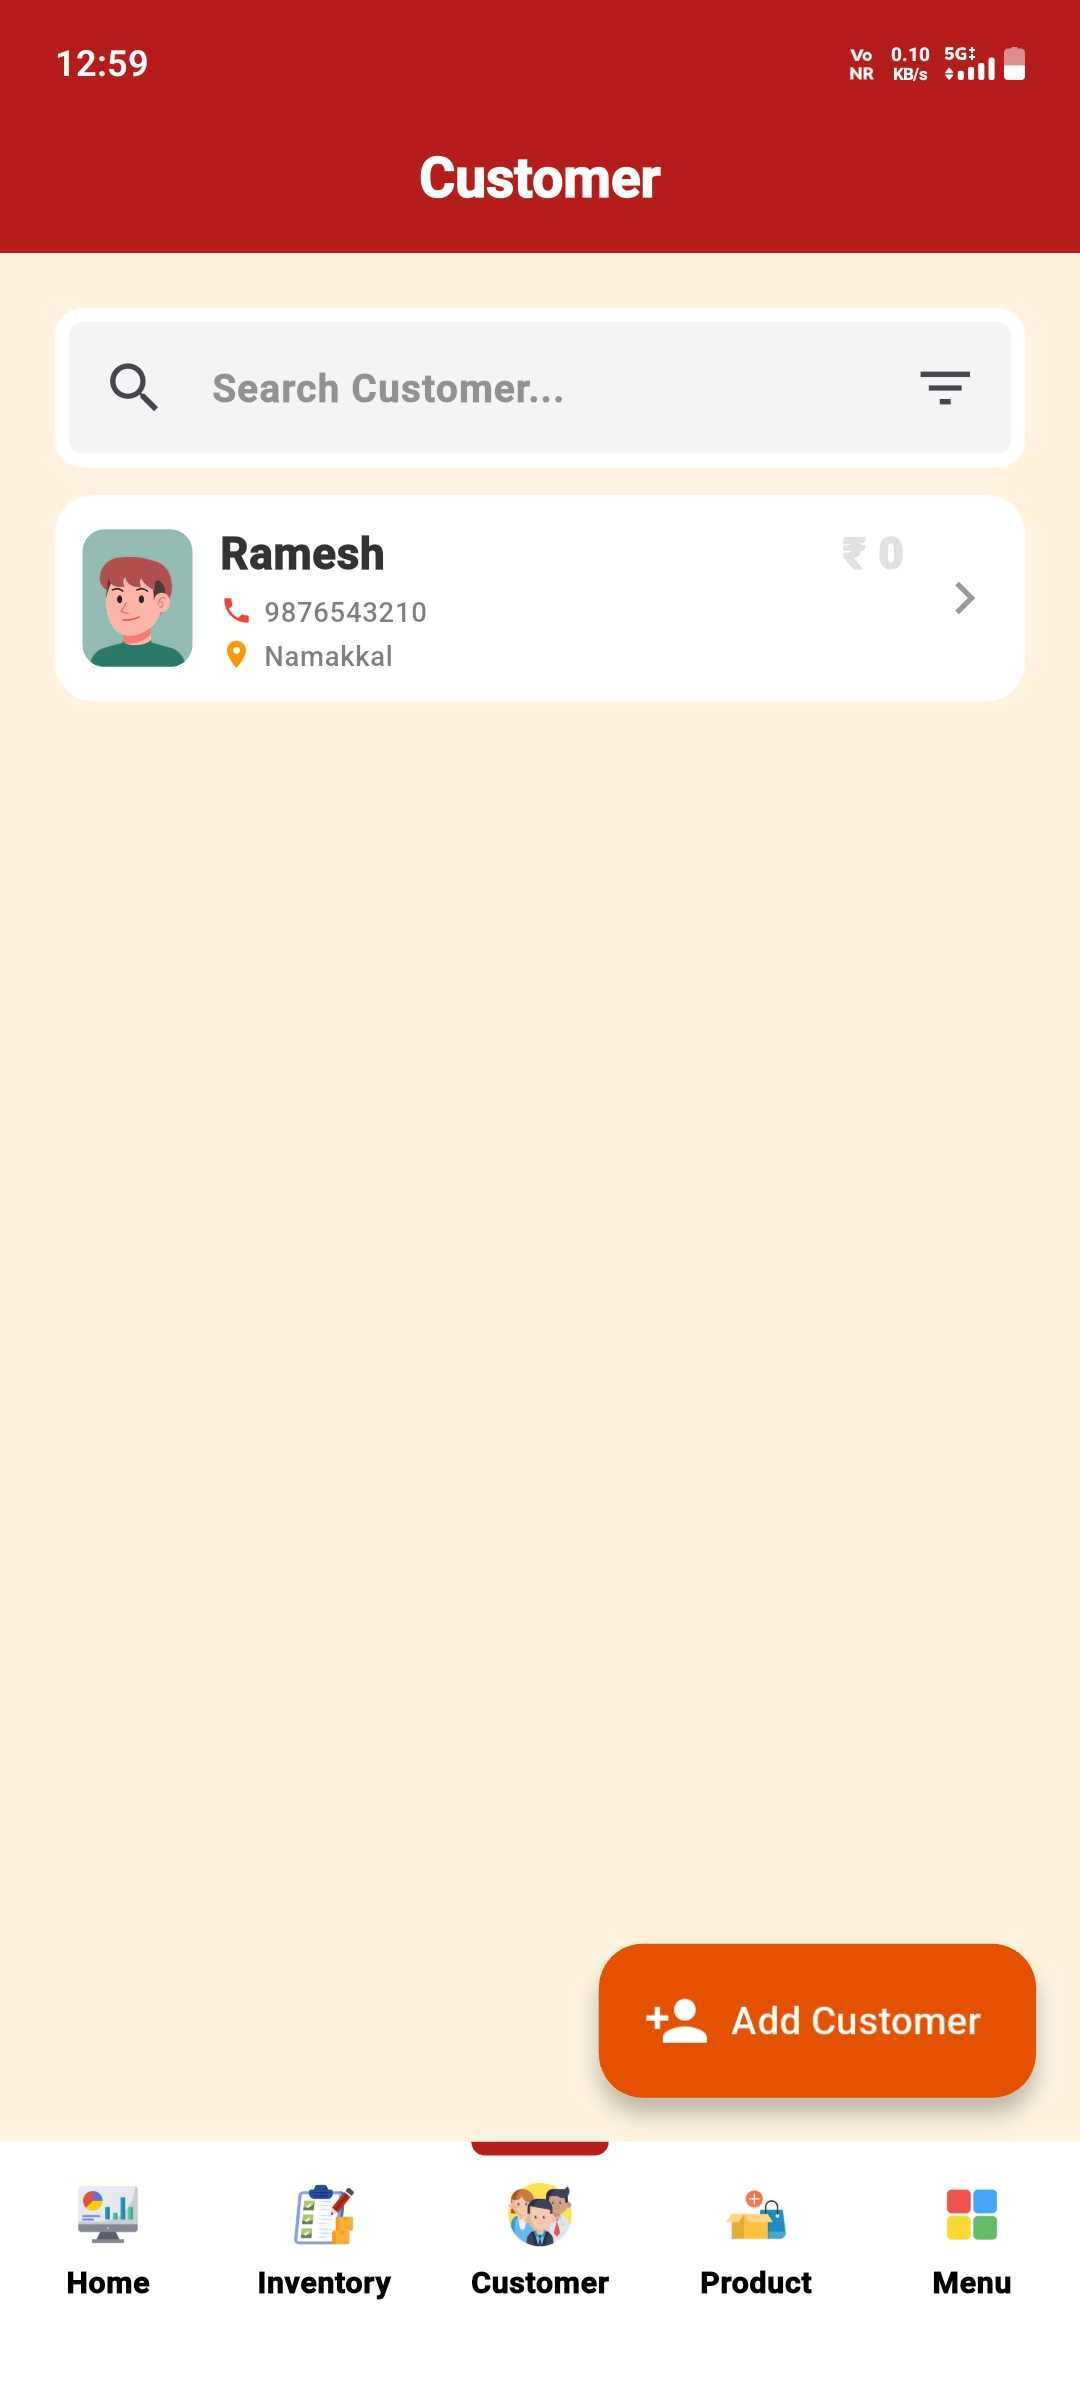
Customer Added
They now show up in your list — tap them to open their ledger.
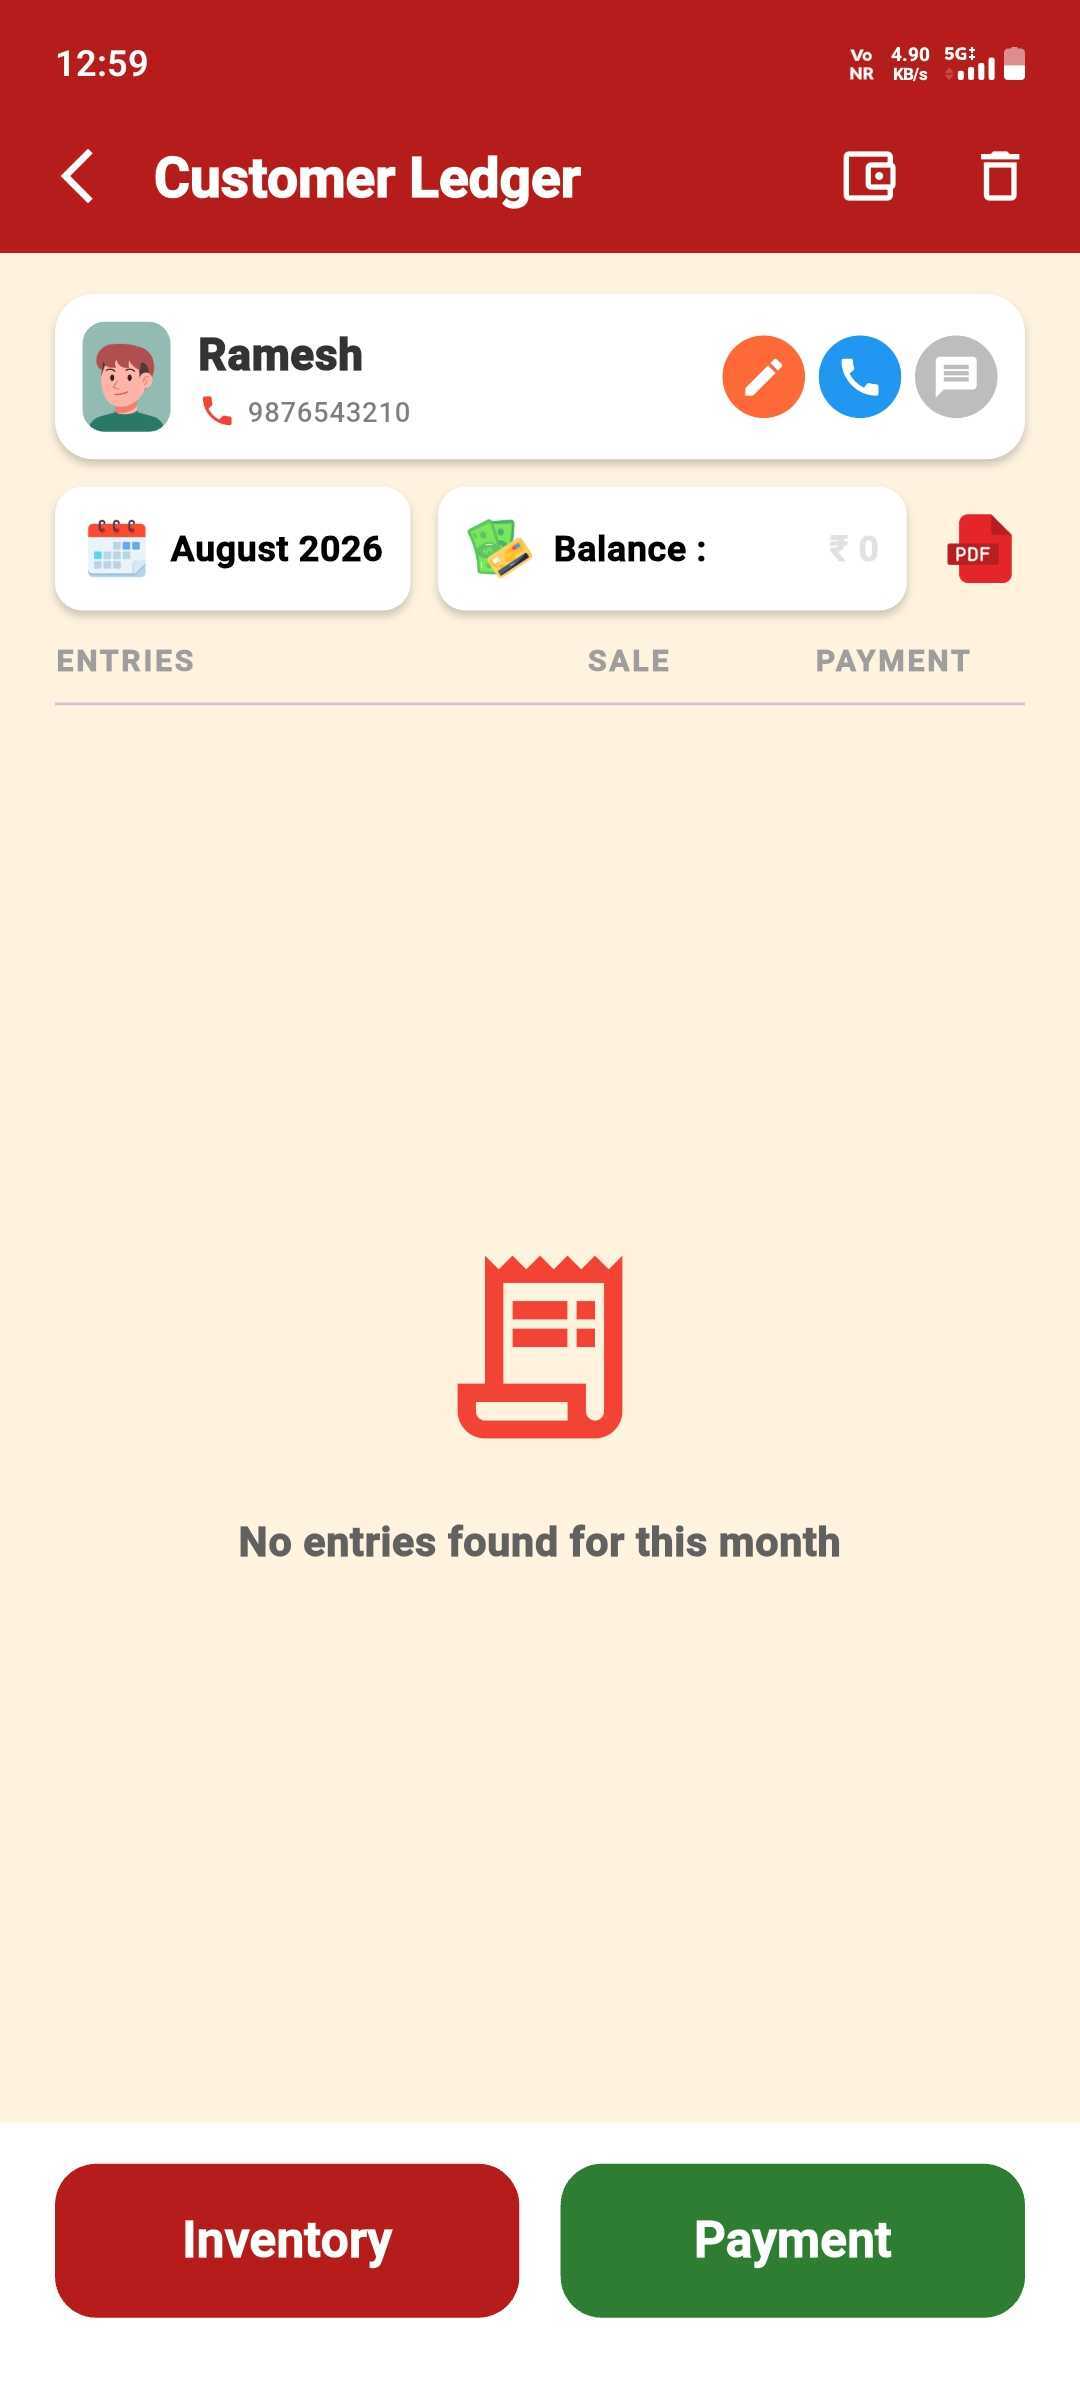
Open Their Ledger
Ready for a Sale, a Payment, or a PDF/delete from the header.
Delete a Customer
Only a fully settled customer can be deleted.
If the customer still has a due balance, deletion is blocked.
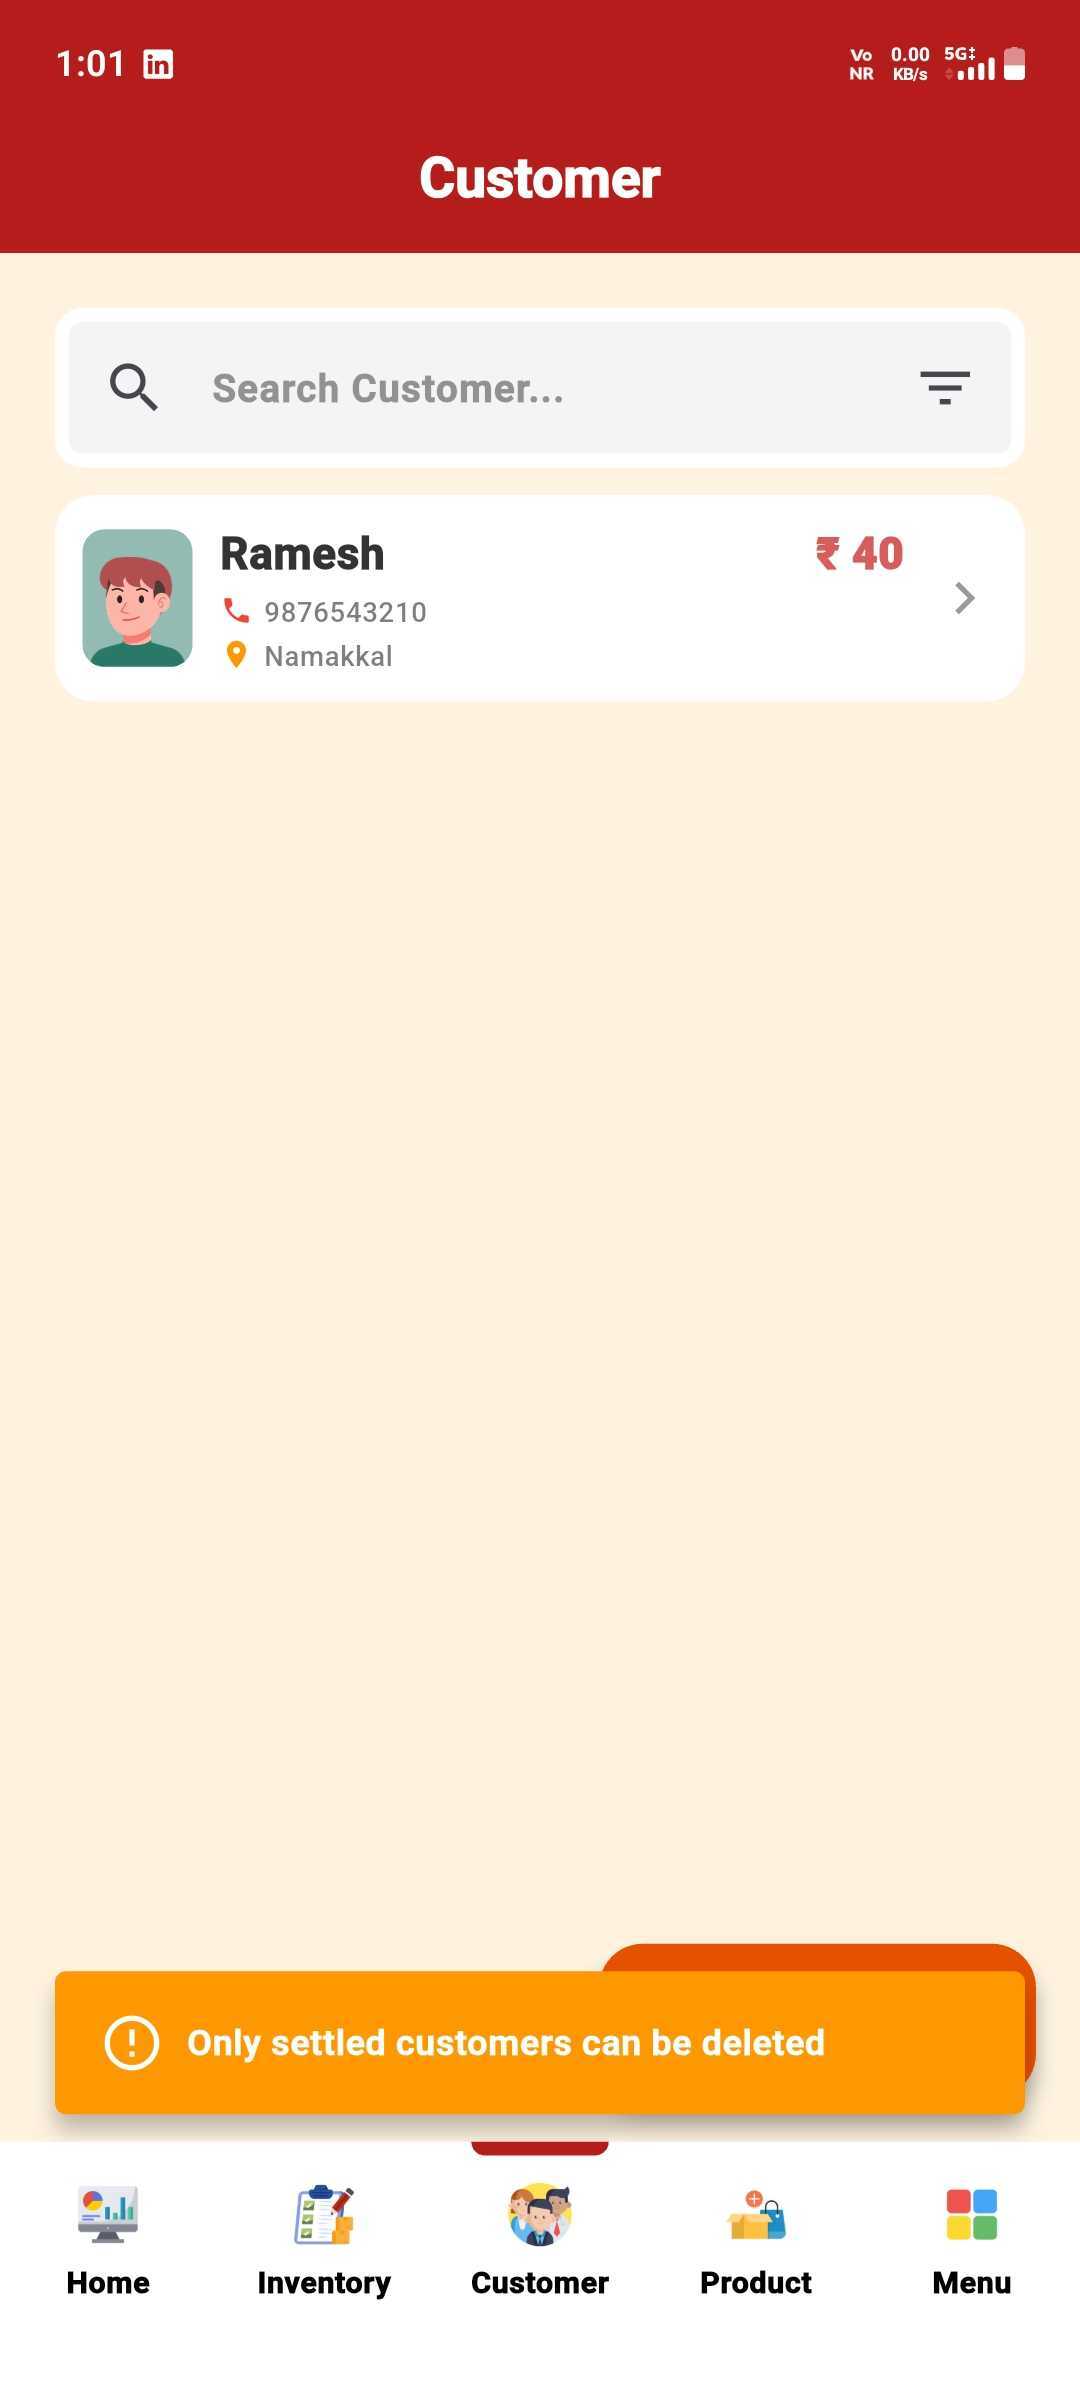
Swipe Shows "Cannot Delete"
With a pending balance, the swipe action is greyed out.
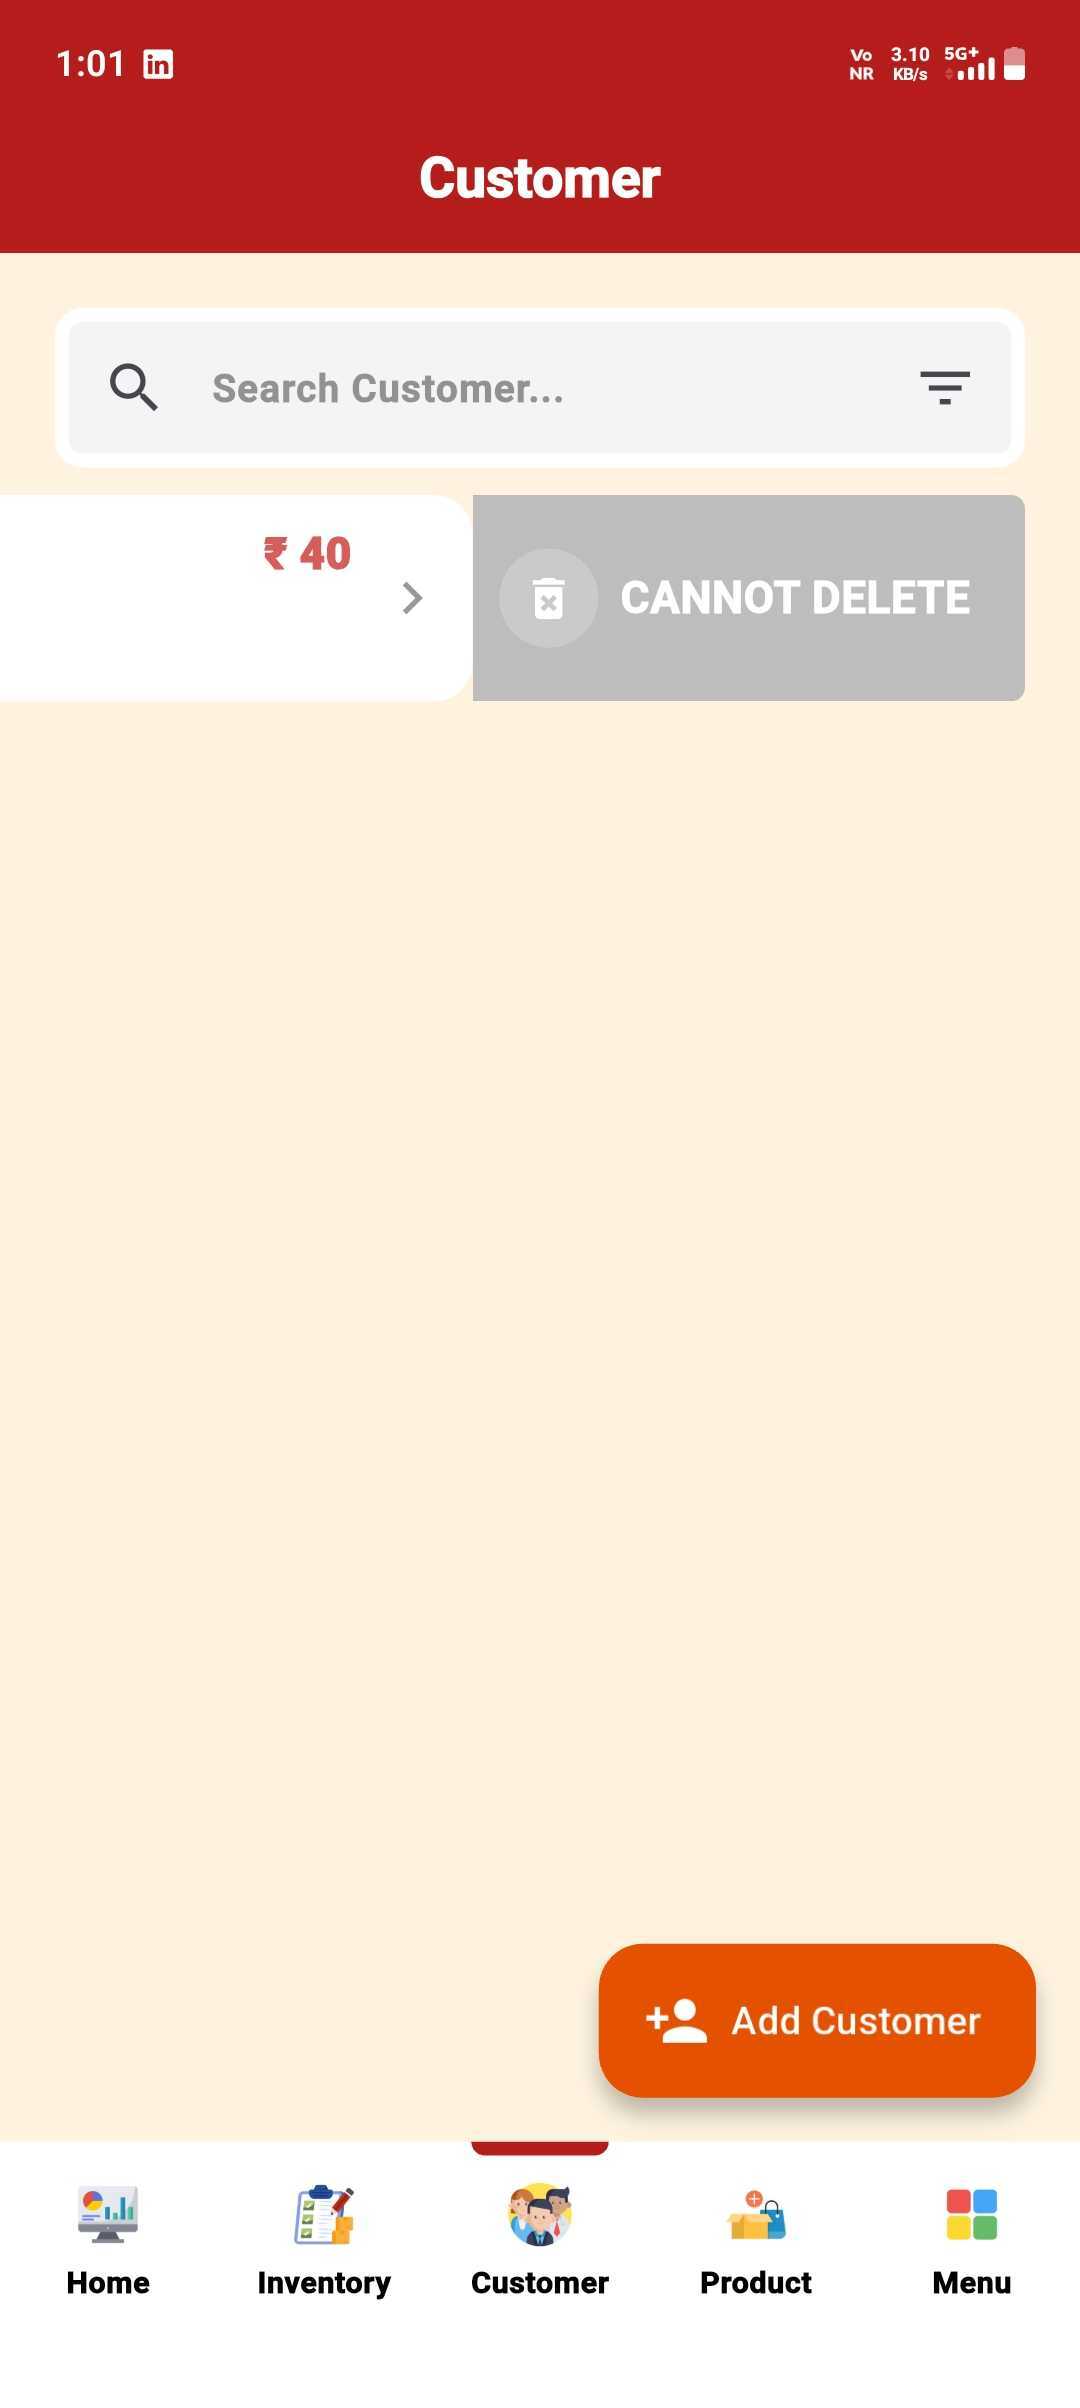
Reason Shown
Tapping it confirms why: "Only settled customers can be deleted."
Once the balance is ₹0, deletion is allowed.
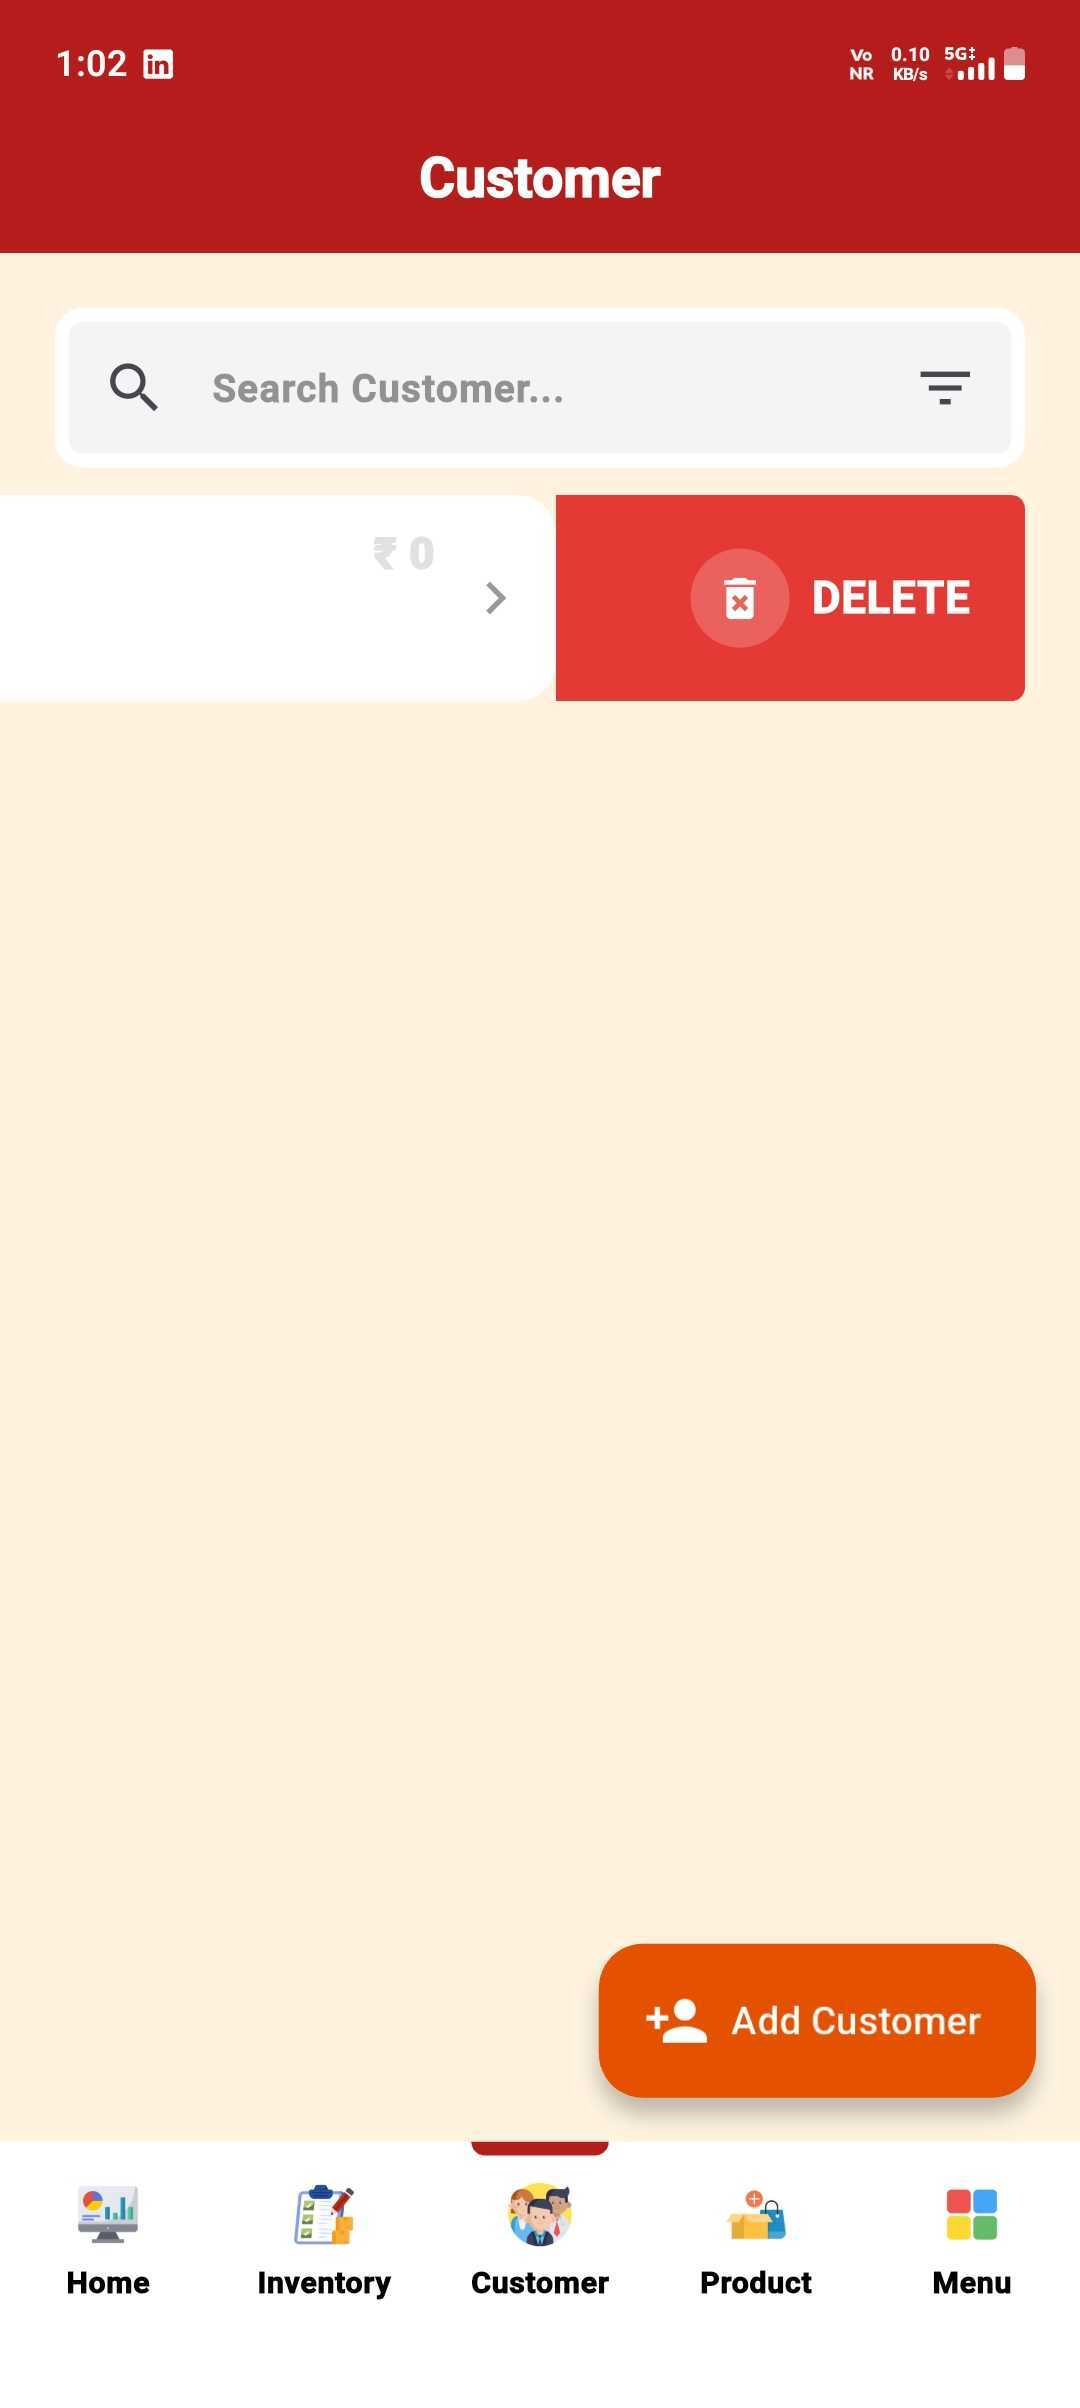
Swipe to Delete
Once the balance is ₹0, the same swipe reveals a working Delete button.
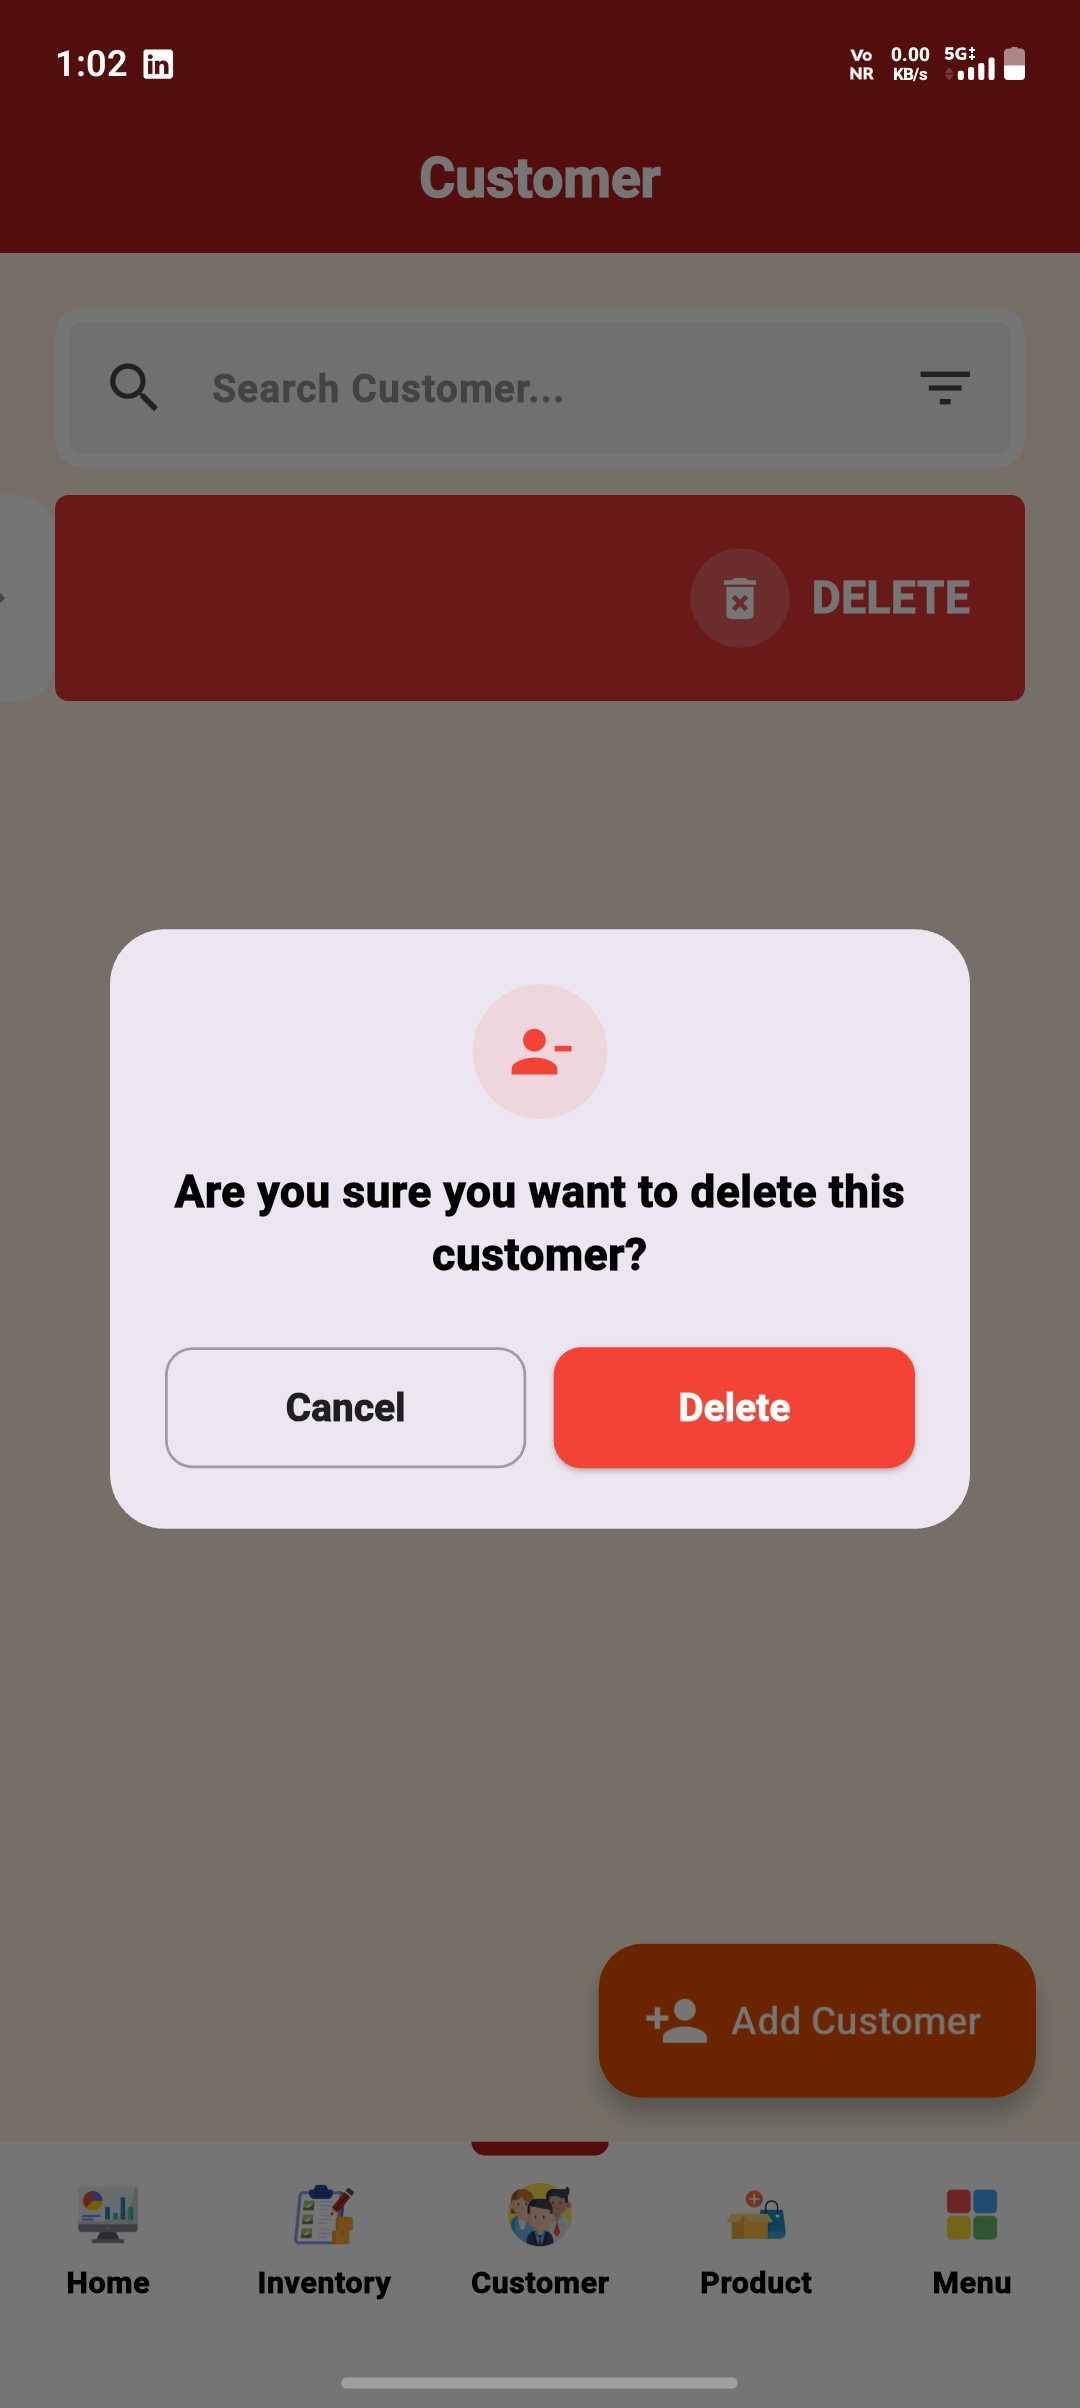
Confirm Deletion
Tap Delete again to confirm — the customer is removed.
Record a Sale for a Customer
Log a sale, share the receipt, and edit it anytime.
Open the Sale Form
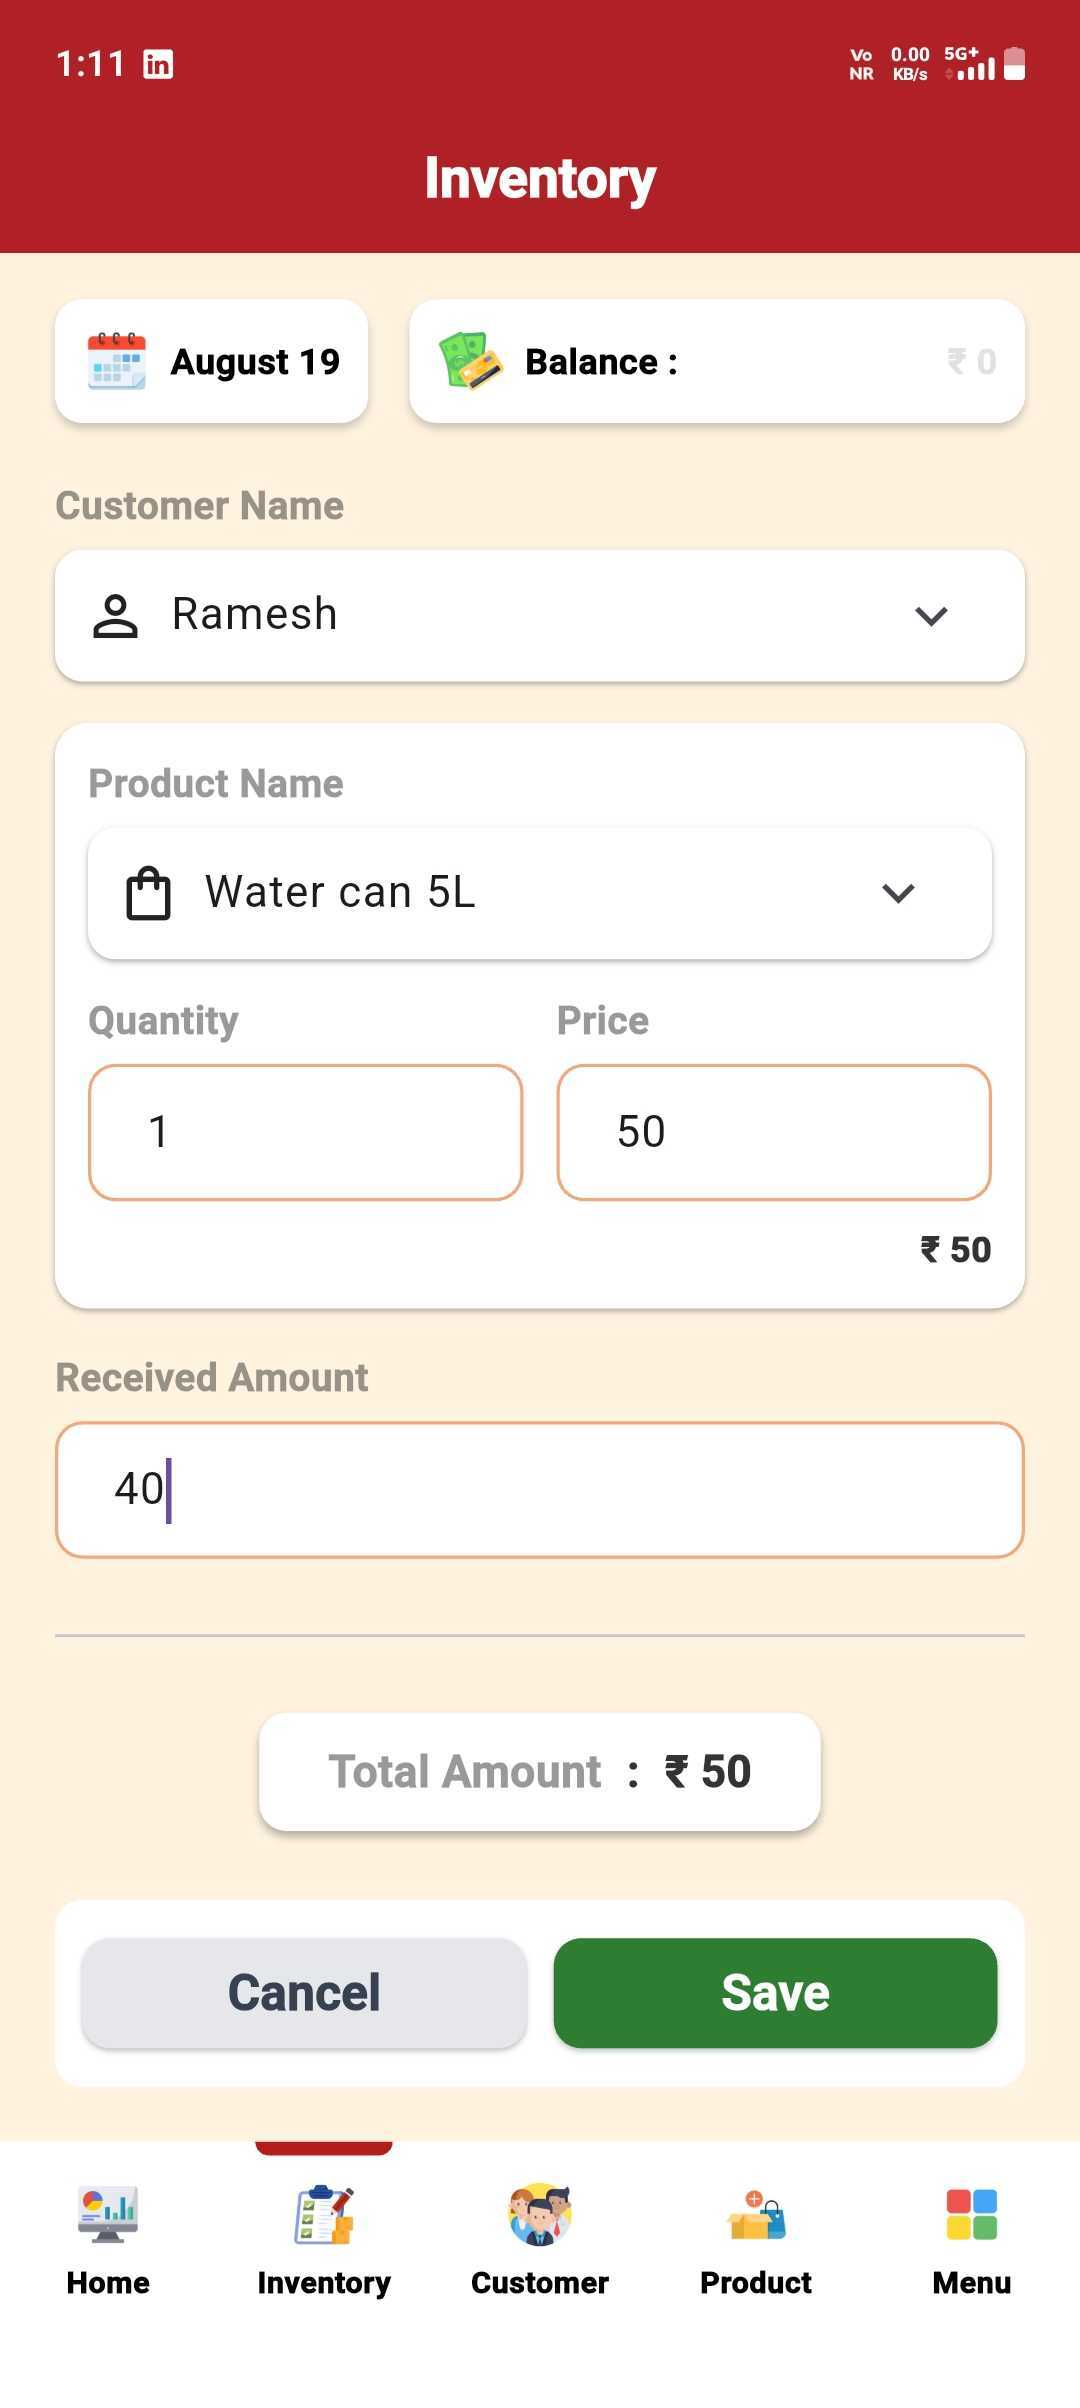
Go to Inventory, pick the Customer & Product.
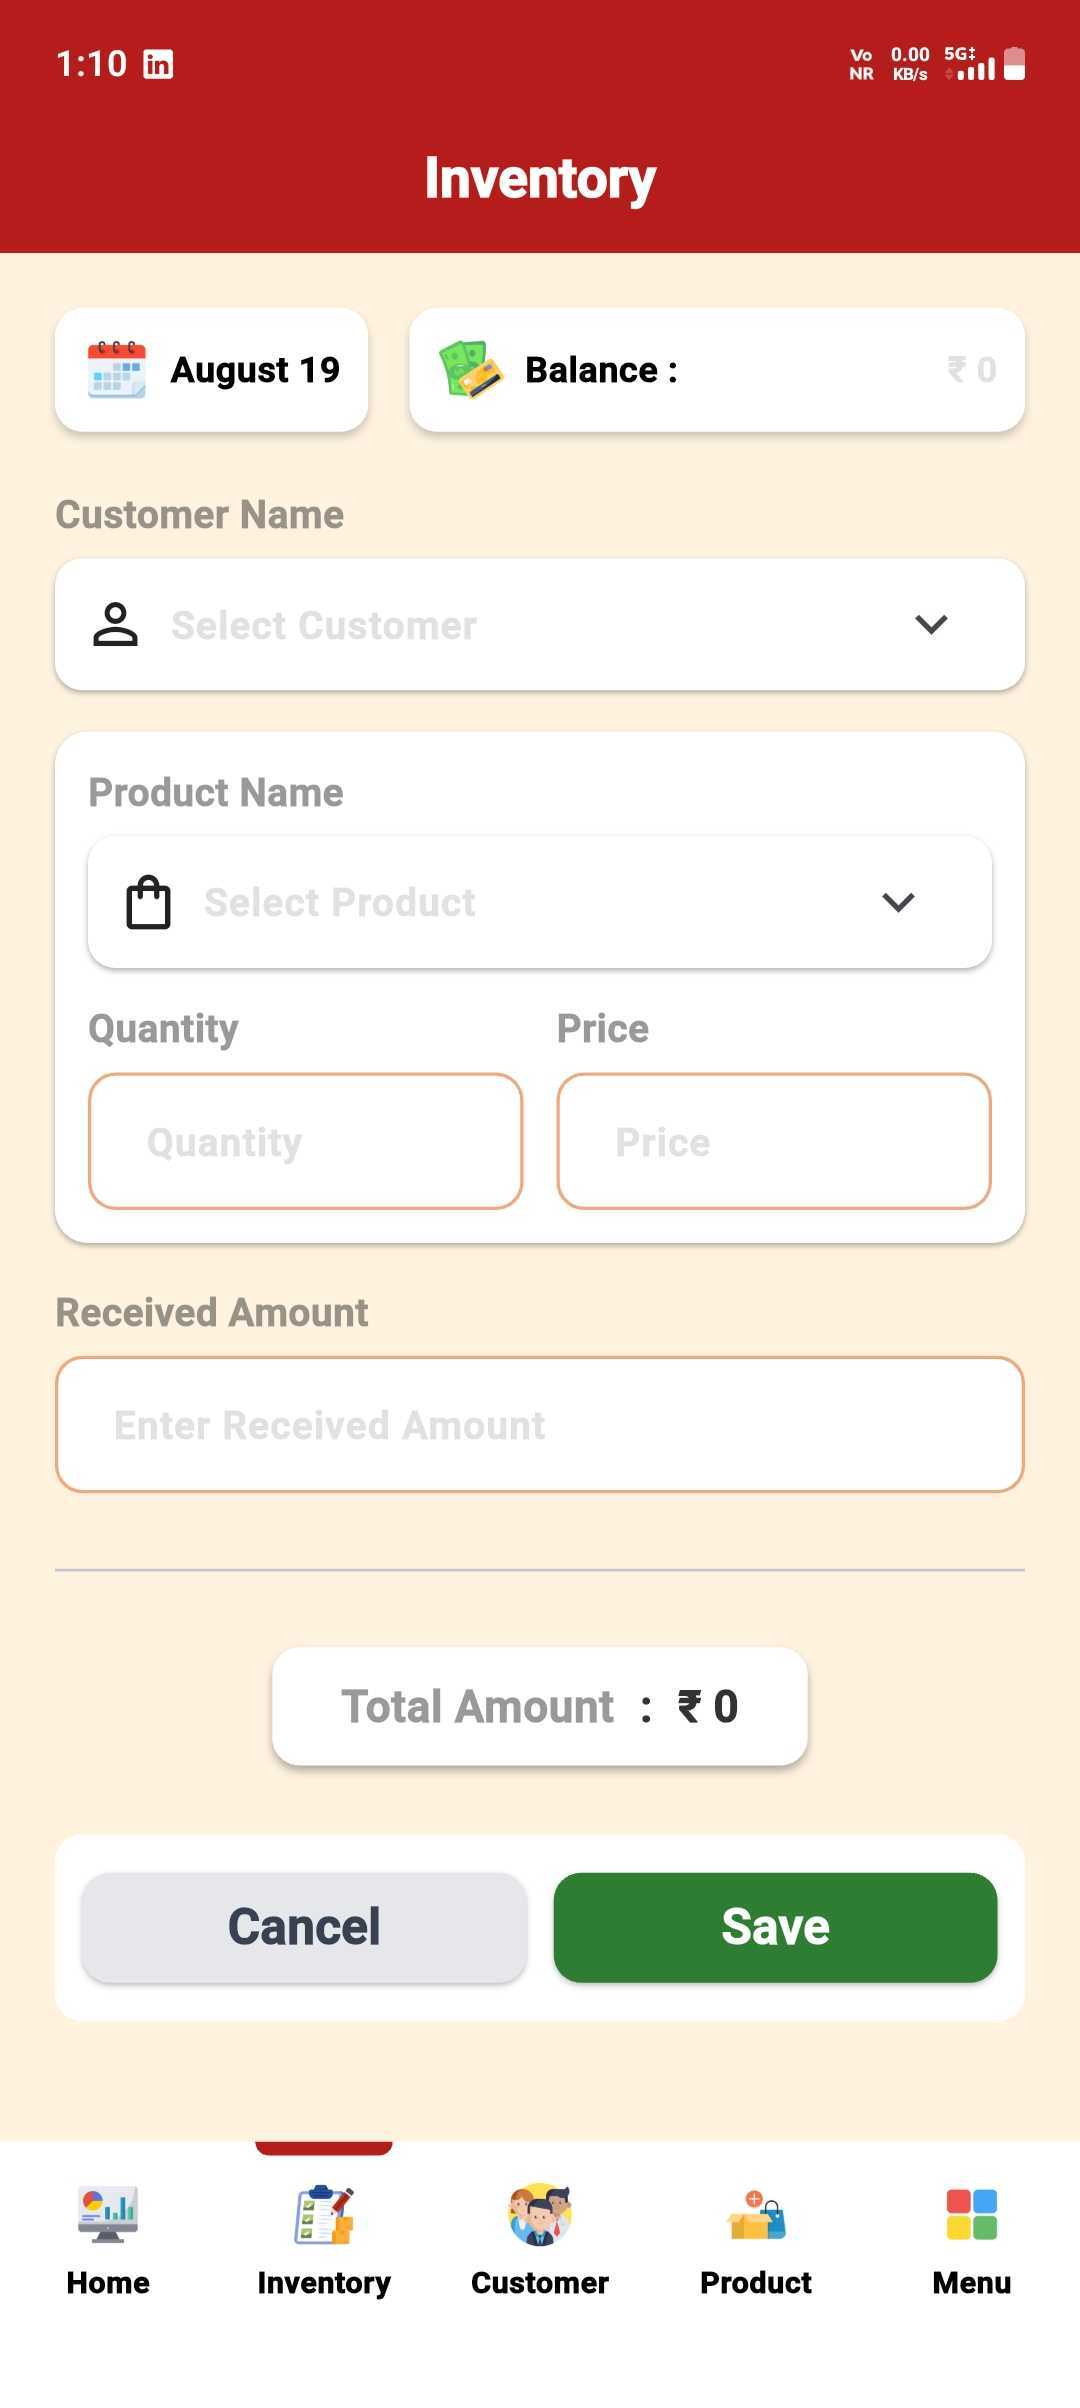
Enter Qty & Amount
Add Quantity, Price & what they paid — total updates live.
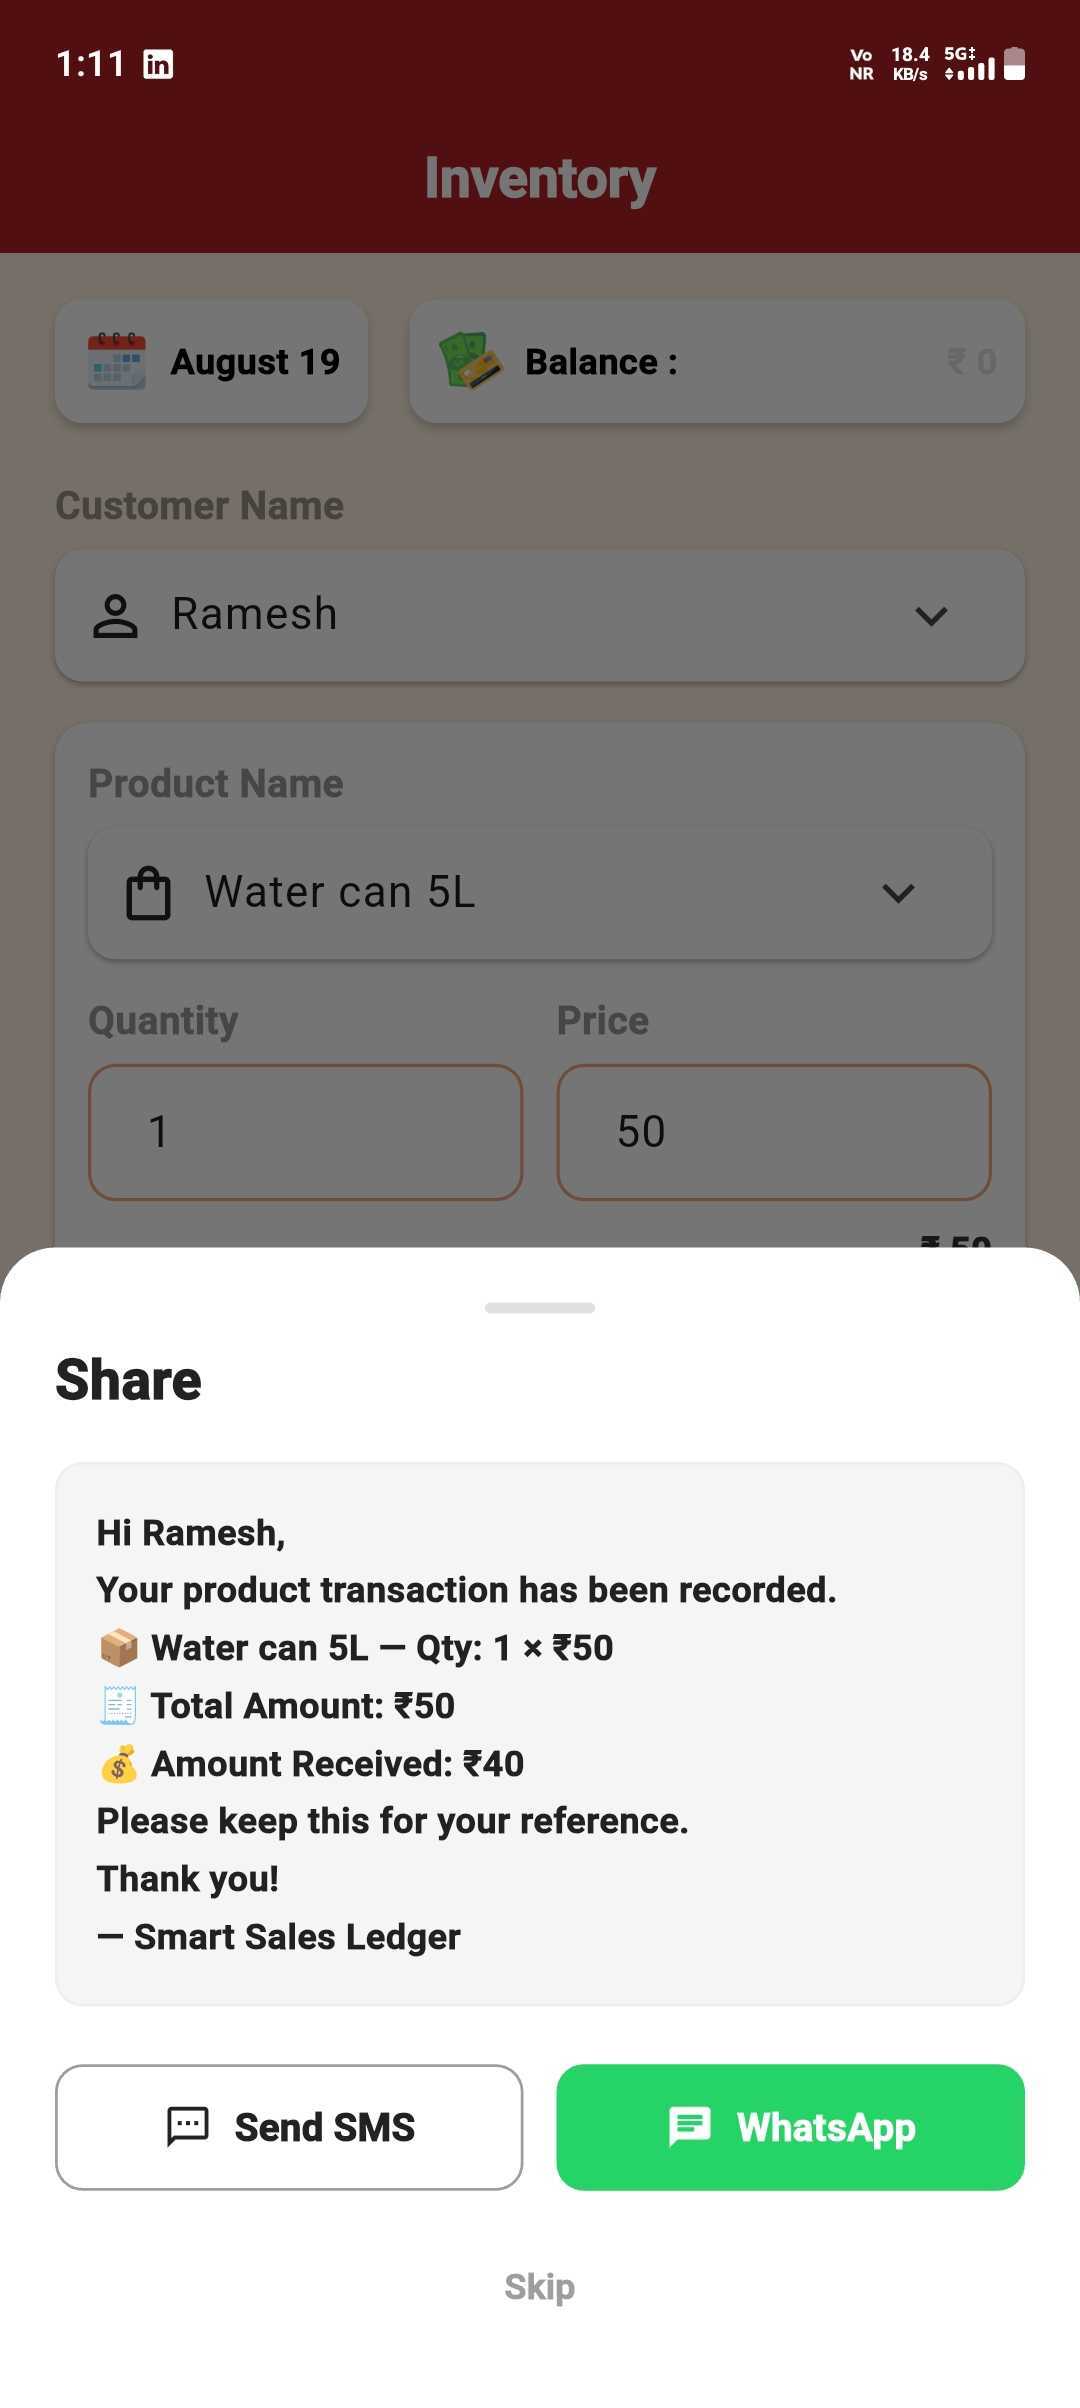
Share the Receipt
Save it, then send a receipt via SMS or WhatsApp — or skip.
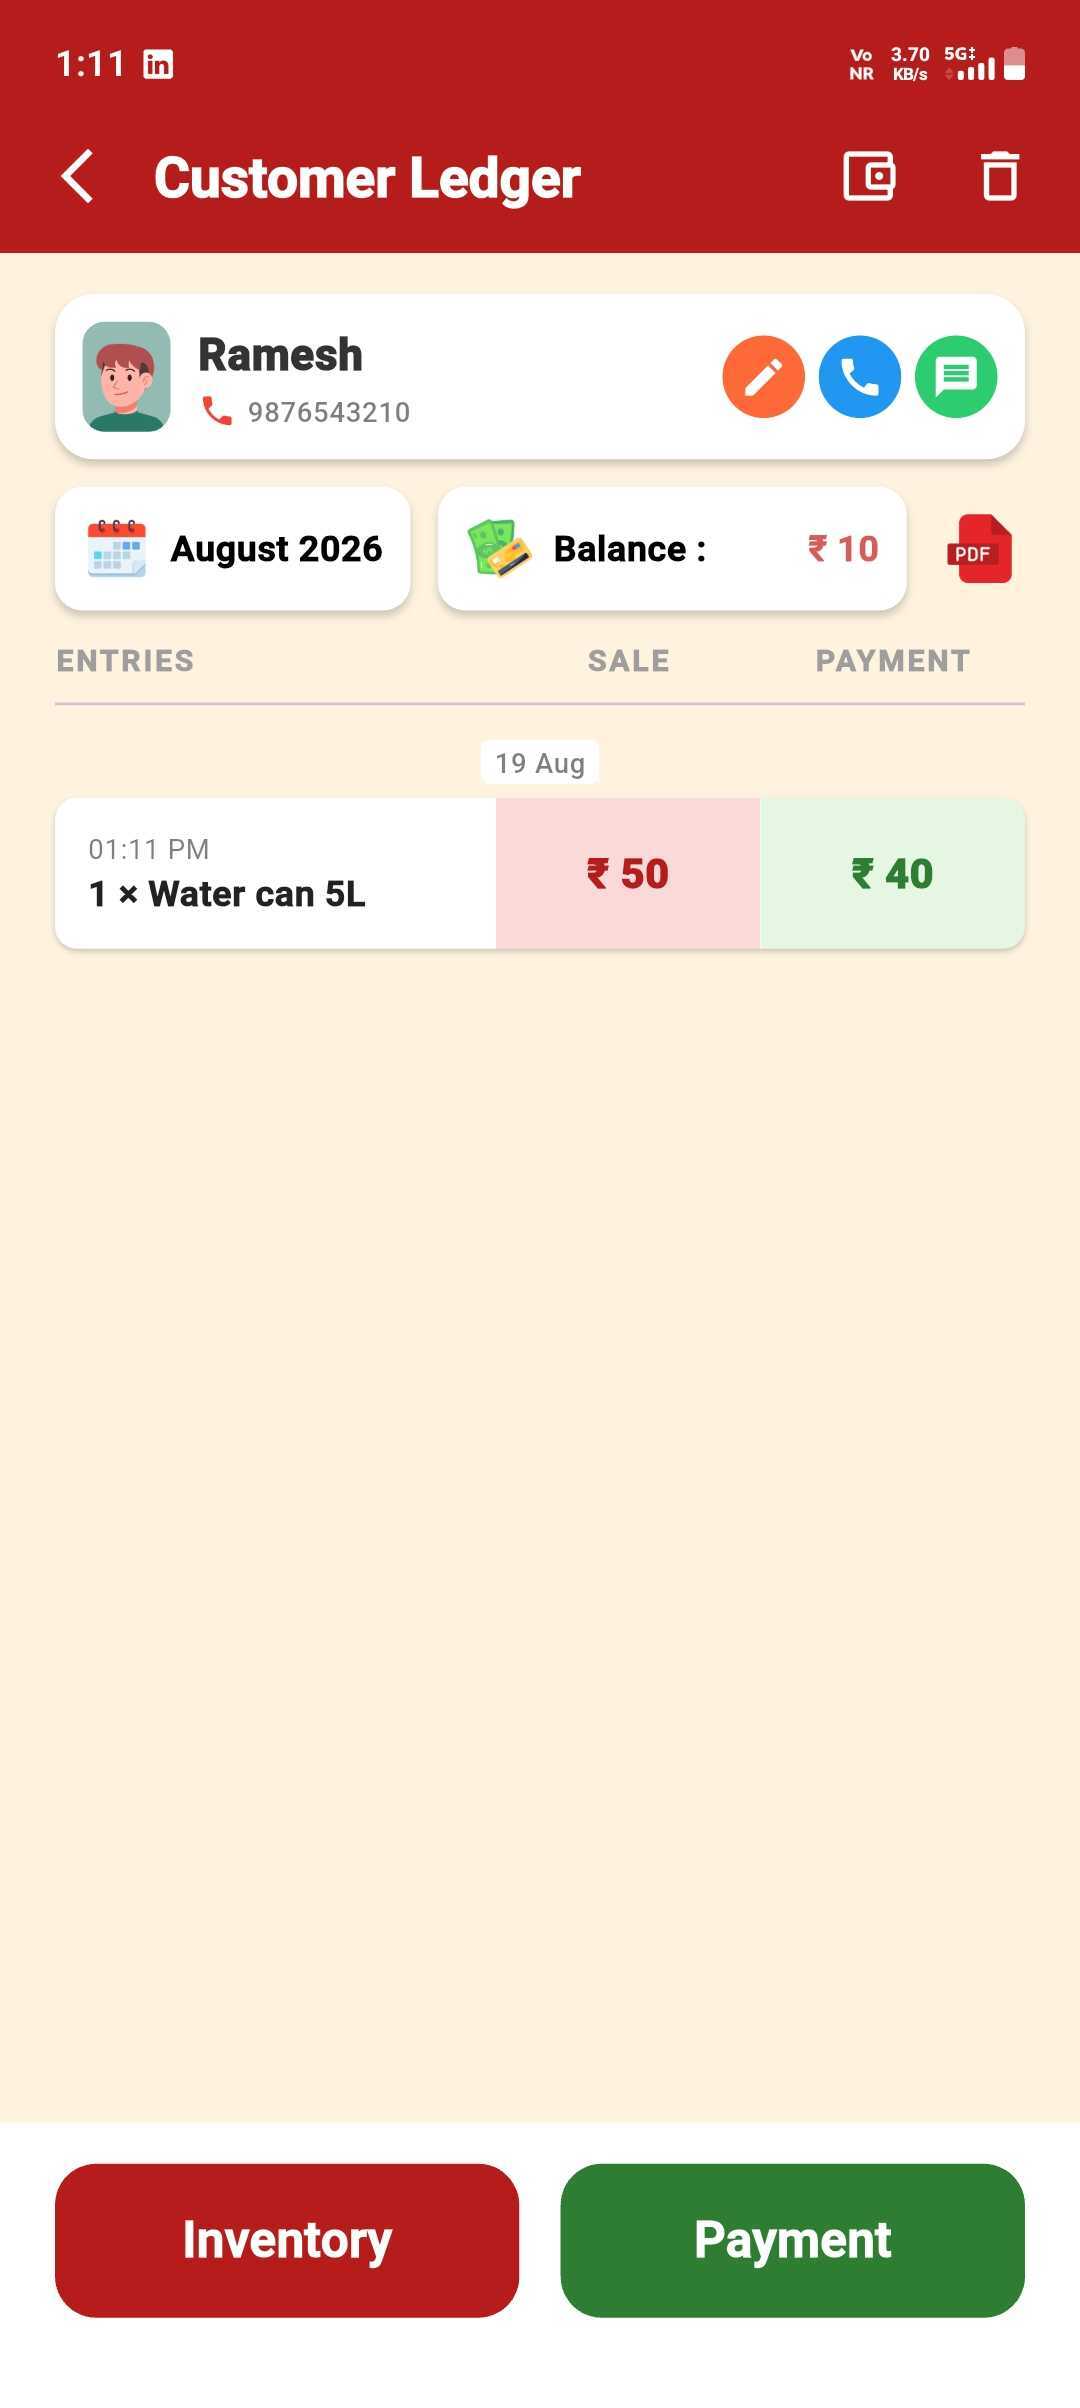
It's in the Ledger
Sale & payment are both logged, balance updates instantly.
Tap to Review
Tap any entry to see its full sale & payment details.
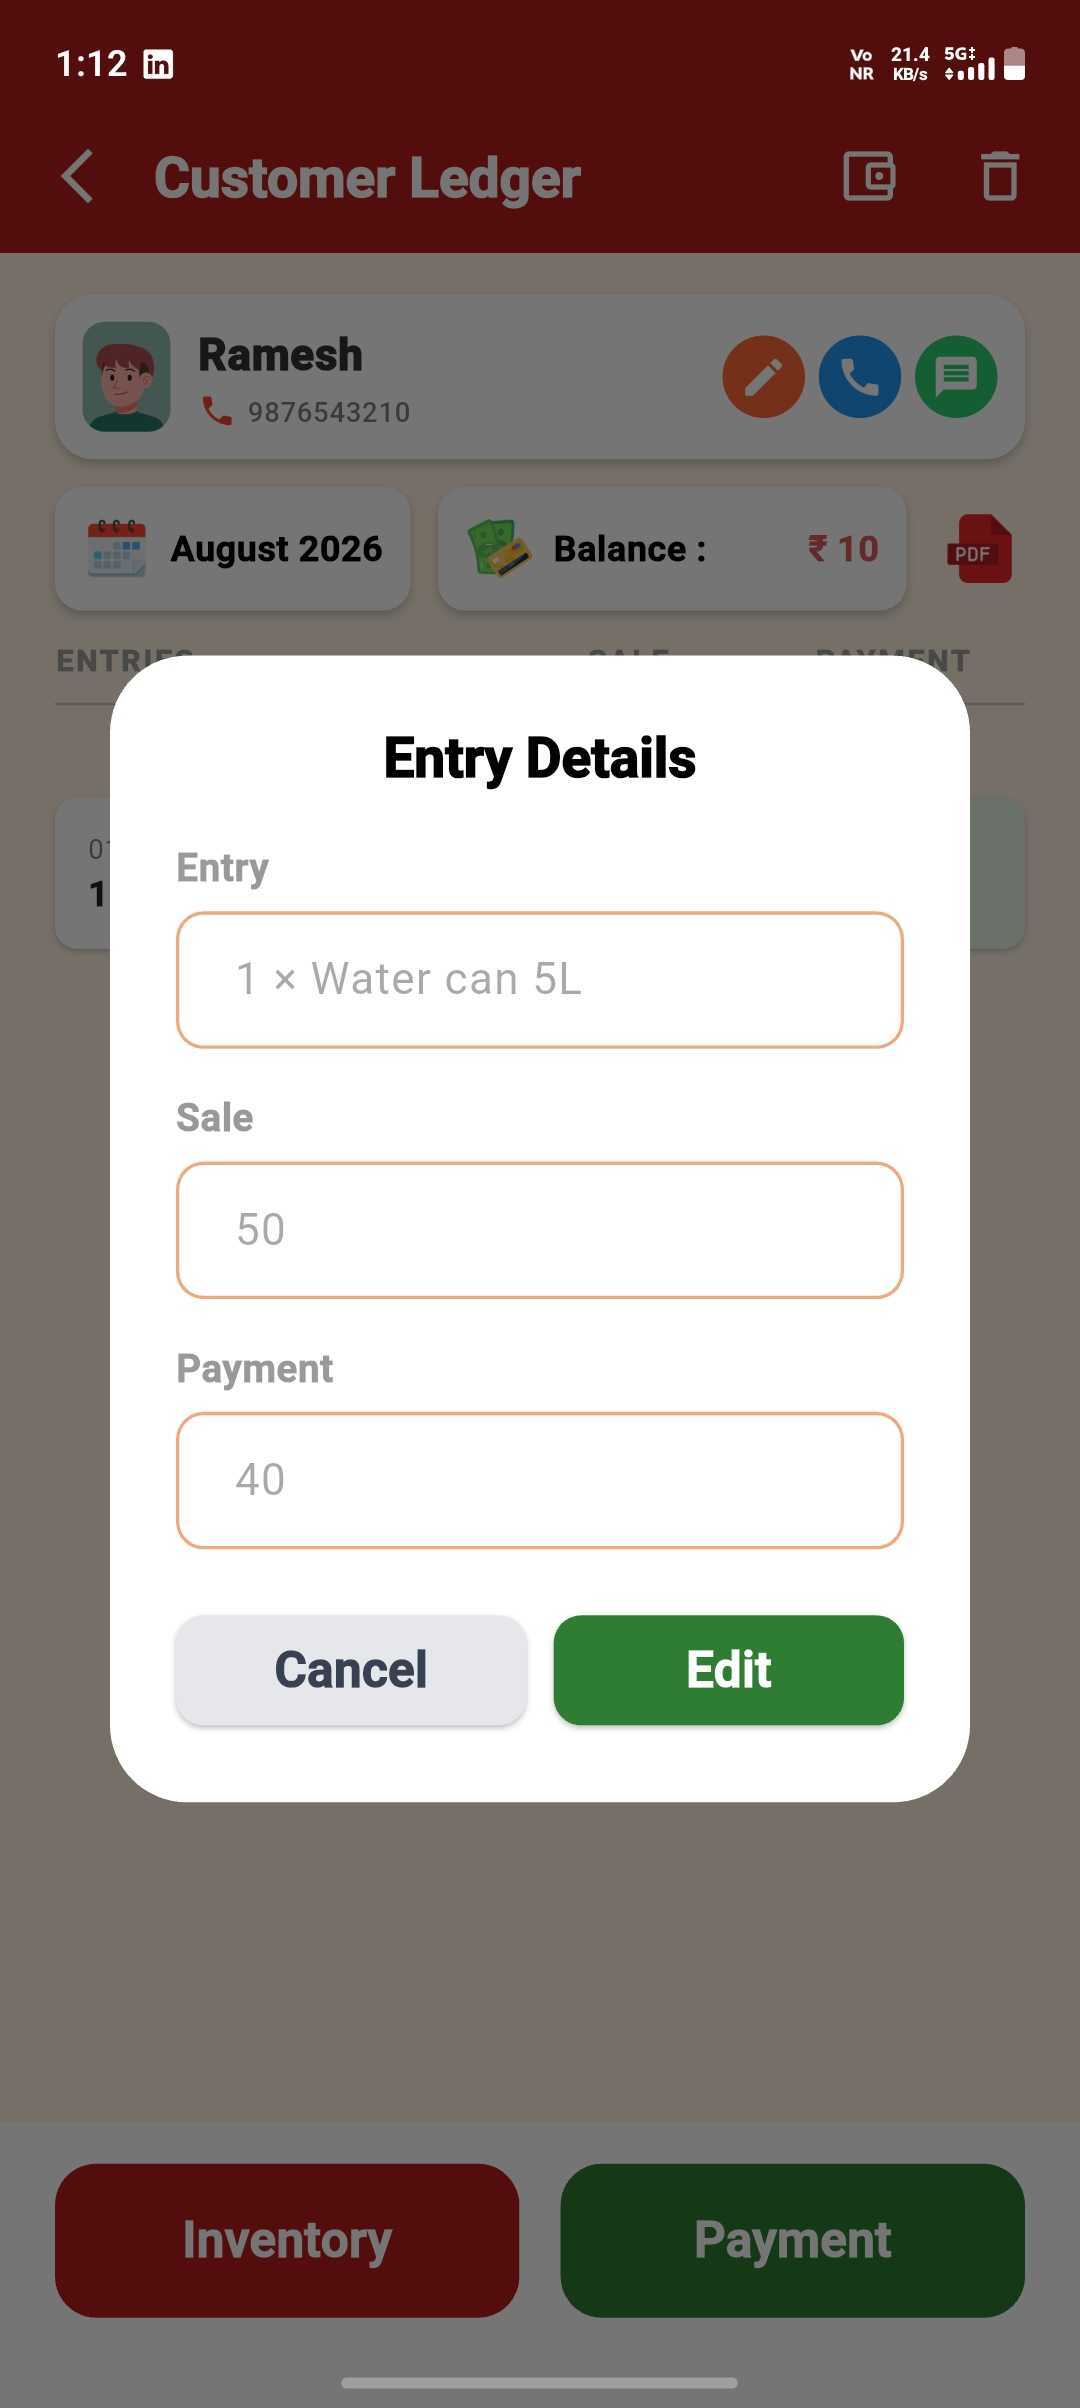
Edit Anytime
Change the quantity, price or amount received, then save.
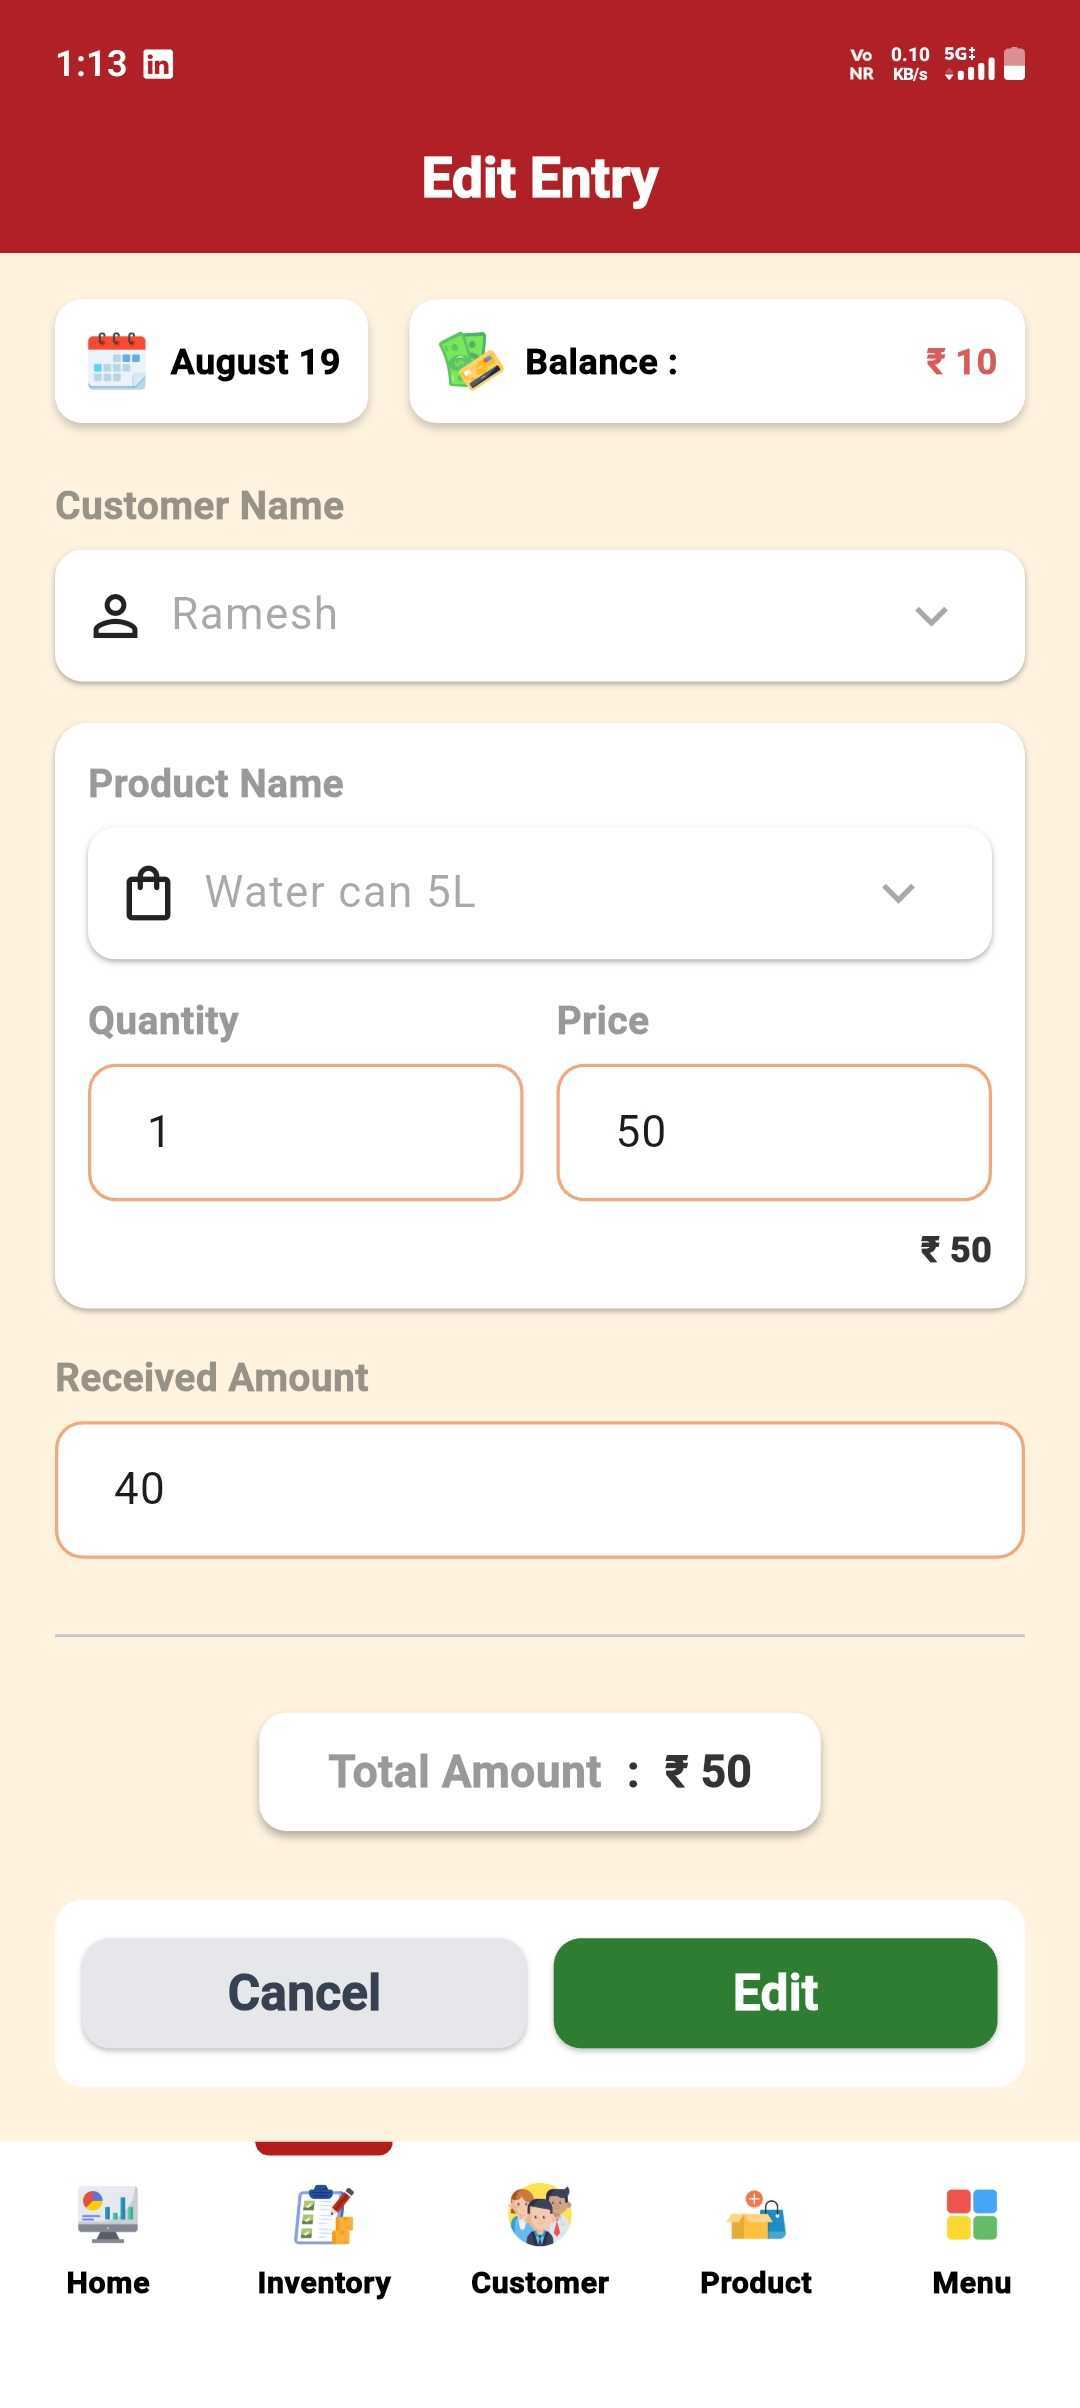
Balance Stays Accurate
The ledger reflects your update right away — fully settled here.
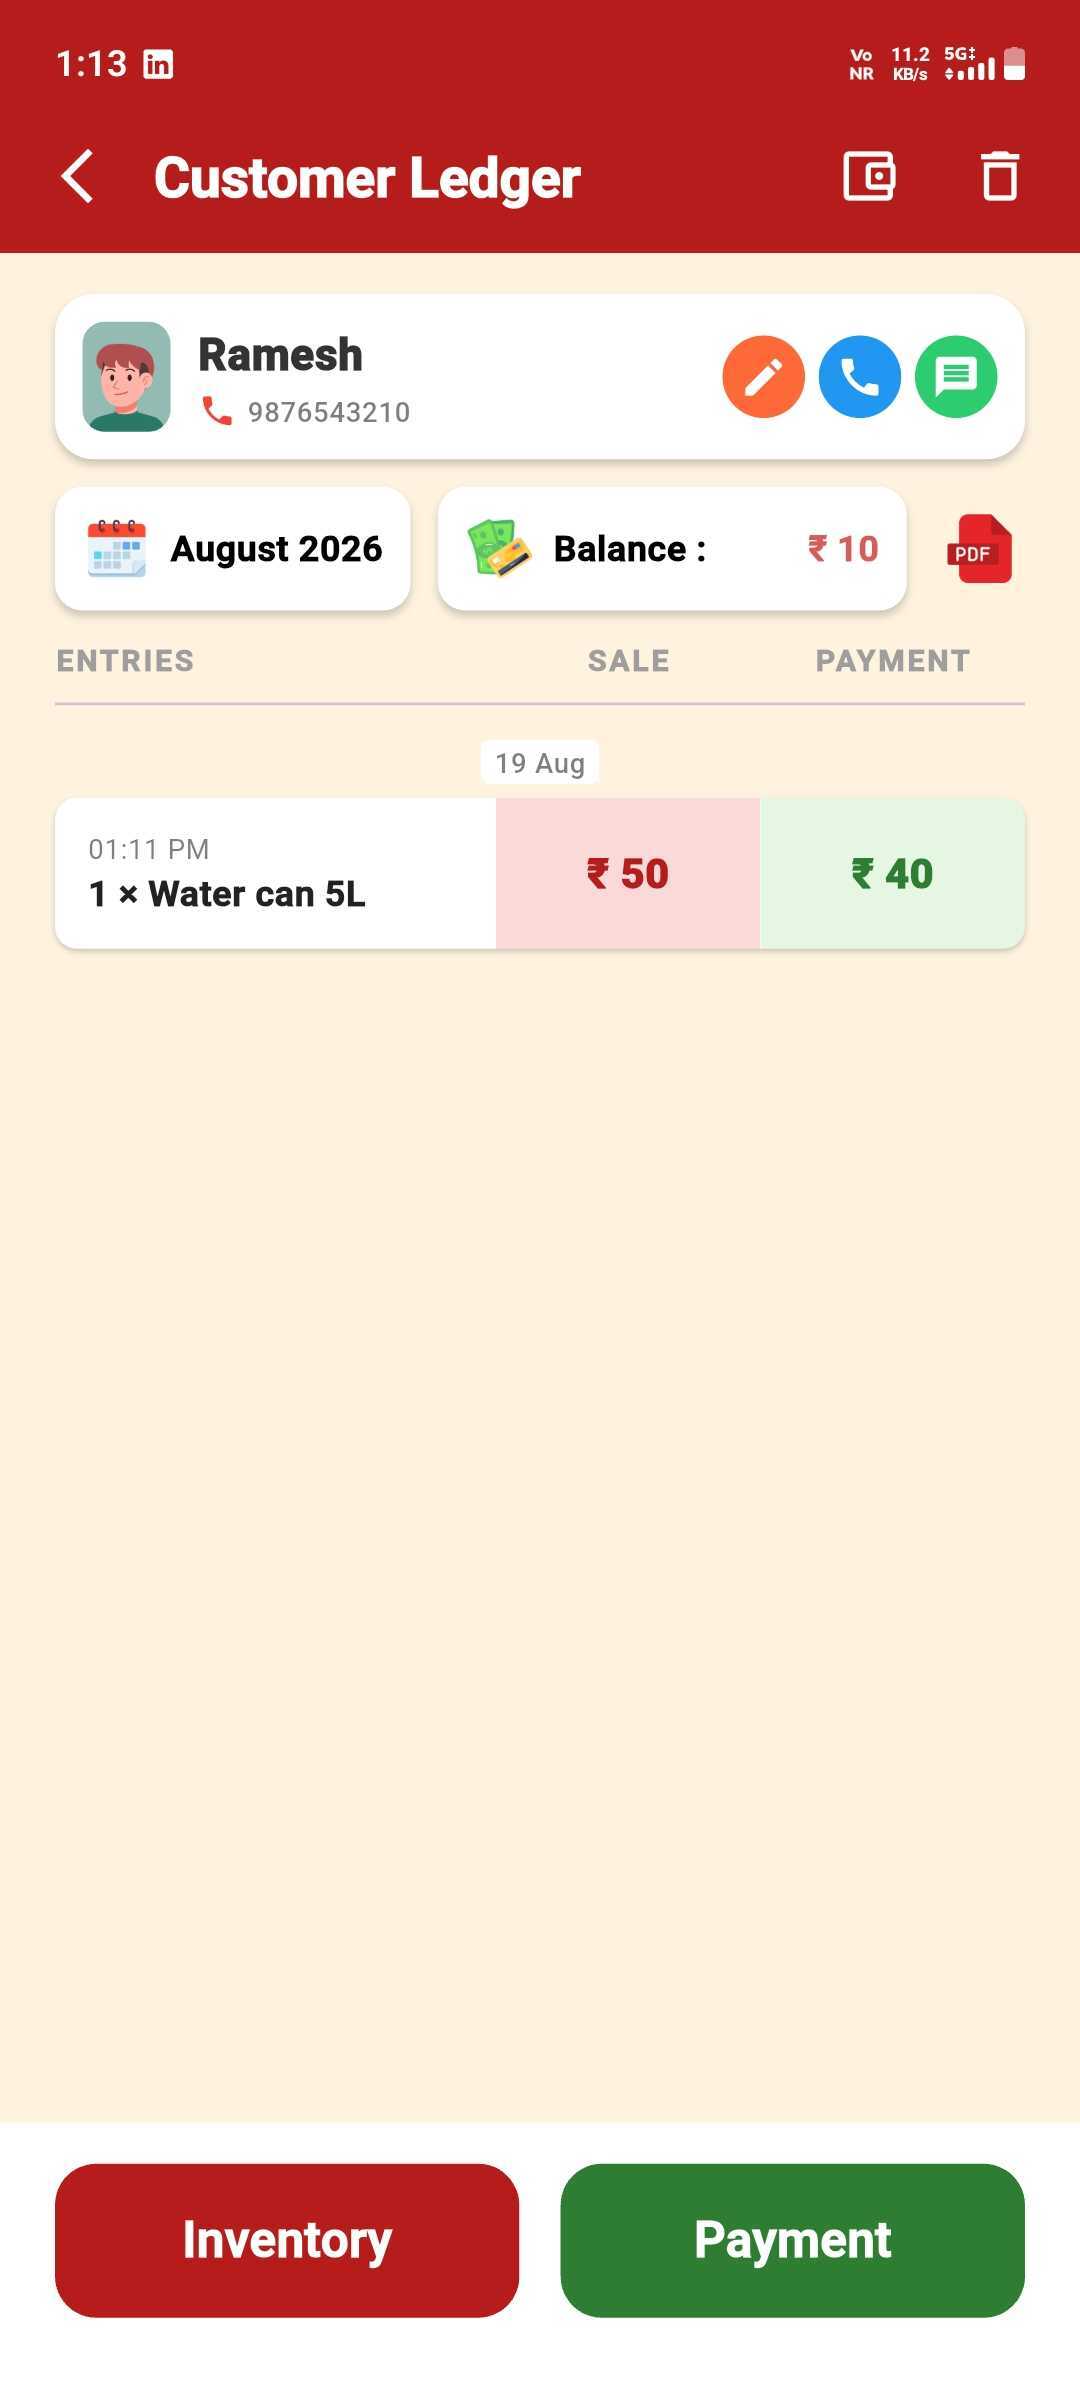
Delete a Sale Entry
Remove a single sale from a customer's ledger.
Swipe the Entry
Inside the customer's ledger, swipe an entry left to reveal Delete.
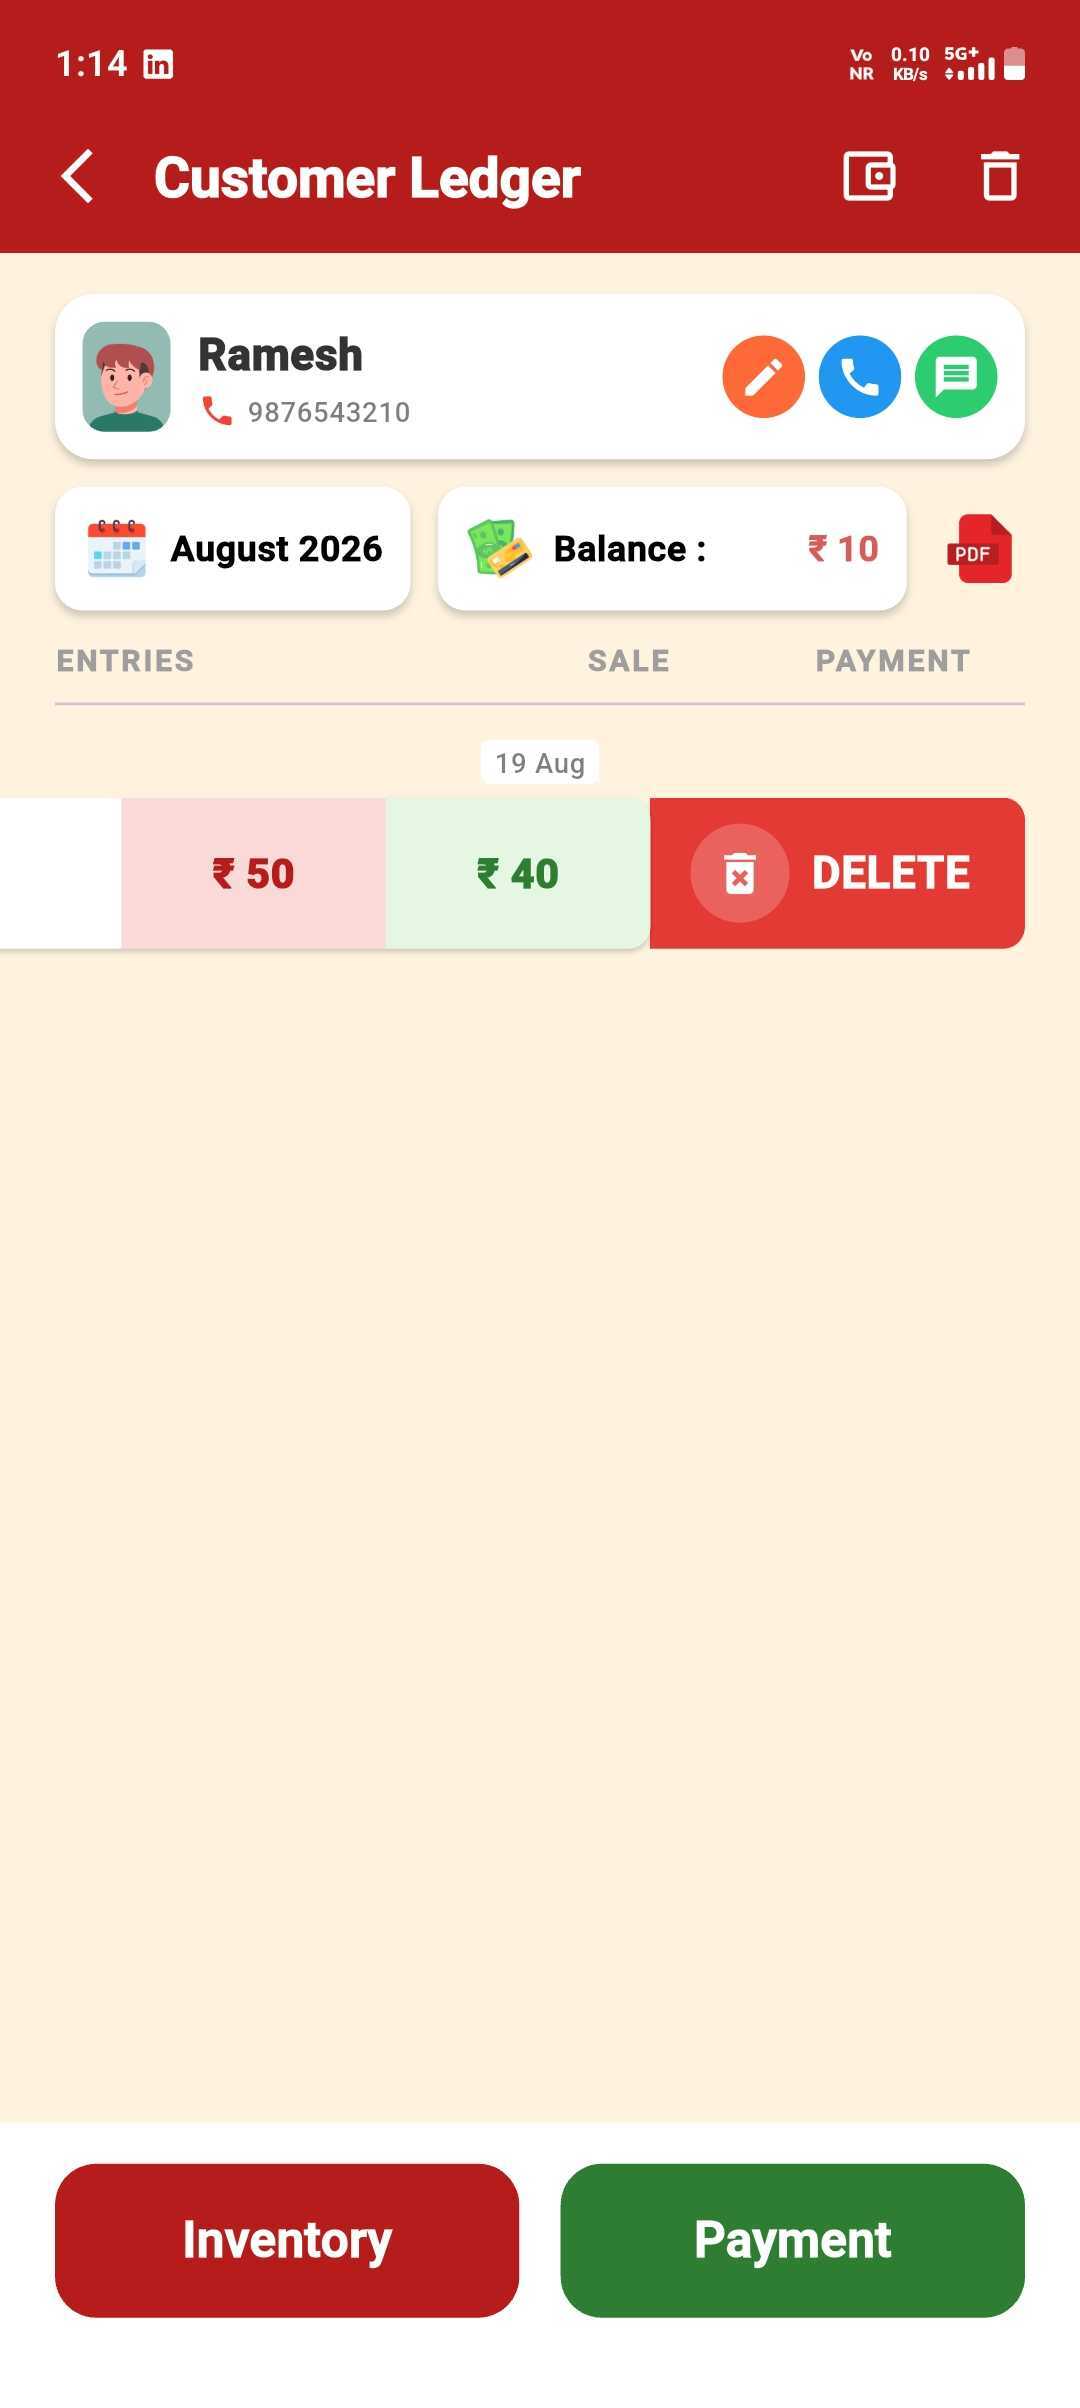
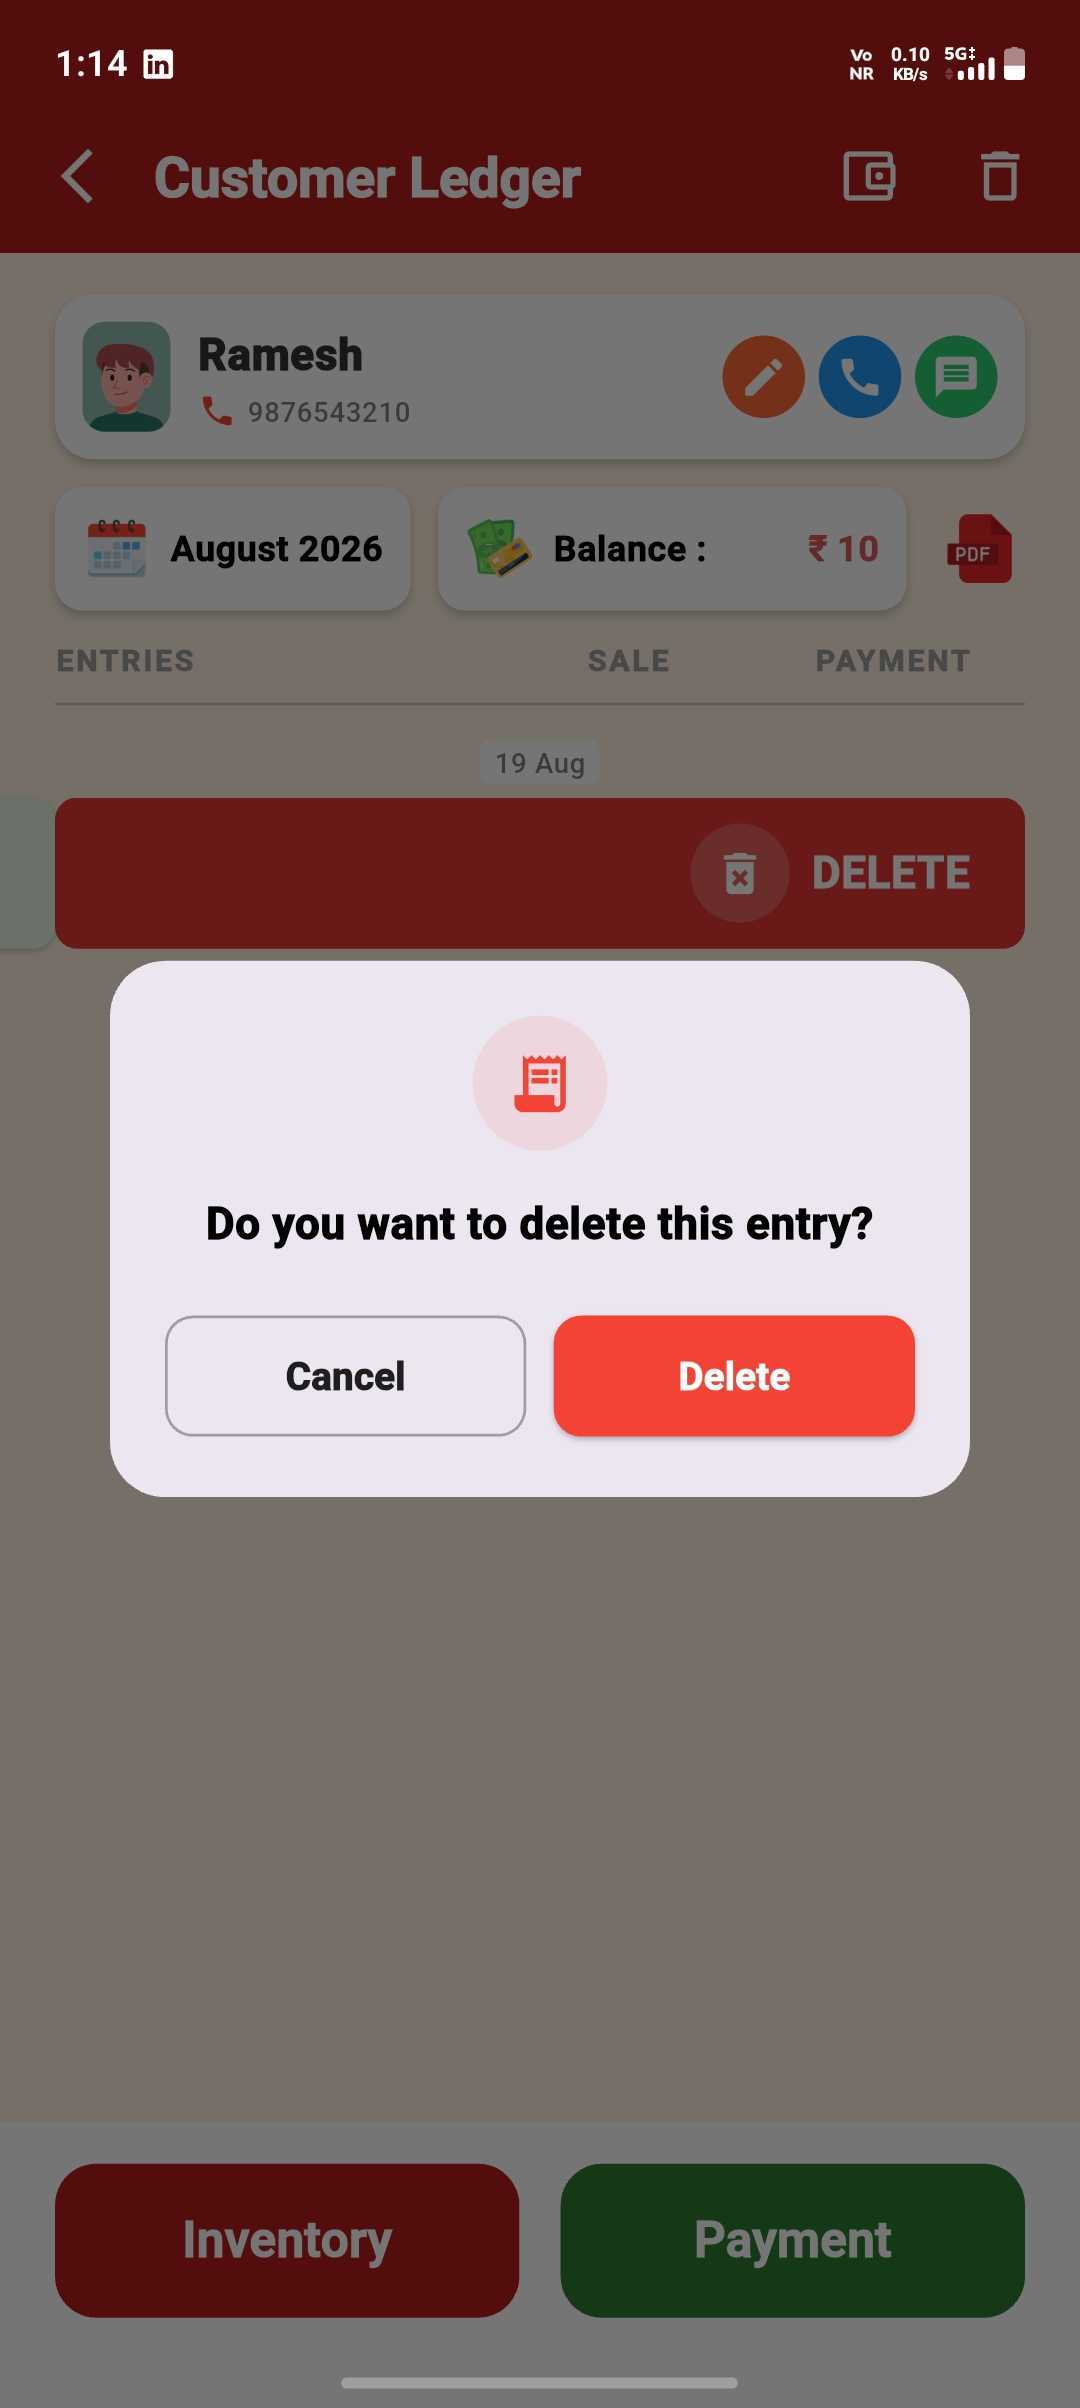
Confirm the Delete
Tap Delete again — the entry is removed and the balance updates instantly.
Record a Payment
Log a payment your customer gives you — updates their balance instantly.
Open the Ledger
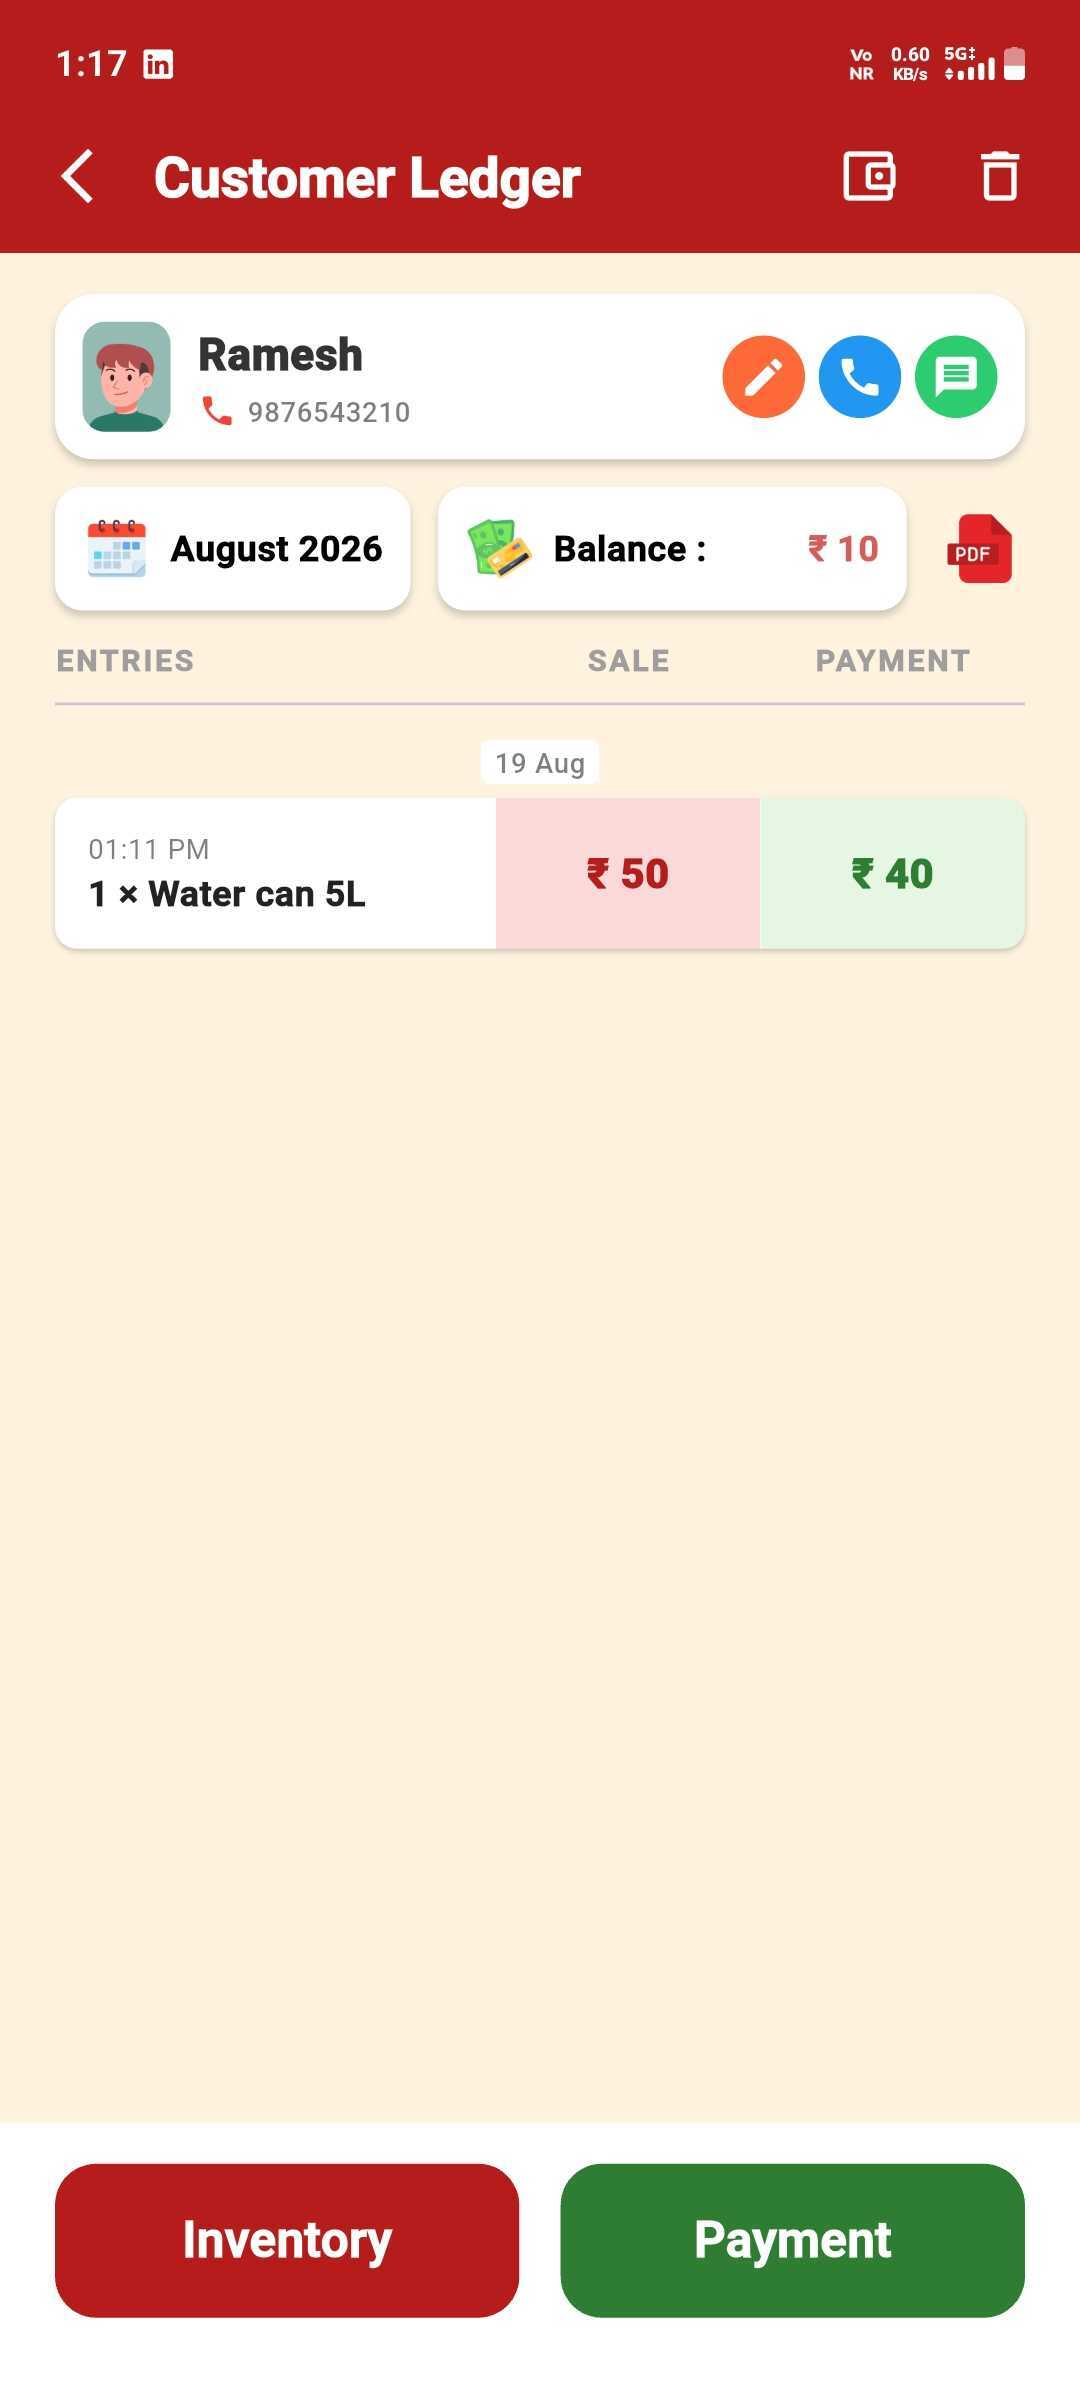
From the customer's ledger, tap Payment.
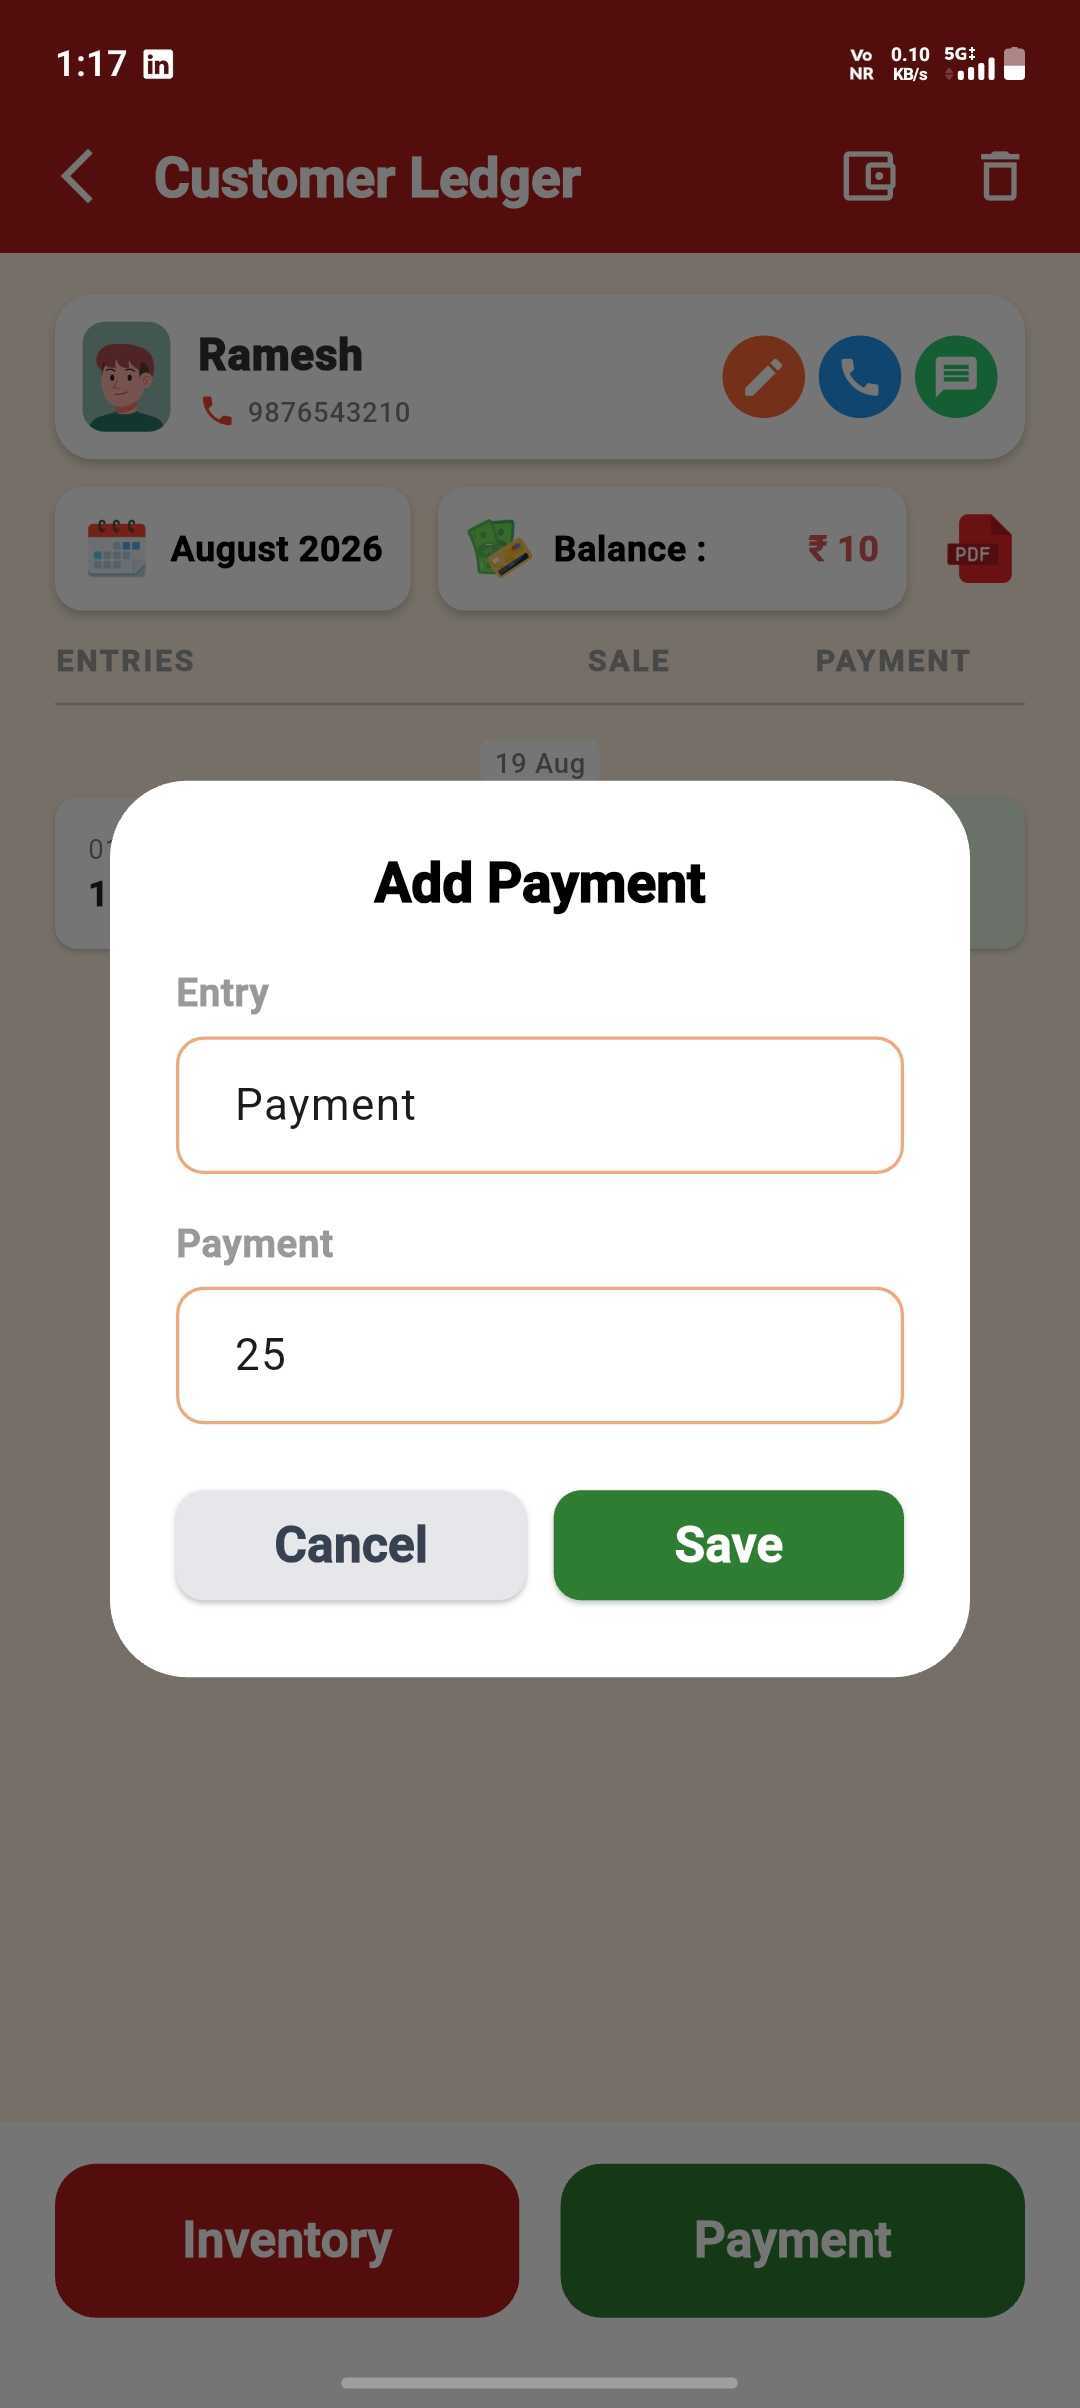
Add the Amount
Enter a short remark and the amount received, then Save.
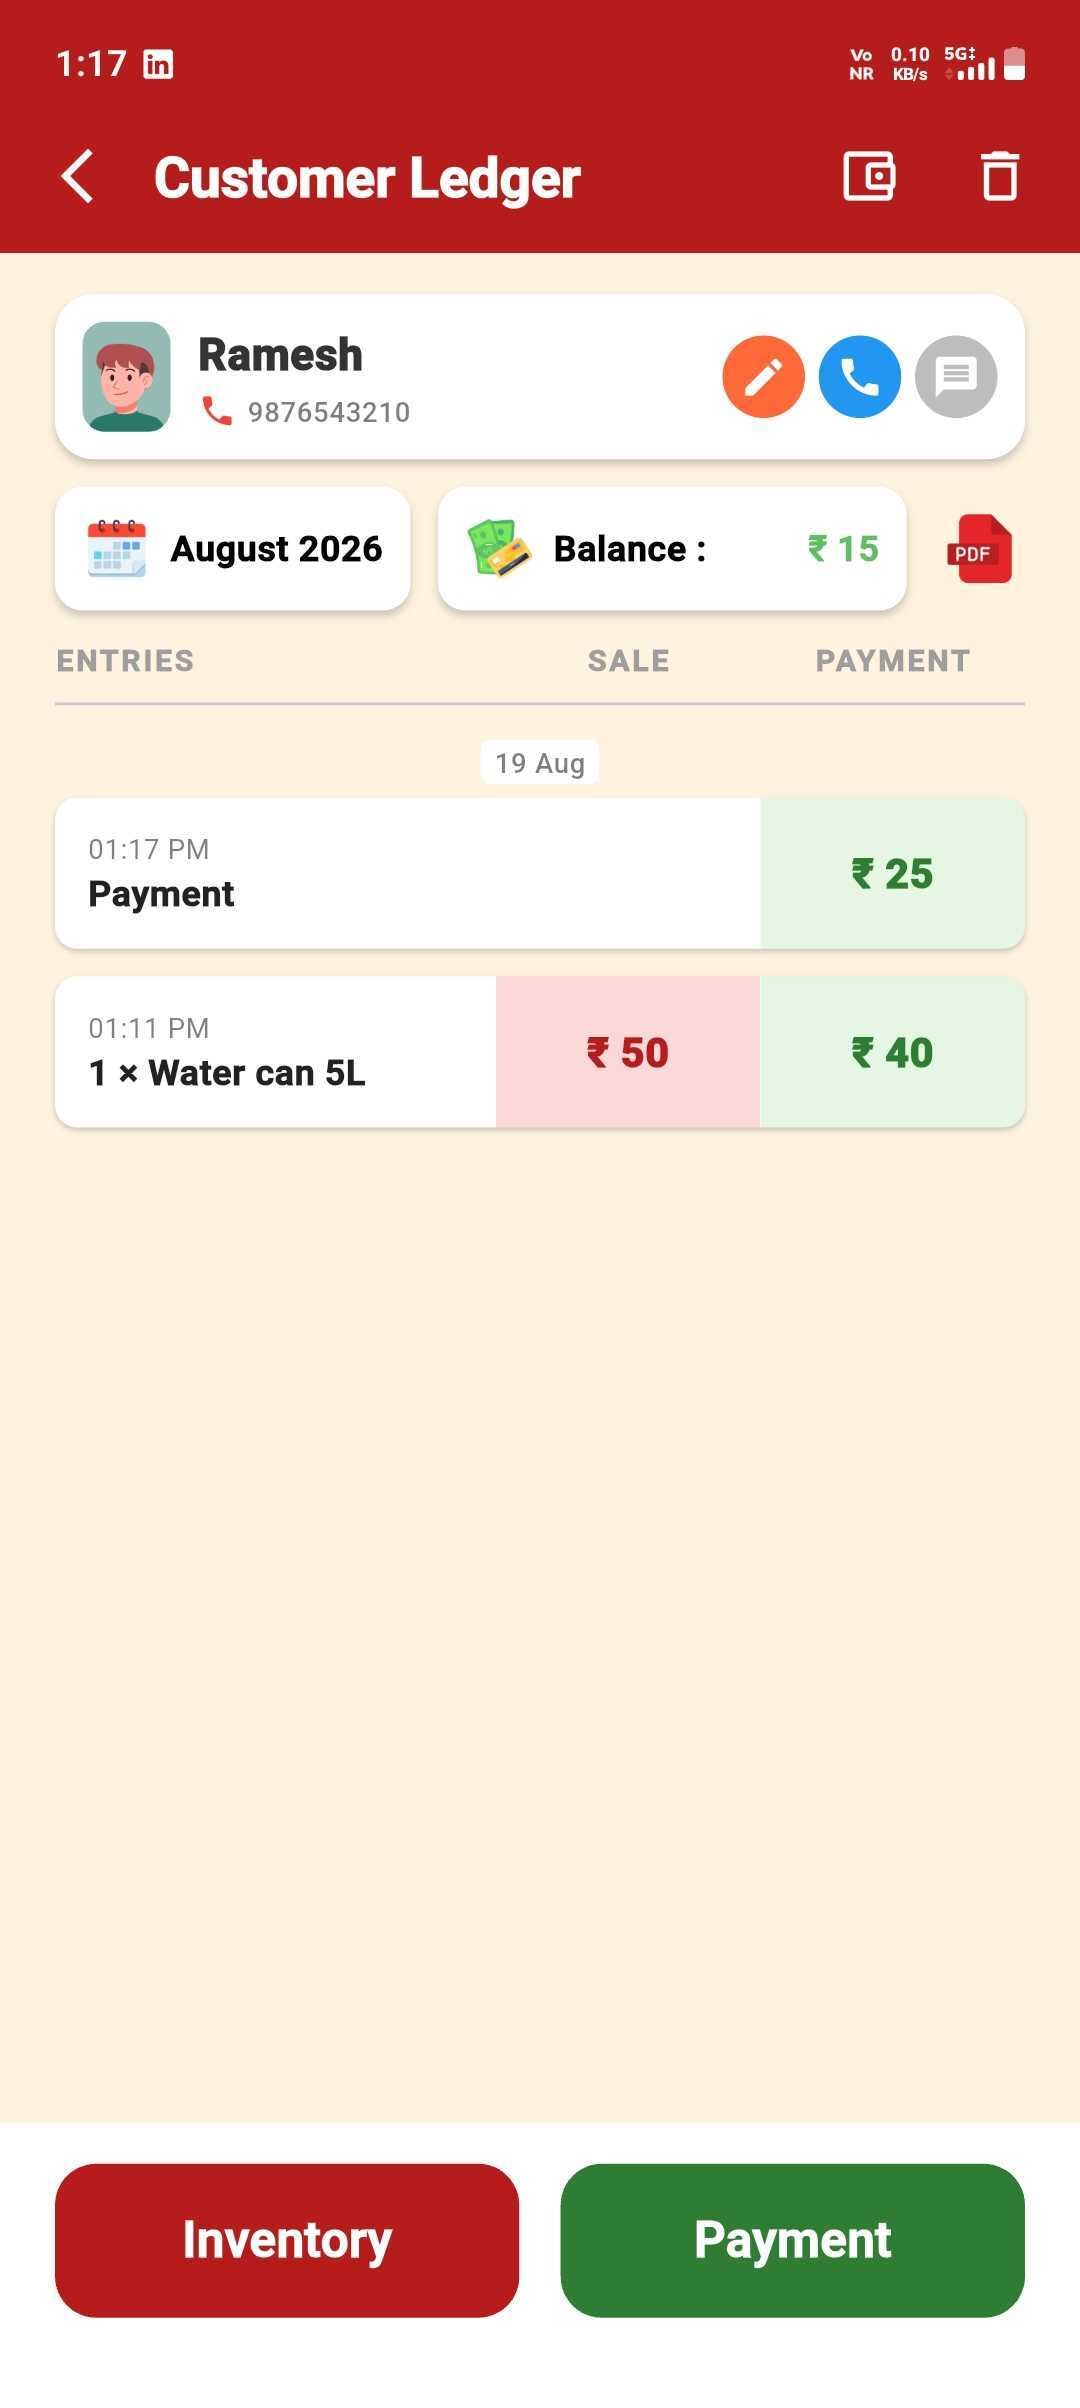
Balance Updates
The payment shows up instantly and the balance recalculates.
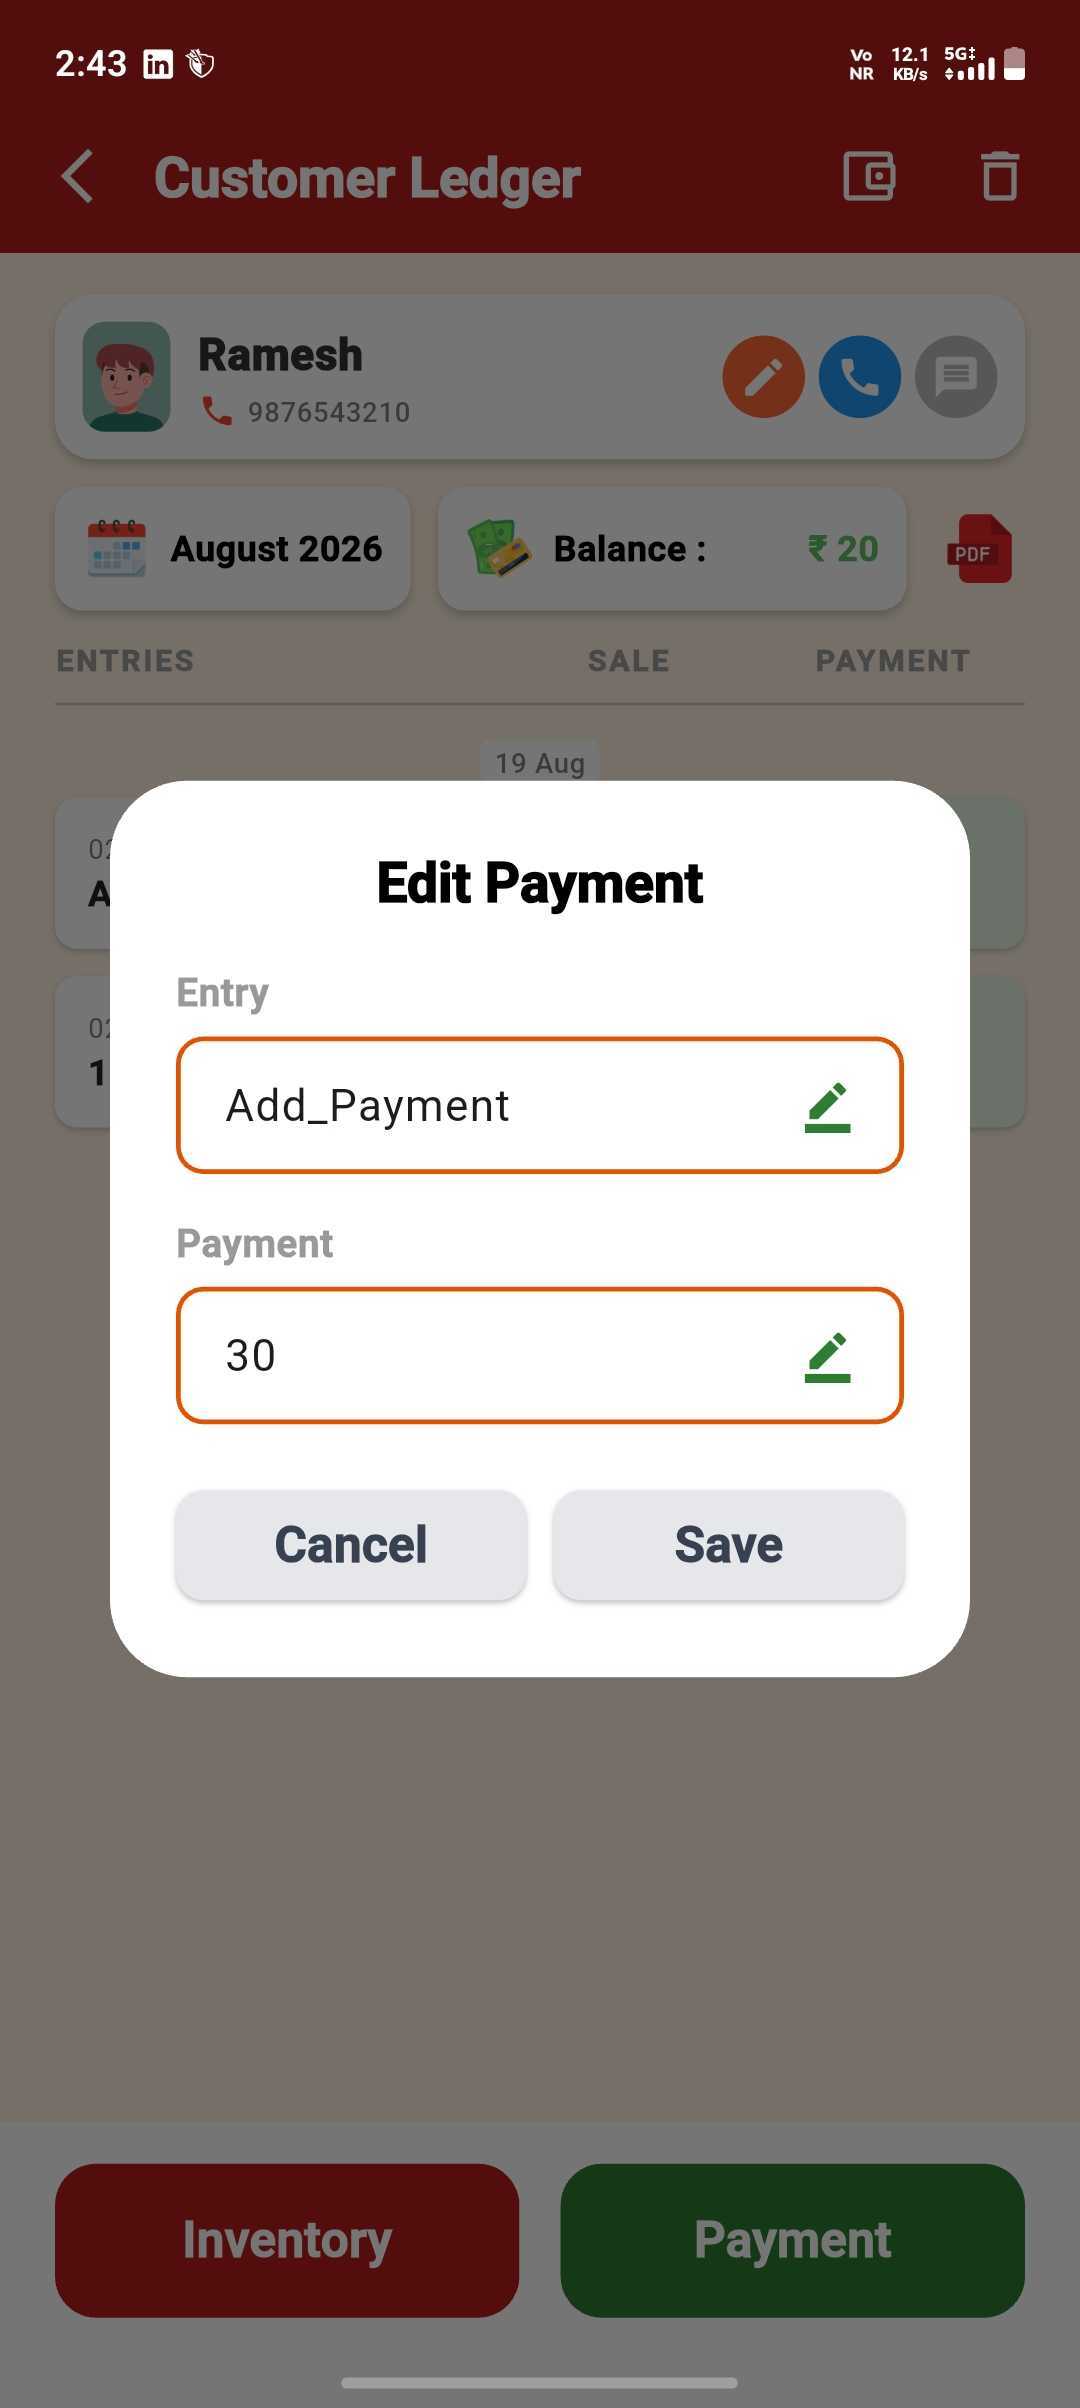
Edit Anytime
Tap the entry to rename the remark or change the amount.
Ledger Stays Accurate
Your edit reflects immediately in the customer's ledger.
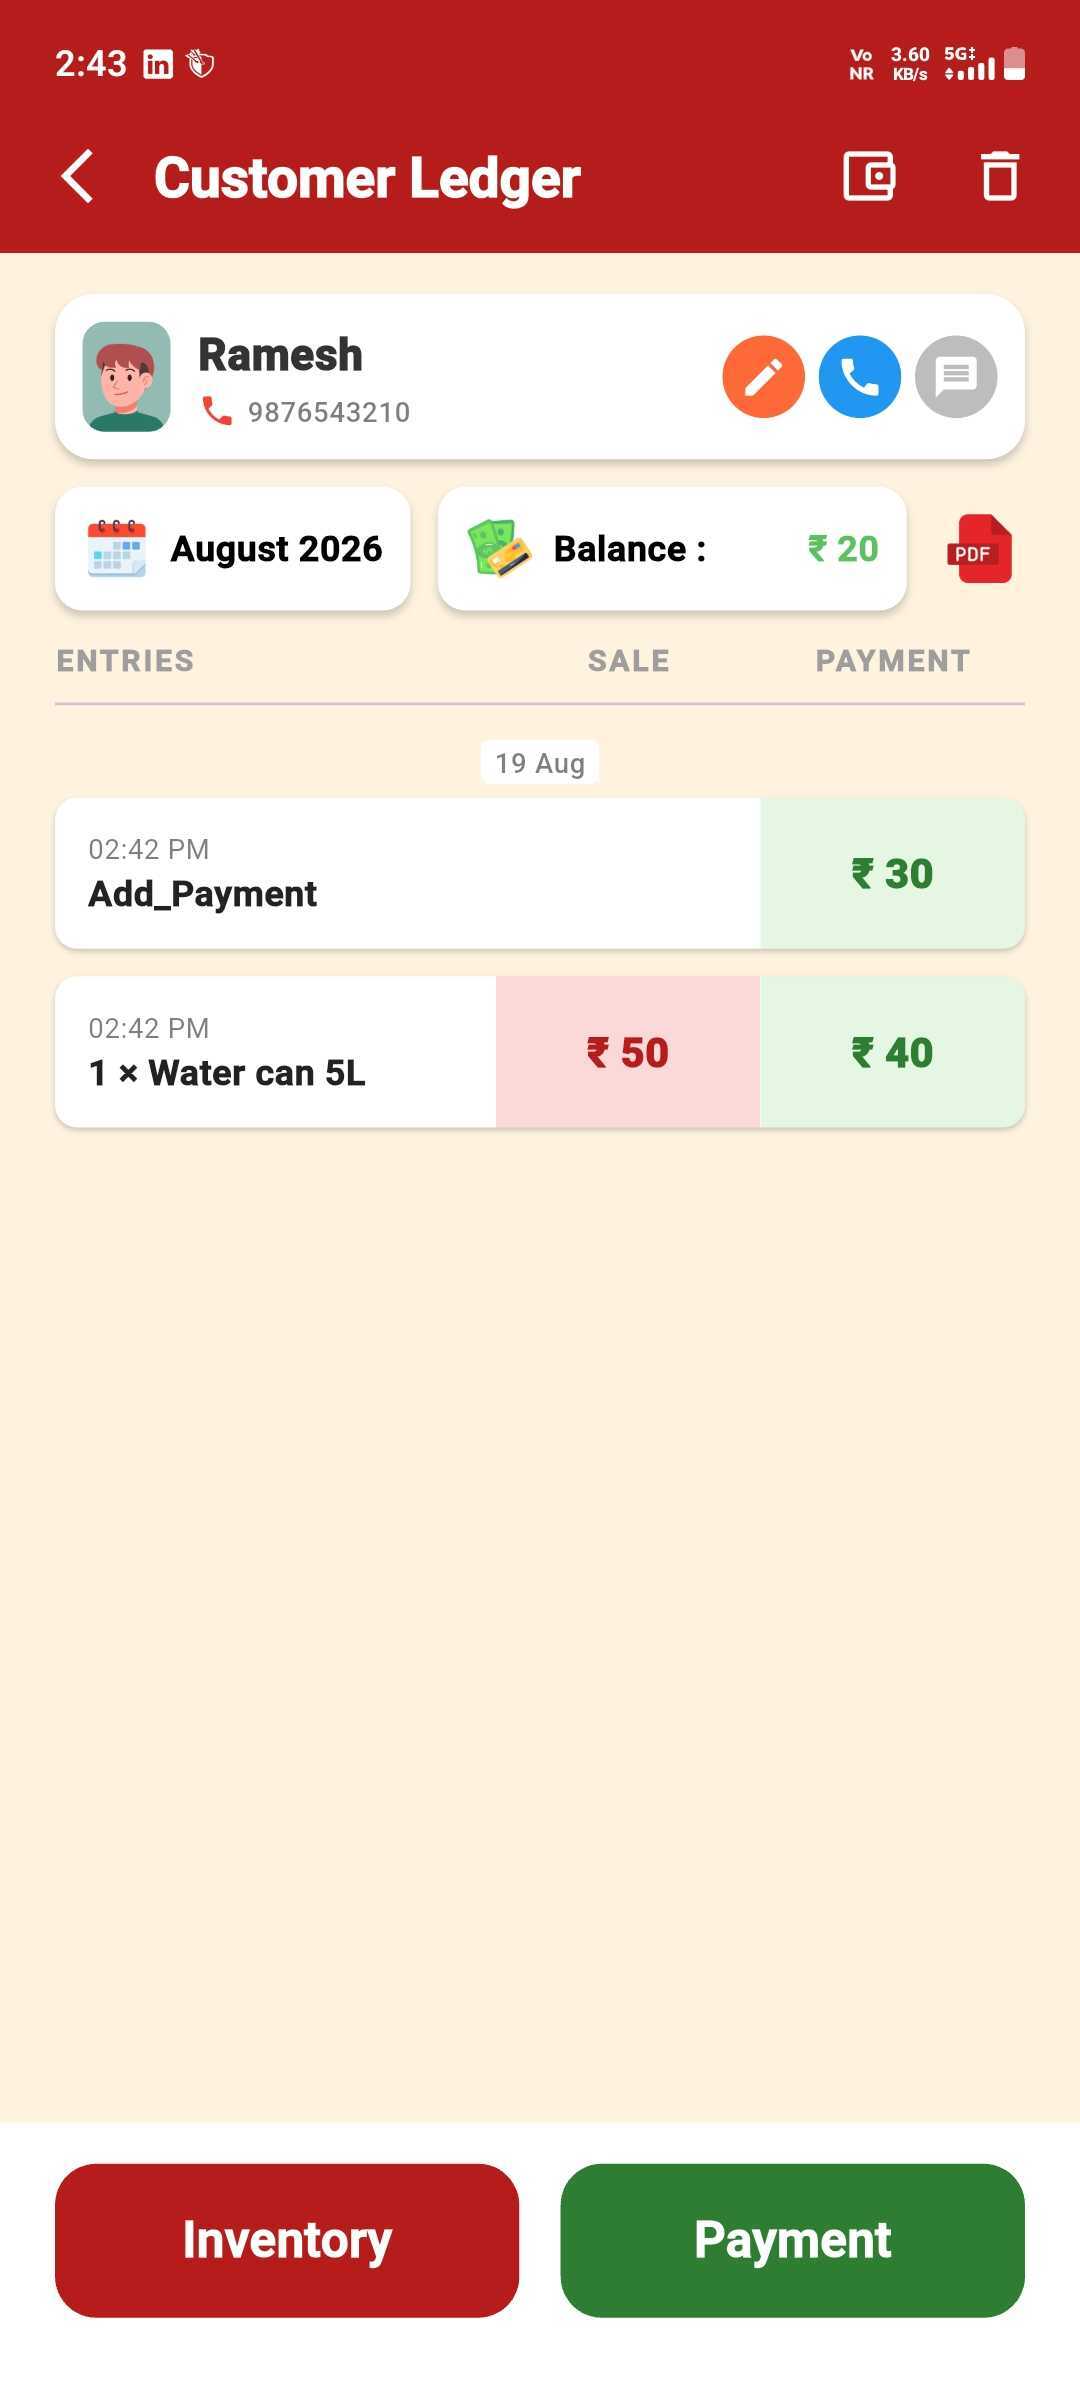
Delete a Payment Entry
Remove a single payment from a customer's ledger.
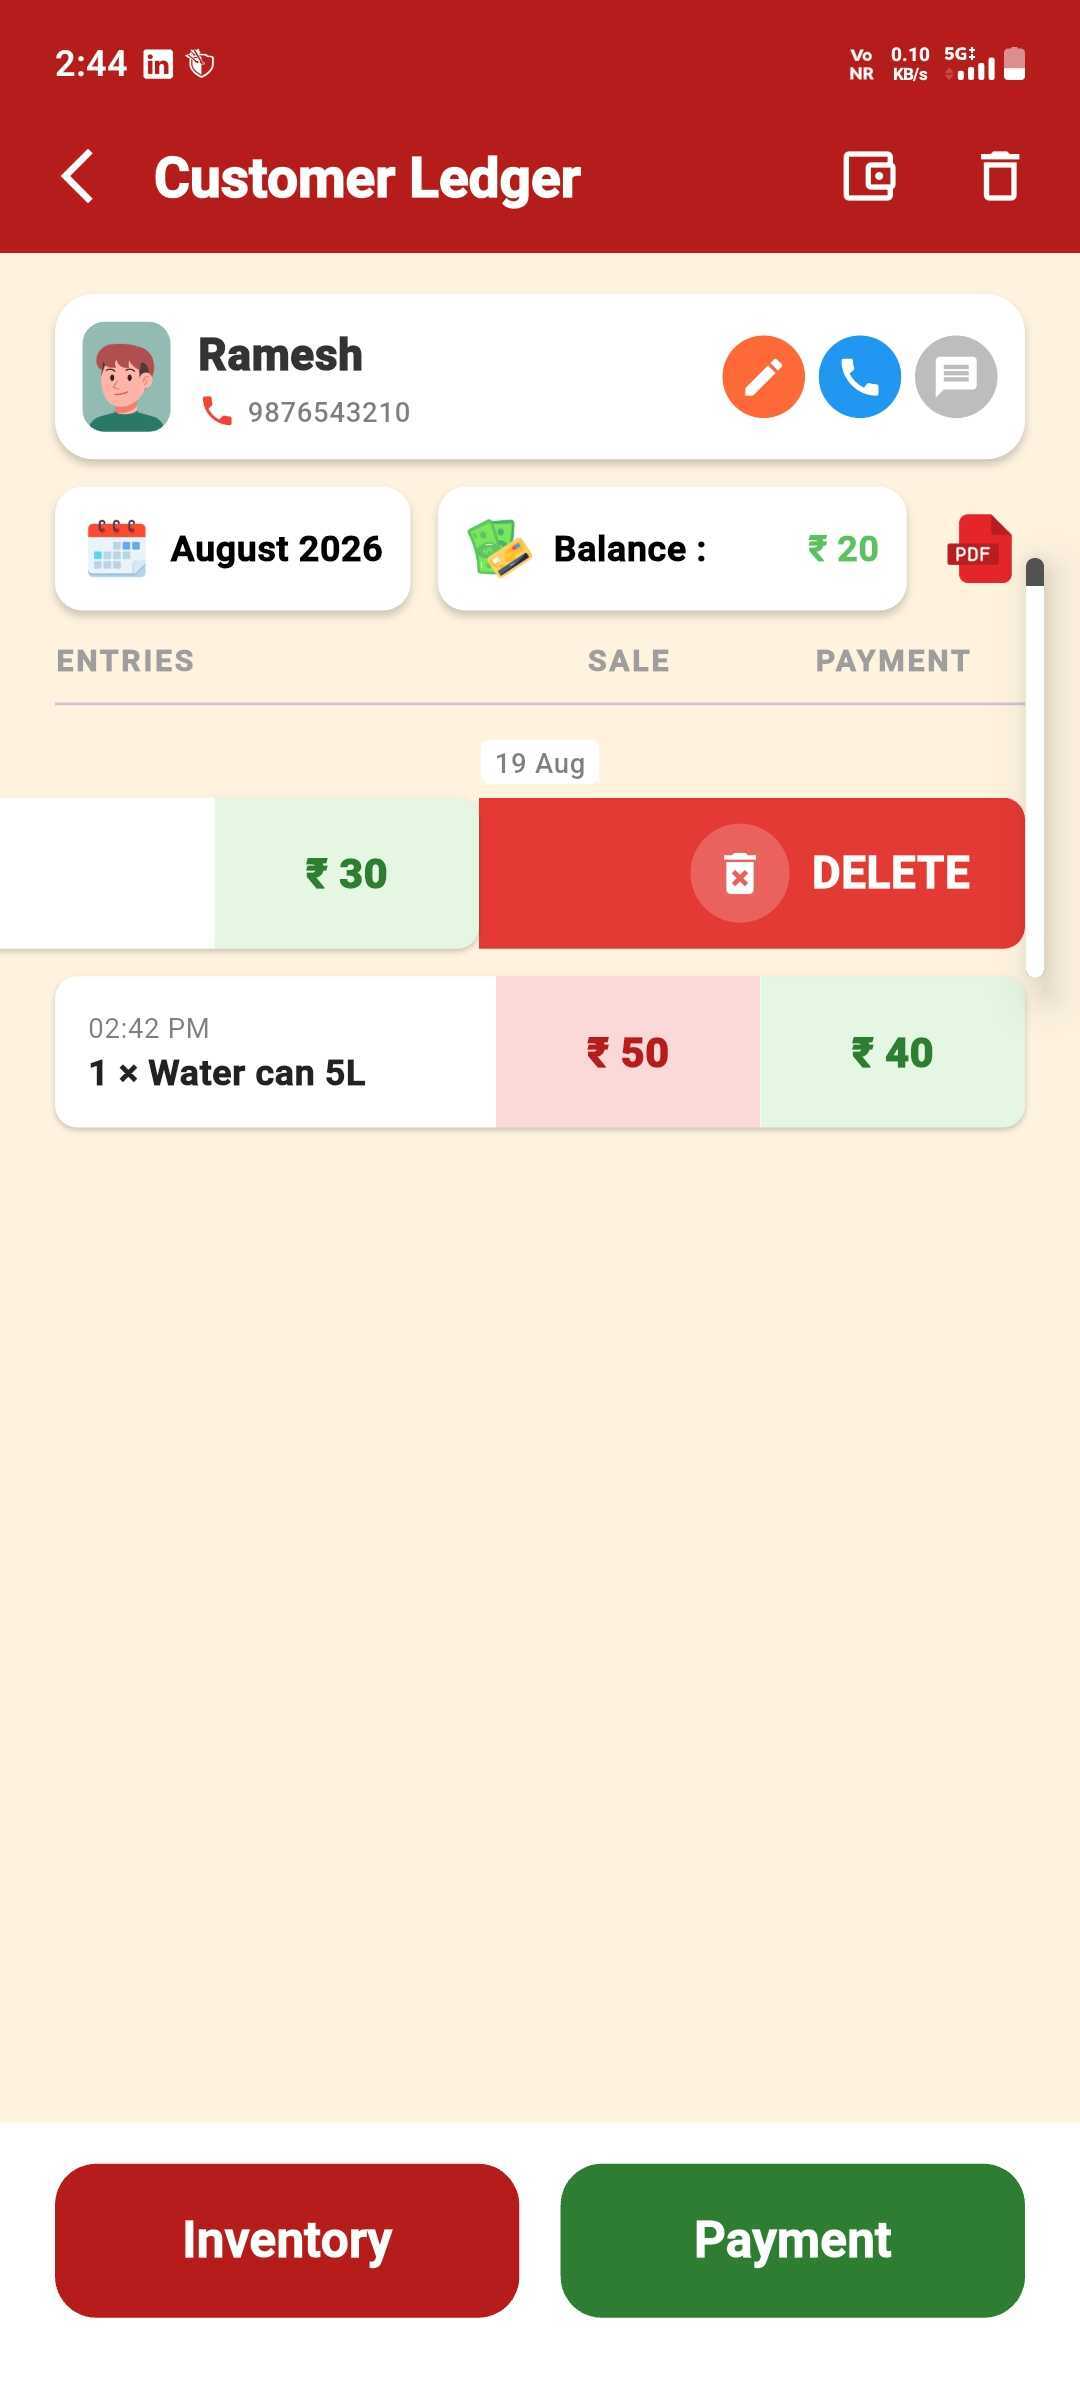
Swipe the Entry
Inside the customer's ledger, swipe a payment entry left to reveal Delete.
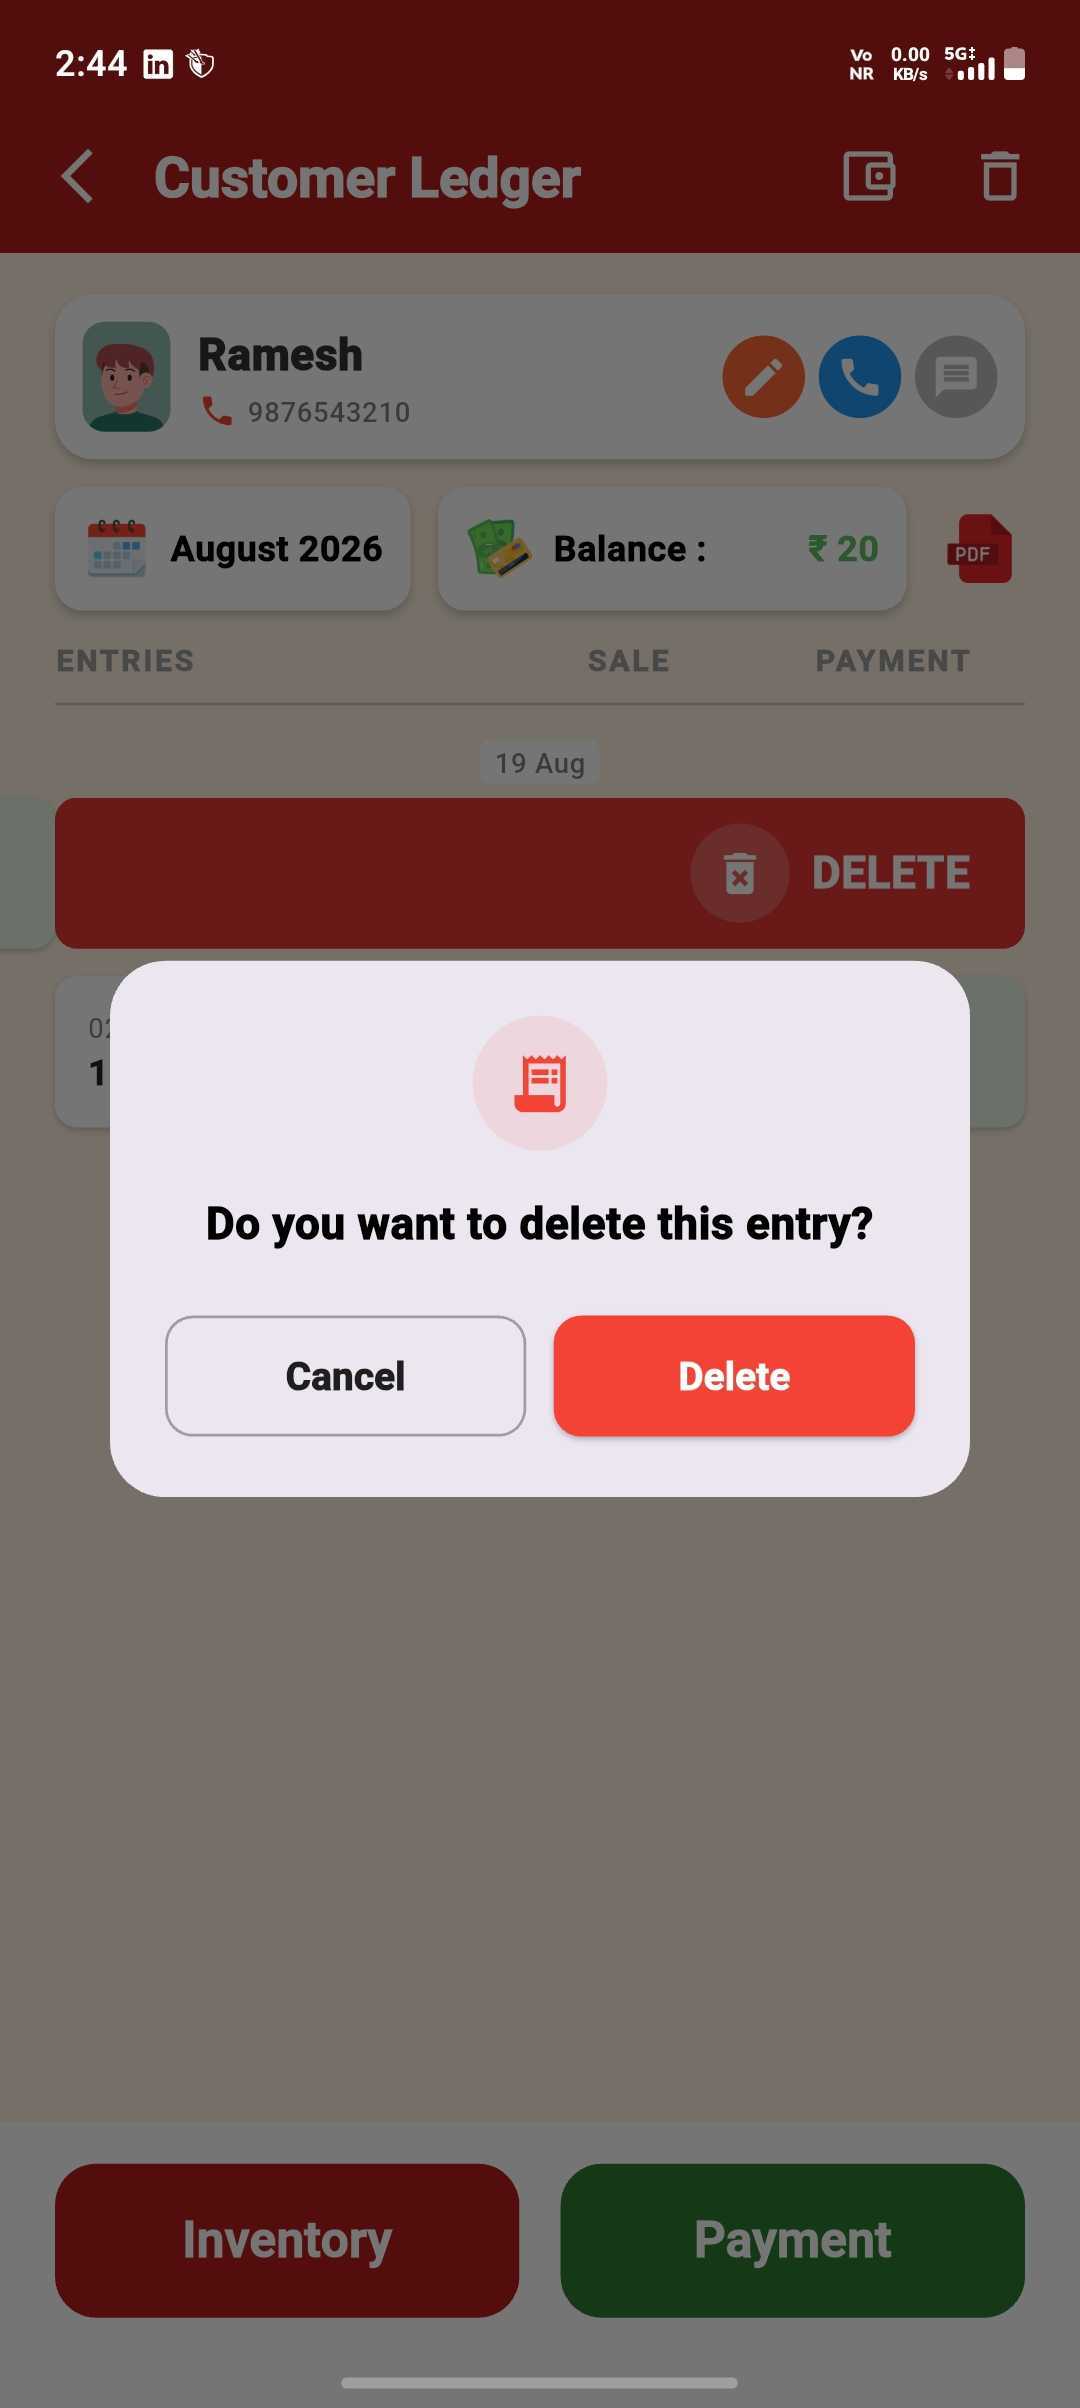
Confirm the Delete
Tap Delete again — the entry is removed and the balance updates instantly.
Add Supplier
Save a supplier once, reuse it for every purchase.
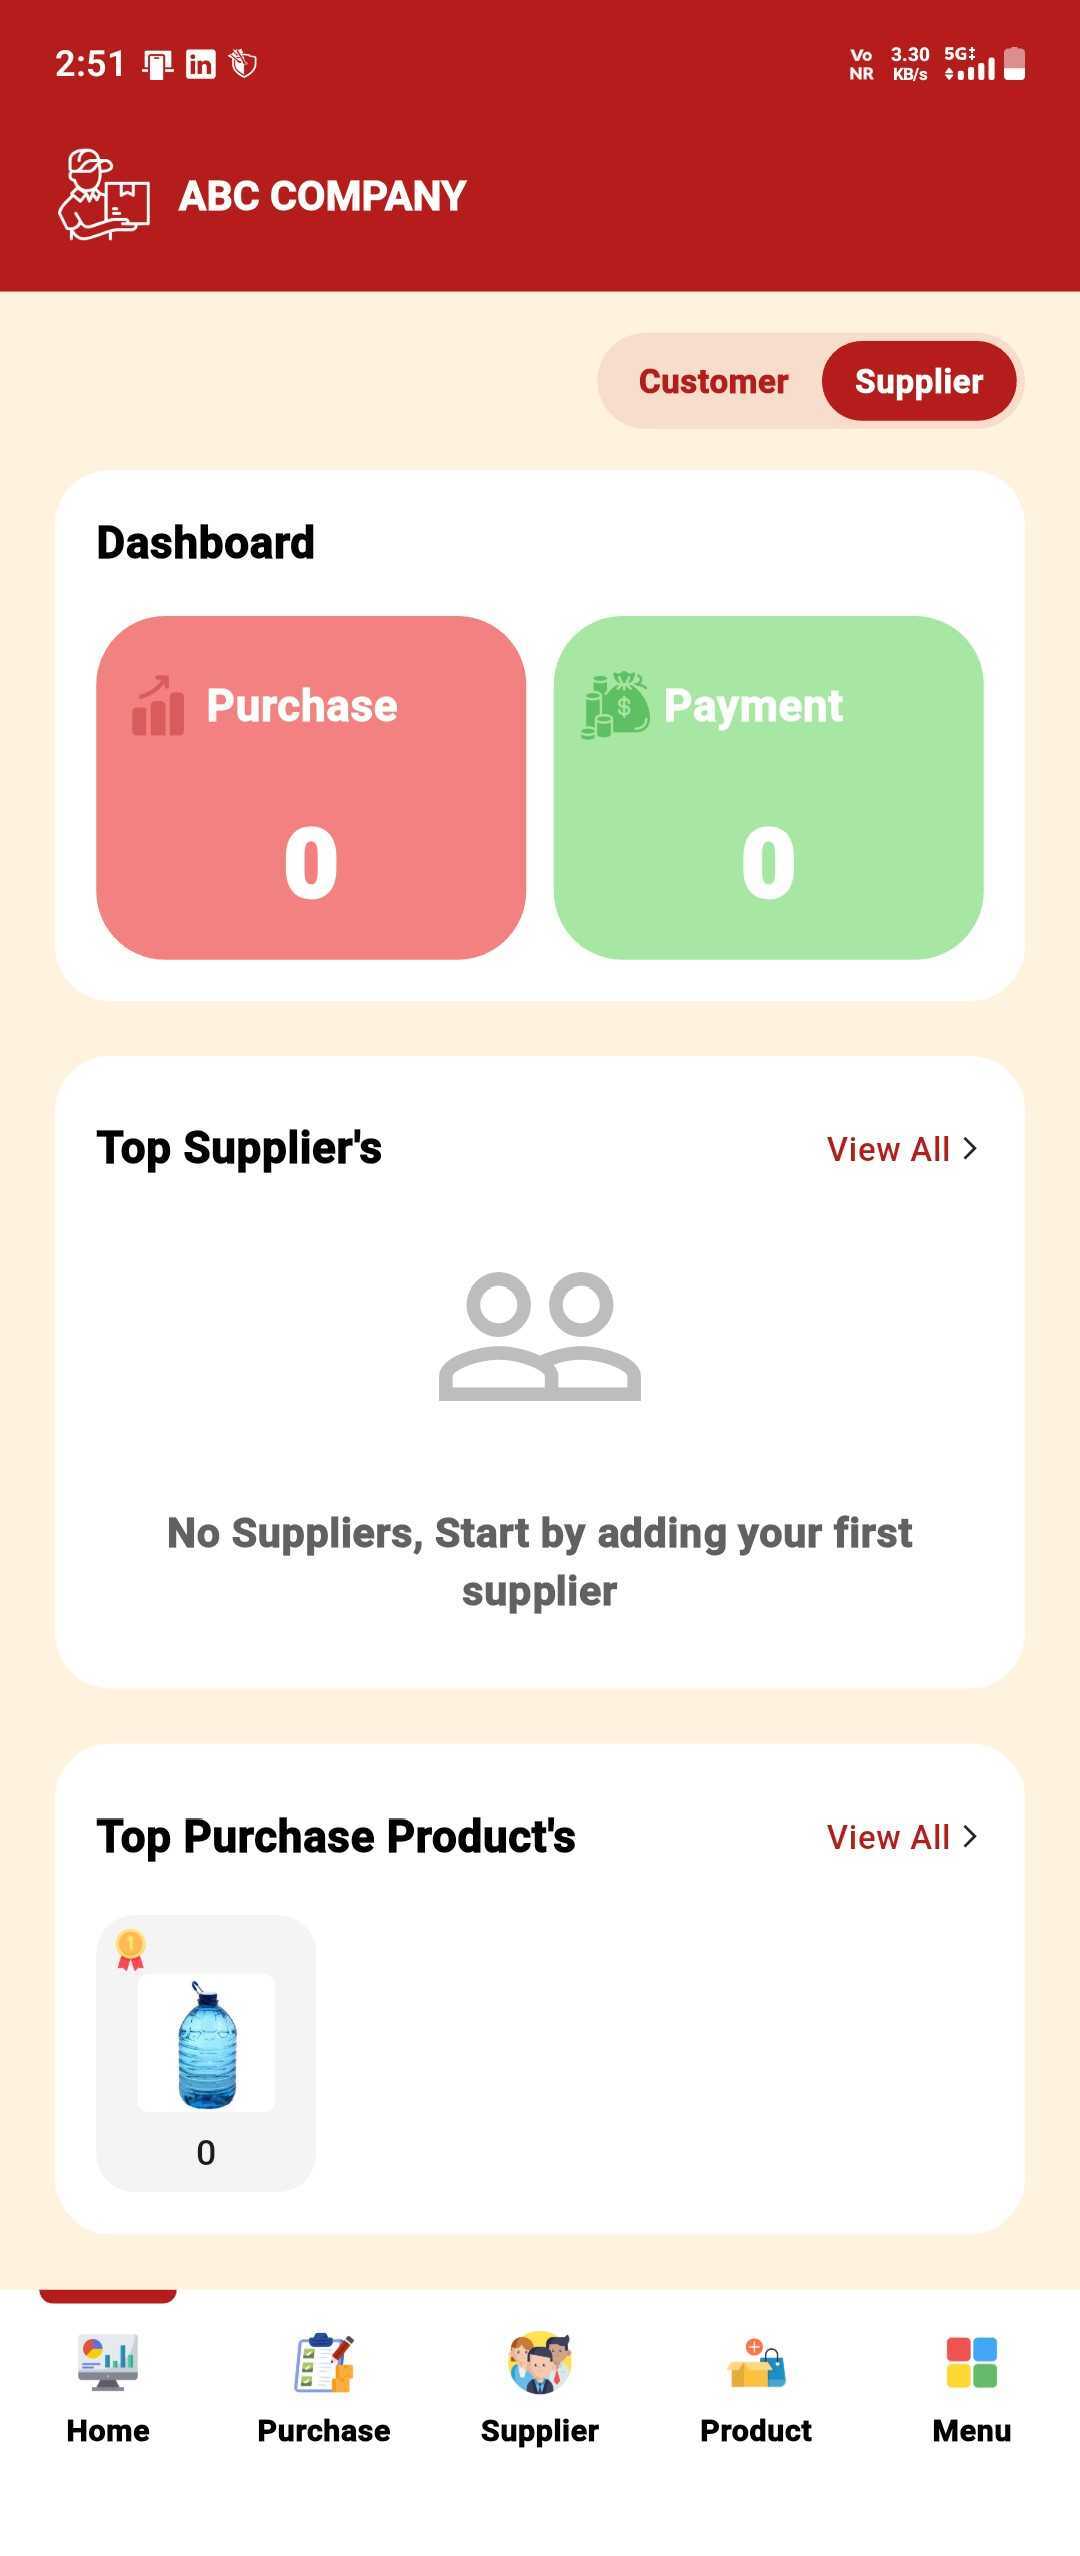
Open the Supplier Tab
On the Home dashboard, tap the Supplier toggle.
Open Supplier List
Tap the Add Supplier button.
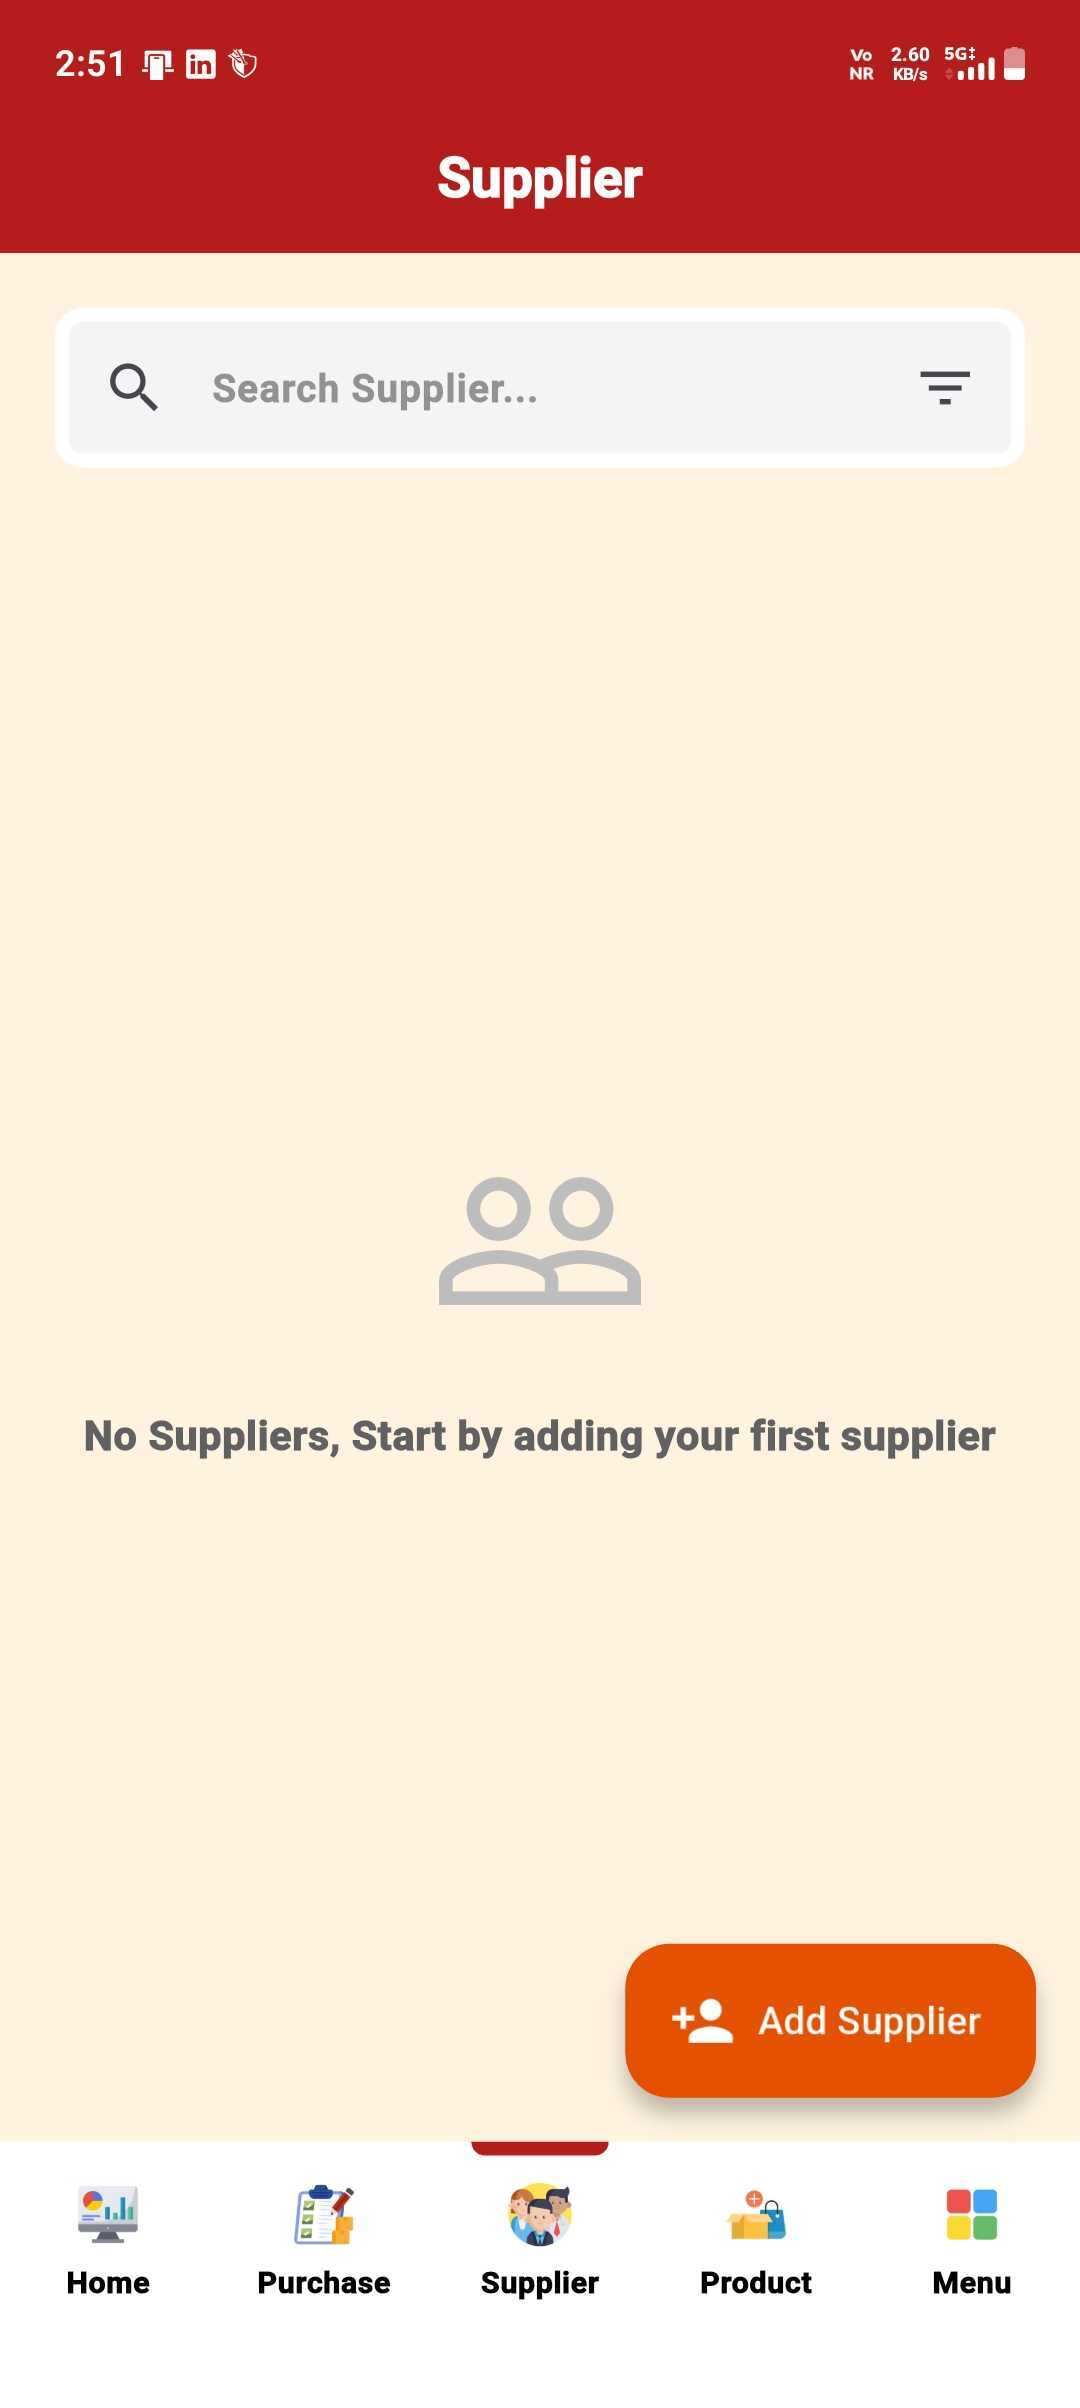
Add Their Details
Add Name, Mobile Number, Address & Landmark — you can even add an opening balance right here, then Save.
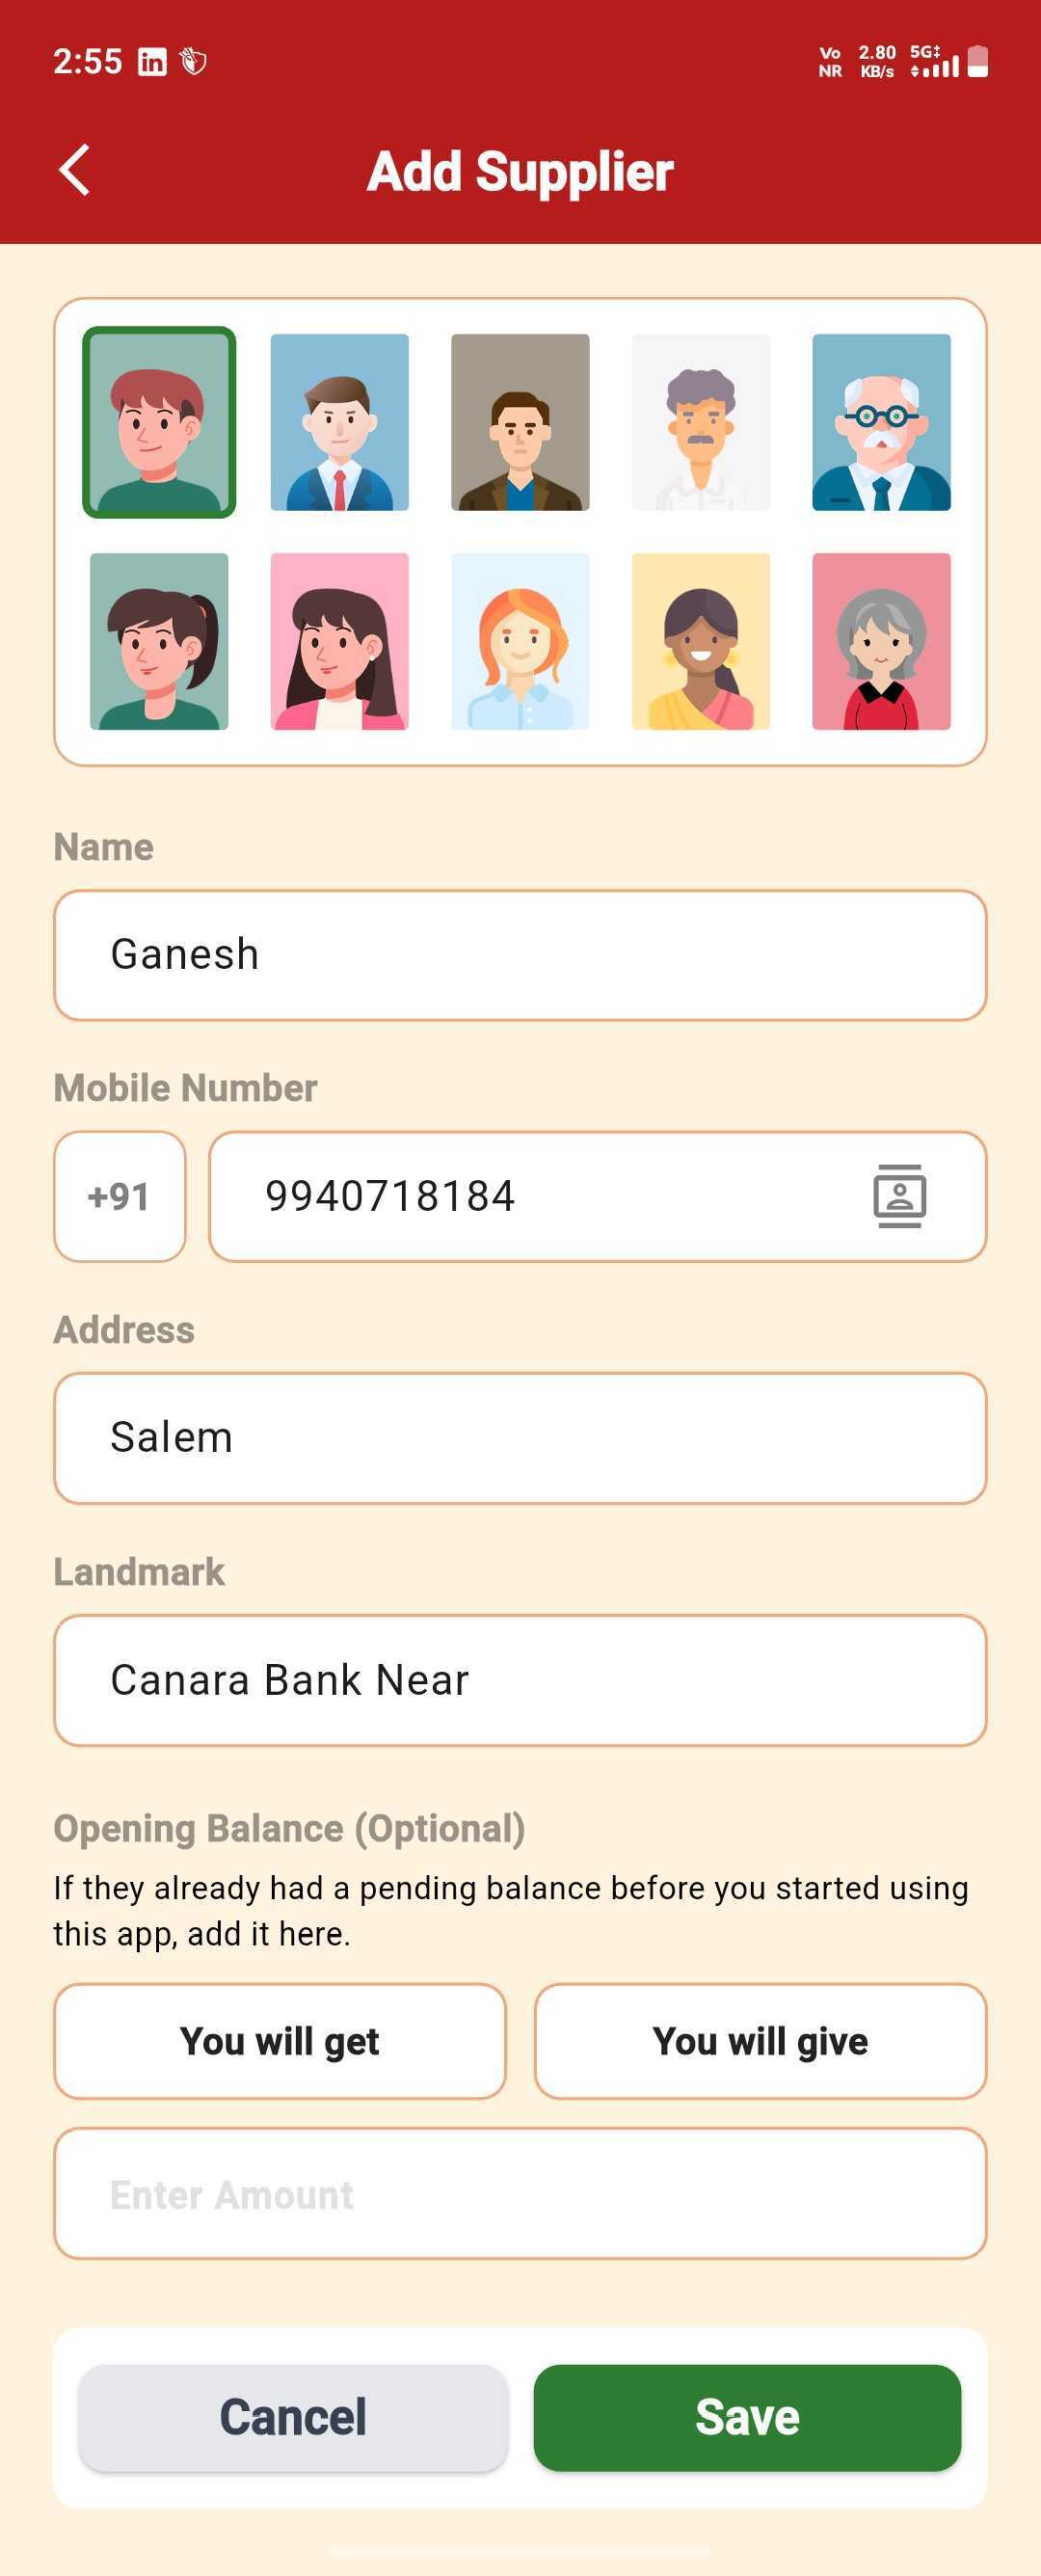
Supplier Added
They now show up in your list — tap them to open their ledger.
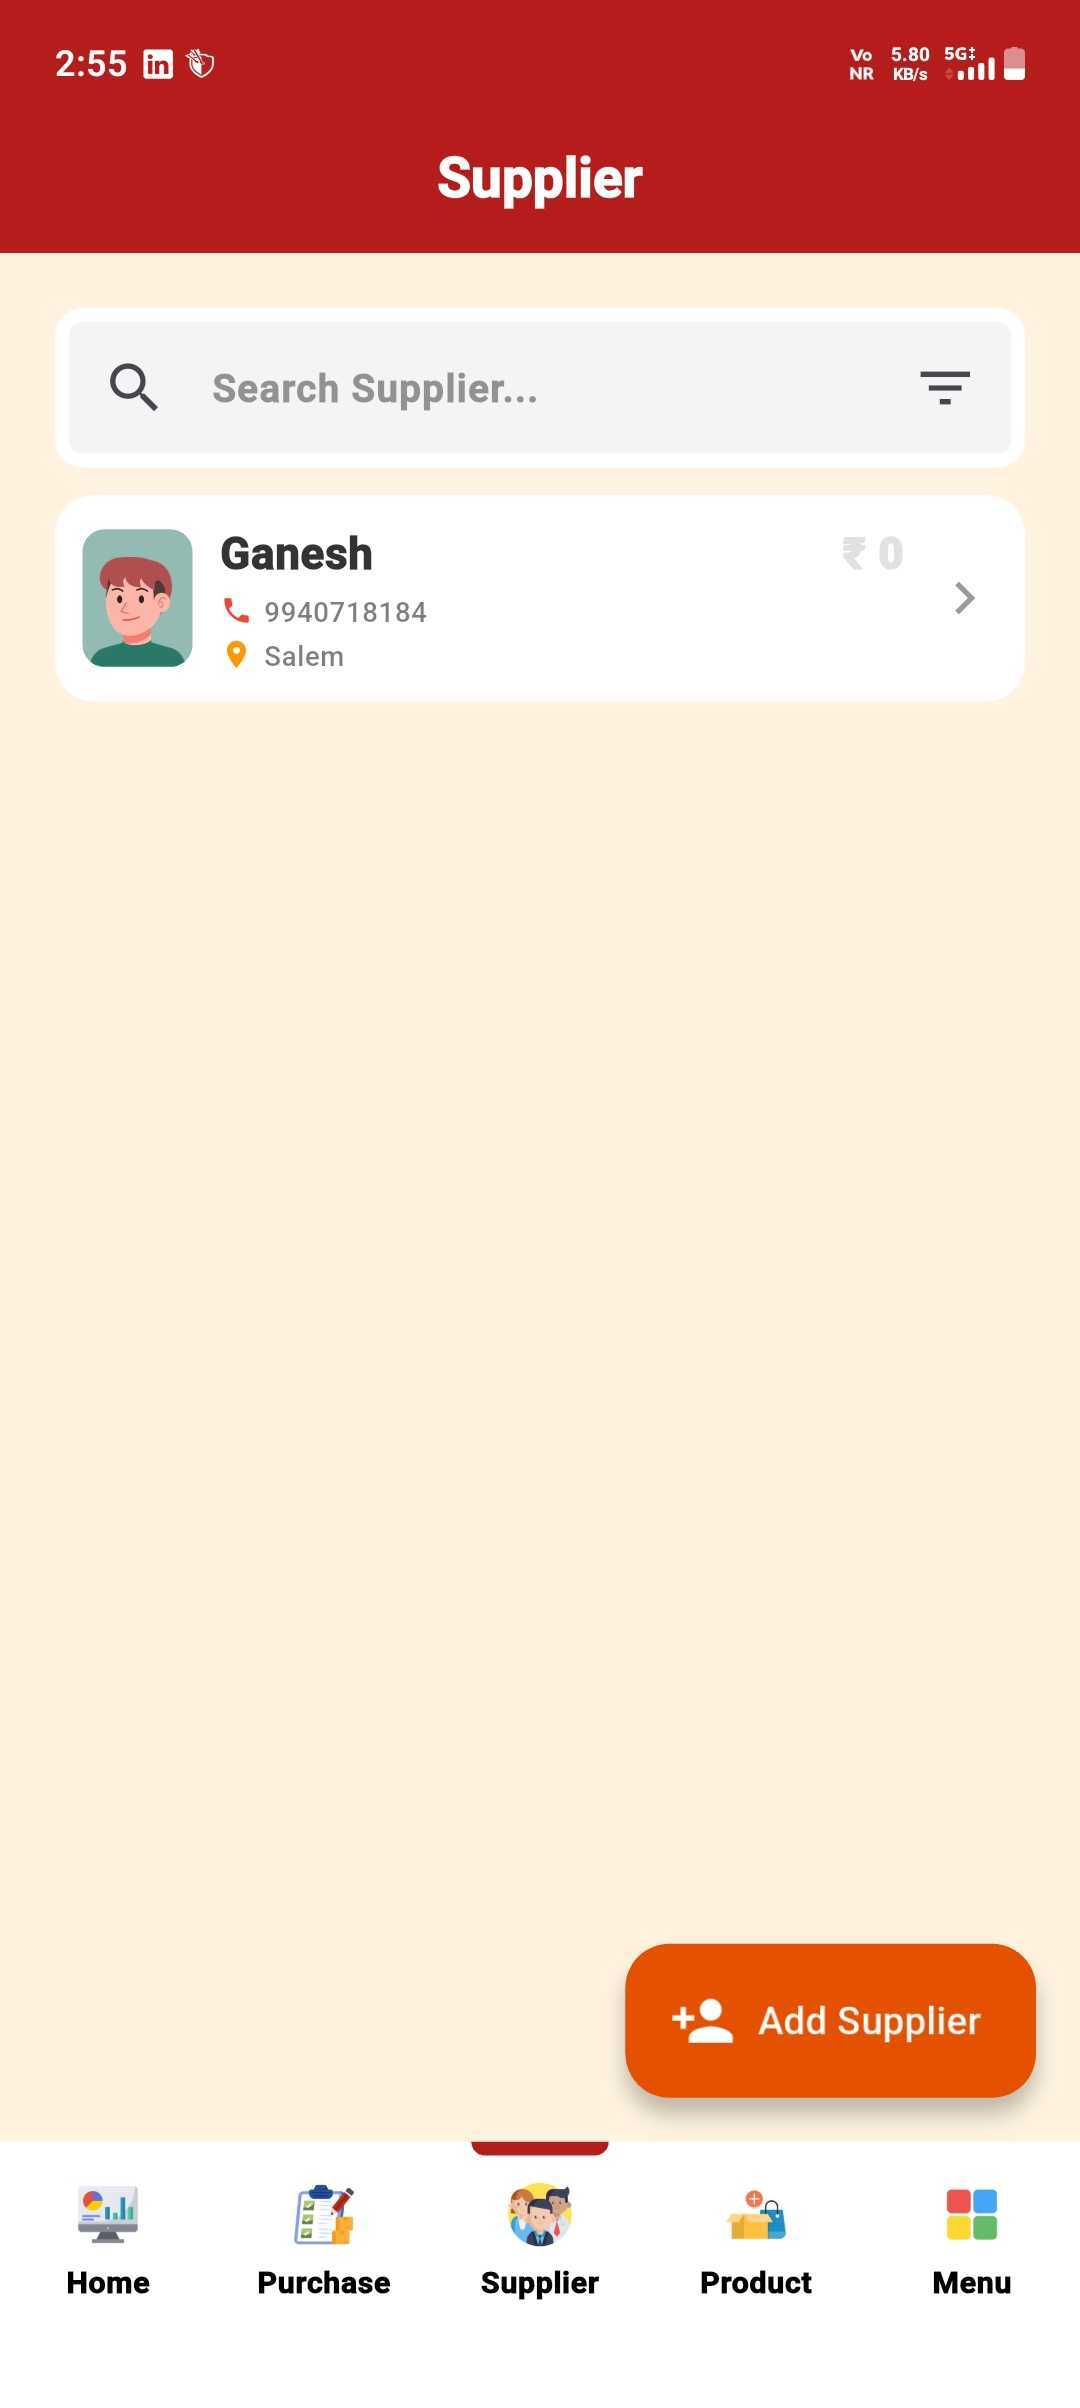
Open Their Ledger
Ready for a Purchase, a Payment, or a PDF/delete from the header.
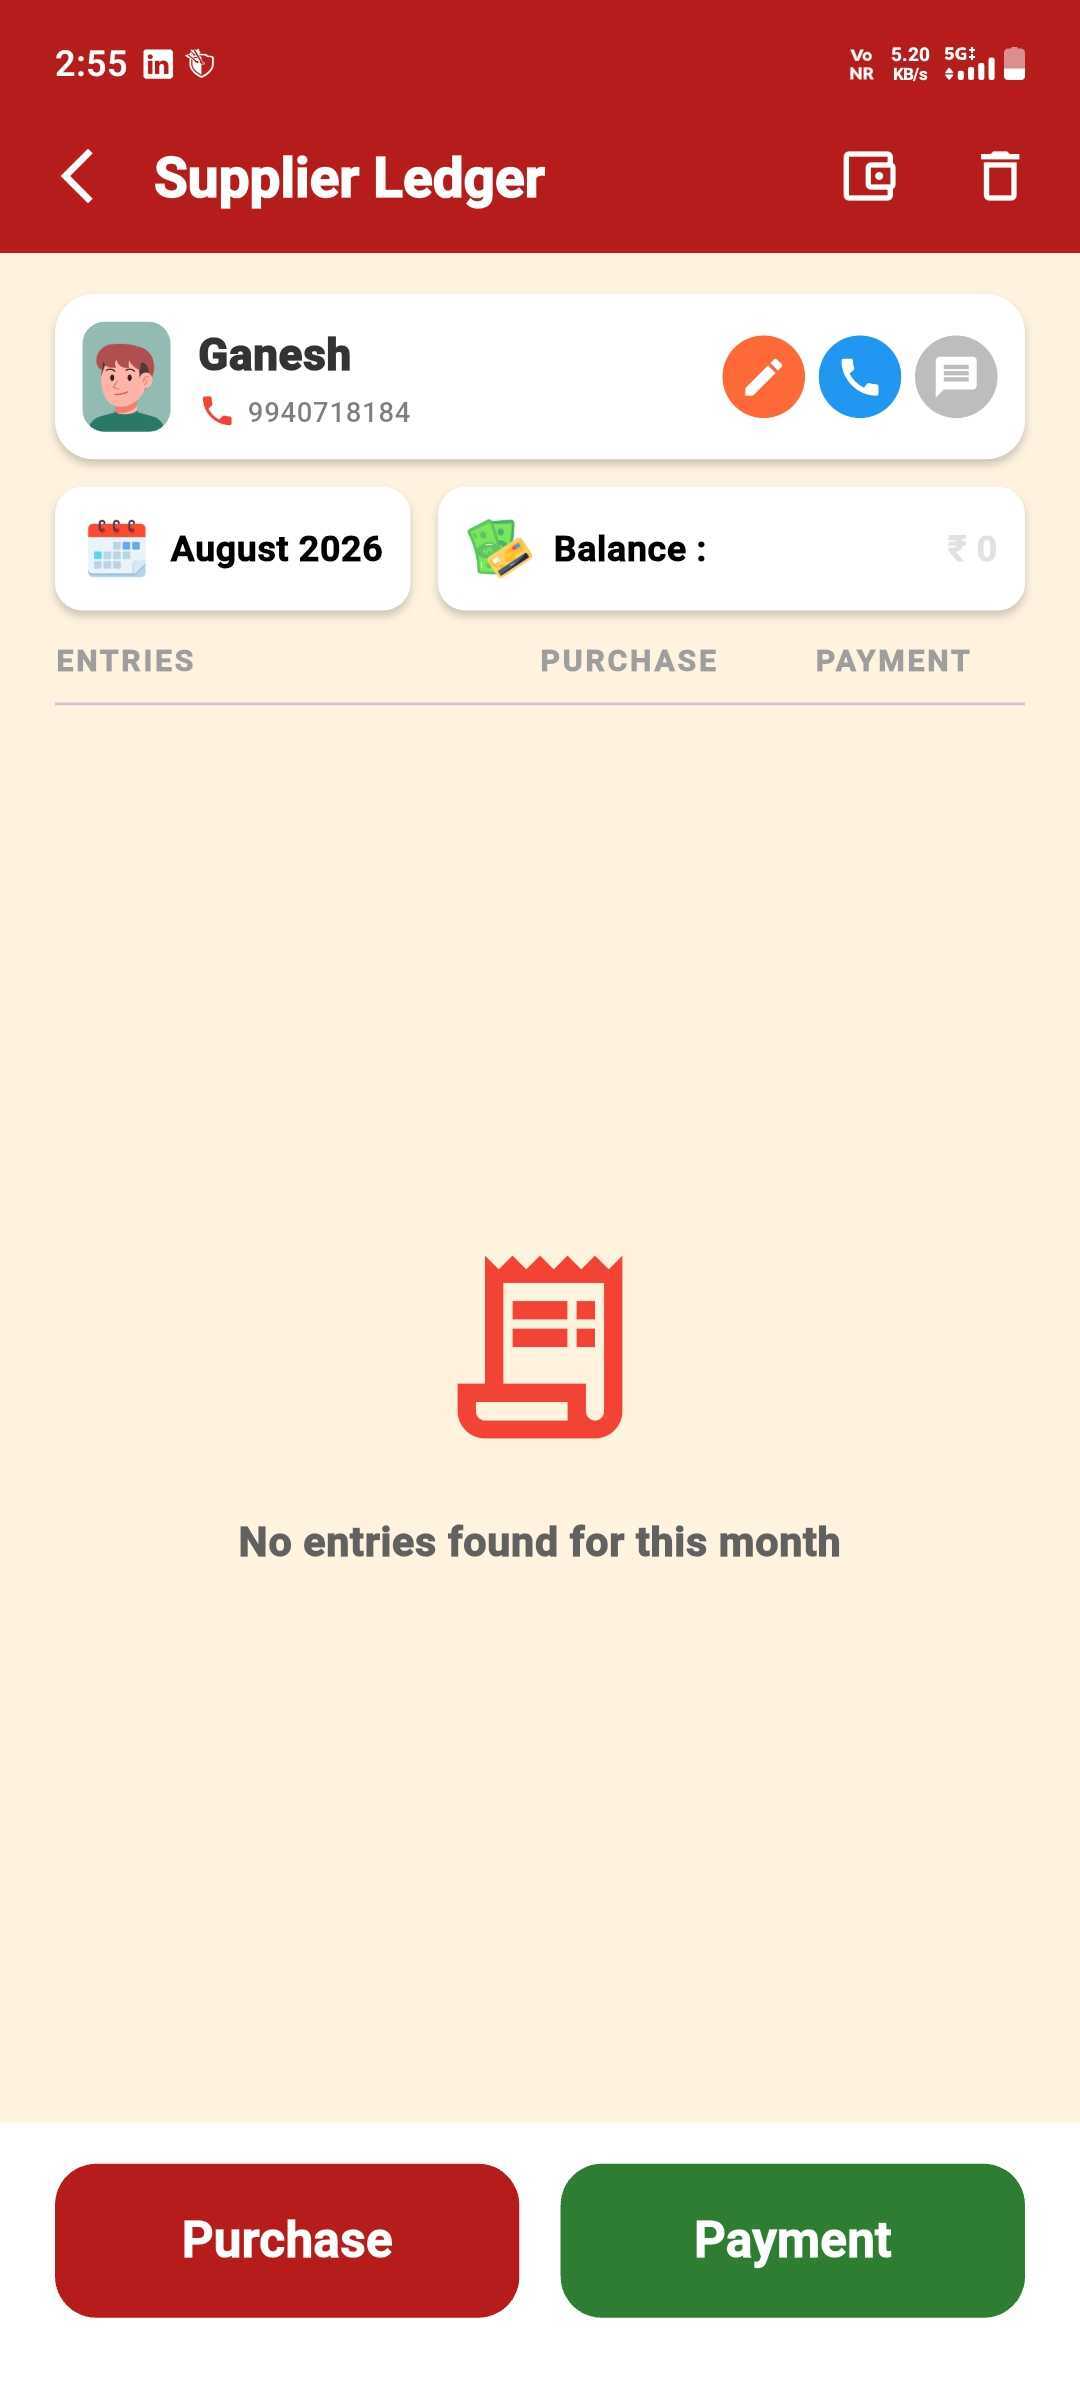
Delete a Supplier
Only a fully settled supplier can be deleted.
If the supplier still has a due balance, deletion is blocked.
Swipe Shows "Cannot Delete"
With a pending balance, the swipe action is greyed out.
Reason Shown
Tapping it confirms why: "Only settled customers can be deleted."
Once the balance is ₹0, deletion is allowed.
Swipe to Delete
Once the balance is ₹0, the same swipe reveals a working Delete button.
Confirm Deletion
Tap Delete again to confirm — the supplier is removed.
Record a Purchase for a Supplier
Log a purchase against a supplier — stock updates itself.
Open the Purchase Form
Go to Inventory, pick the Supplier & Product.
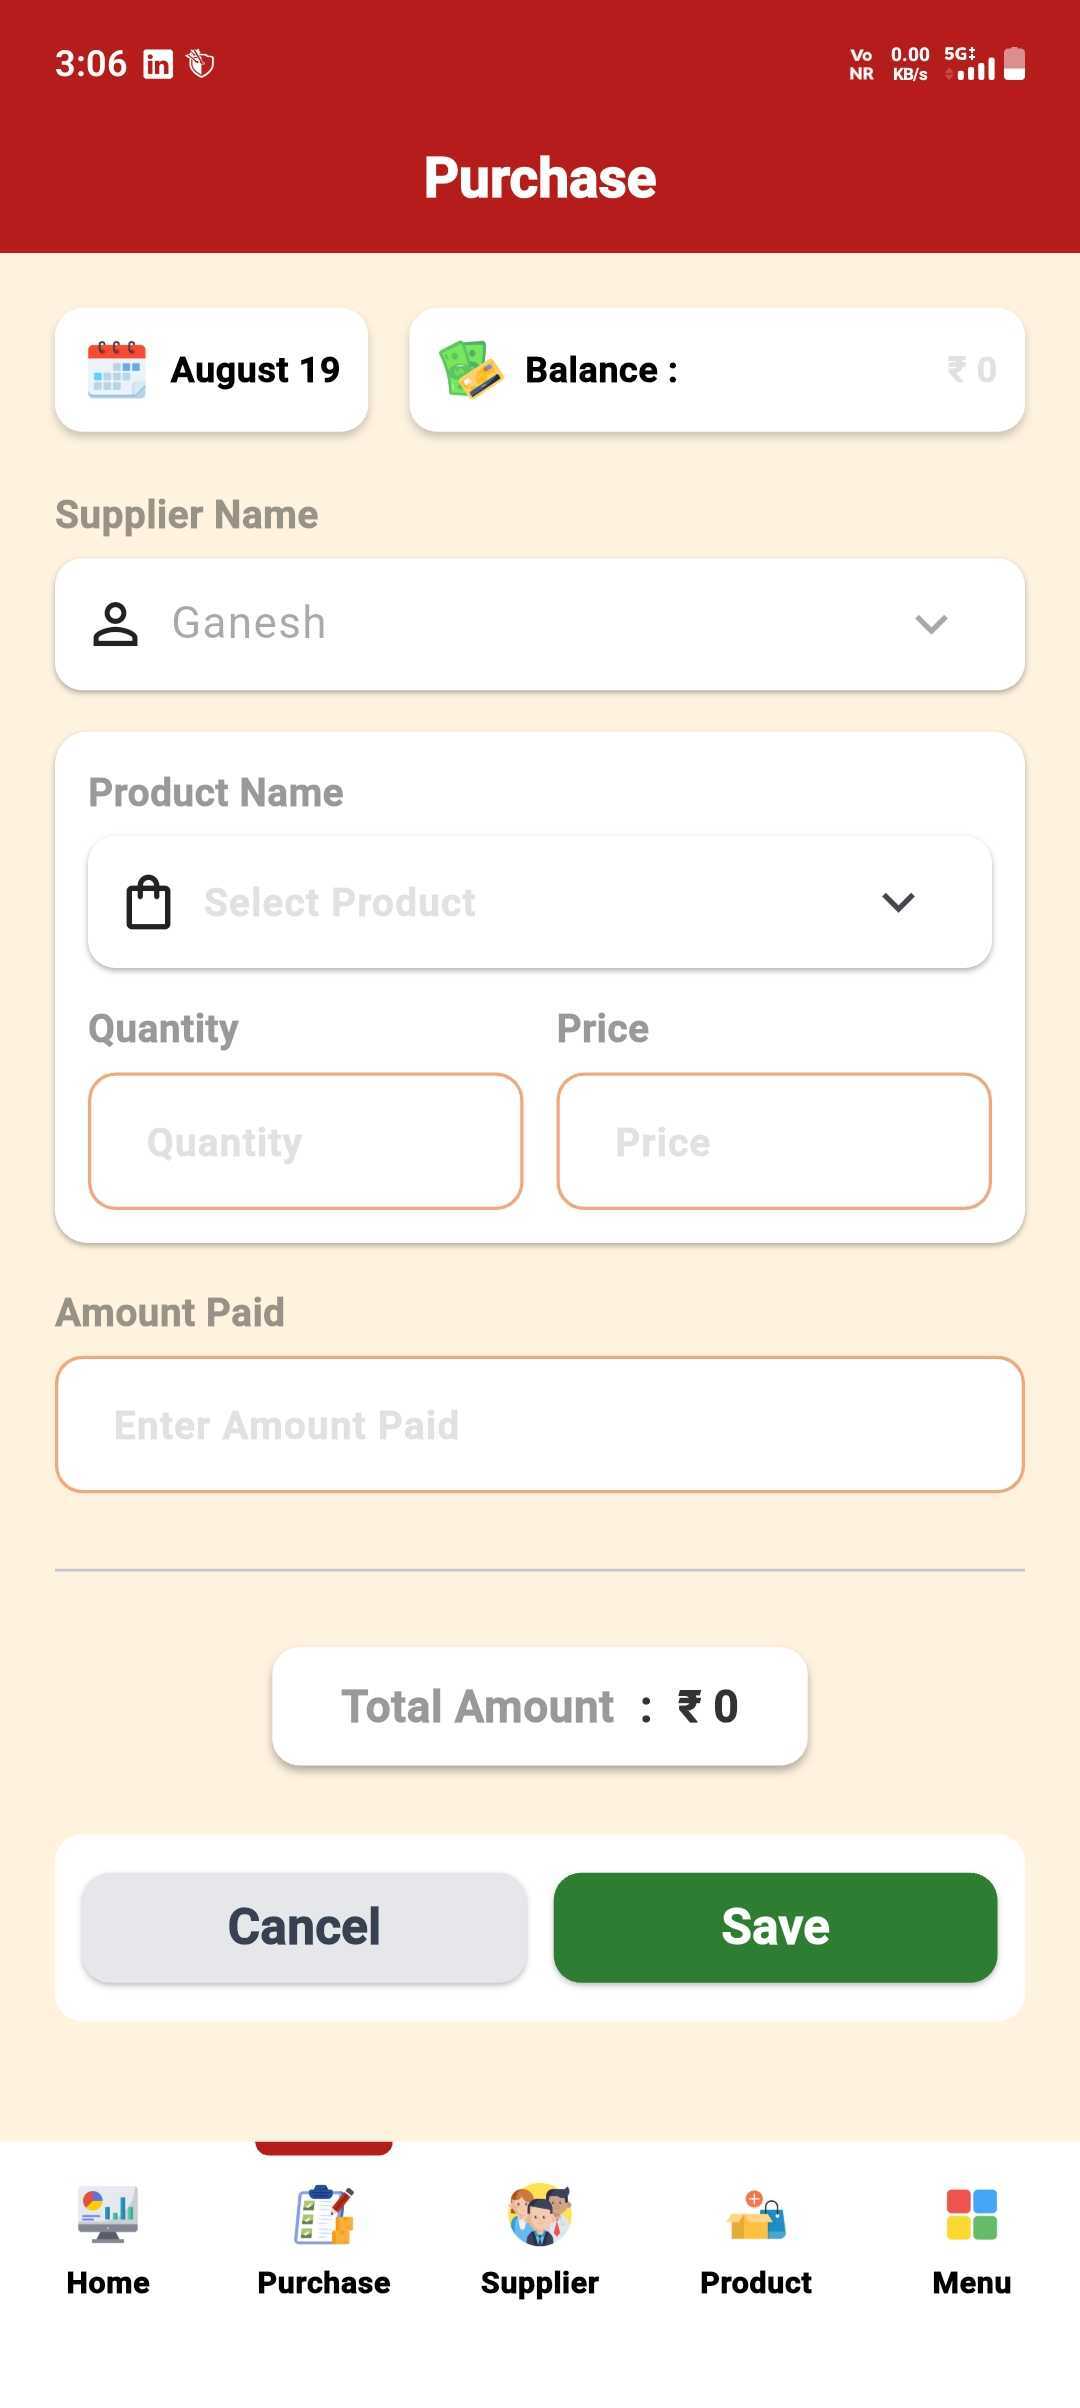
Enter Qty & Amount
Add Quantity, Price & what you paid — total updates live.
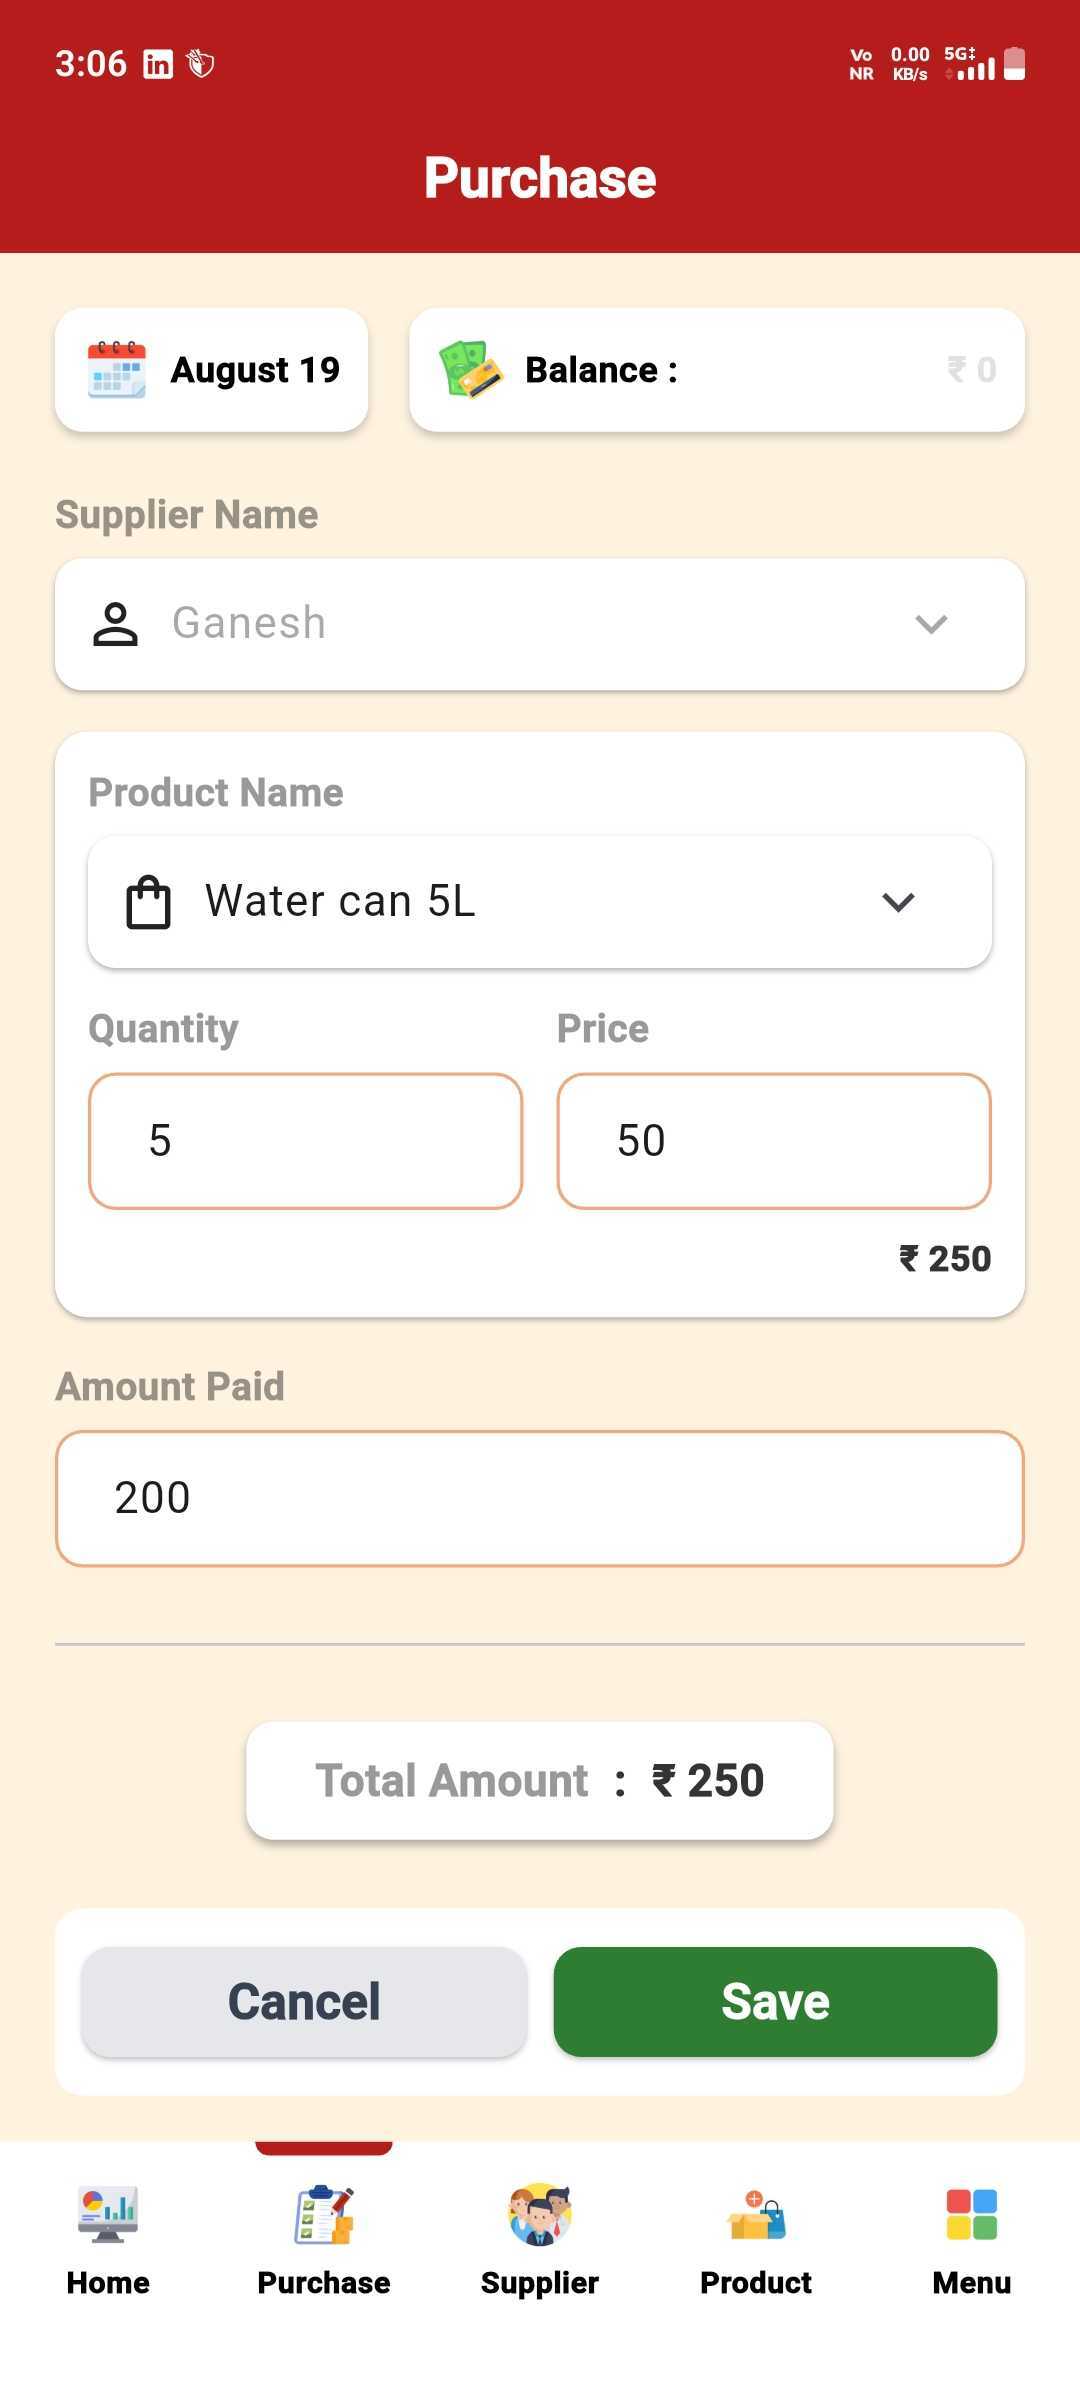
Share the Receipt
Save it, then share a receipt via SMS or WhatsApp — or skip.
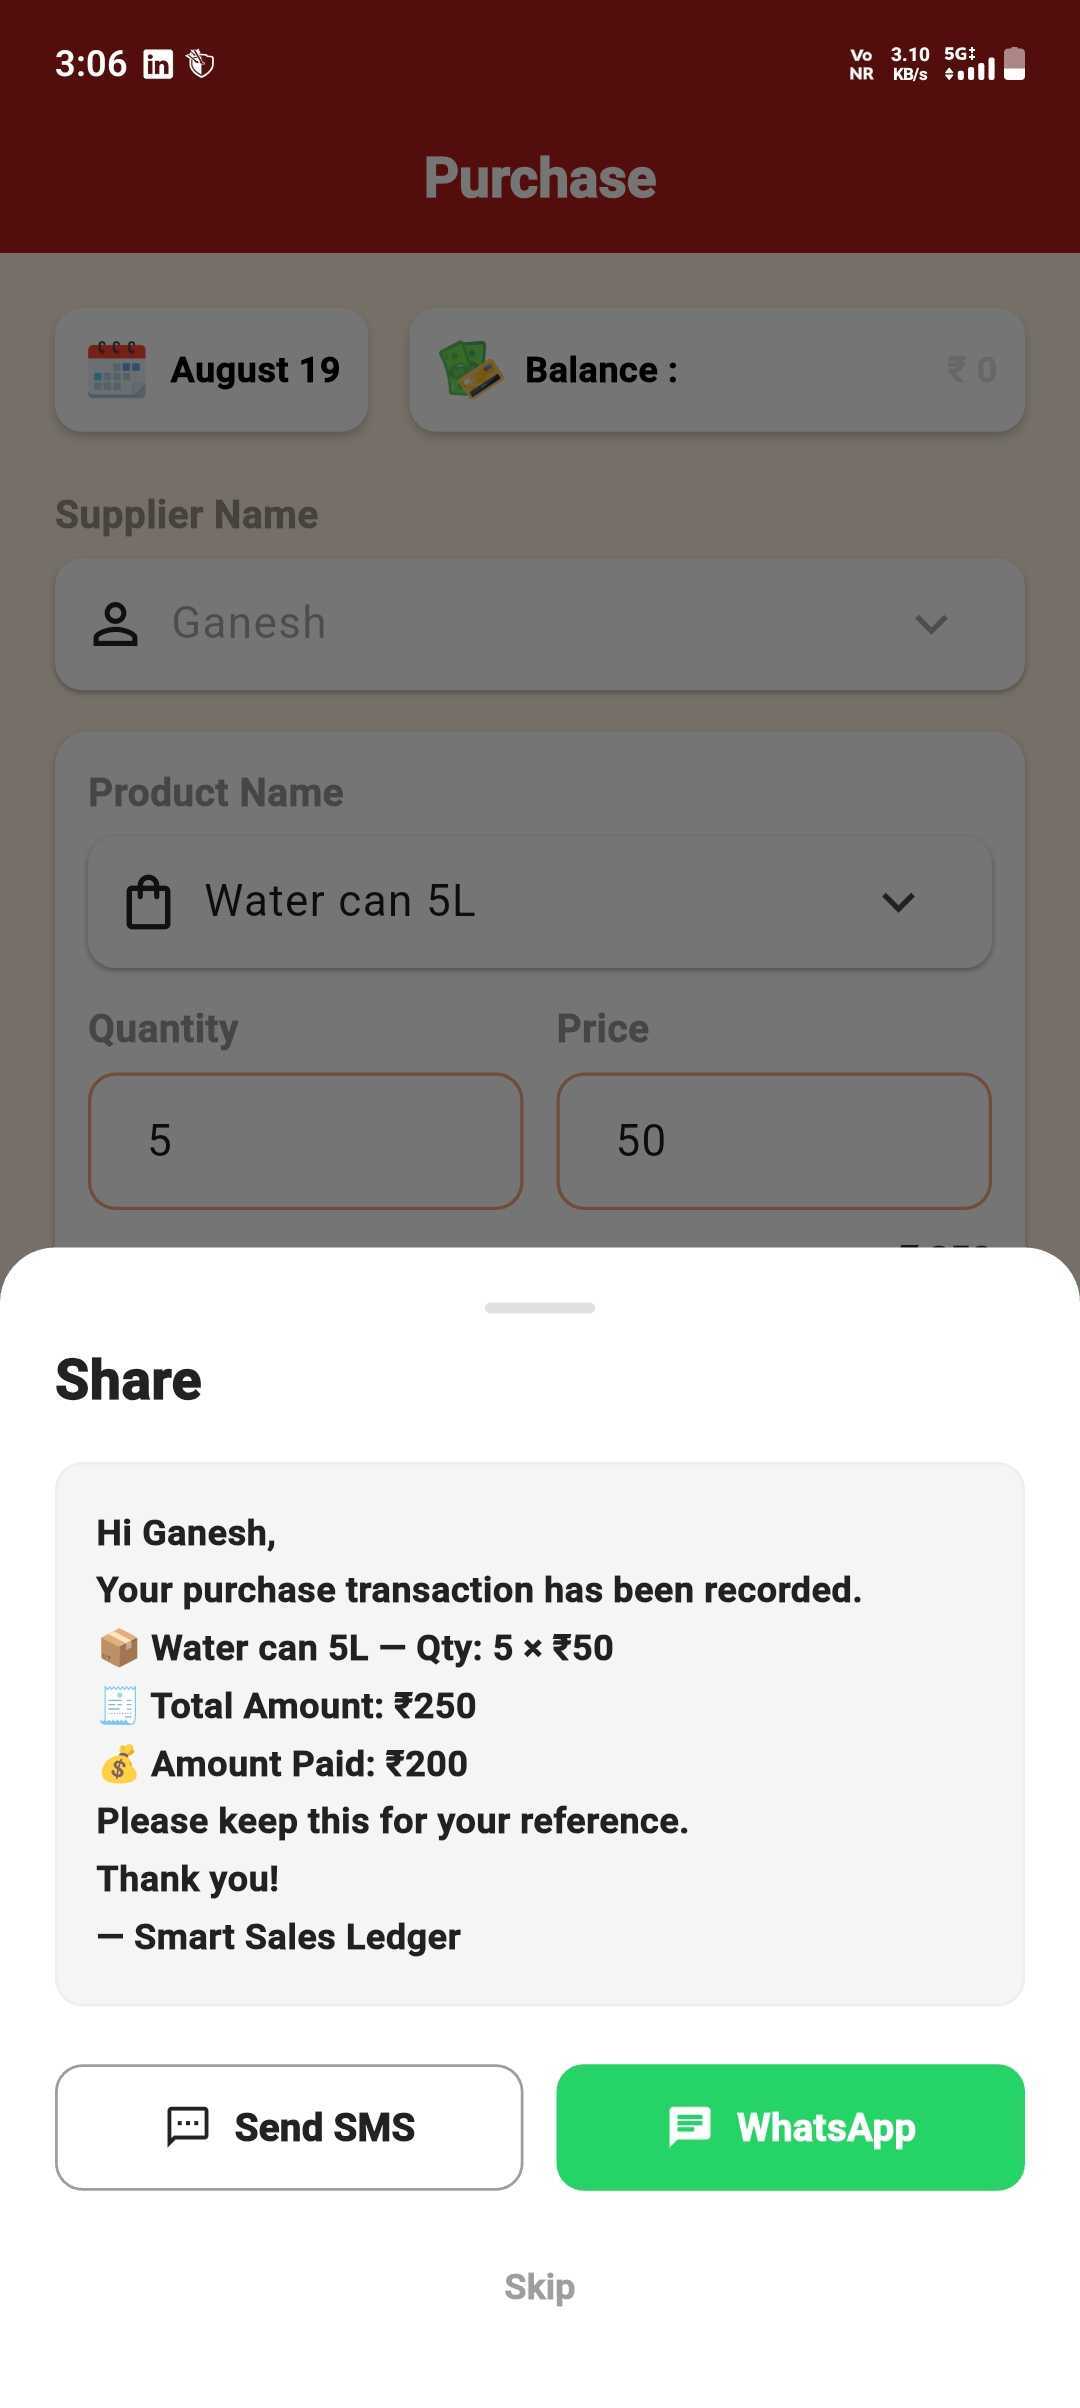
It's in the Ledger
Purchase & payment are both logged, balance updates instantly.
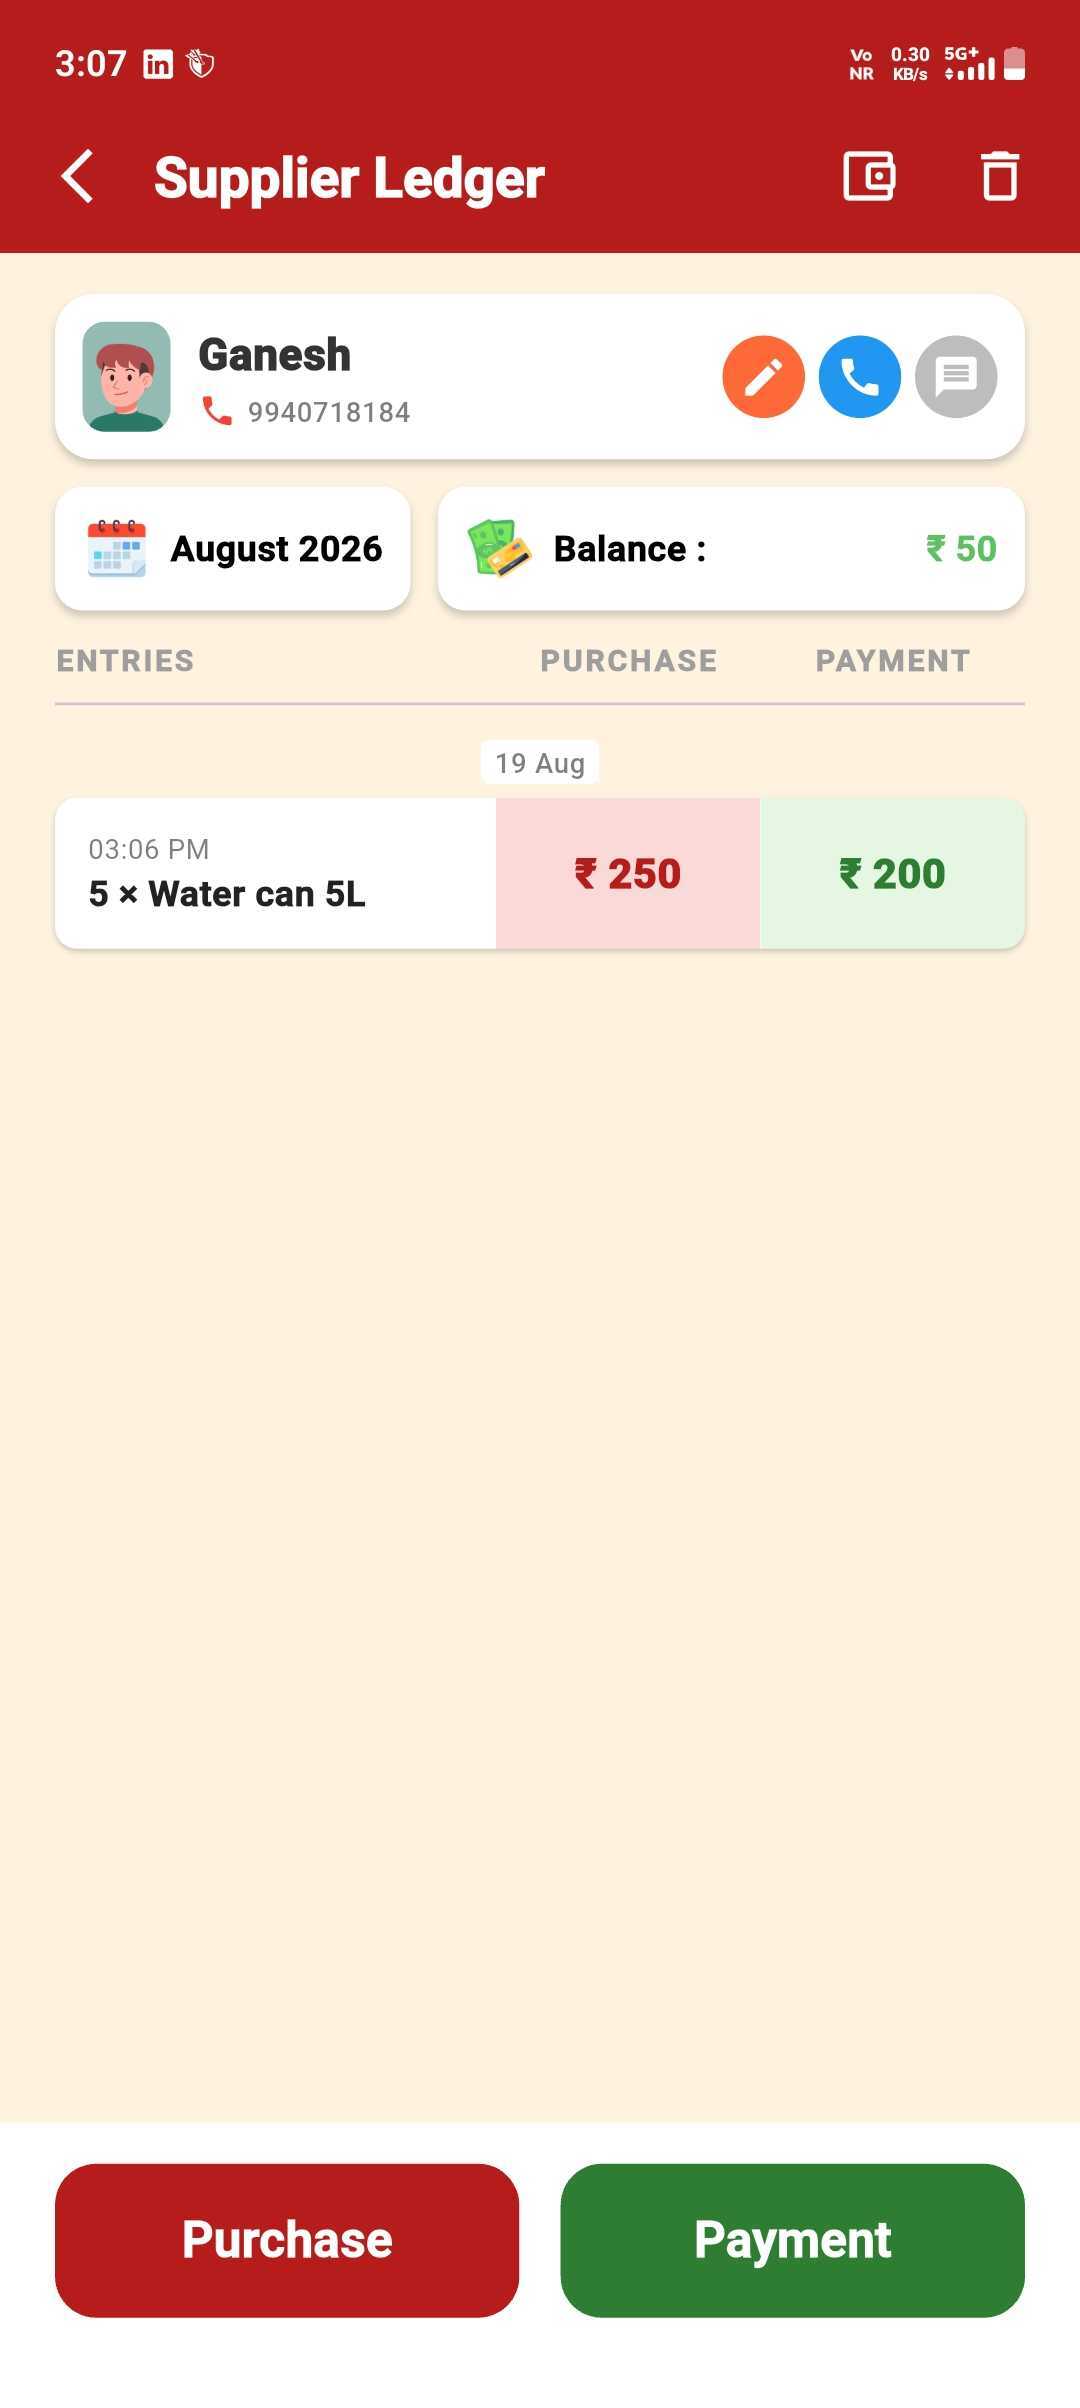
Tap to Review
Tap any entry to see its full purchase & payment details.
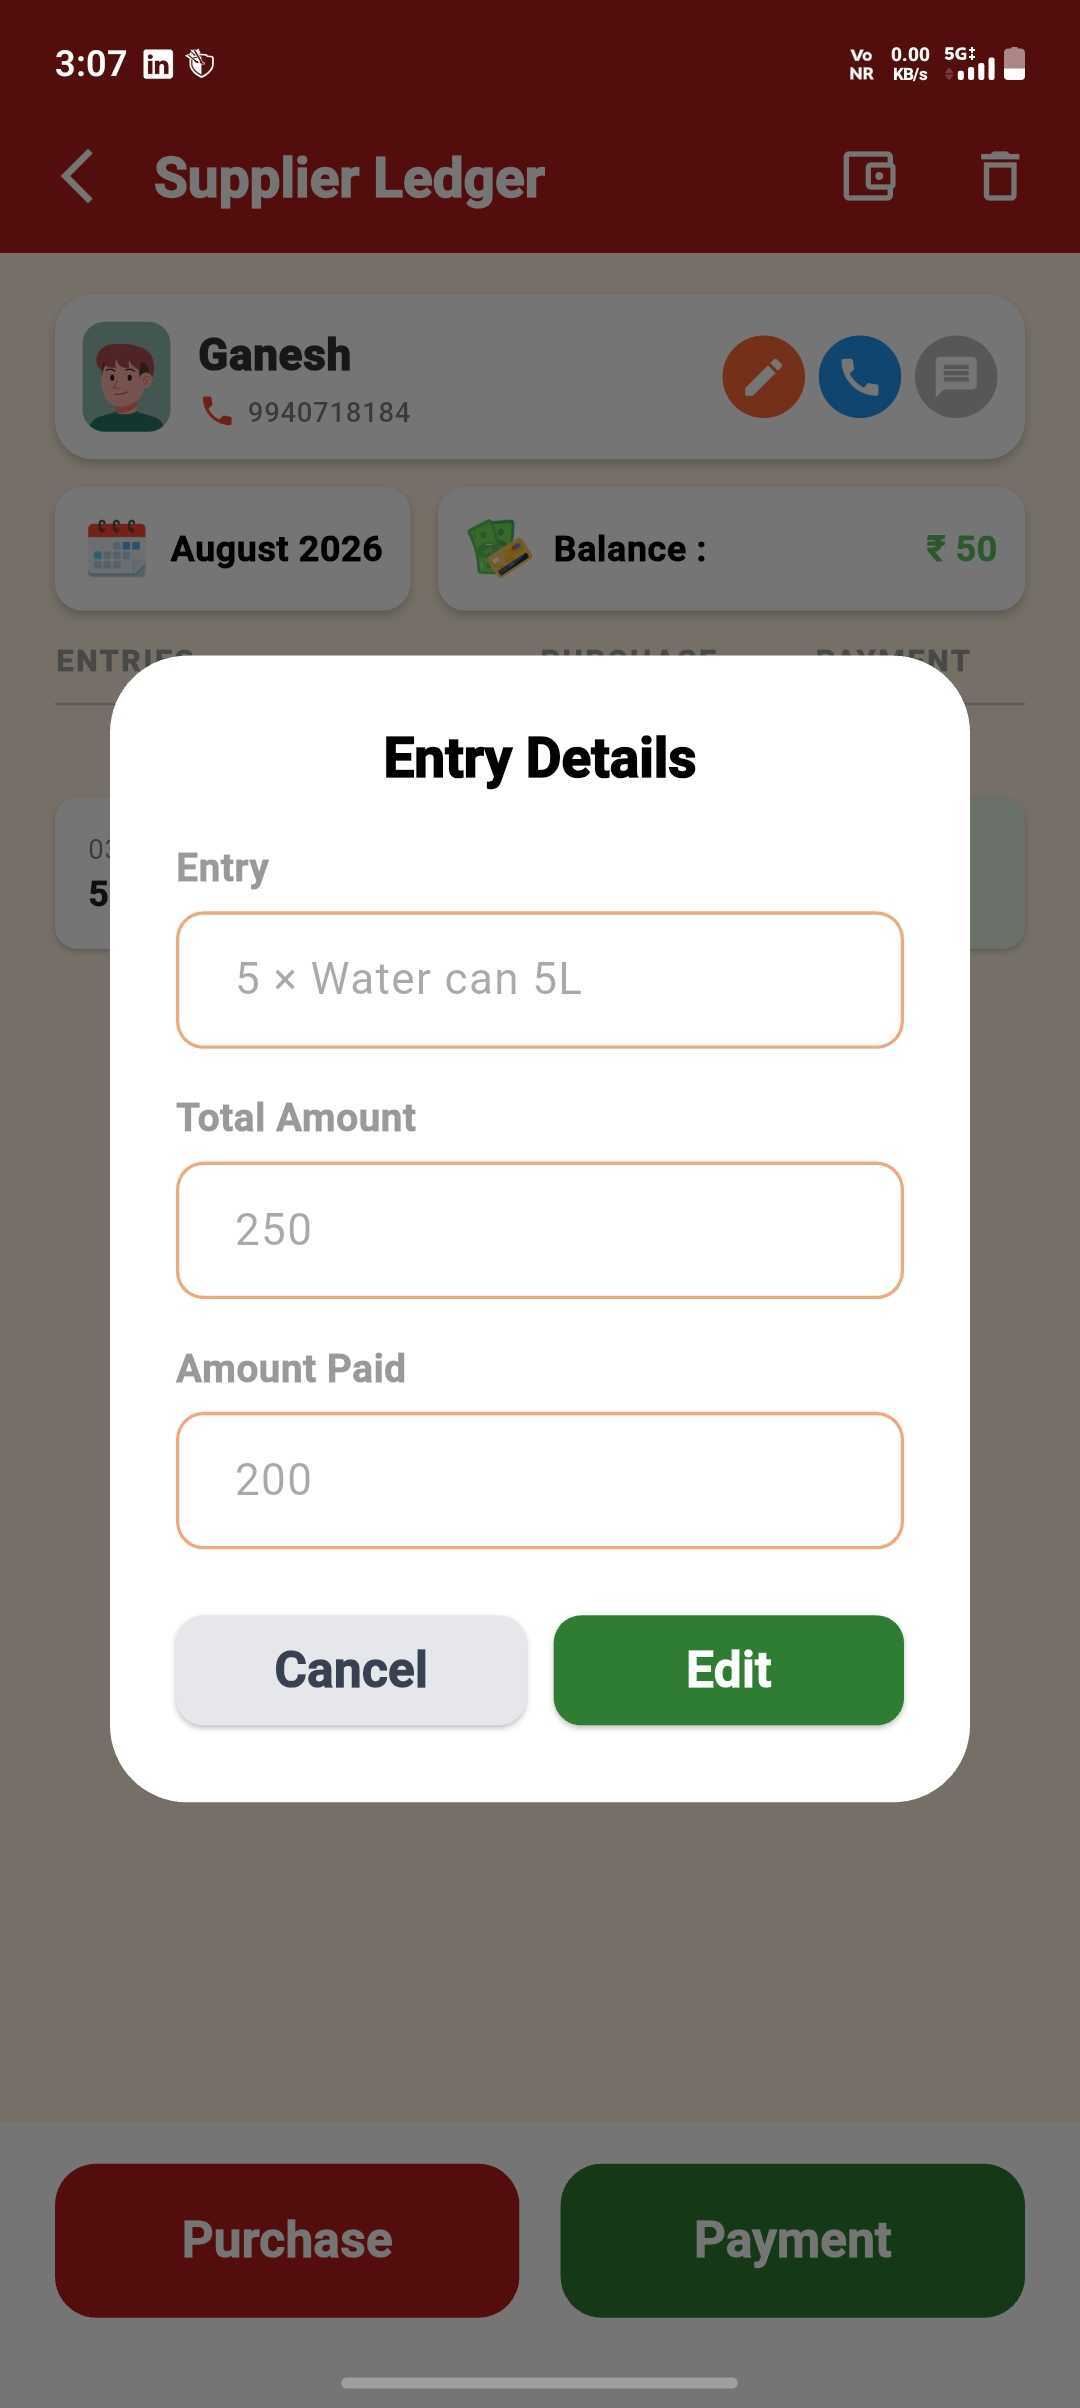
Edit Anytime
Change the quantity, price or amount paid, then save.
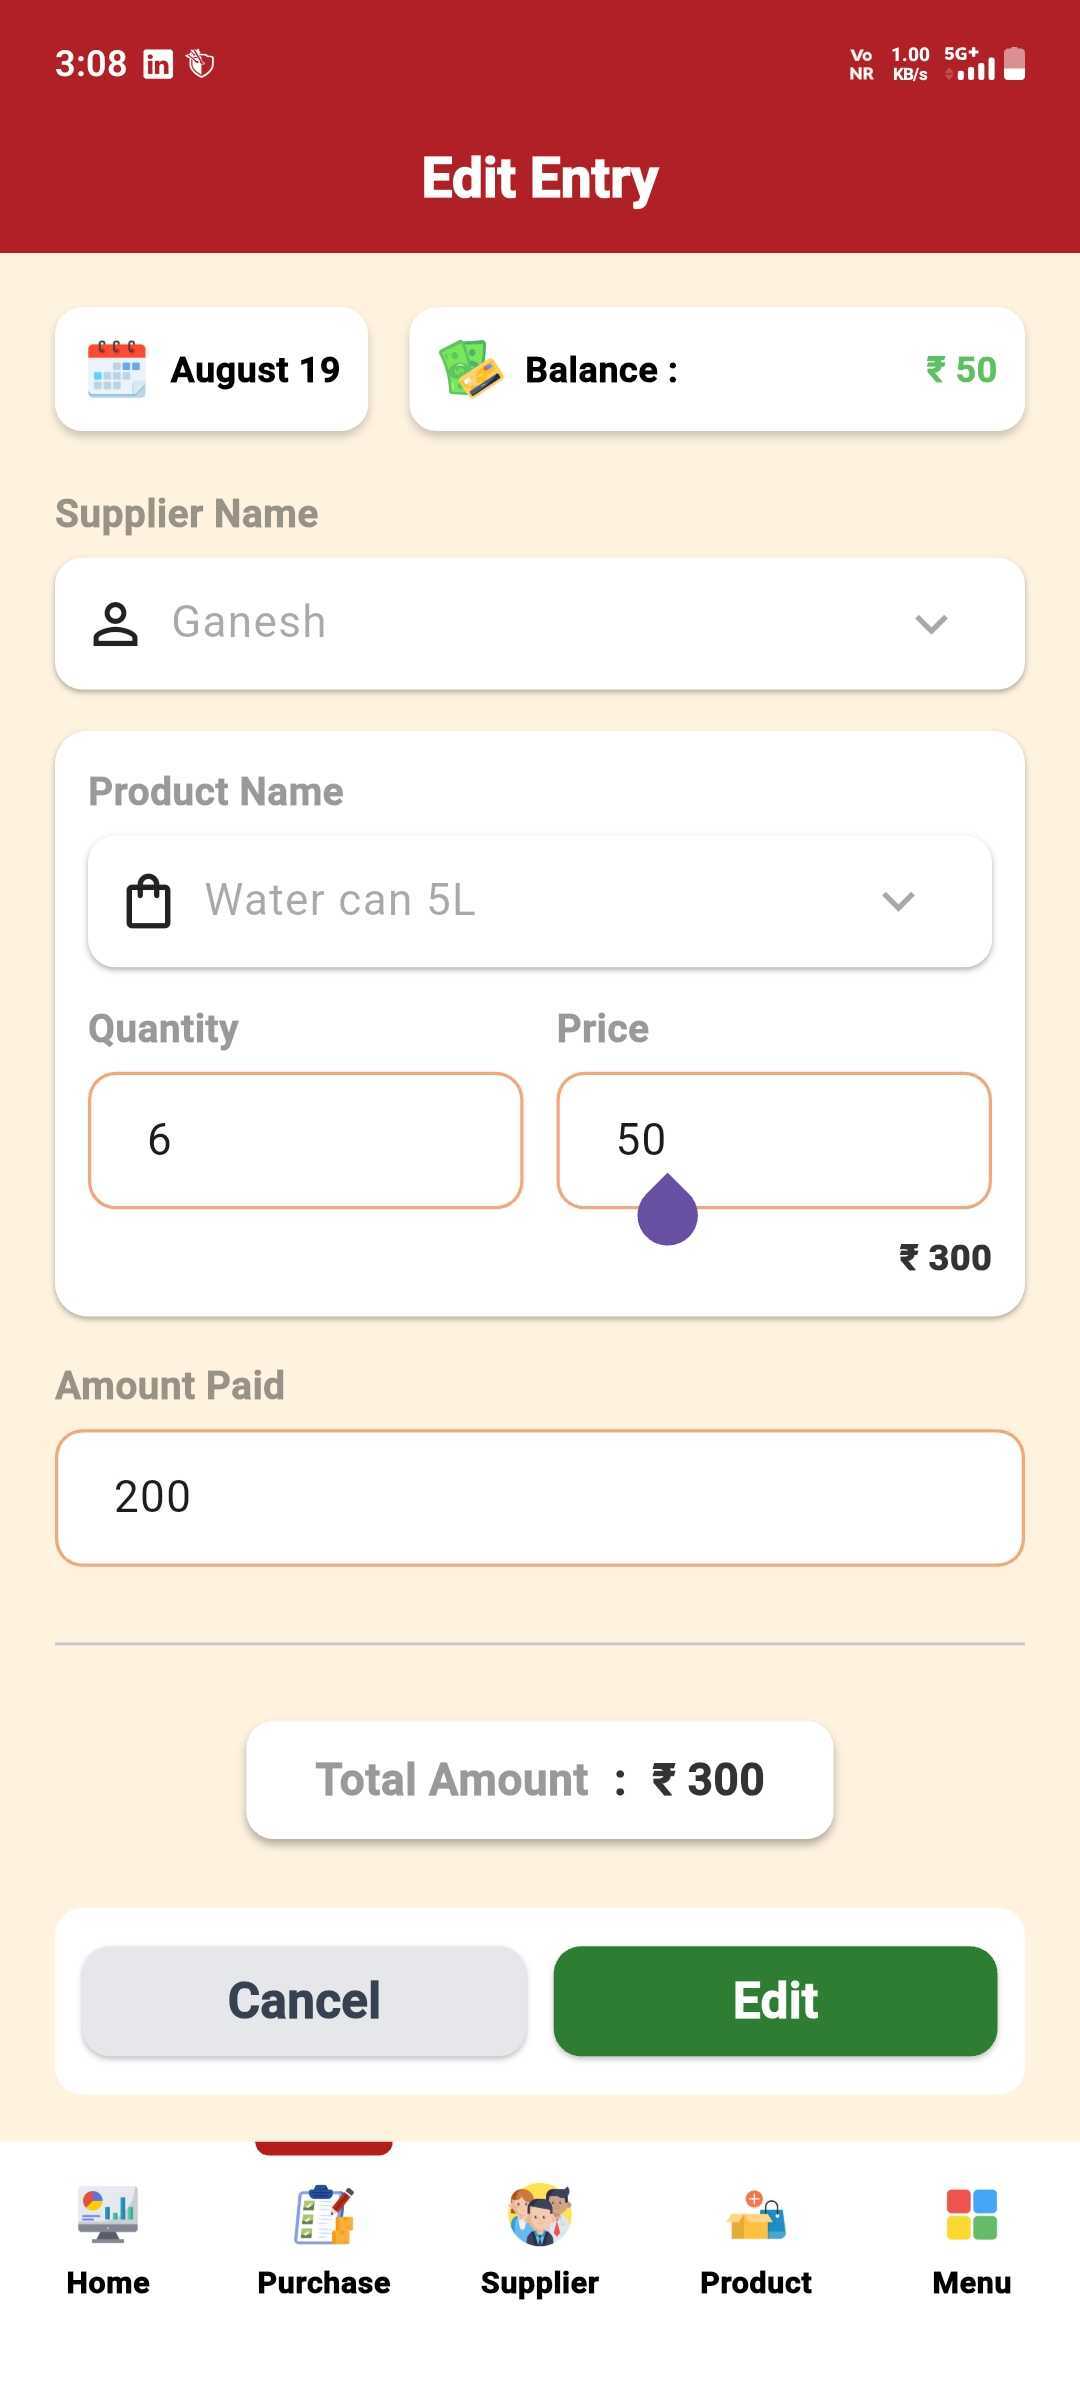
Balance Stays Accurate
The ledger reflects your update right away — fully settled here.
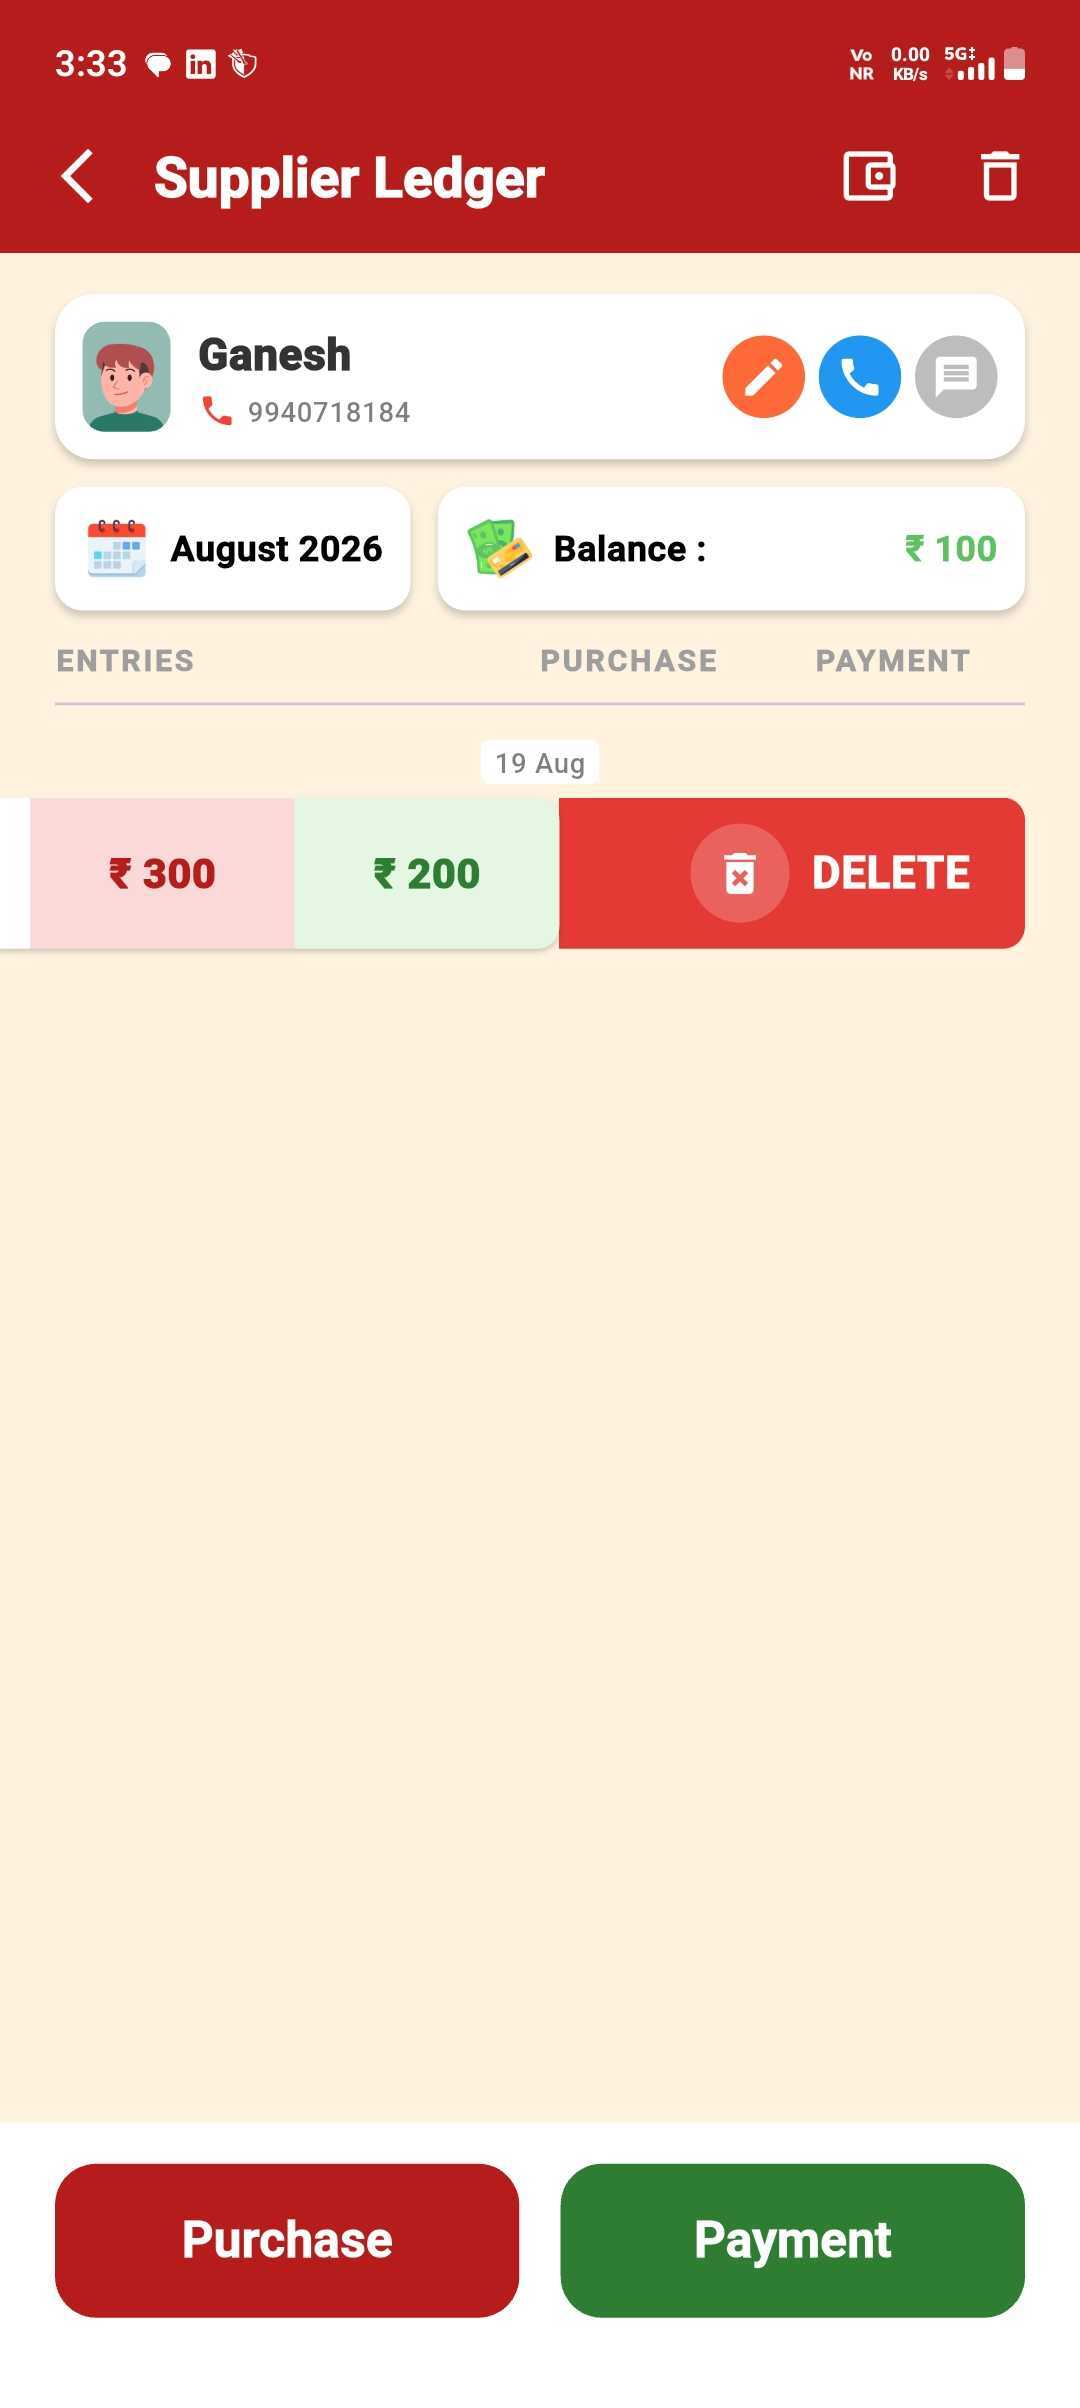
Delete a Purchase Entry
Remove a single purchase from a supplier's ledger.
Swipe the Entry
Inside the supplier's ledger, swipe an entry left to reveal Delete.
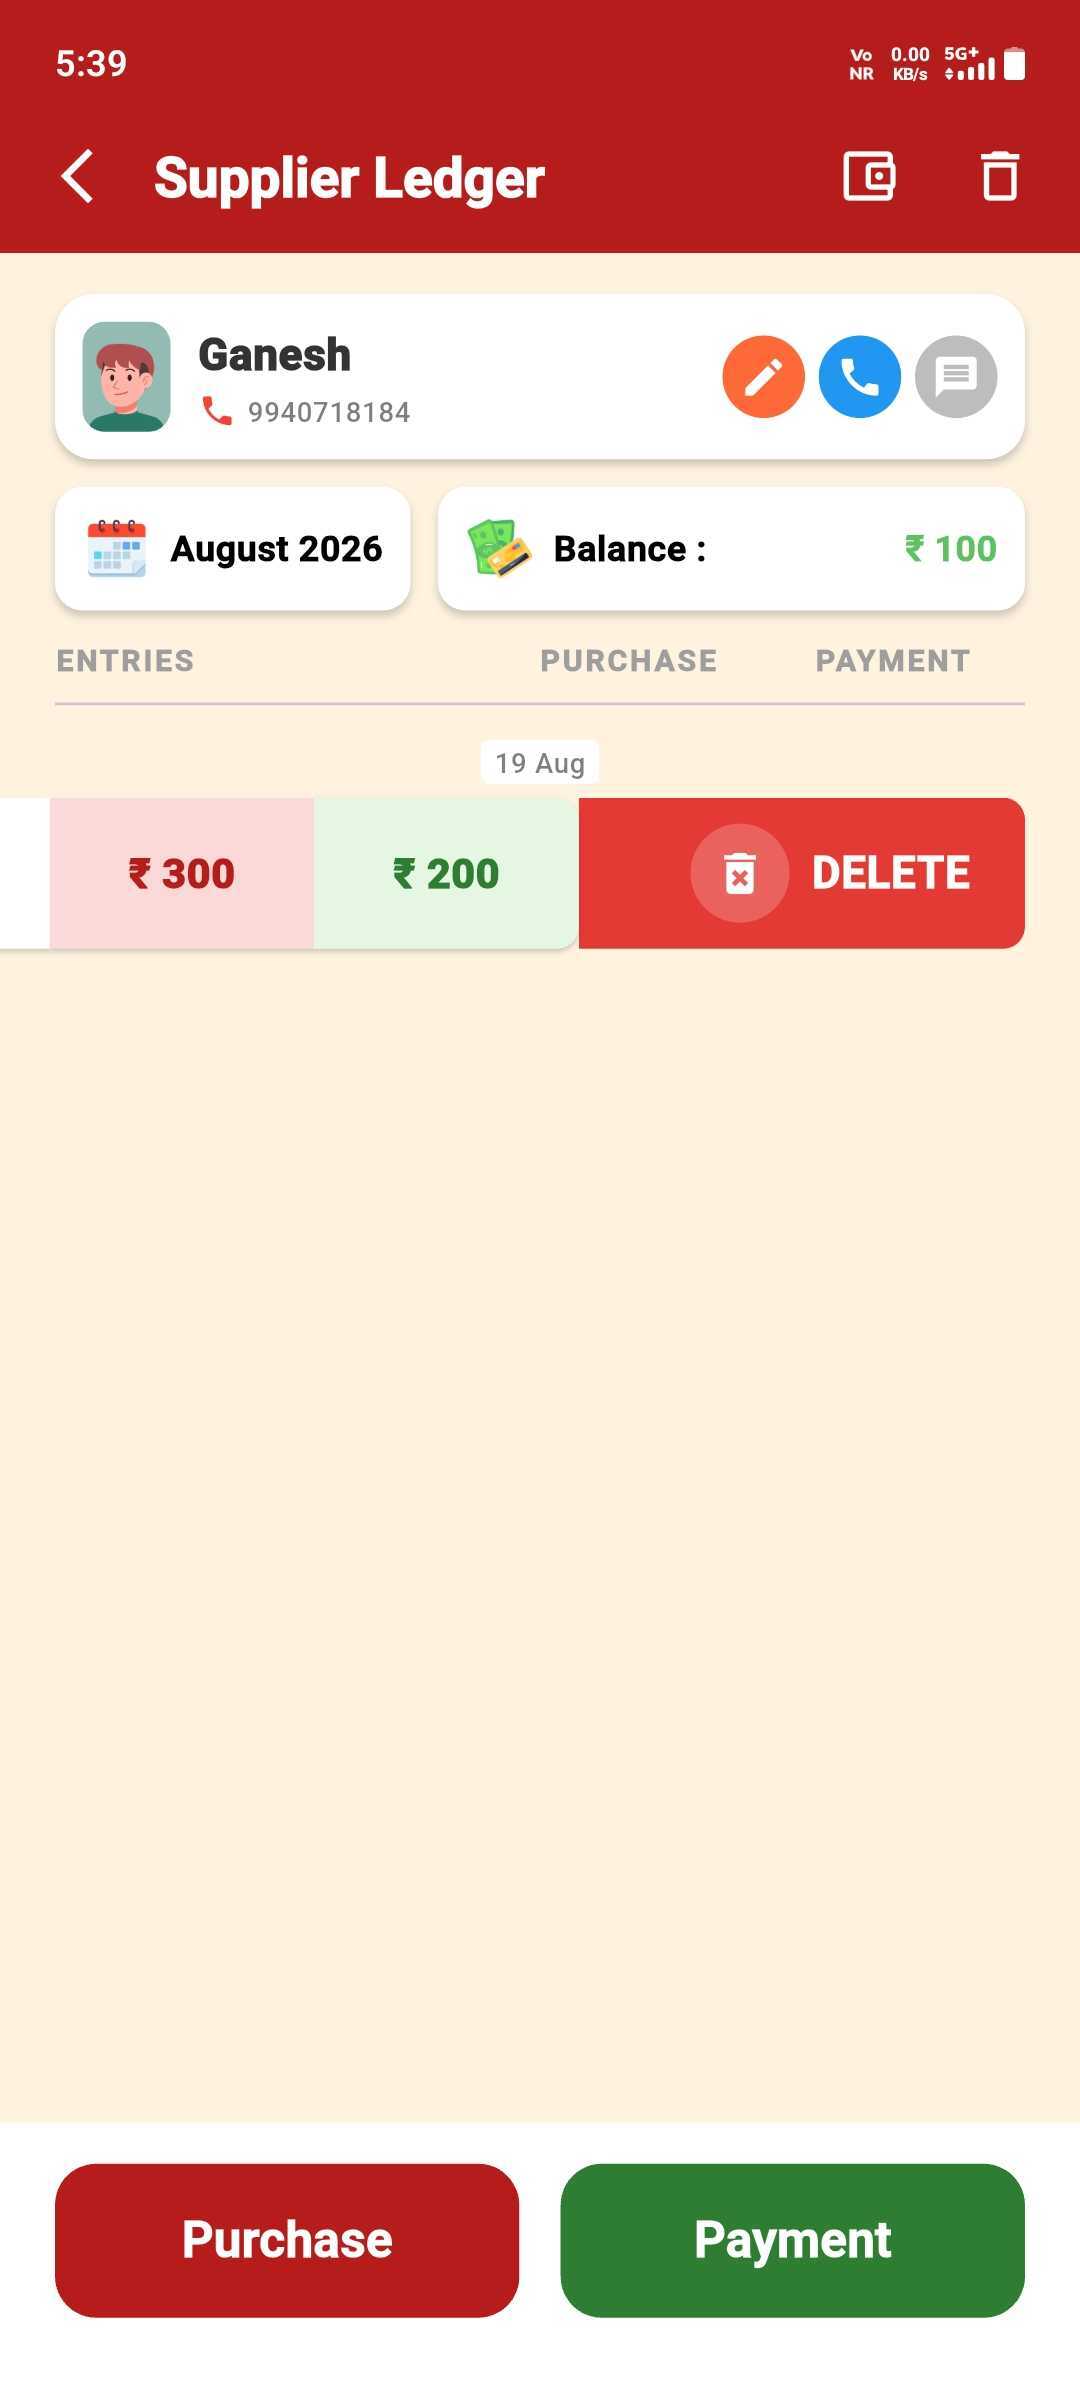
Confirm the Delete
Tap Delete again — the entry is removed and the balance updates instantly.
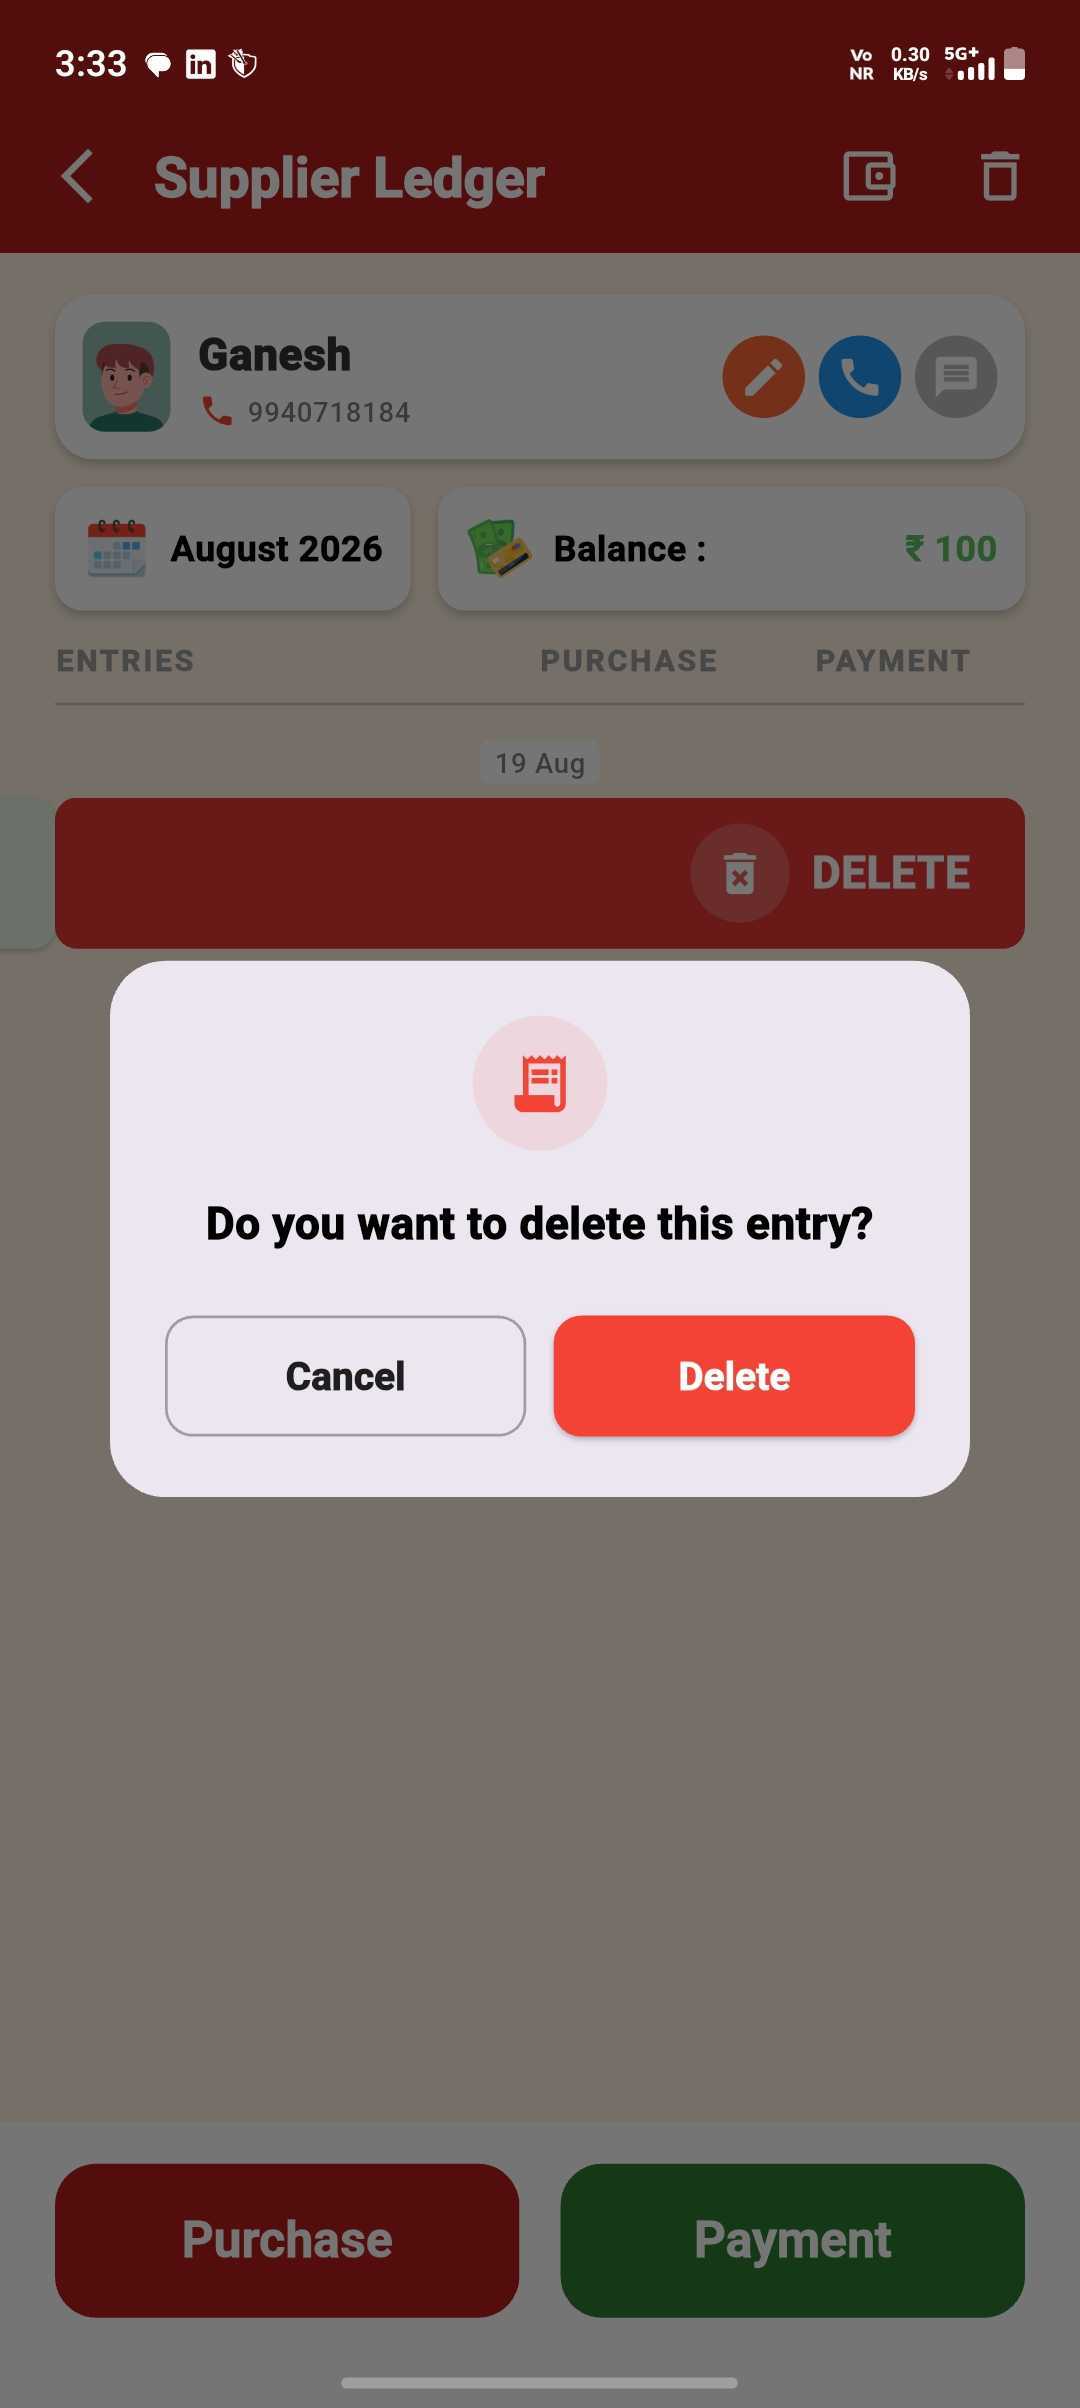
Record a Payment for a Supplier
Log a payment you give a supplier — updates their balance instantly.
Open the Ledger
From the supplier's ledger, tap Payment.
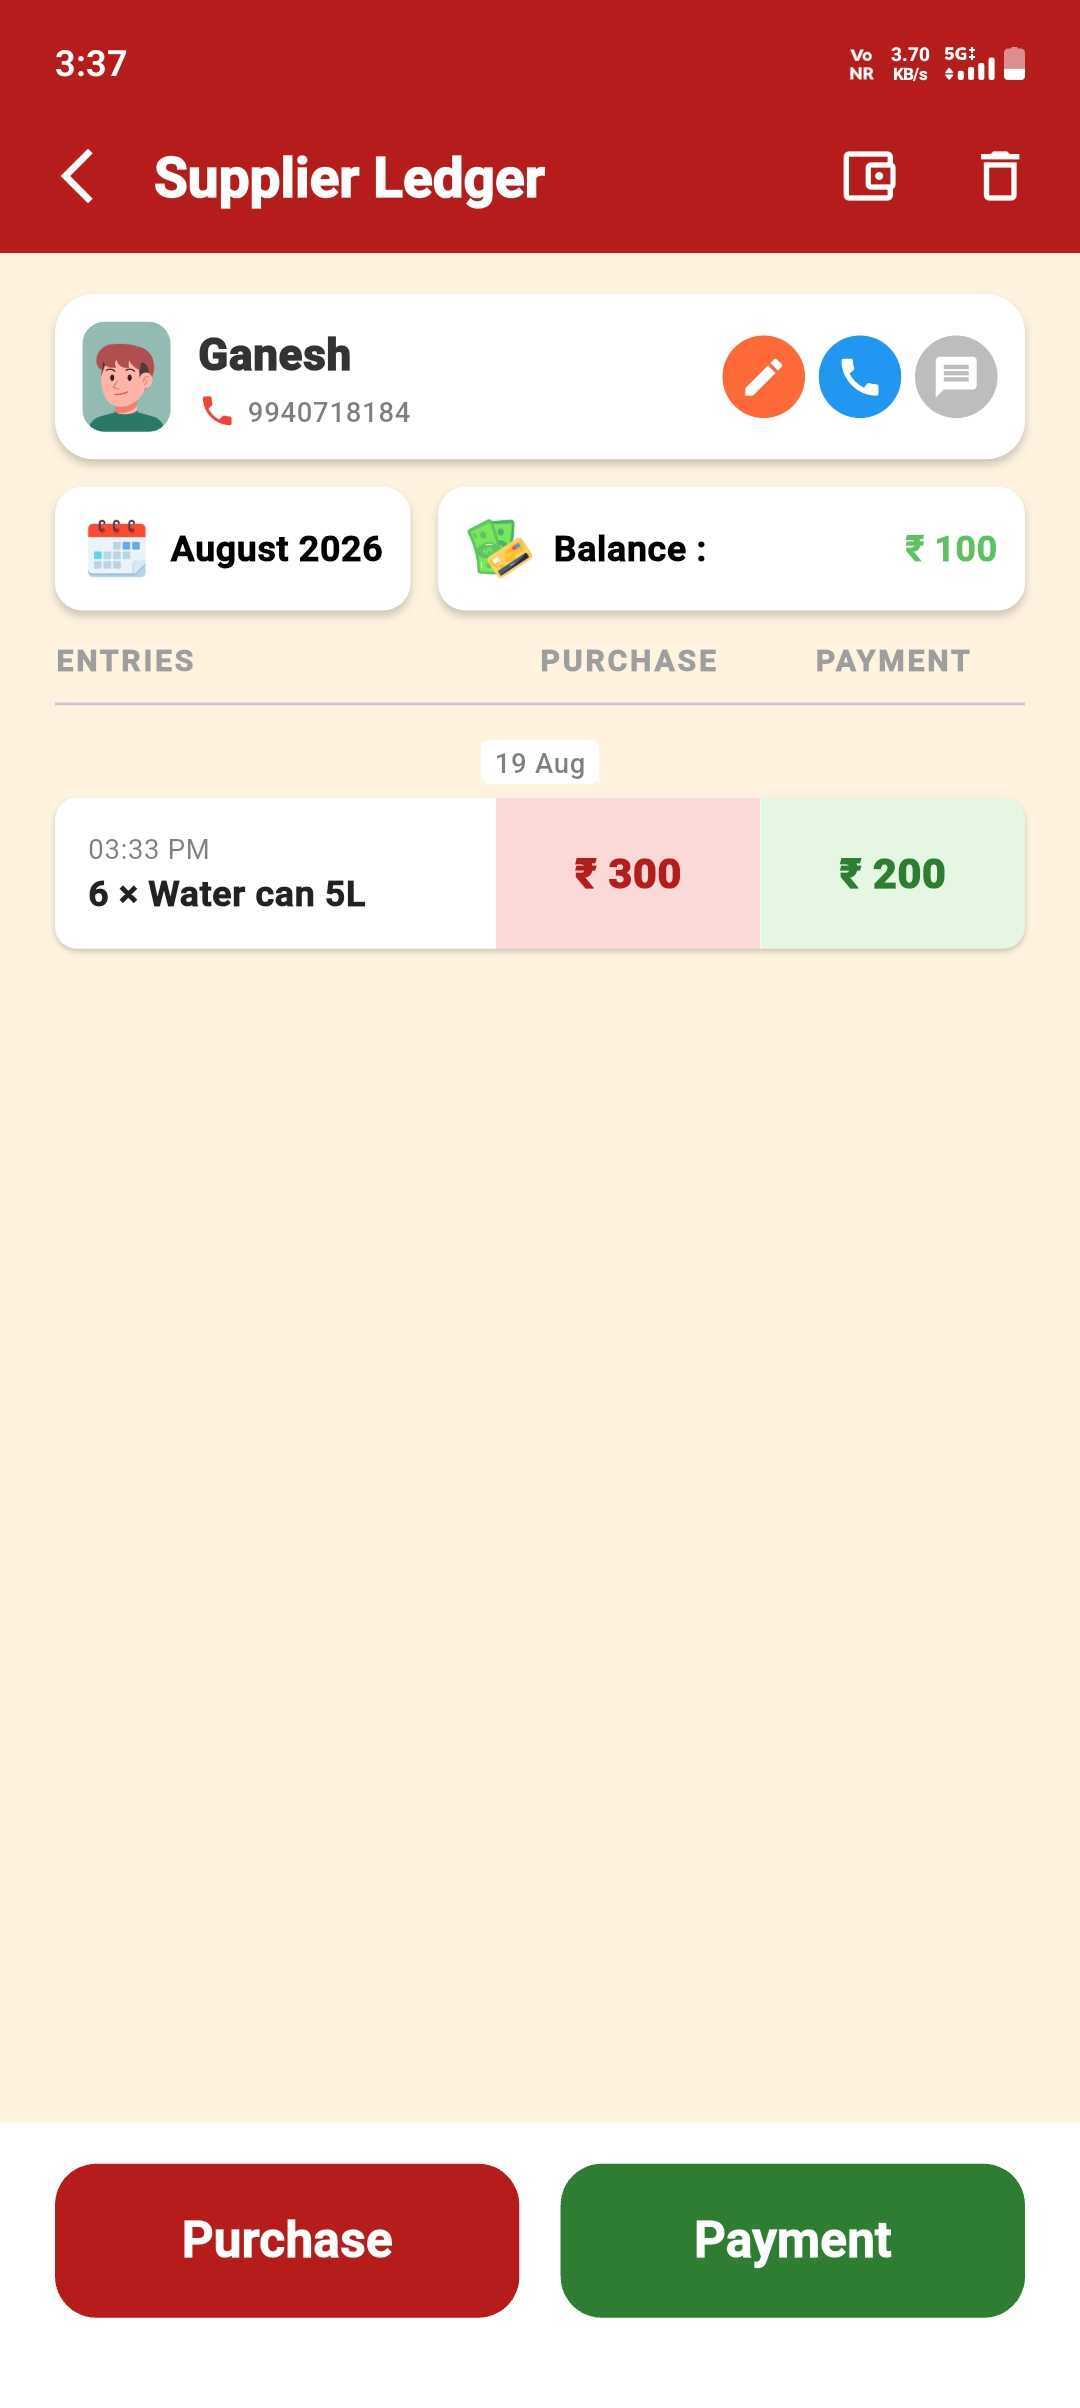
Add the Amount
Enter a short remark and the amount paid, then Save.
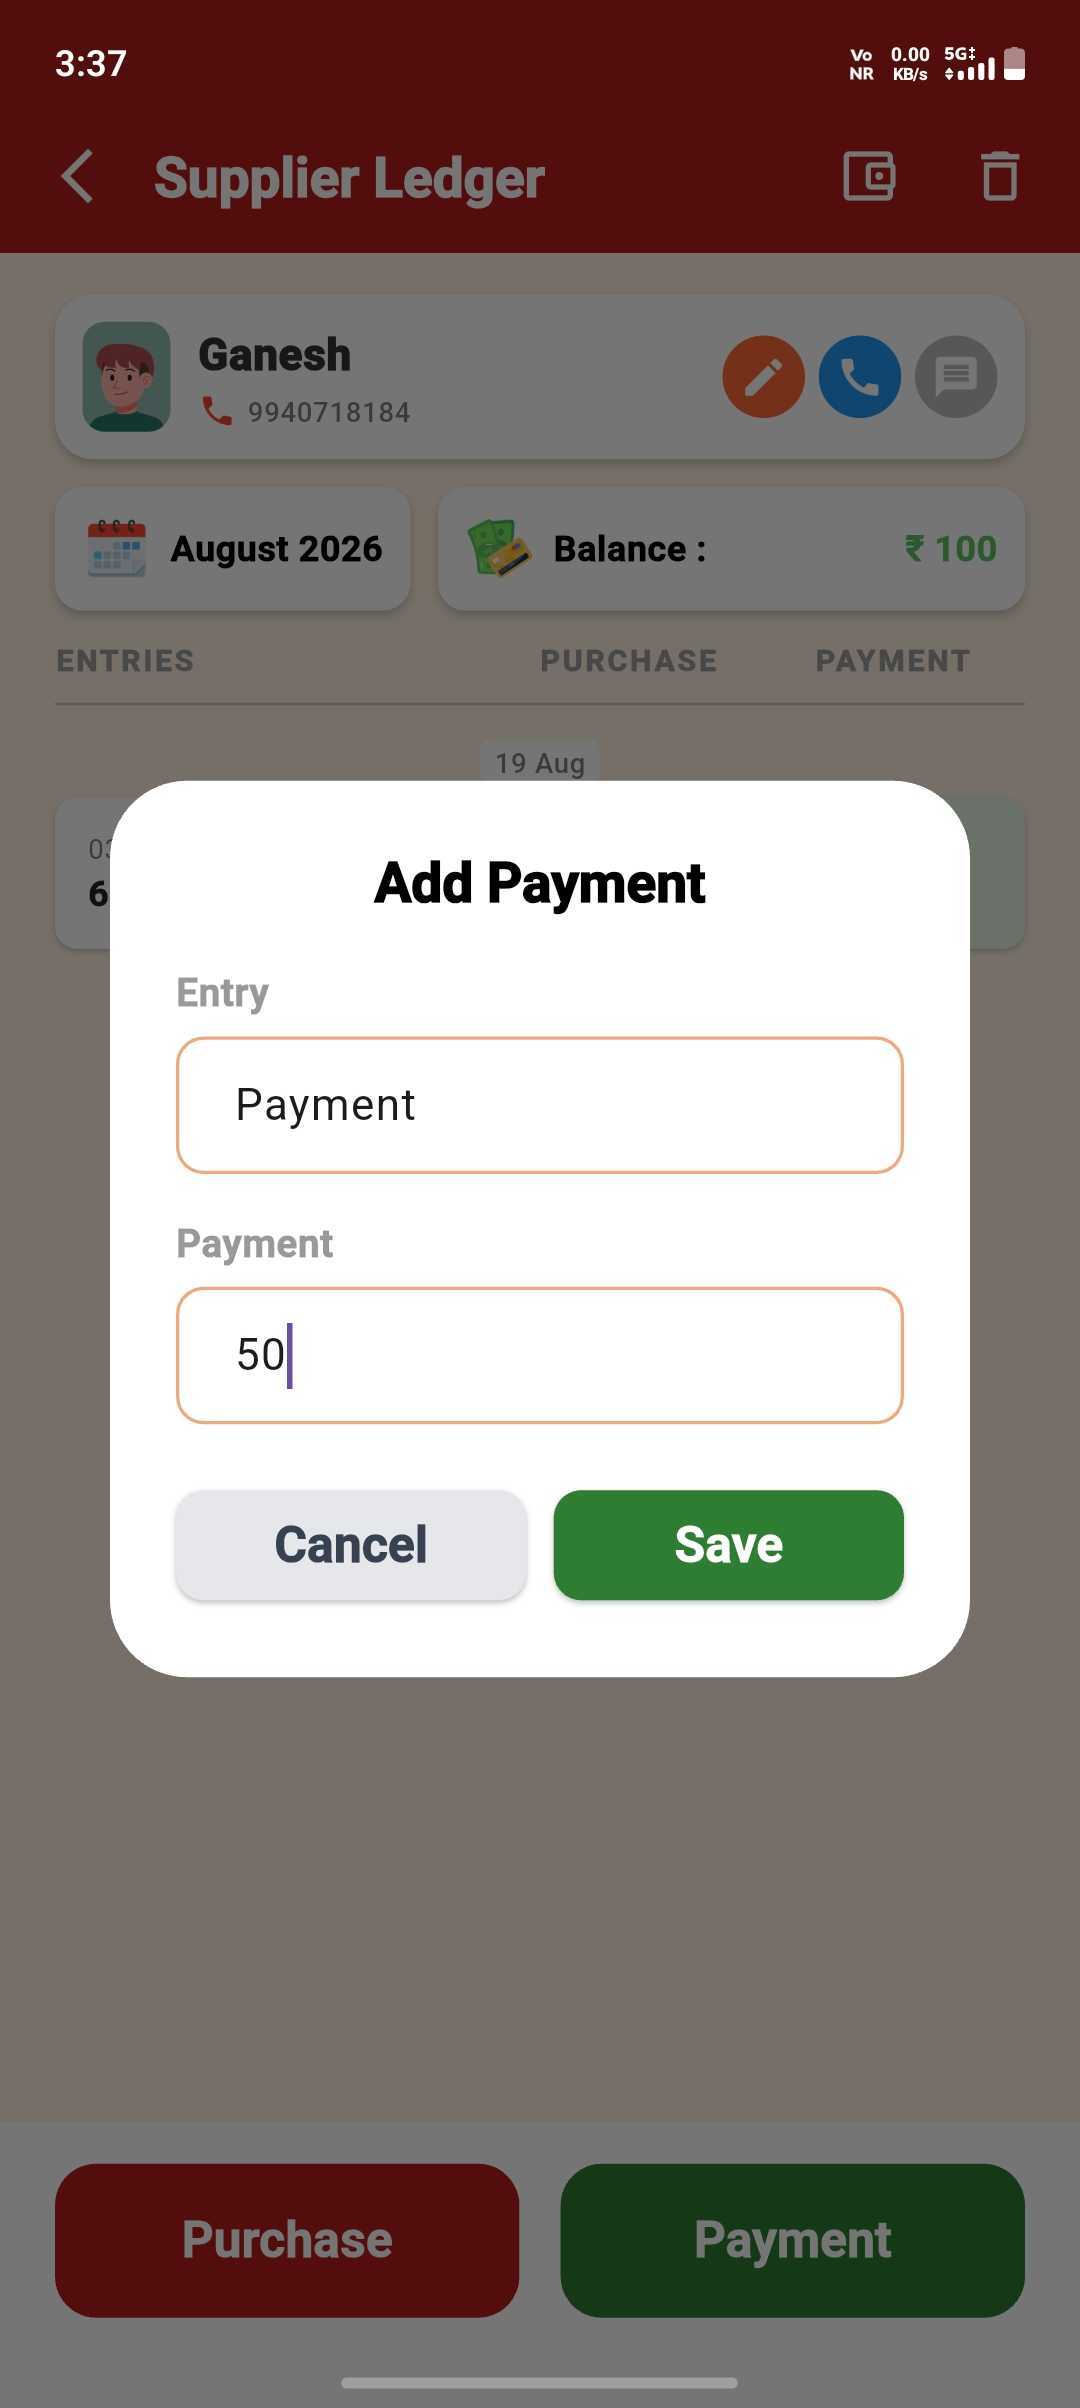
Balance Updates
The payment shows up instantly and the balance recalculates.
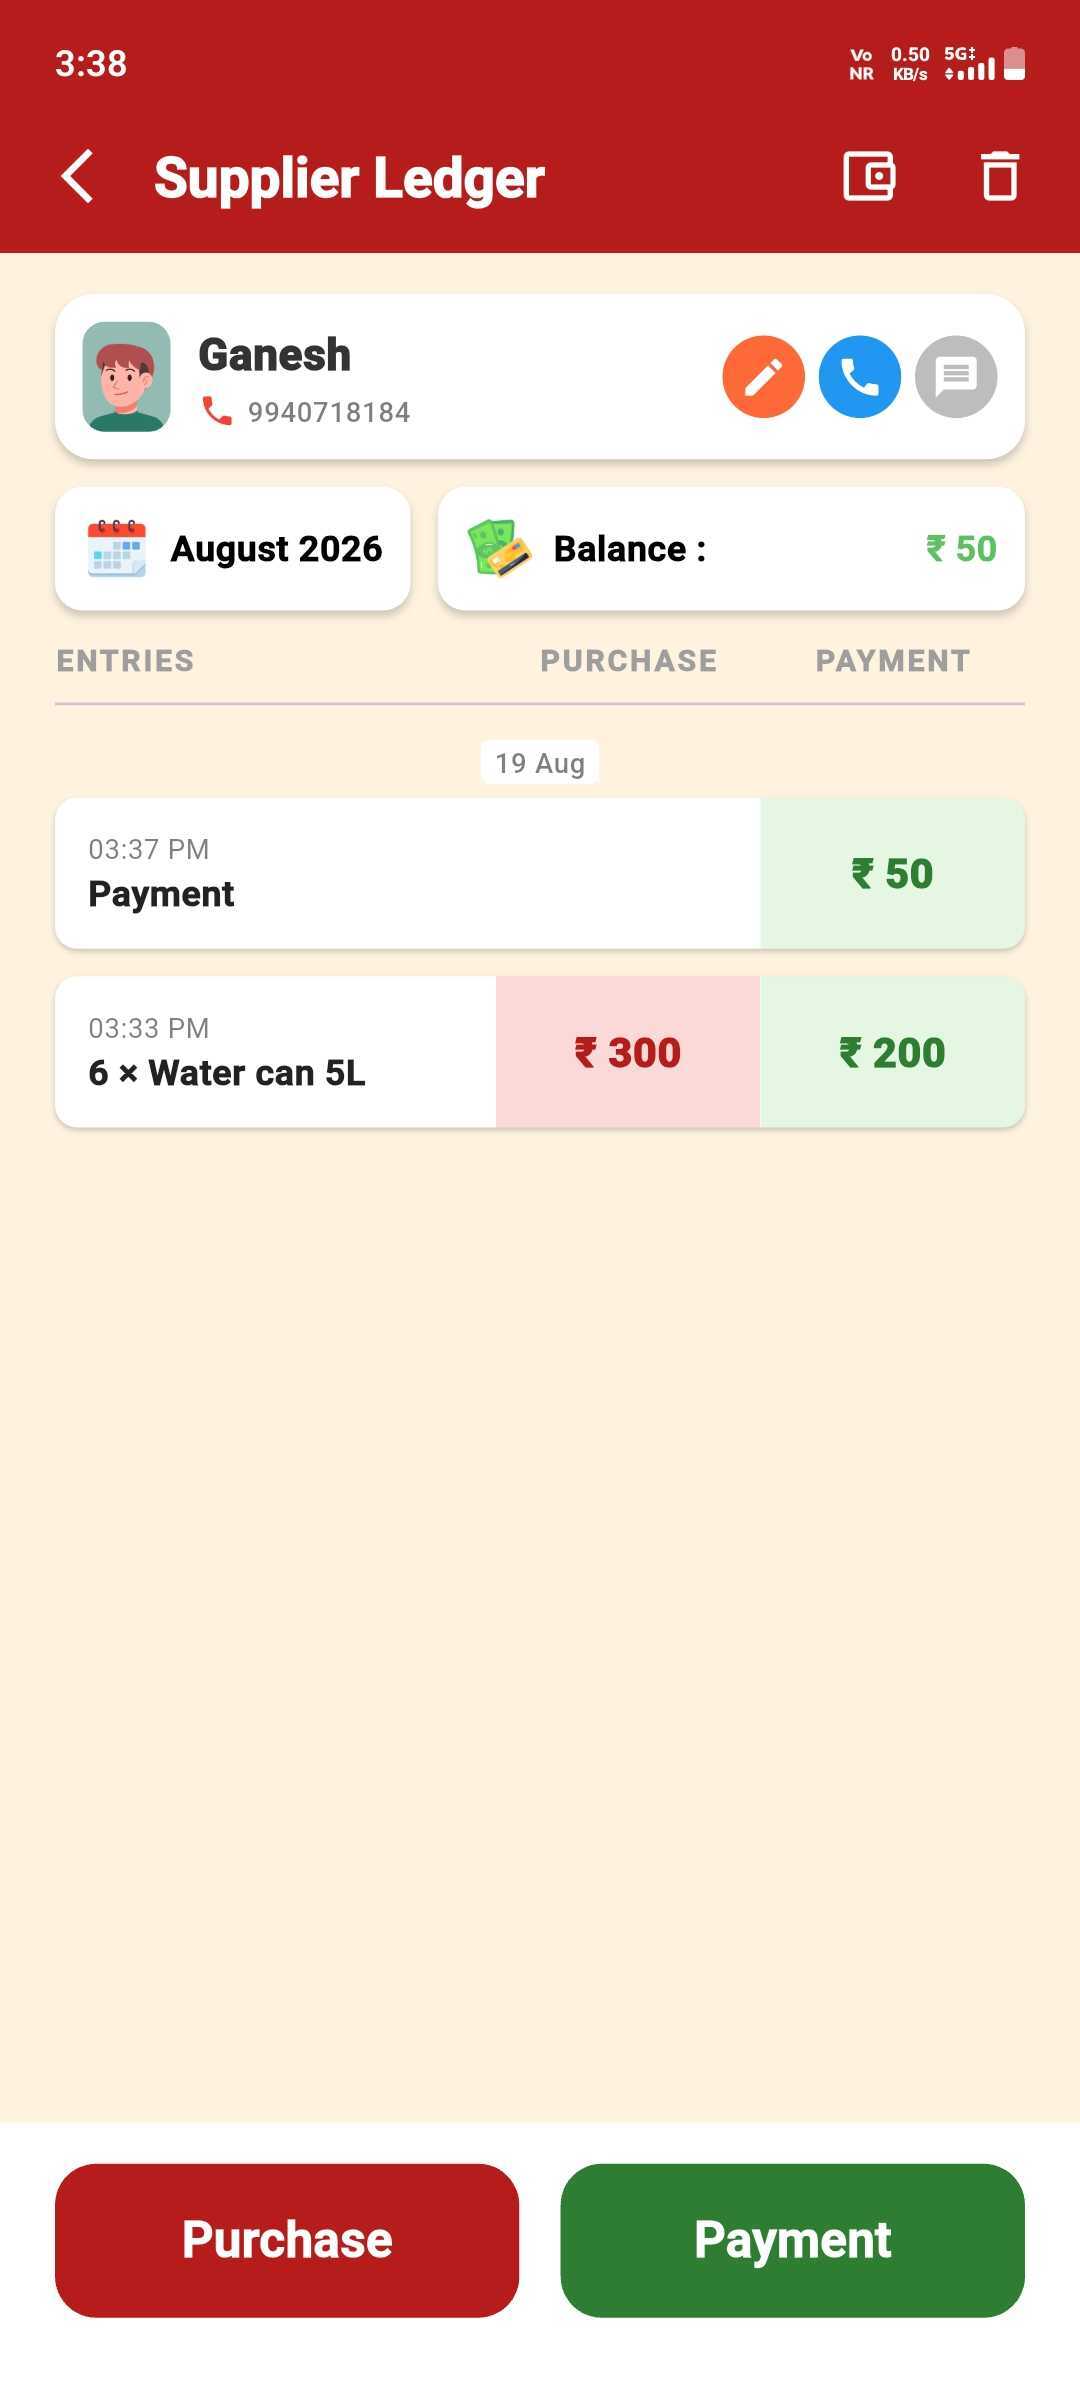
Edit Anytime
Tap the entry to rename the remark or change the amount.
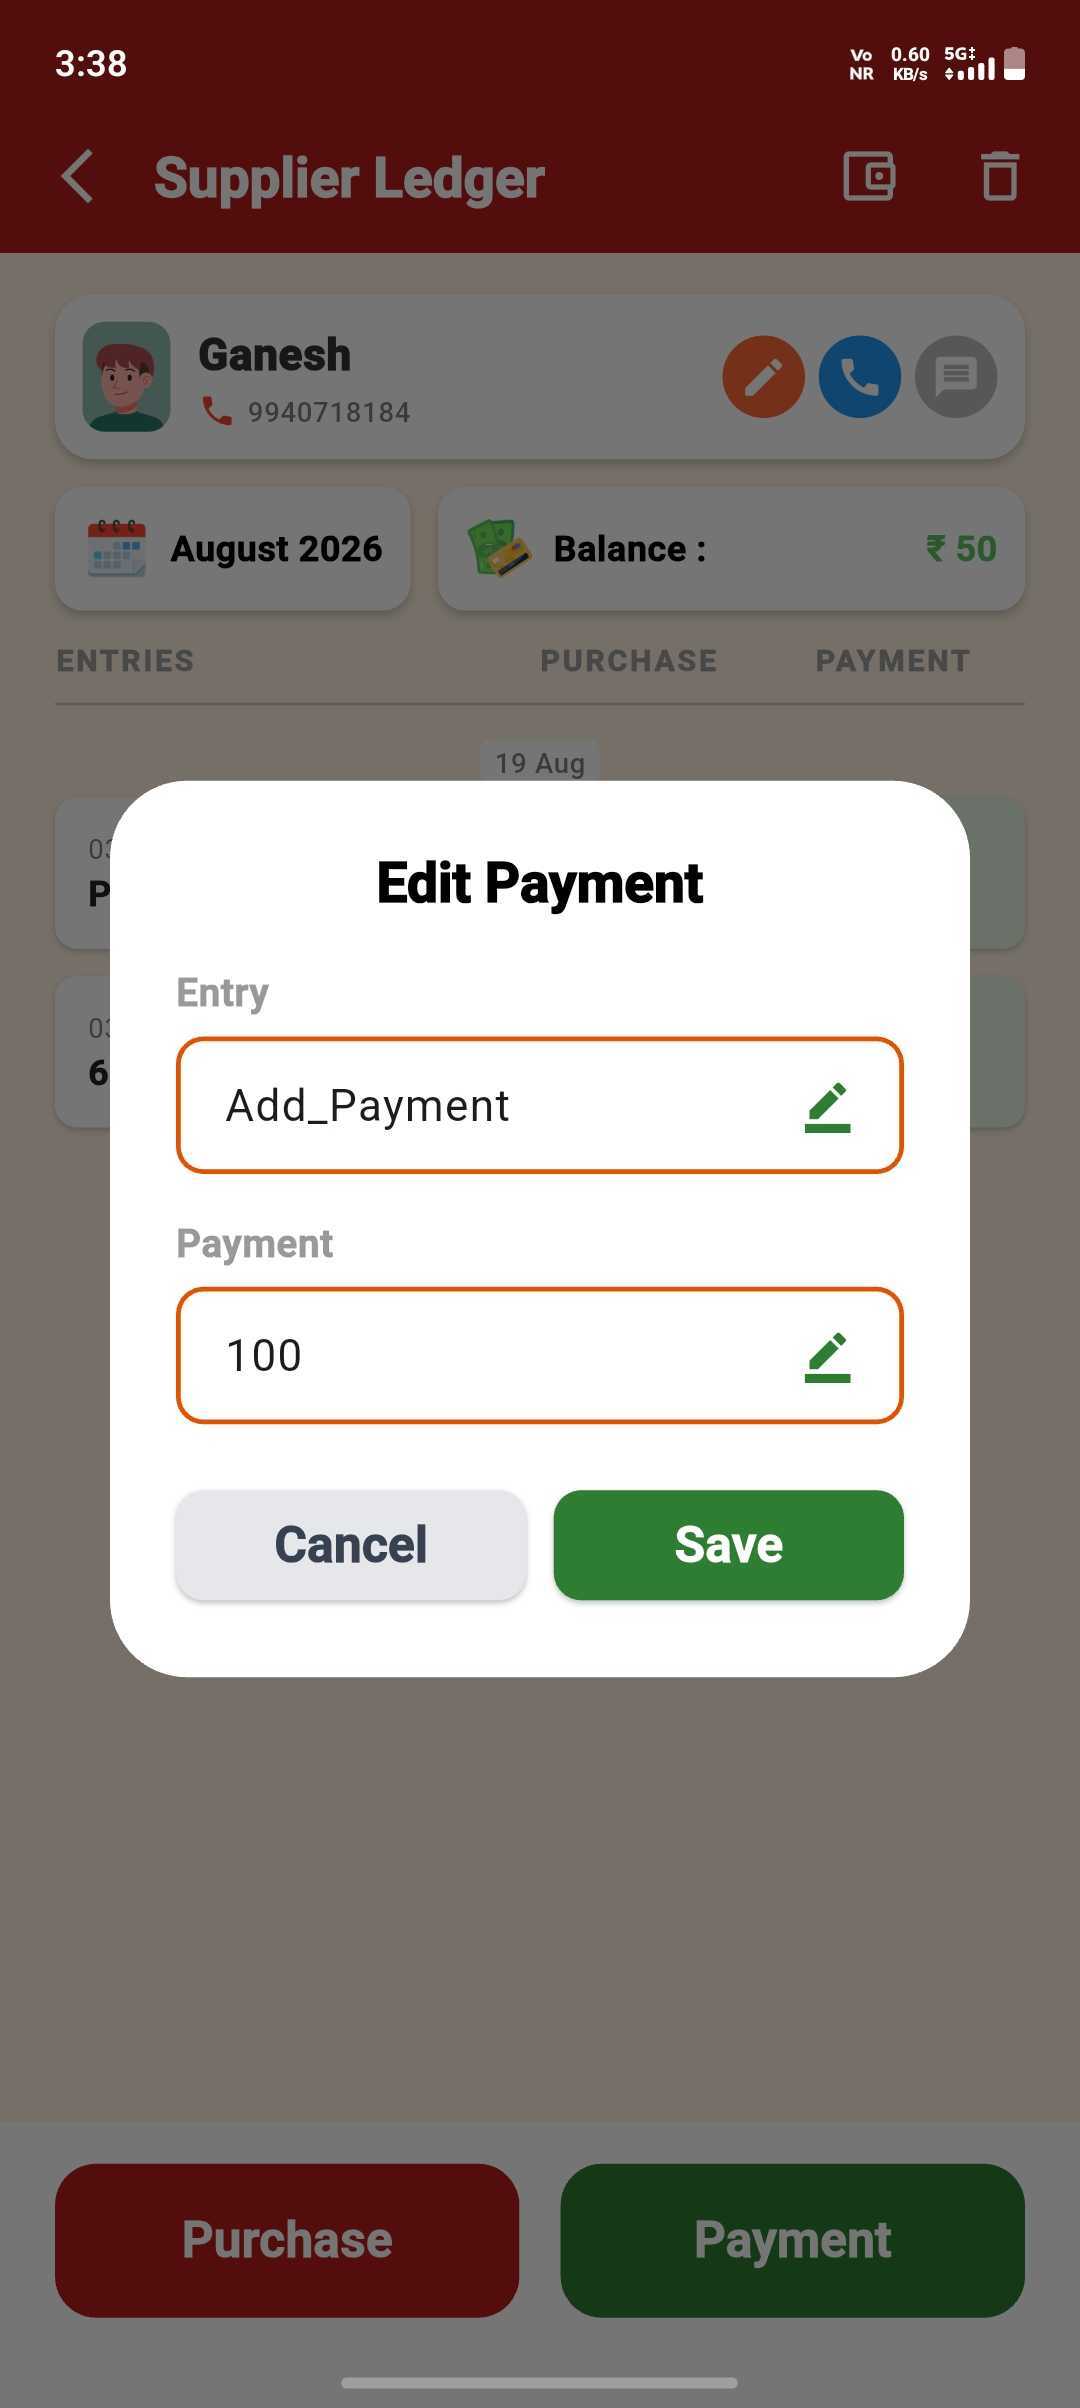
Ledger Stays Accurate
Your edit reflects immediately in the supplier's ledger.
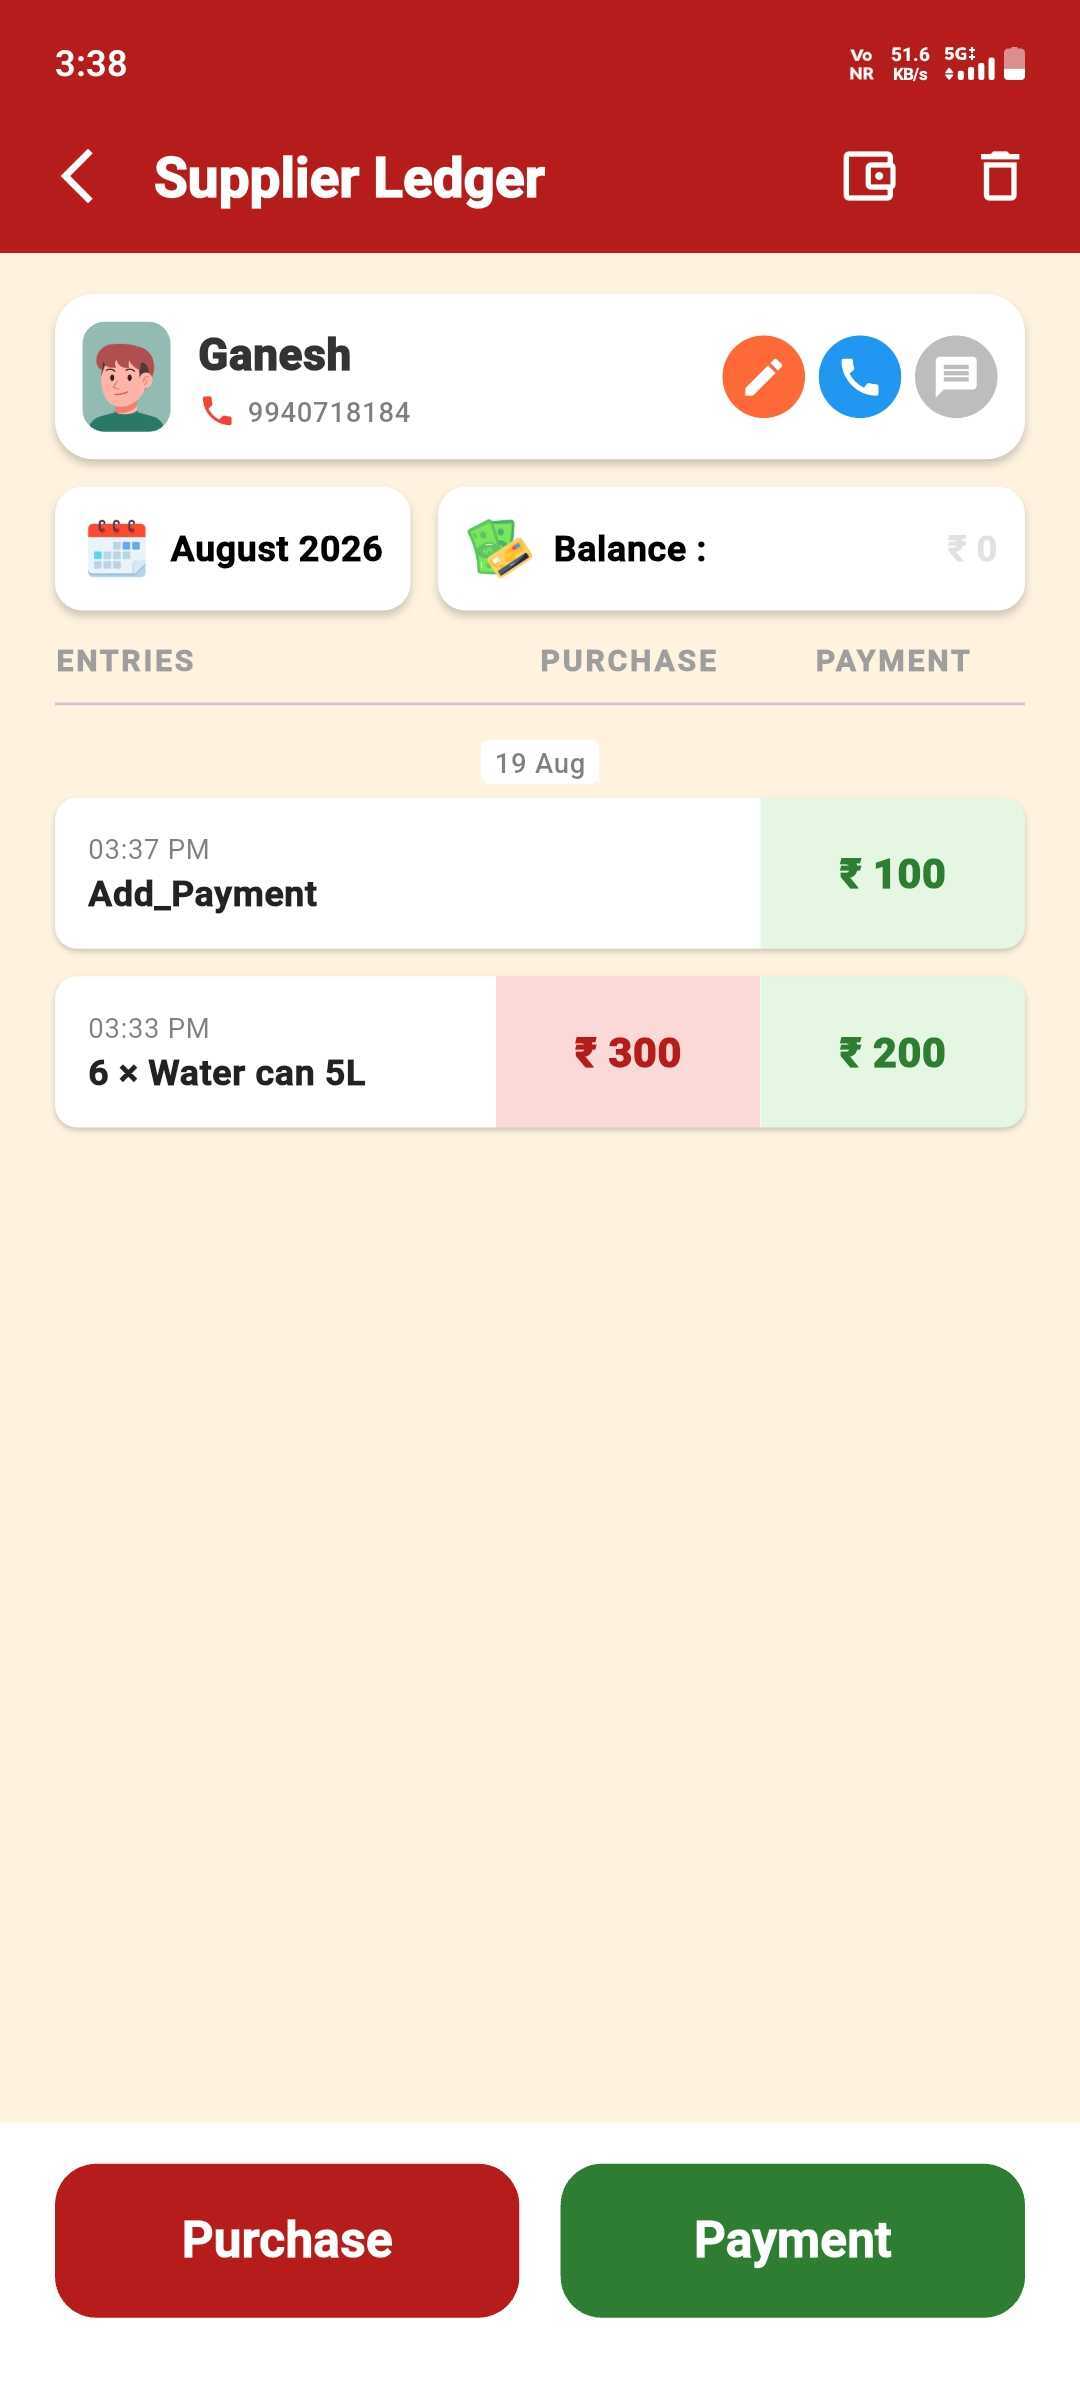
Delete a Payment Entry
Remove a single payment from a supplier's ledger.
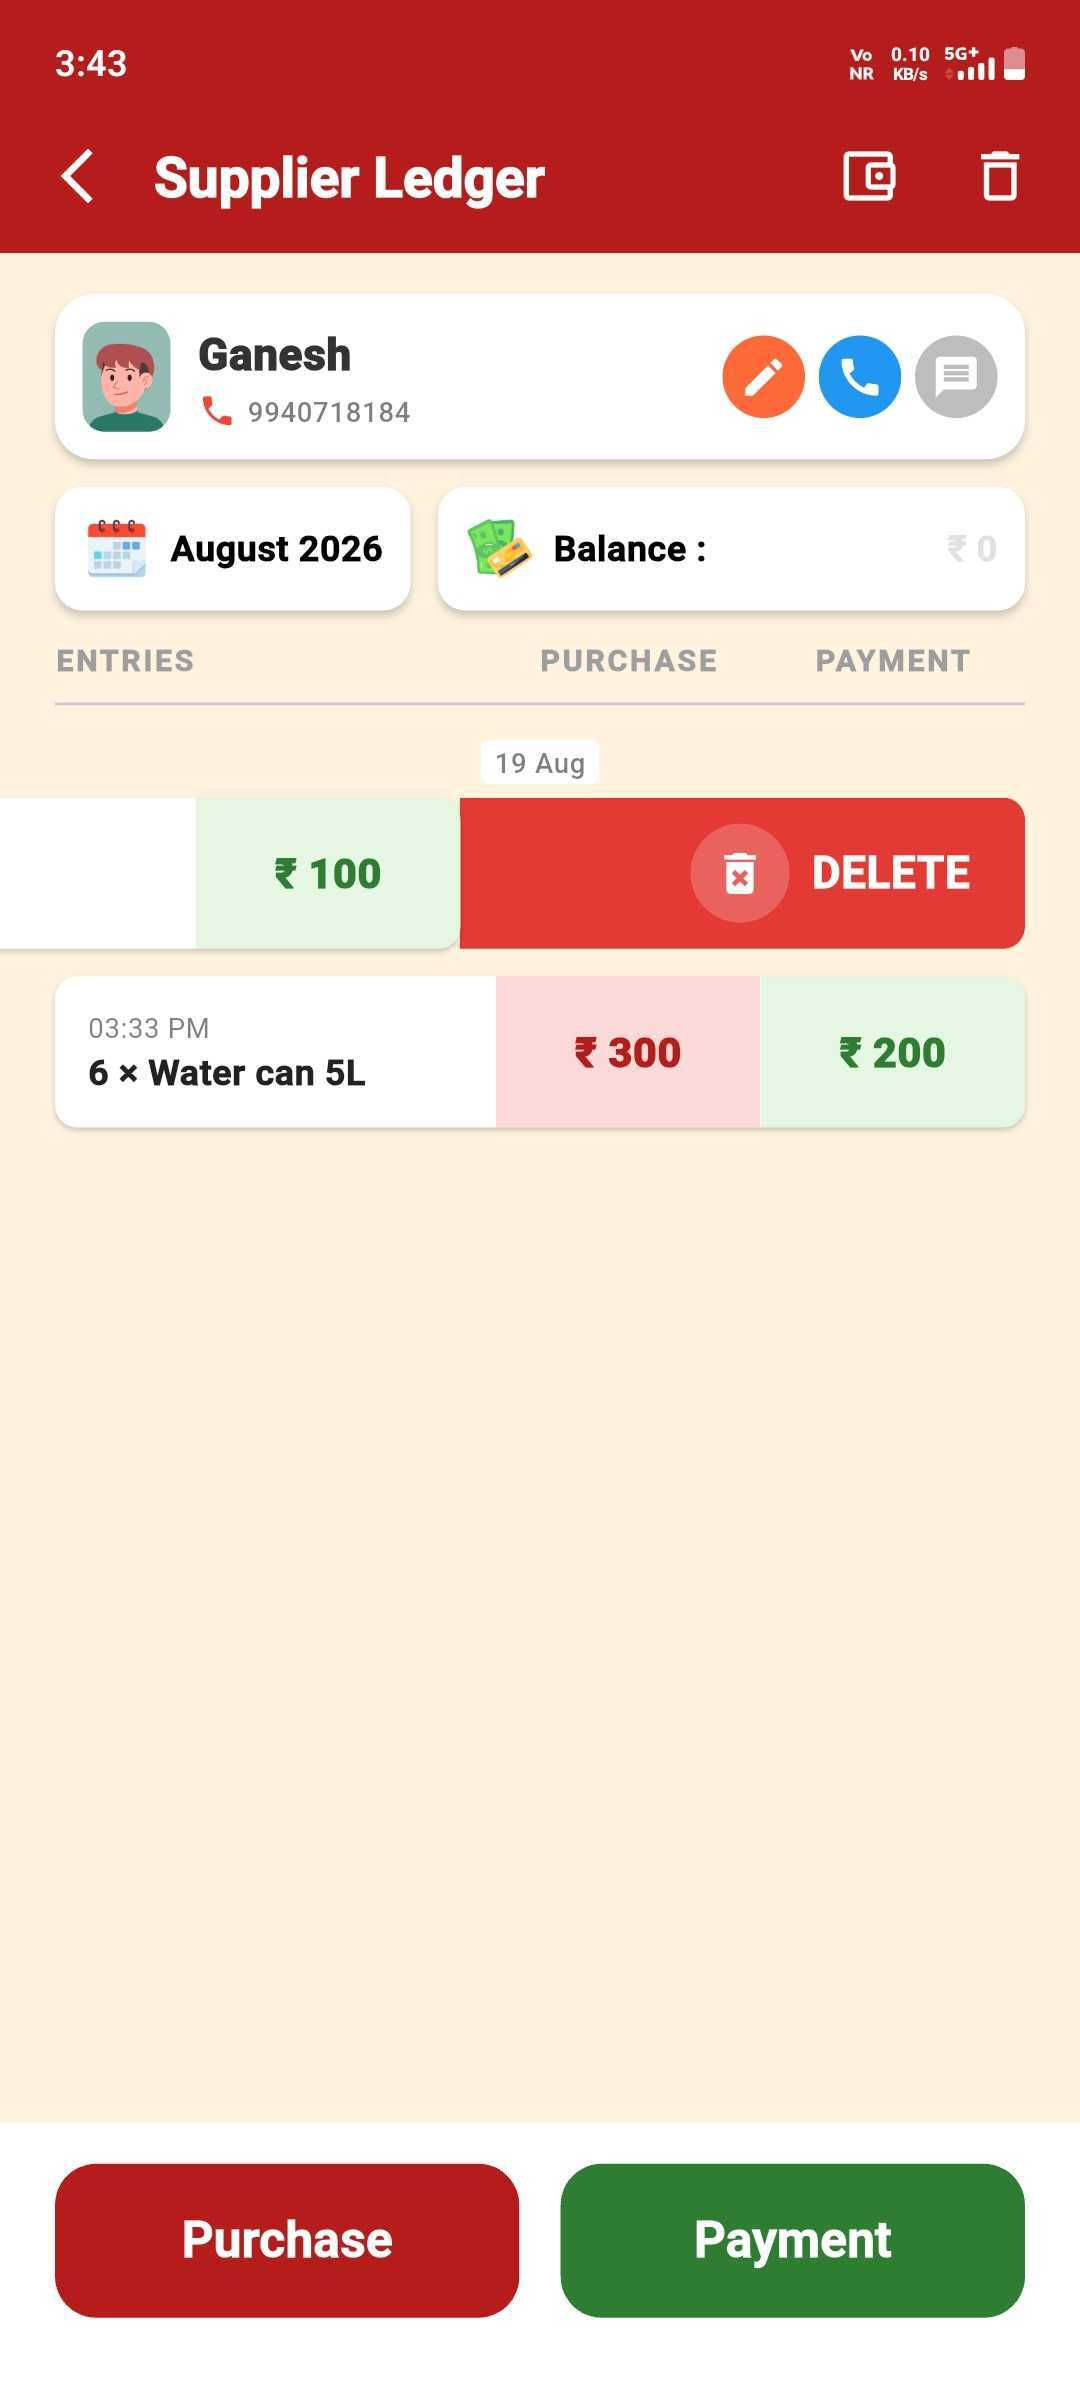
Swipe the Entry
Inside the supplier's ledger, swipe a payment entry left to reveal Delete.
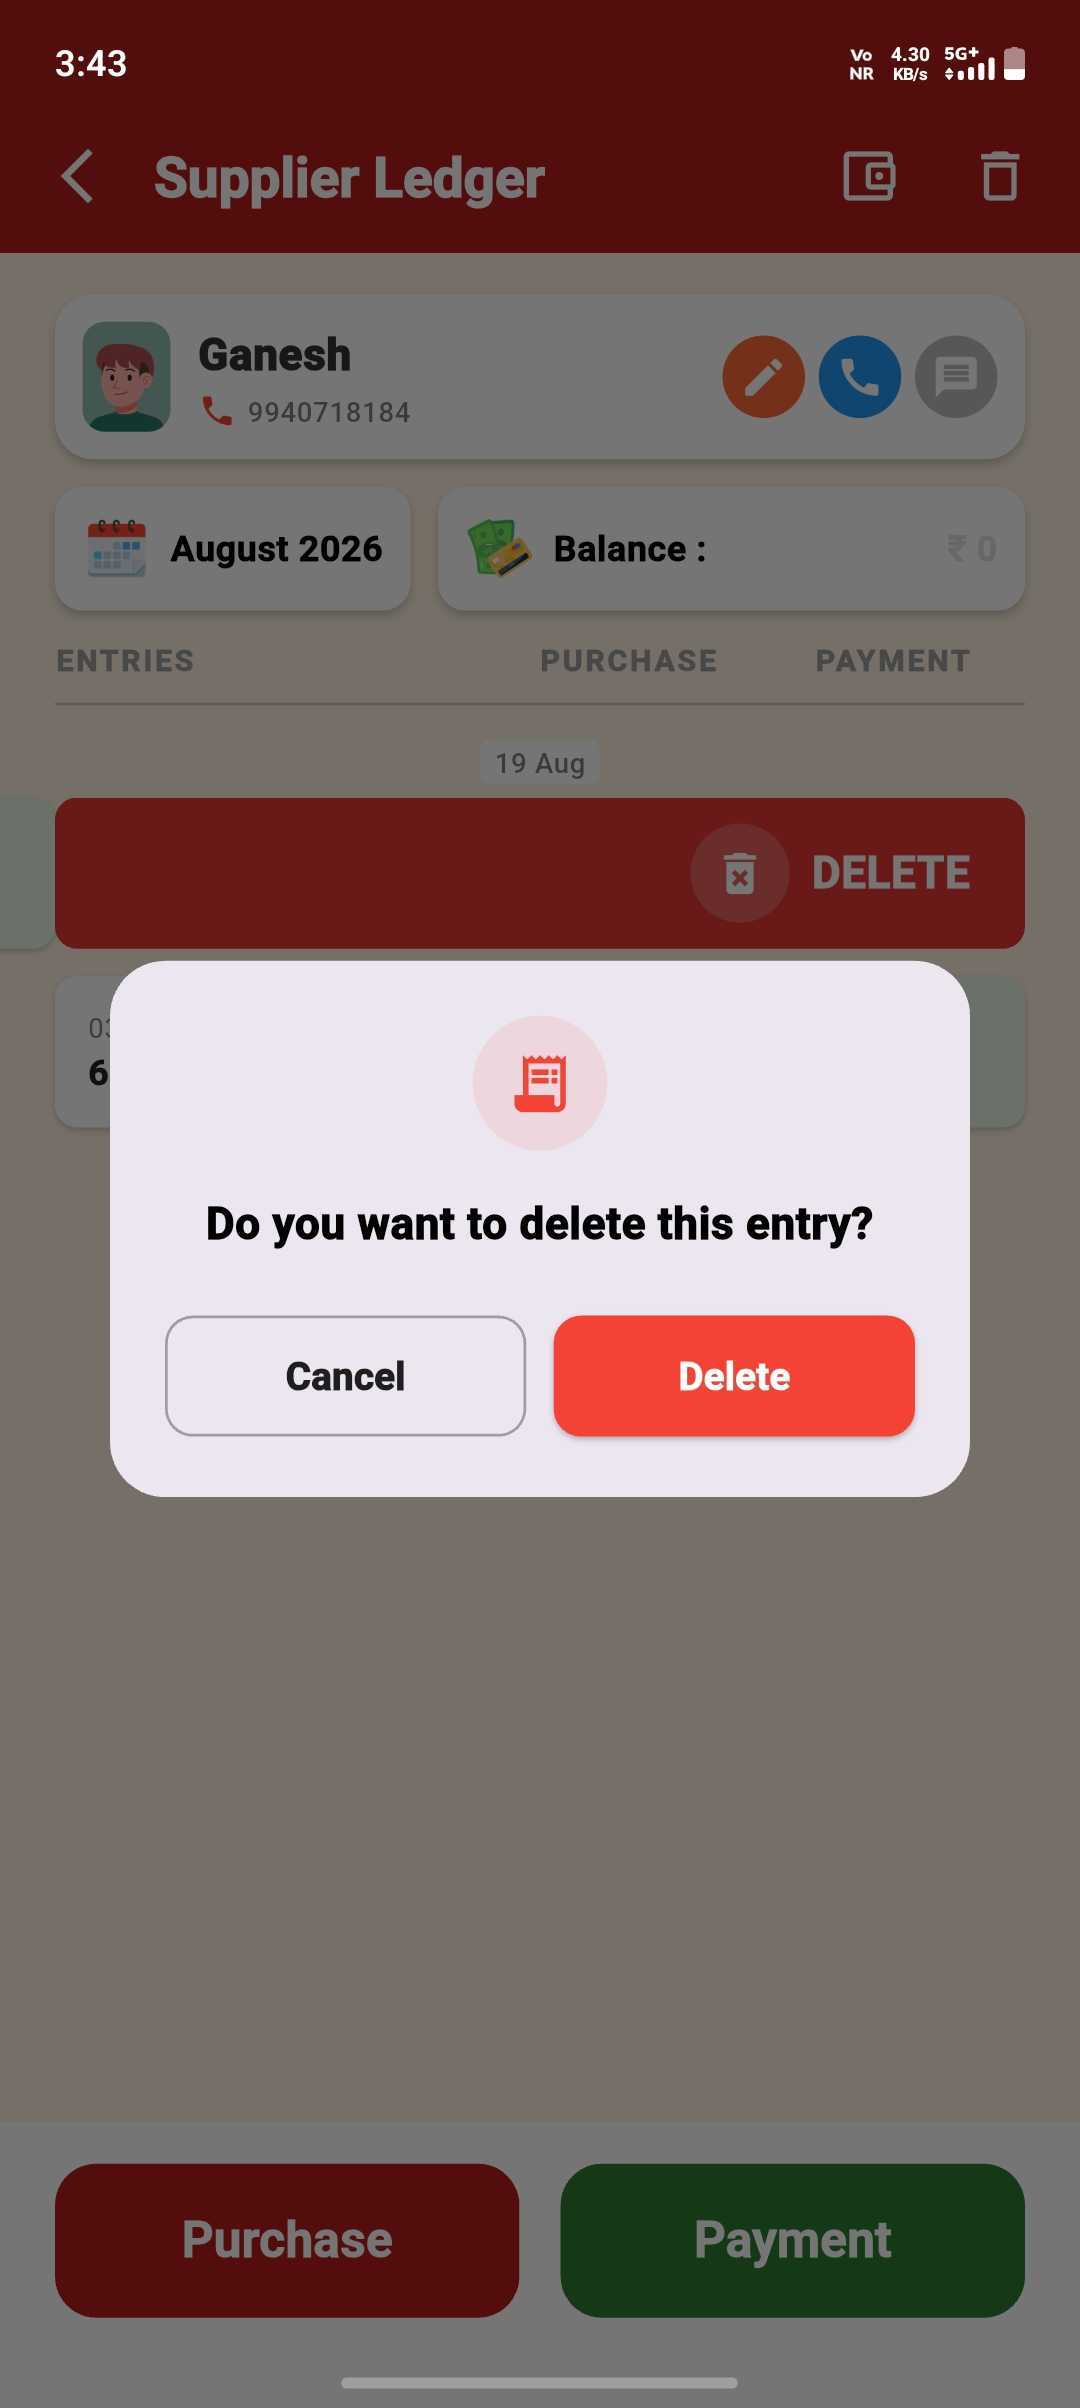
Confirm the Delete
Tap Delete again — the entry is removed and the balance updates instantly.
Still stuck on a step?
Check the FAQ for quick answers, or message our support team directly — we usually reply within two working days.